

Hello DIY enthusiasts! Today, I'm excited to share a simple yet charming project that brings the beauty of nature into your home. I recently crafted a Wood Slice Lantern, and I'm thrilled to guide you through the process. Let's get started!
Materials You'll Need:
- Branch
- Saw
- Hot glue gun
- Vase or similar container
- String lights
How to Make Your Wood Slice Lantern:
1. Find the Perfect Branch:
Begin by selecting a branch of your desired thickness. Ensure the branch is thoroughly dry to prevent any cracks during the crafting process.
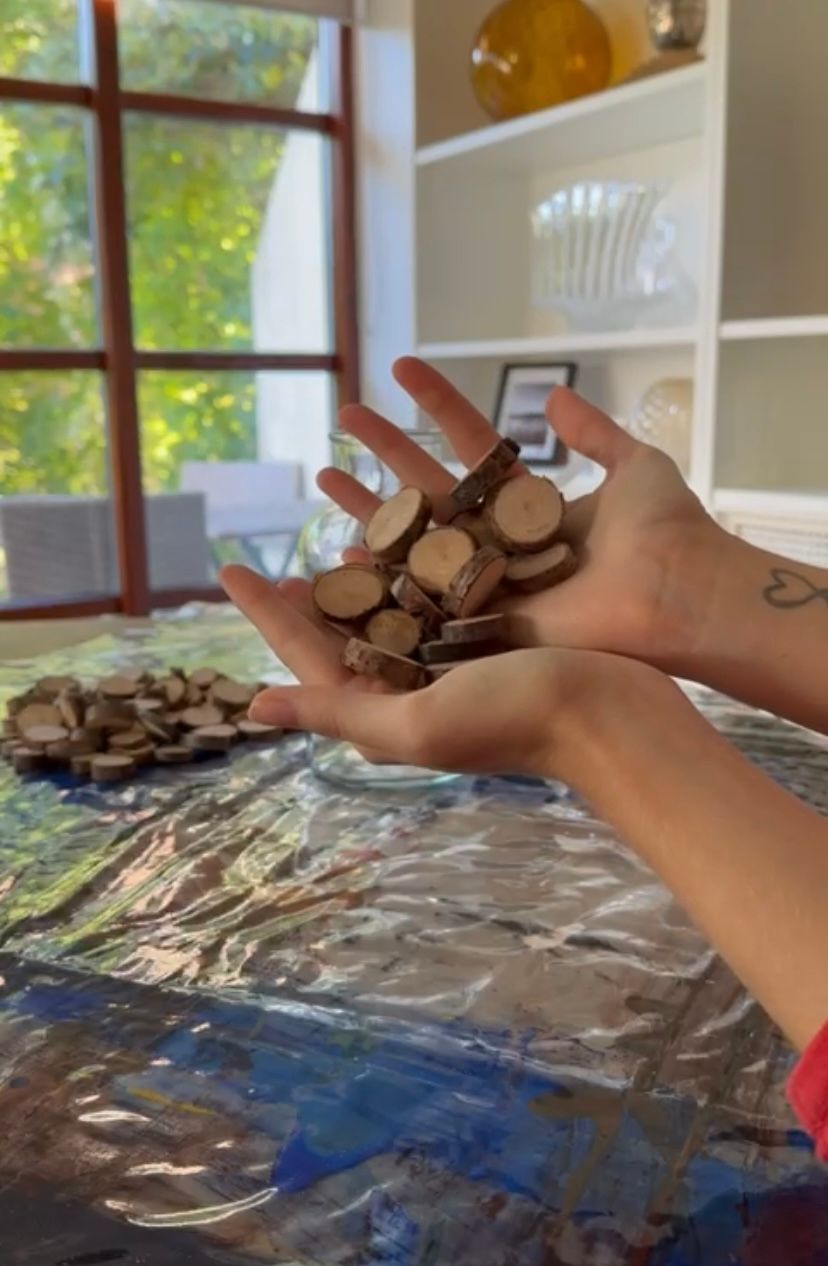
2. Slice it Up:
Use a saw to cut round slices of the branch at your preferred thickness.
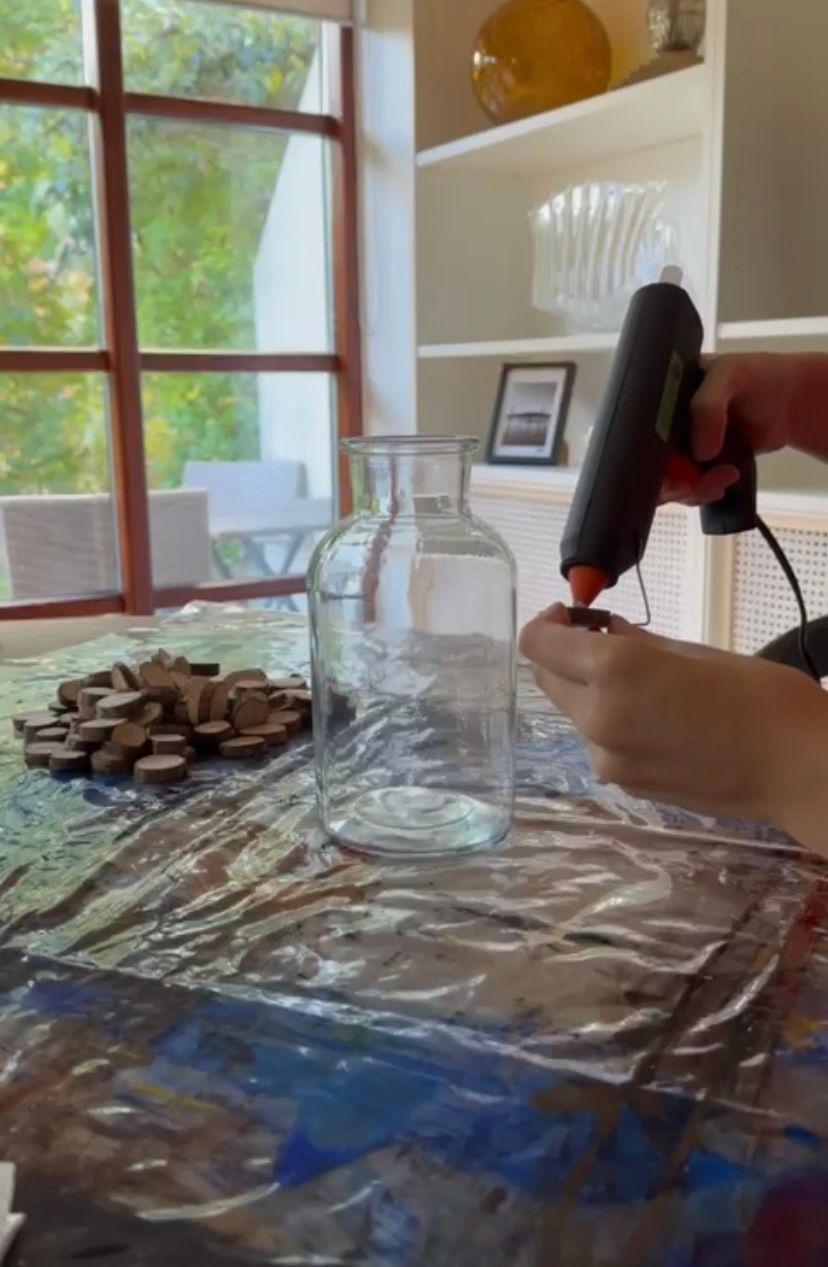
3. Prepare the Vase:
Clean your chosen vase thoroughly, providing a clean surface for the glue to adhere to.
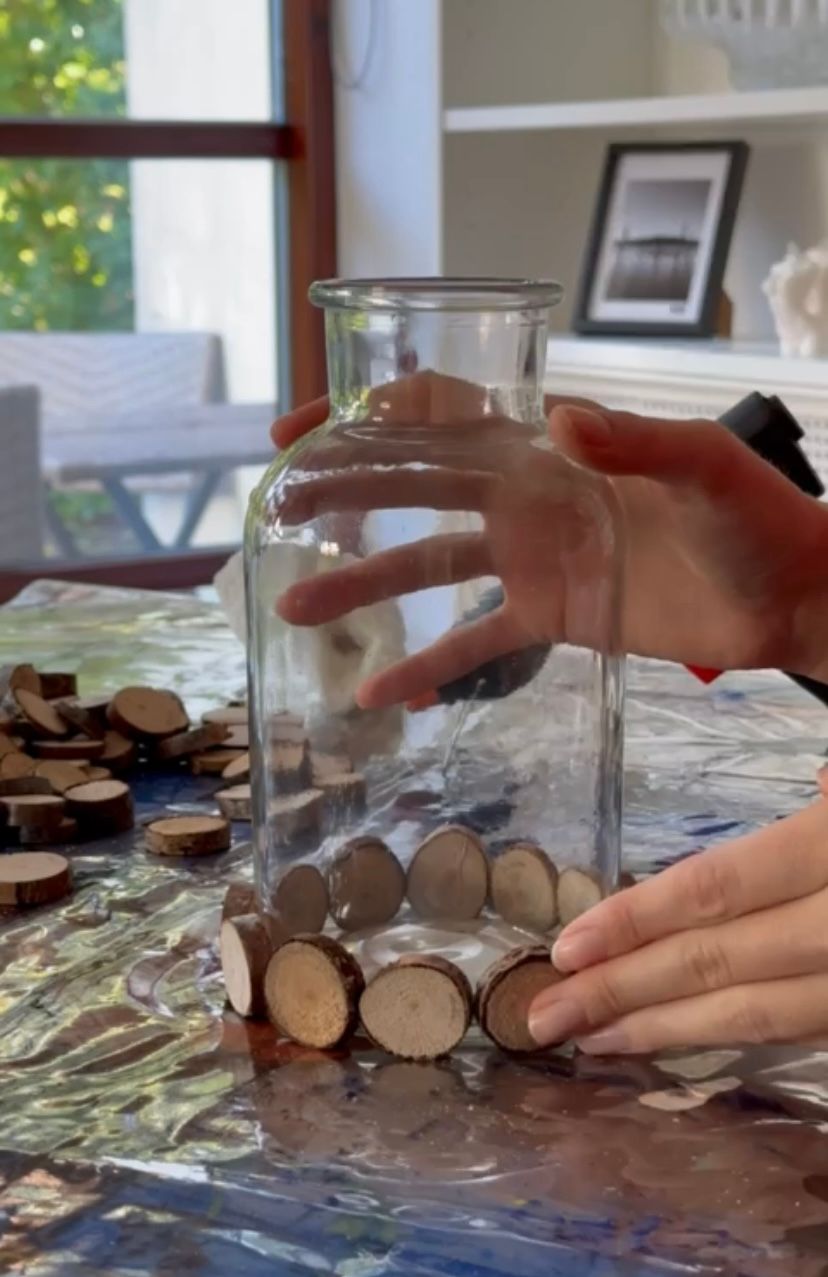
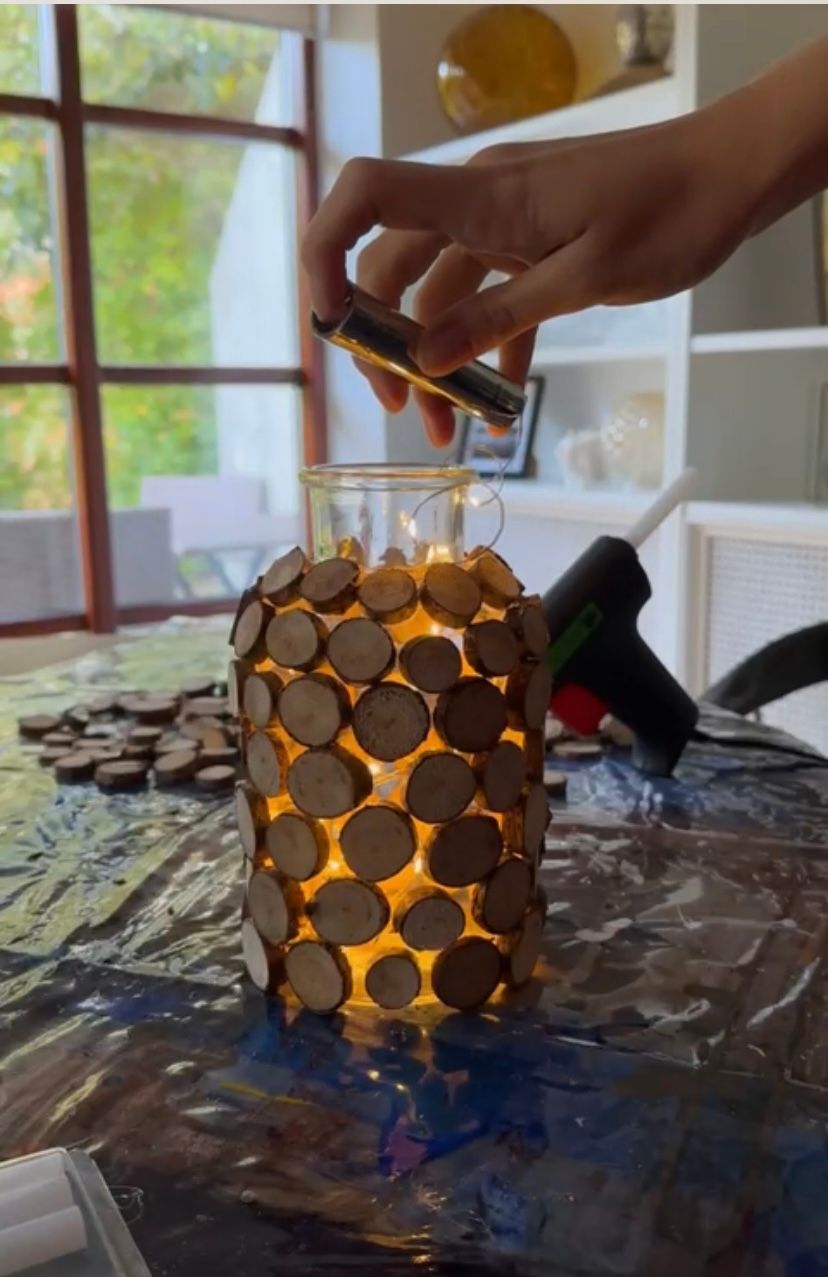
4. Glue the Wood Slices:
Fire up your trusty hot glue gun and start attaching the wood slices to the vase. Get creative with the arrangement and spacing.
5. Let it Set:
Allow the glued wood slices to dry completely. This ensures a secure bond and longevity for your lantern.
6. Introduce the Light:
Once the glue is dry, delicately place your string lights into the vase. Watch as your lantern comes to life with a warm, inviting glow.
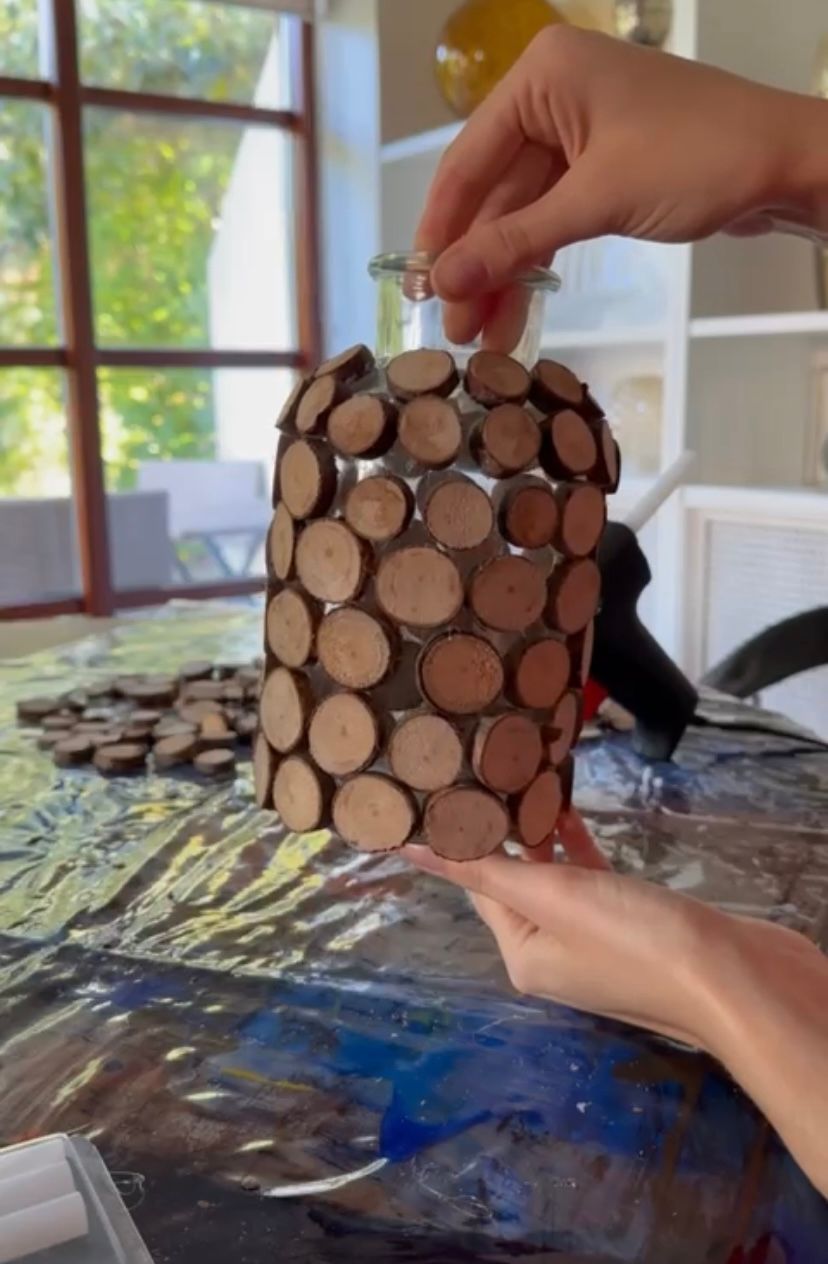
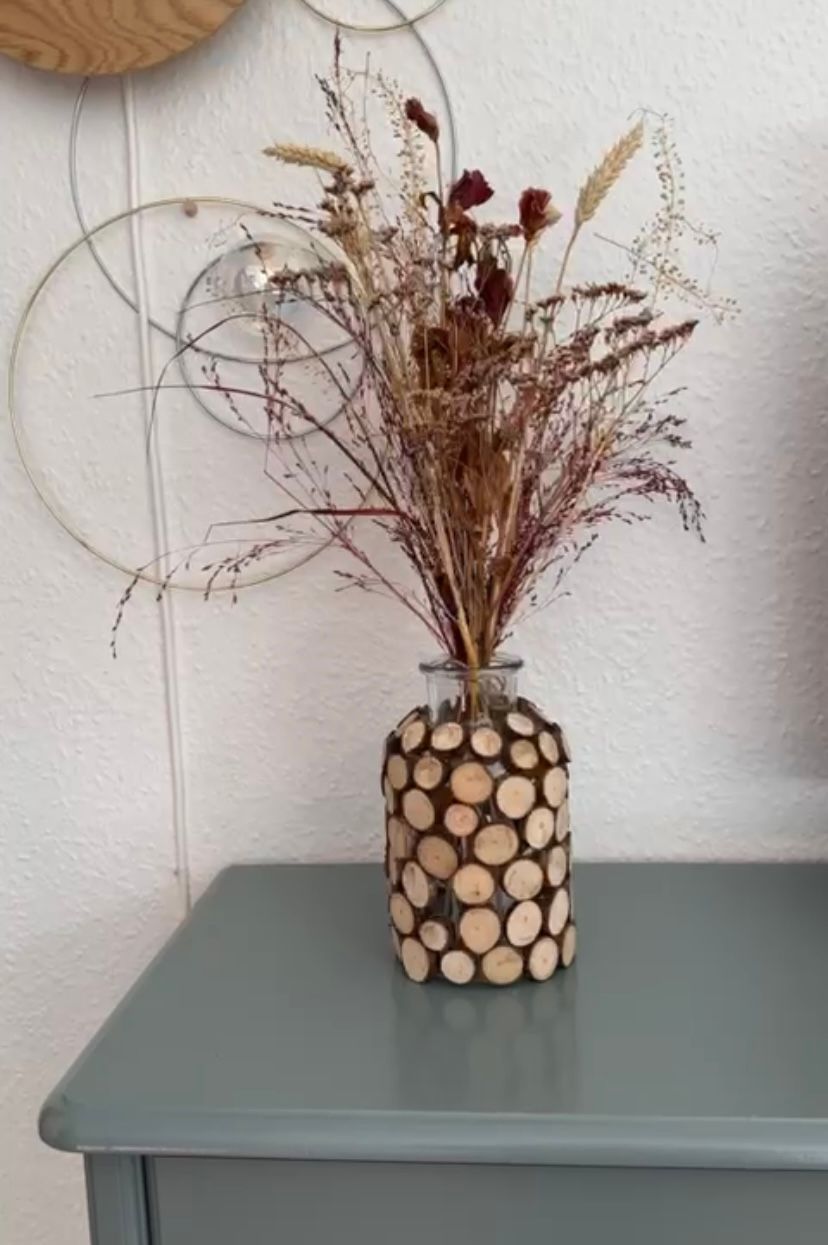
Why I Love It:
This Wood Slice Lantern not only adds a touch of rustic charm to any space but also serves a dual purpose as a versatile vase. The natural warmth of the wood combined with the soft illumination of the lights creates a cozy ambiance.
Crafting this Wood Slice Lantern was not only a delightful experience but also an opportunity to bring a piece of nature indoors. If you decide to embark on this project, share your results in the comments below. I'd love to see your take on this charming DIY lantern!
Happy crafting!
Creator: Theresa
Instragam: @stylingby_soevig


