

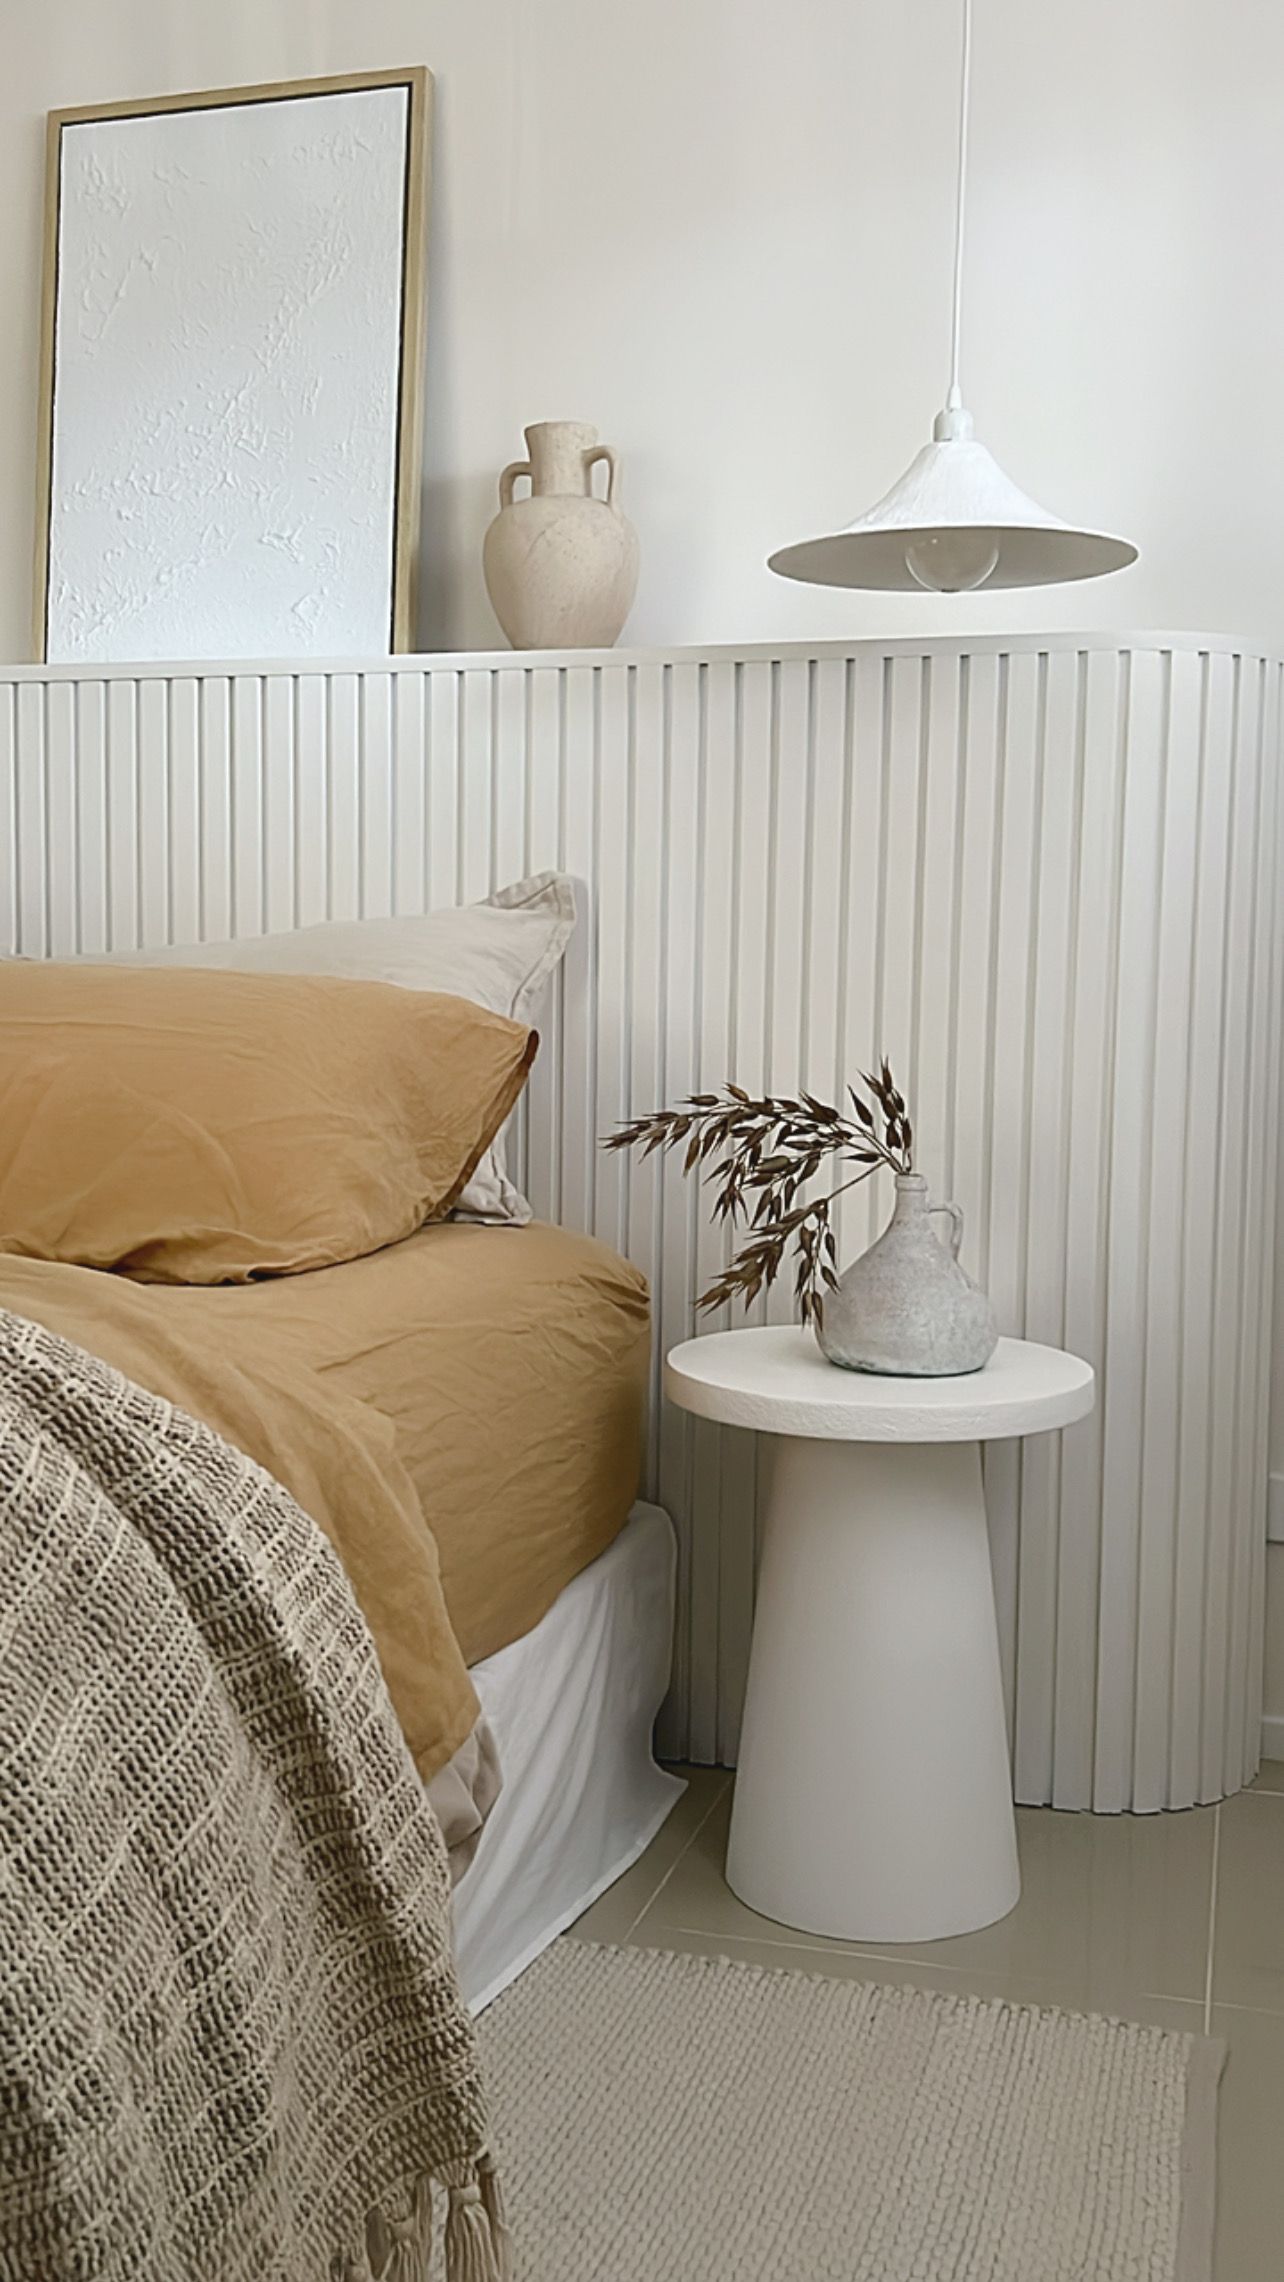
I hope you really enjoy this DIY, we really thought of all the possibilities of moving home or even moving rooms, I designed this headboard so that it can be moved around and also renter friendly too.
So I really wanted to design a bedhead that was aesthetically pleasing and could be moved around with ease but also if I ever wanted to move bedrooms or home we could move it, my design had to have a shelf on it with beautiful curved ends to add softness, texture and a dreamy vibe and also to style your favourite decor pieces on or even a lean a beautiful print or your favourite artwork.
Here is a step by step guide on what we used - The Porta Timber Contours Range in the Strata profile really helped us achieve the curved ends, this product is new and is the most easiest to use, see below for how to..
Step by Step Guide
Here is what we used:
- H2 Treated Pine
- 18mm Mdf
- Stud adhesive
- 3mm plywood
- 75mm screws
- Clout nails & Pin Nails
- Drop Saw
- Jig Saw
- Hammer
- Two Clamps to form the curves
- A spray bottle full of water
- Porta timber Contours Strata profile 39x16mm
- 2 in 1 primer and paint acrylic water based.
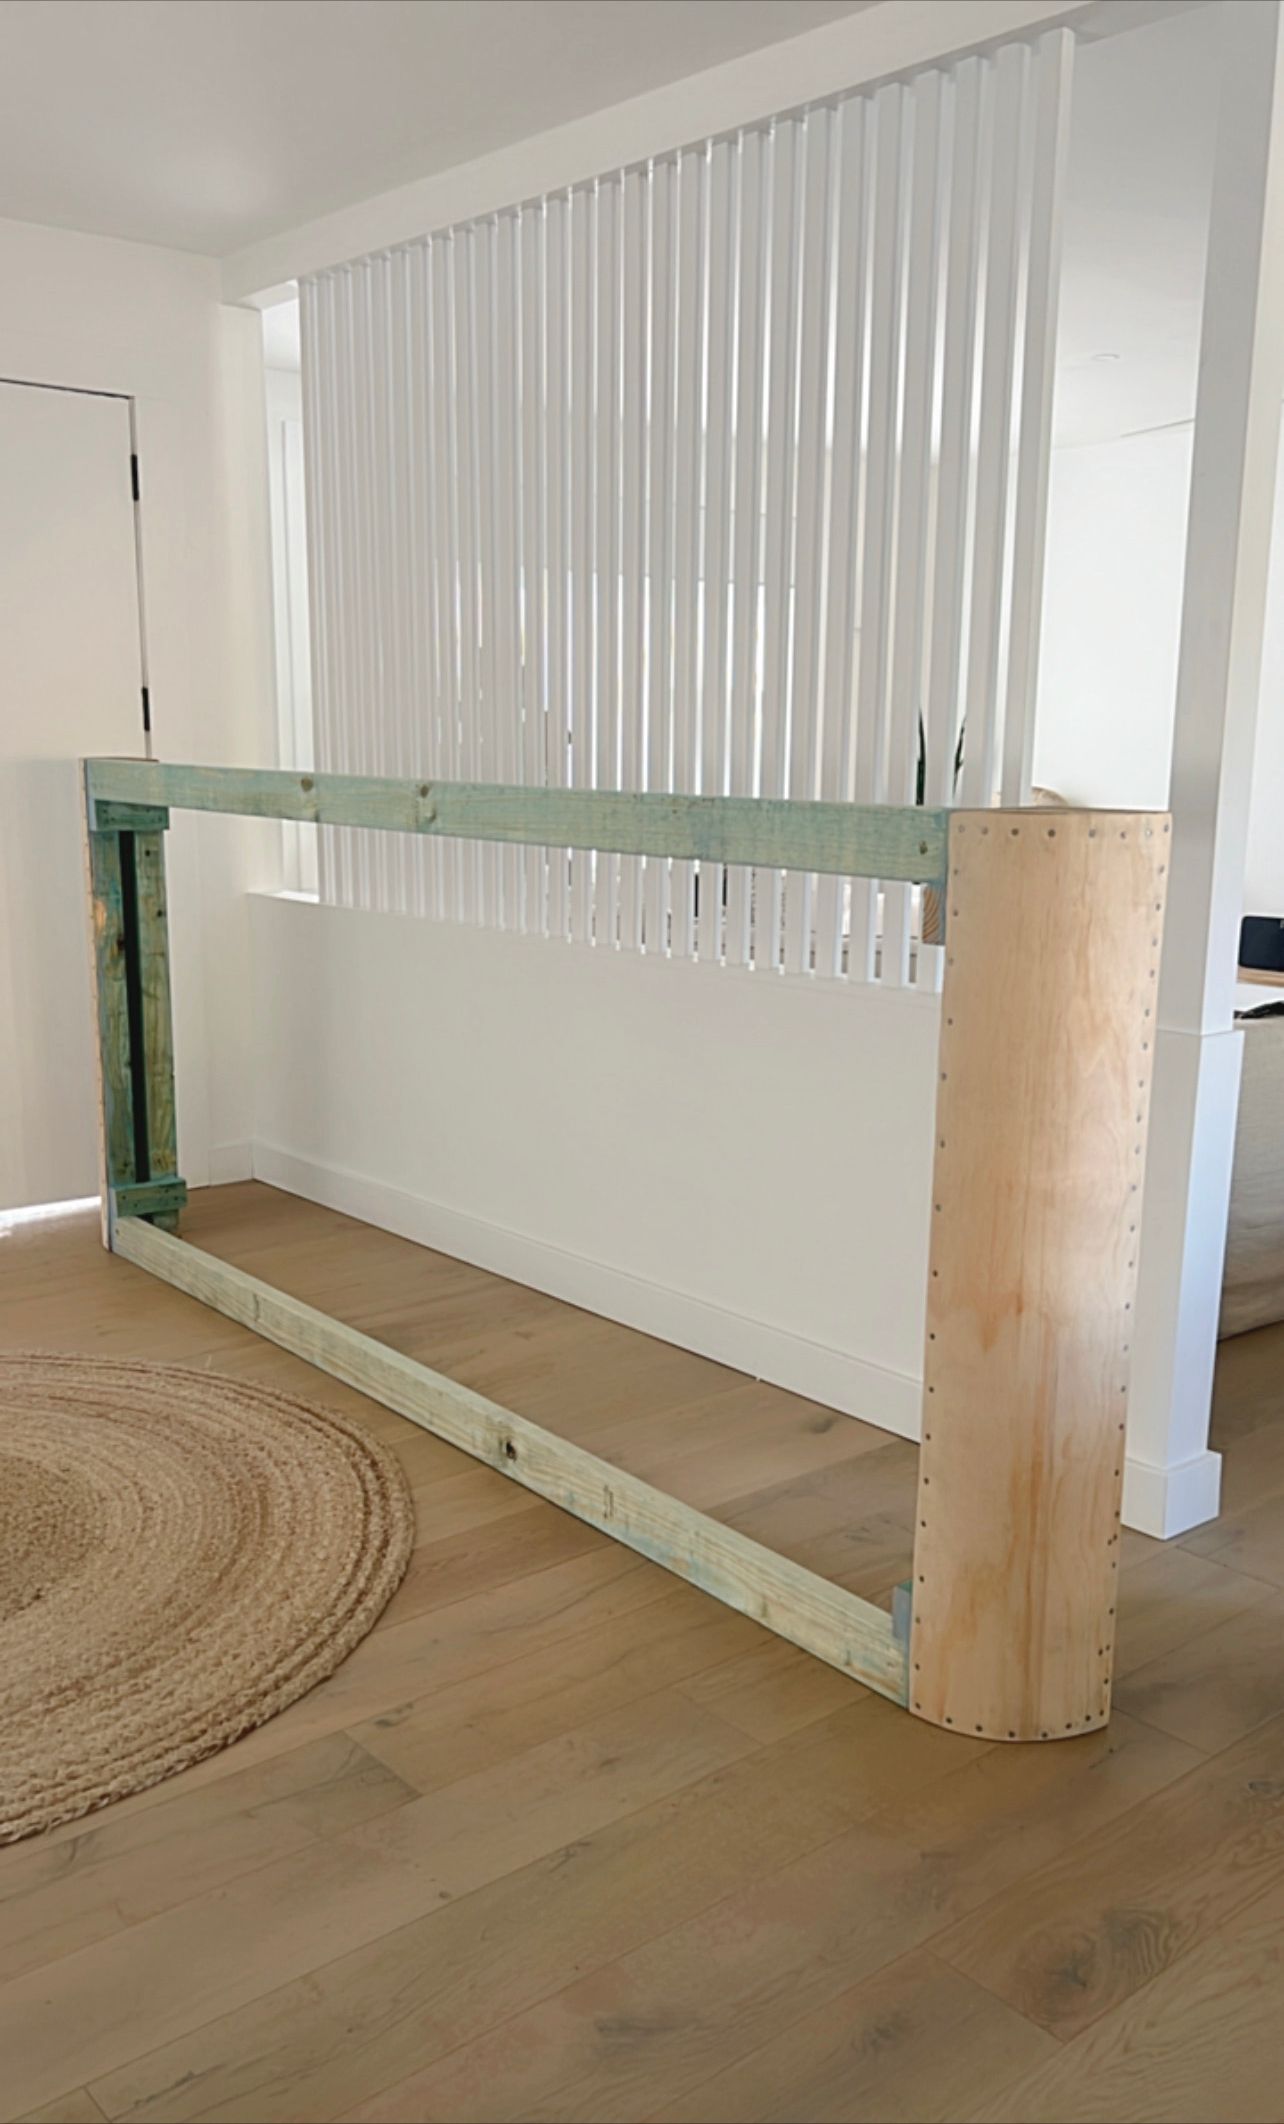
Step 1. Make the end frames first. Starting with the top and bottom plates to form the curve then attach the H2 treated pine with your adhesive and screws. Once the frame is ready its time to clad the curve, get your ply and wet it well, glue and hammer in one side first then bend to the other end forming the curve, glue down this side also and hammer in your clout nails and let dry for 24hours. (Use clamps and a piece of timber to slowly and gently curve the wet ply)
Once your two end curve sections are built its time to attach your centre lengths of H2 Treated pine timber, (we used H2 only because it was left over from another job, non treated is fine) ours is 3 metres long (here is where you can custom yours to whatever width desired) attach and screw these together to complete the frame structure.
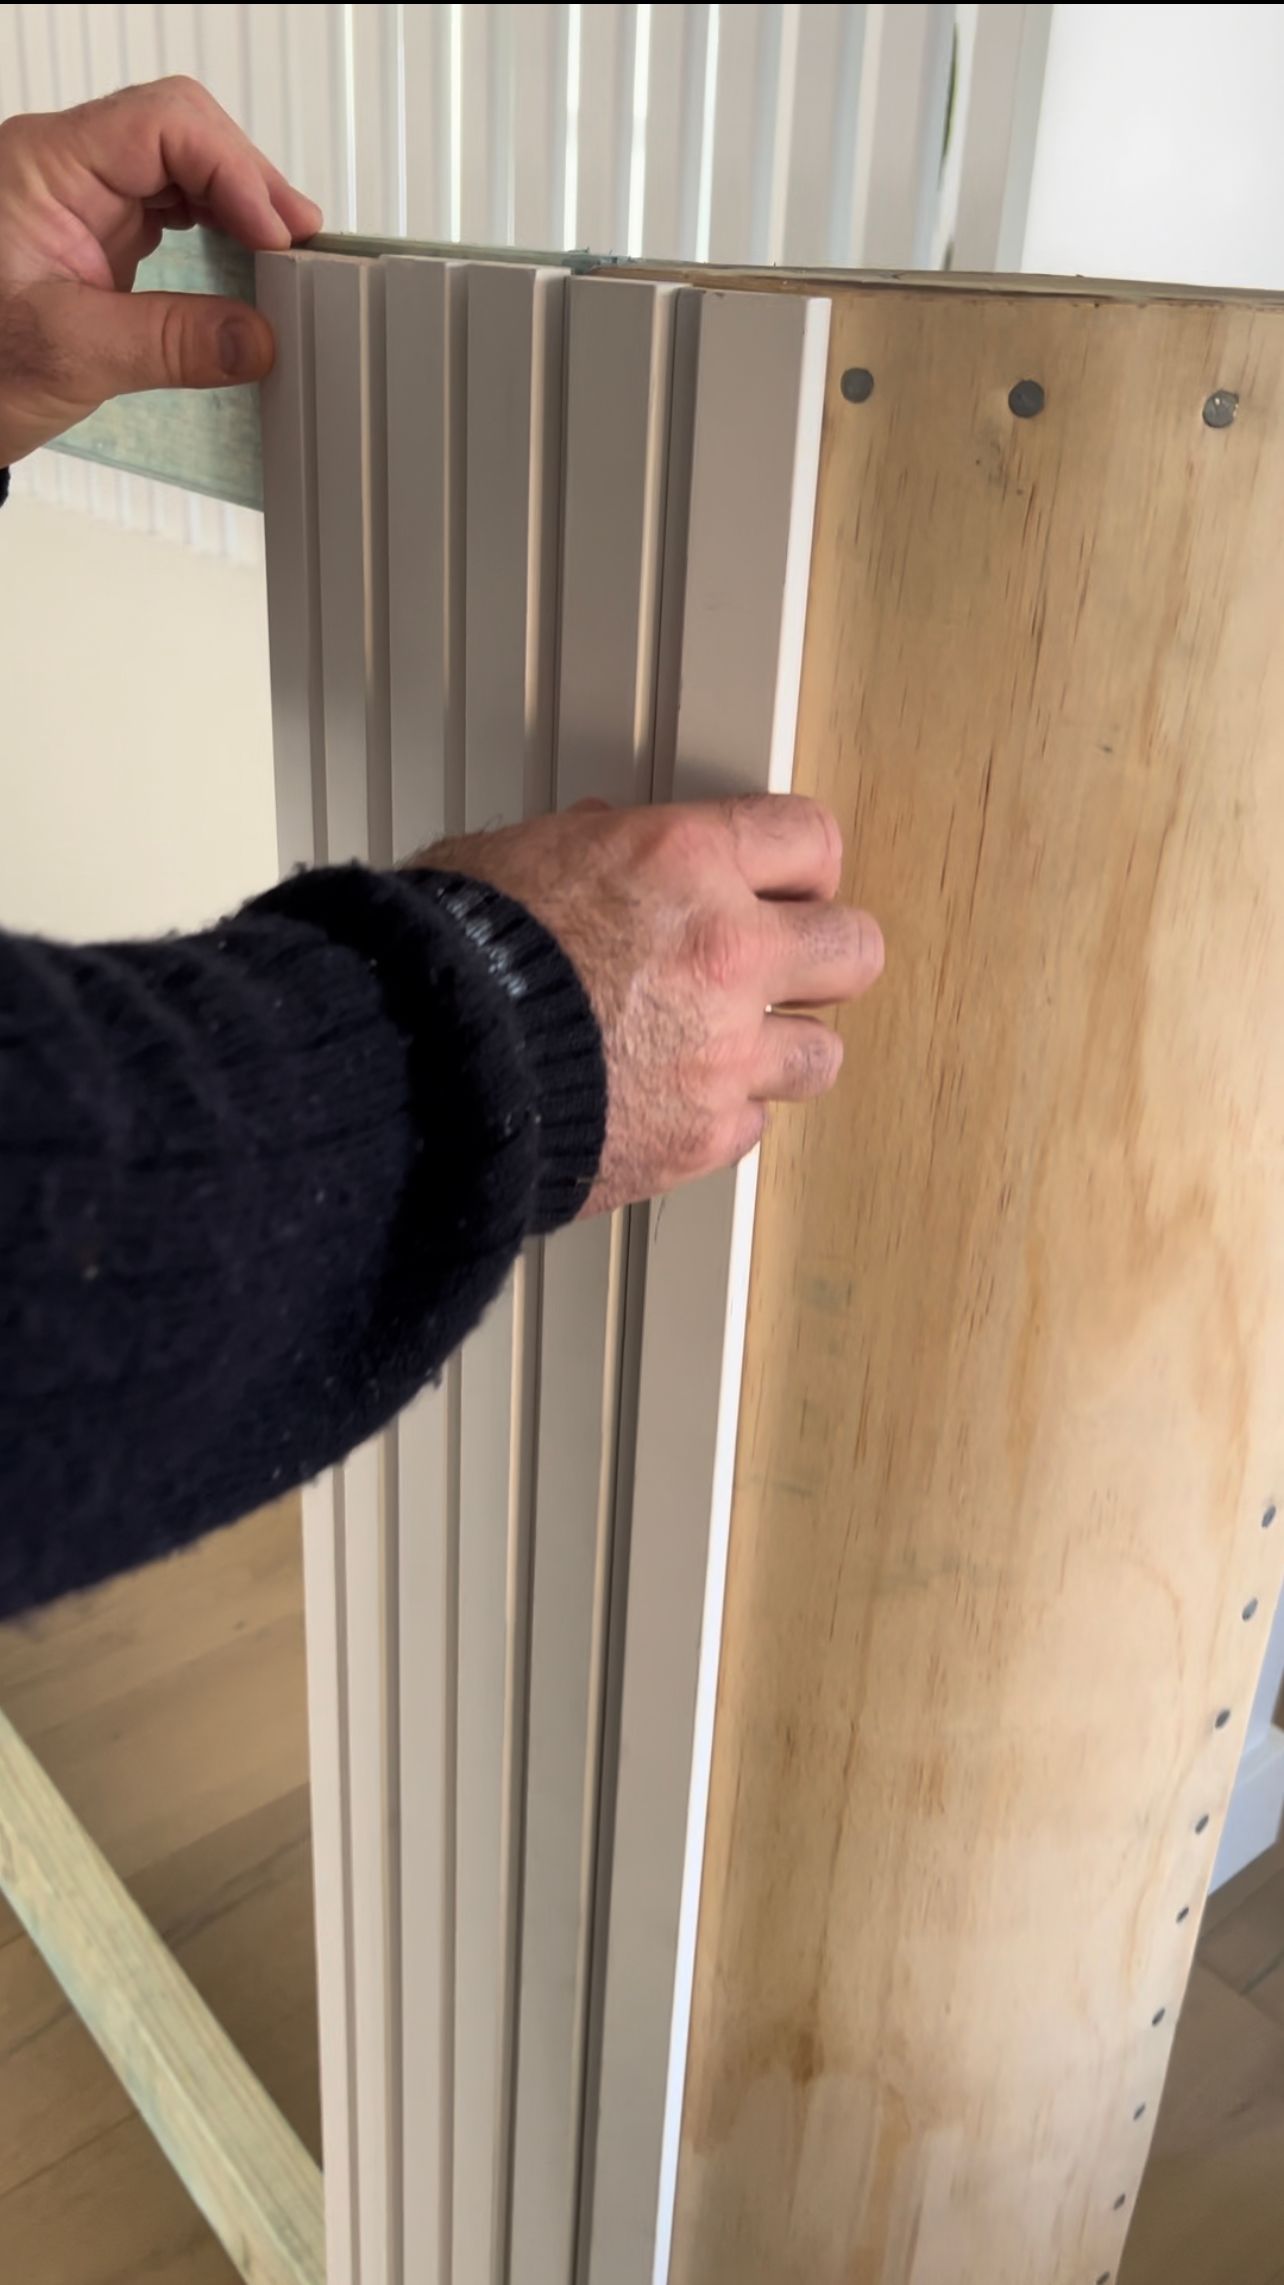
Step 2. Now it is time to start attaching your Porta Timber Contours lining boards, ( available at Bunnings) glue and use pin nails to secure these into place, then once they are all attached, its ready to have the top put on. (fill the pin nail heads with filler and sand prior to painting)
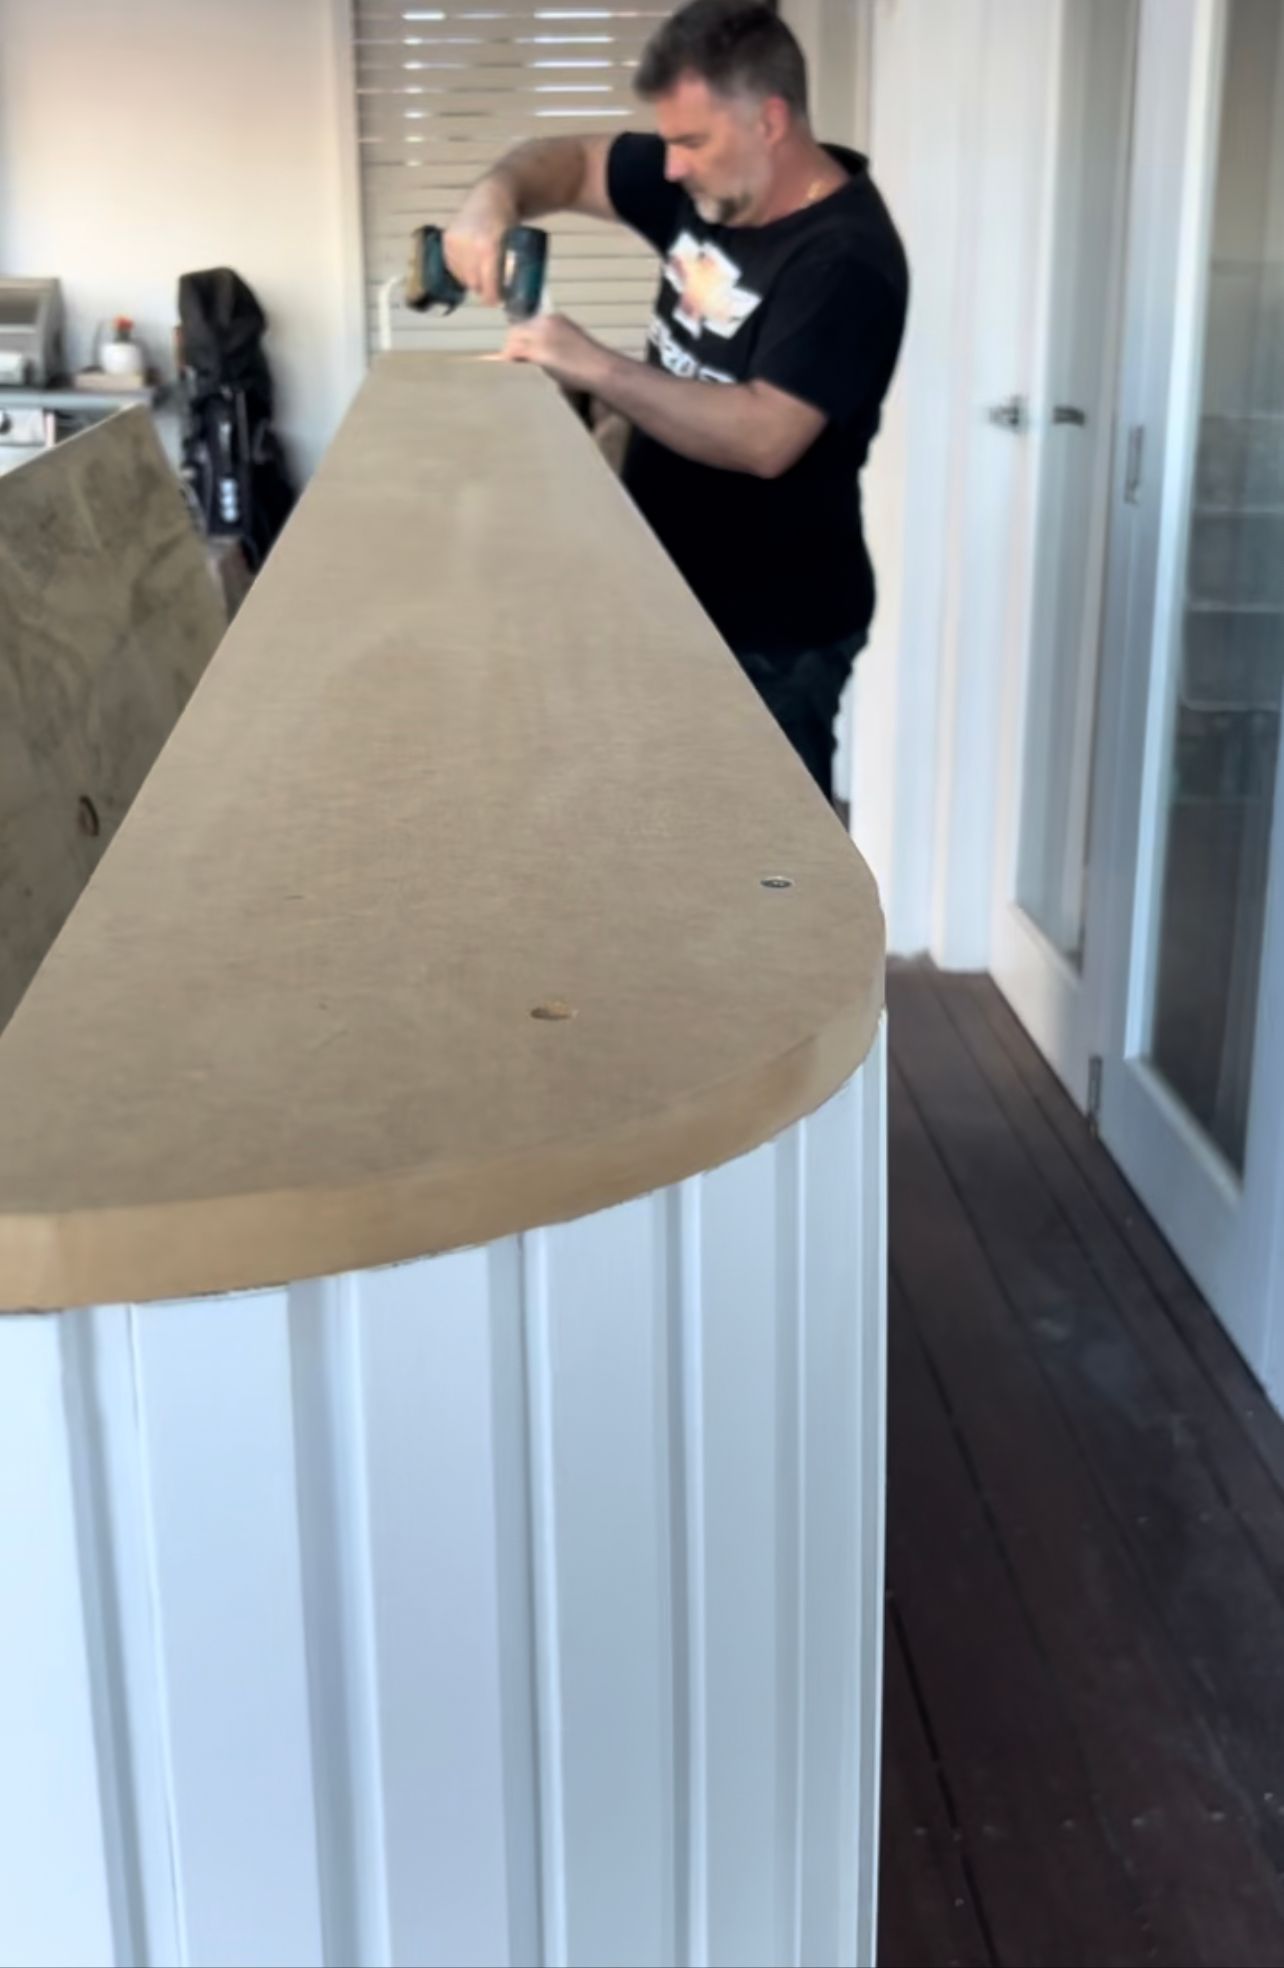
Step 3. Cut your Mdf out the width of our headboard shelf is 30cm x 3metres long, cut out the piece required, using a jigsaw to cut radius to for the curves on each end.
Step 4. Attach your top with adhesive and screws, fill in screw holes with some wood putty, give it a sand and use a 2 in 1 timber primer and paint (We used British paints 2 in 1 water based acrylic paint) paint it the colour of your choice.

I hope you all enjoyed this DIY follow my Instagram account @playa_interiors for more on DIY's Reno ideas and Styling Tips.
Creator: Rosanna
Instagram: @playa_interiors


