
I can guarantee you we all know someone who knows someone who owns a farmhouse chair. They are quite popular and I am going to share with you a step by step guide on how you can refinish yours!
STEP 1: PLANNING AND WHAT YOUR GOING TO NEED
Before we even begin revamping a farmhouse chair, its important we have everything we need ready to get started
You’re going to need:
1. Sander and Sand Paper
2. Dishwasher Soap/ Disinfectant Soap
3. Cloth and sponge
4. Paint brush/ Paint Sprayer
5. Choice of paint/ stain/ varnish
6. Wax or Poly
This project shouldn’t take you more than 1-2 days depending on your availability. When I refinished this farmhouse chair for a customer I took a day and a half to allow the paint to fully dry and the wax to dry before I staged it.
STEP 2: CLEANING AND SANDING
Cleaning
Cleaning is critical when it comes to refinishing any piece of furniture. Old grease, dirt and bacteria will prevent the new paint/ stain from adhering to your surface properly which causes the paint to chip and mark away easily.
Cleaning is simple. All you need is warm water and either dishwasher/disinfectant soap or a de-greaser. I clean my furniture surface both before and after sanding. This ensures no dirt, sand or bacteria gets left on the surface. Use a microfibre cloth or a clean cloth to wipe away any excess soap and water and allow the surface to fully dry.
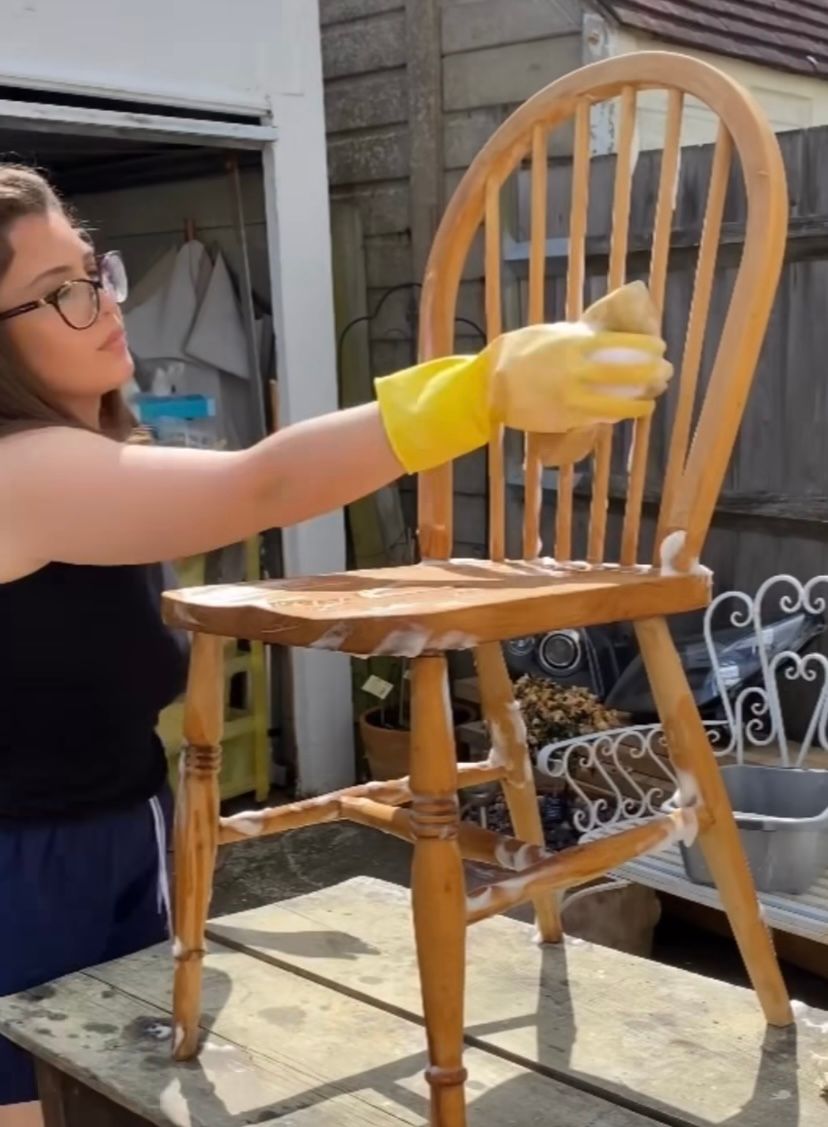
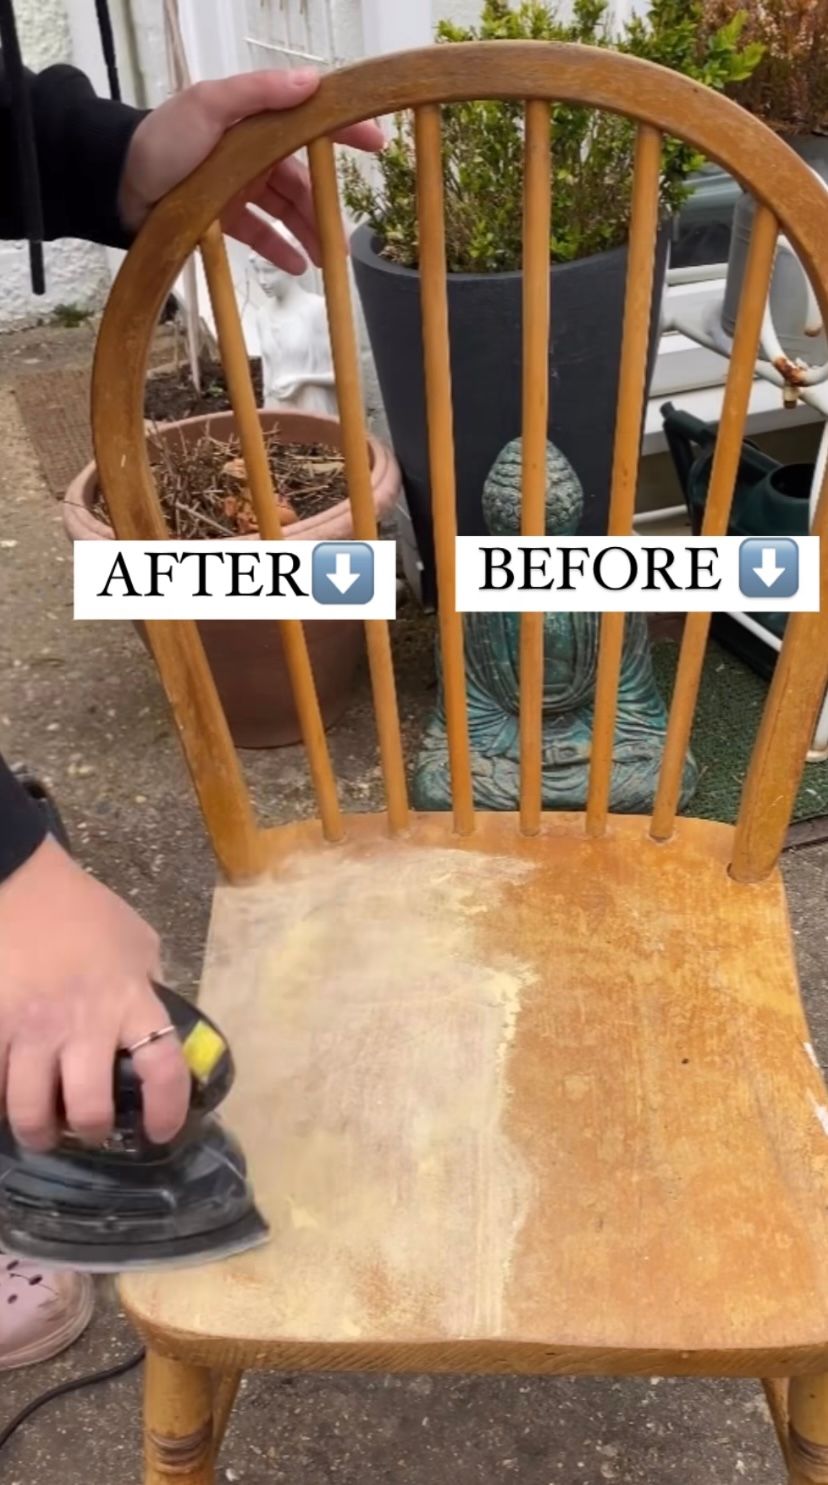
Sanding
If you don’t own a sander, you can still sand your farmhouse chair but it may be more time consuming. I used my Challenge Palm Sander with a 80 grit and 120 grit sandpaper to sand the entire piece apart from the small spindles which I sanded by hand using medium coarse sandpaper. I chose the palm sander as it has a smaller front making the task easier to get into the corners of the chair and sanding the legs.
https://www.amazon.co.uk/shop/handcraftedbysev
STEP 3: PAINTING / Staining/ Varnishing
Paint
Your probably wondering why we have skipped straight to painting, where is the primer? Depending on your surface, depends whether primer applies. The likelihood is that the farmhouse chair your looking to revamp is pine wood. With all my pine wood pieces I don’t apply a primer because pine takes really well to absorbing and holding the paint so a primer is not necessarily needed, but a top coat like wax or poly is most definitely needed!
The only downside is if you don’t like the natural knots in the pinewood. You would then need to apply a knot blocker before applying any paint. This prevents the knots showing or appearing after you have painted the wood surface. And NO regular Primer won’t prevent knots from showing or appearing. I have listed below a Knot block undercoat for those who don’t like the look of knots.
https://www.amazon.co.uk/shop/handcraftedbysev
The paint you use doesn’t matter too much. It does not need to be strictly furniture paint. There is this assumption that since your painting furniture you have to use strictly only furniture paint. But that’s a myth! If your favourite colour is only available in the Farrow and Ball line or a Dulux line, it is fine to use. I’ve done it plenty of times! In fact, the Dulux Heritage Line is not a furniture paint line but I love working with that paint on many furniture pieces.
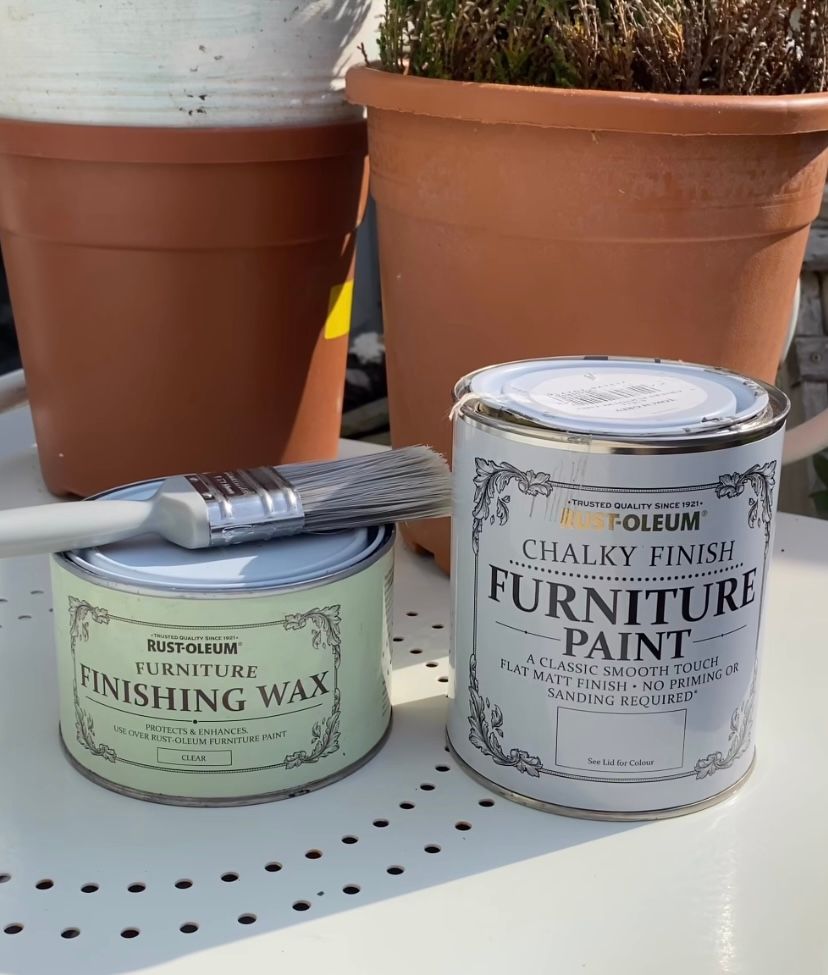
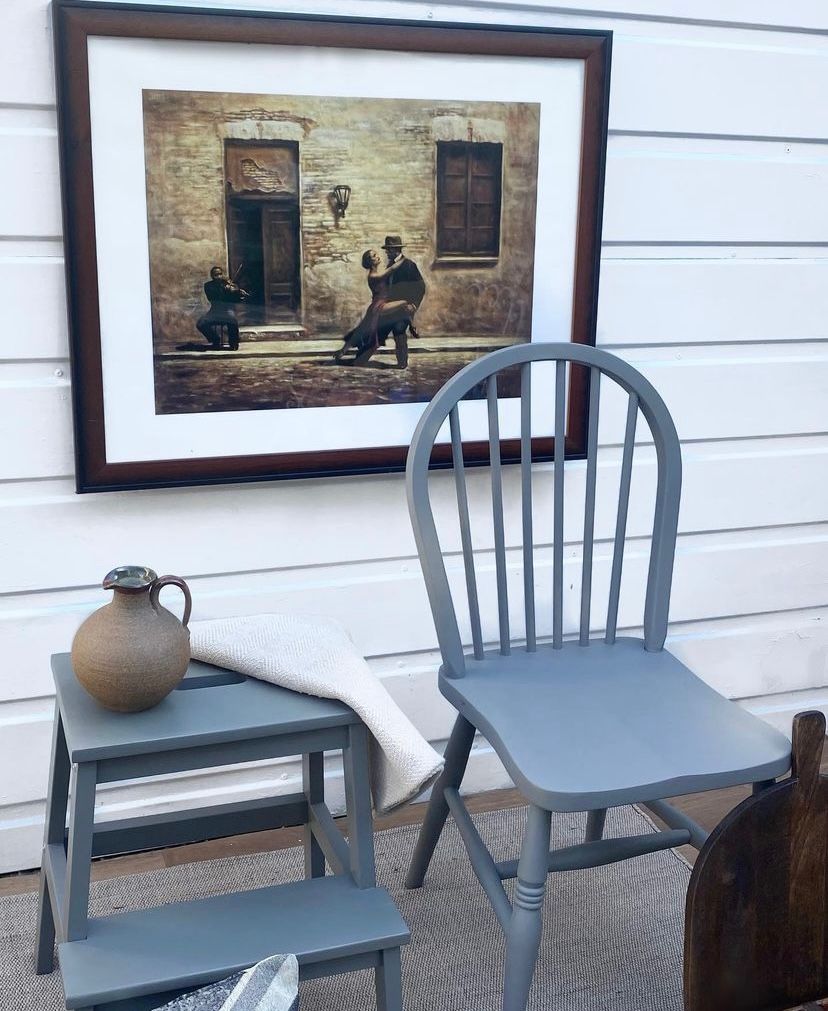
For this farmhouse chair, I am using Rustoleums chalky paint in “Torch Grey”.
To apply the chosen paint you can either use a paint brush or paint sprayer depending on which you have on hand, and which one you prefer. I am personally using Harris 5 pack Essential Paint brushes to apply the chalky paint to ensure I get in all the gaps and to prevent any accidental paint drips or marks. If you do prefer a paint sprayer, you can definitely use a paint sprayer to also apply your chosen paint colour.
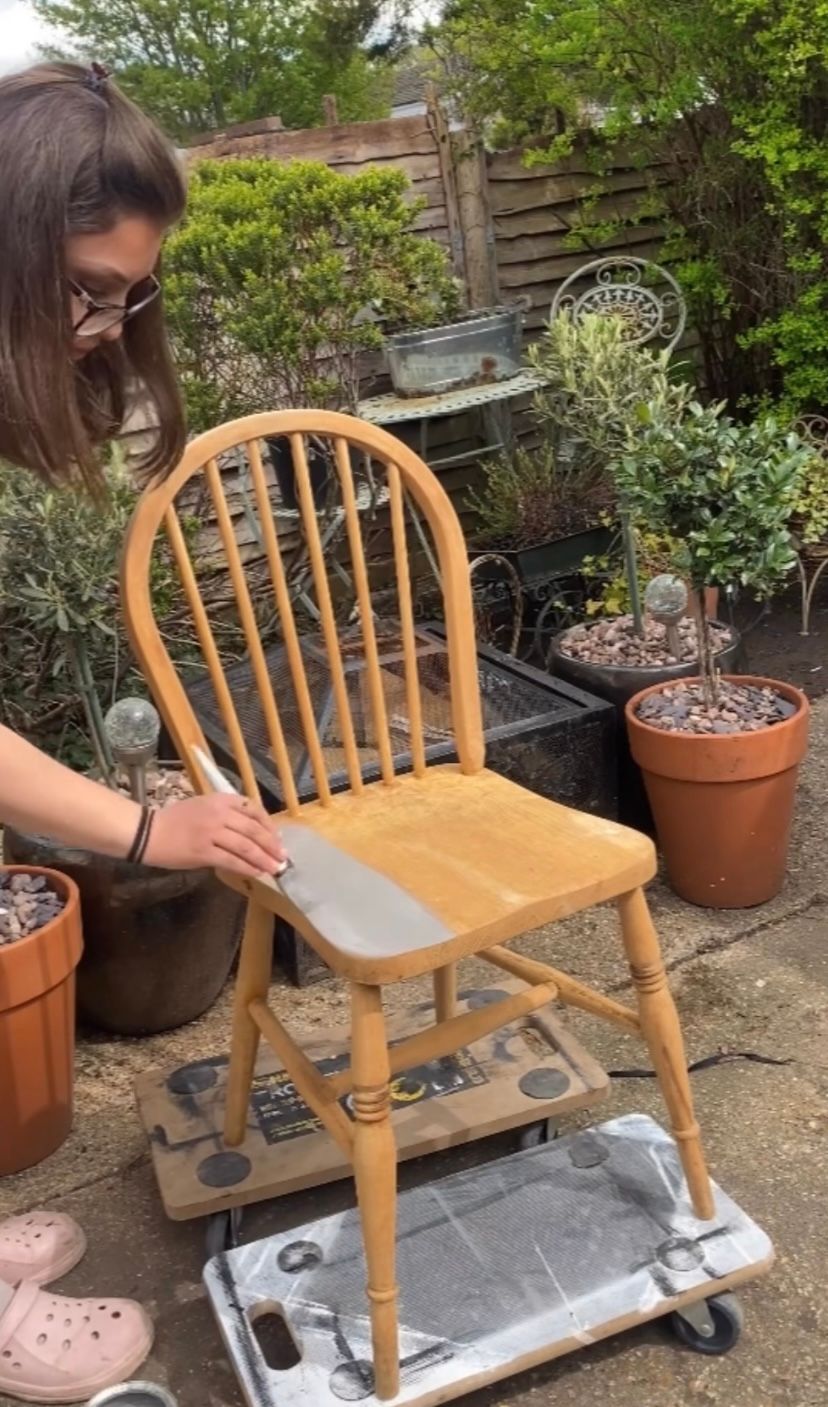
I applied a total of 3 thin layers of paint to ensure I got an even streak free full coverage finish. I always recommend applying thin coats of paint. It may be tempting to want to finish the piece quickly or even getting to see how it looks, but applying thicker coats causes uneven drying time, a higher chance of brush marks and a patchy finish.
If you feel some parts need an extra thin coat or touching up this is perfectly fine.
Stain/Varnish
If you’re looking to stain or varnish your farmhouse chair I would also recommend applying the stain to go with the grain! This will give you an even natural finish. To get into the deeper pores of the wood you can apply the stain against the grain but don’t forget to wipe away any unwanted excess. You can use either a paint brush or a lint free cotton cloth to apply your chosen stain/ varnish.
STEP 4: WAX OR POLY?
Time to seal and protect all that hard work!
For Paint
I would recommend either a polyurethane varnish or a wax depending on the desired finish. I personally prefer to use a wax as it dries much quicker and I like the light sheen it gives. When refinishing the farmhouse chair I used Rustoleums Clear Furniture Finishing Wax and applied the wax with both a clean unused paint brush and a lint free cloth for the spindles. I also recommend Littlefairs Clear Wax which also provides a beautiful light sheen. Again when using Littlefairs clear wax I use either a clean unused paint brush or a lint free soft cloth.
For Stain/Varnish
Depending on the stain and varnish your using depends whether you will need a topcoat. Some varnishes have a built in top coat or diamond hard finish which means you don’t need to put a topcoat on. However, if you are using a stain that does not have a built in topcoat I would highly recommend Littlefairs Clear Wax which is made specifically for protecting all types of wood that has been stained for indoor use.
STEP 5: STYLING
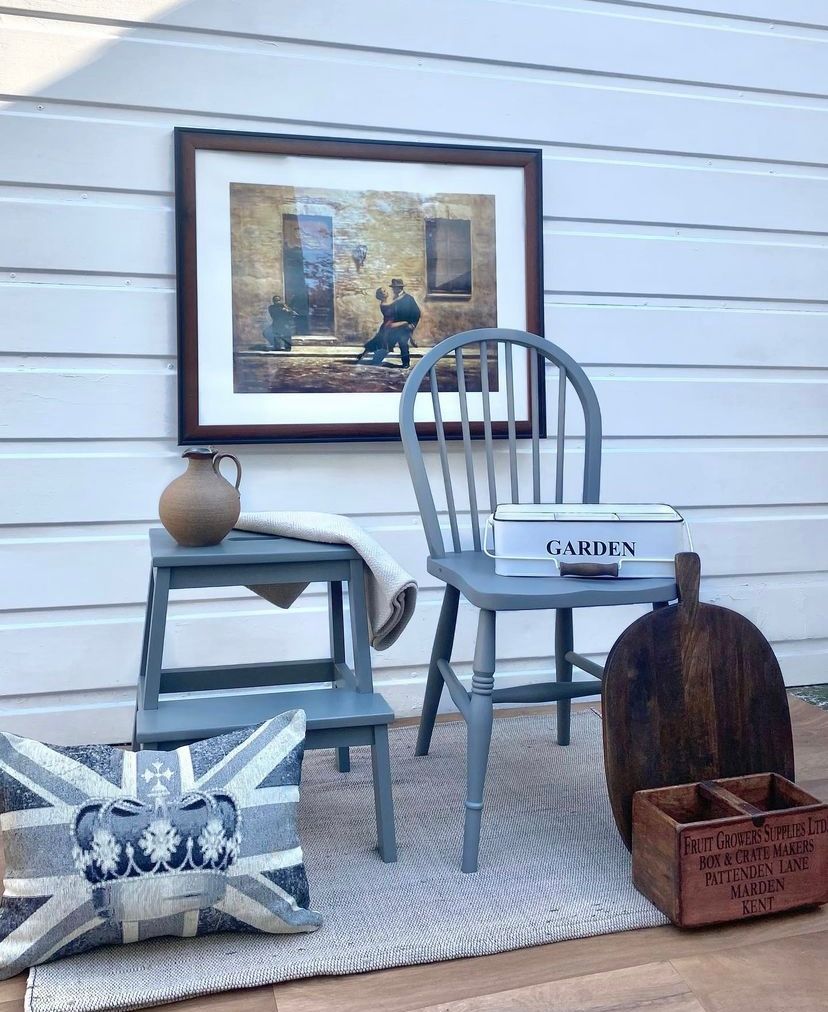
Now that your farmhouse chair looks brand new and to your personal taste its time to style it! For my farmhouse chair that I just completed for my customer I paired it with rich browns, whites and light greys. This hones the chair back into that countryside feel without feeling too modern.
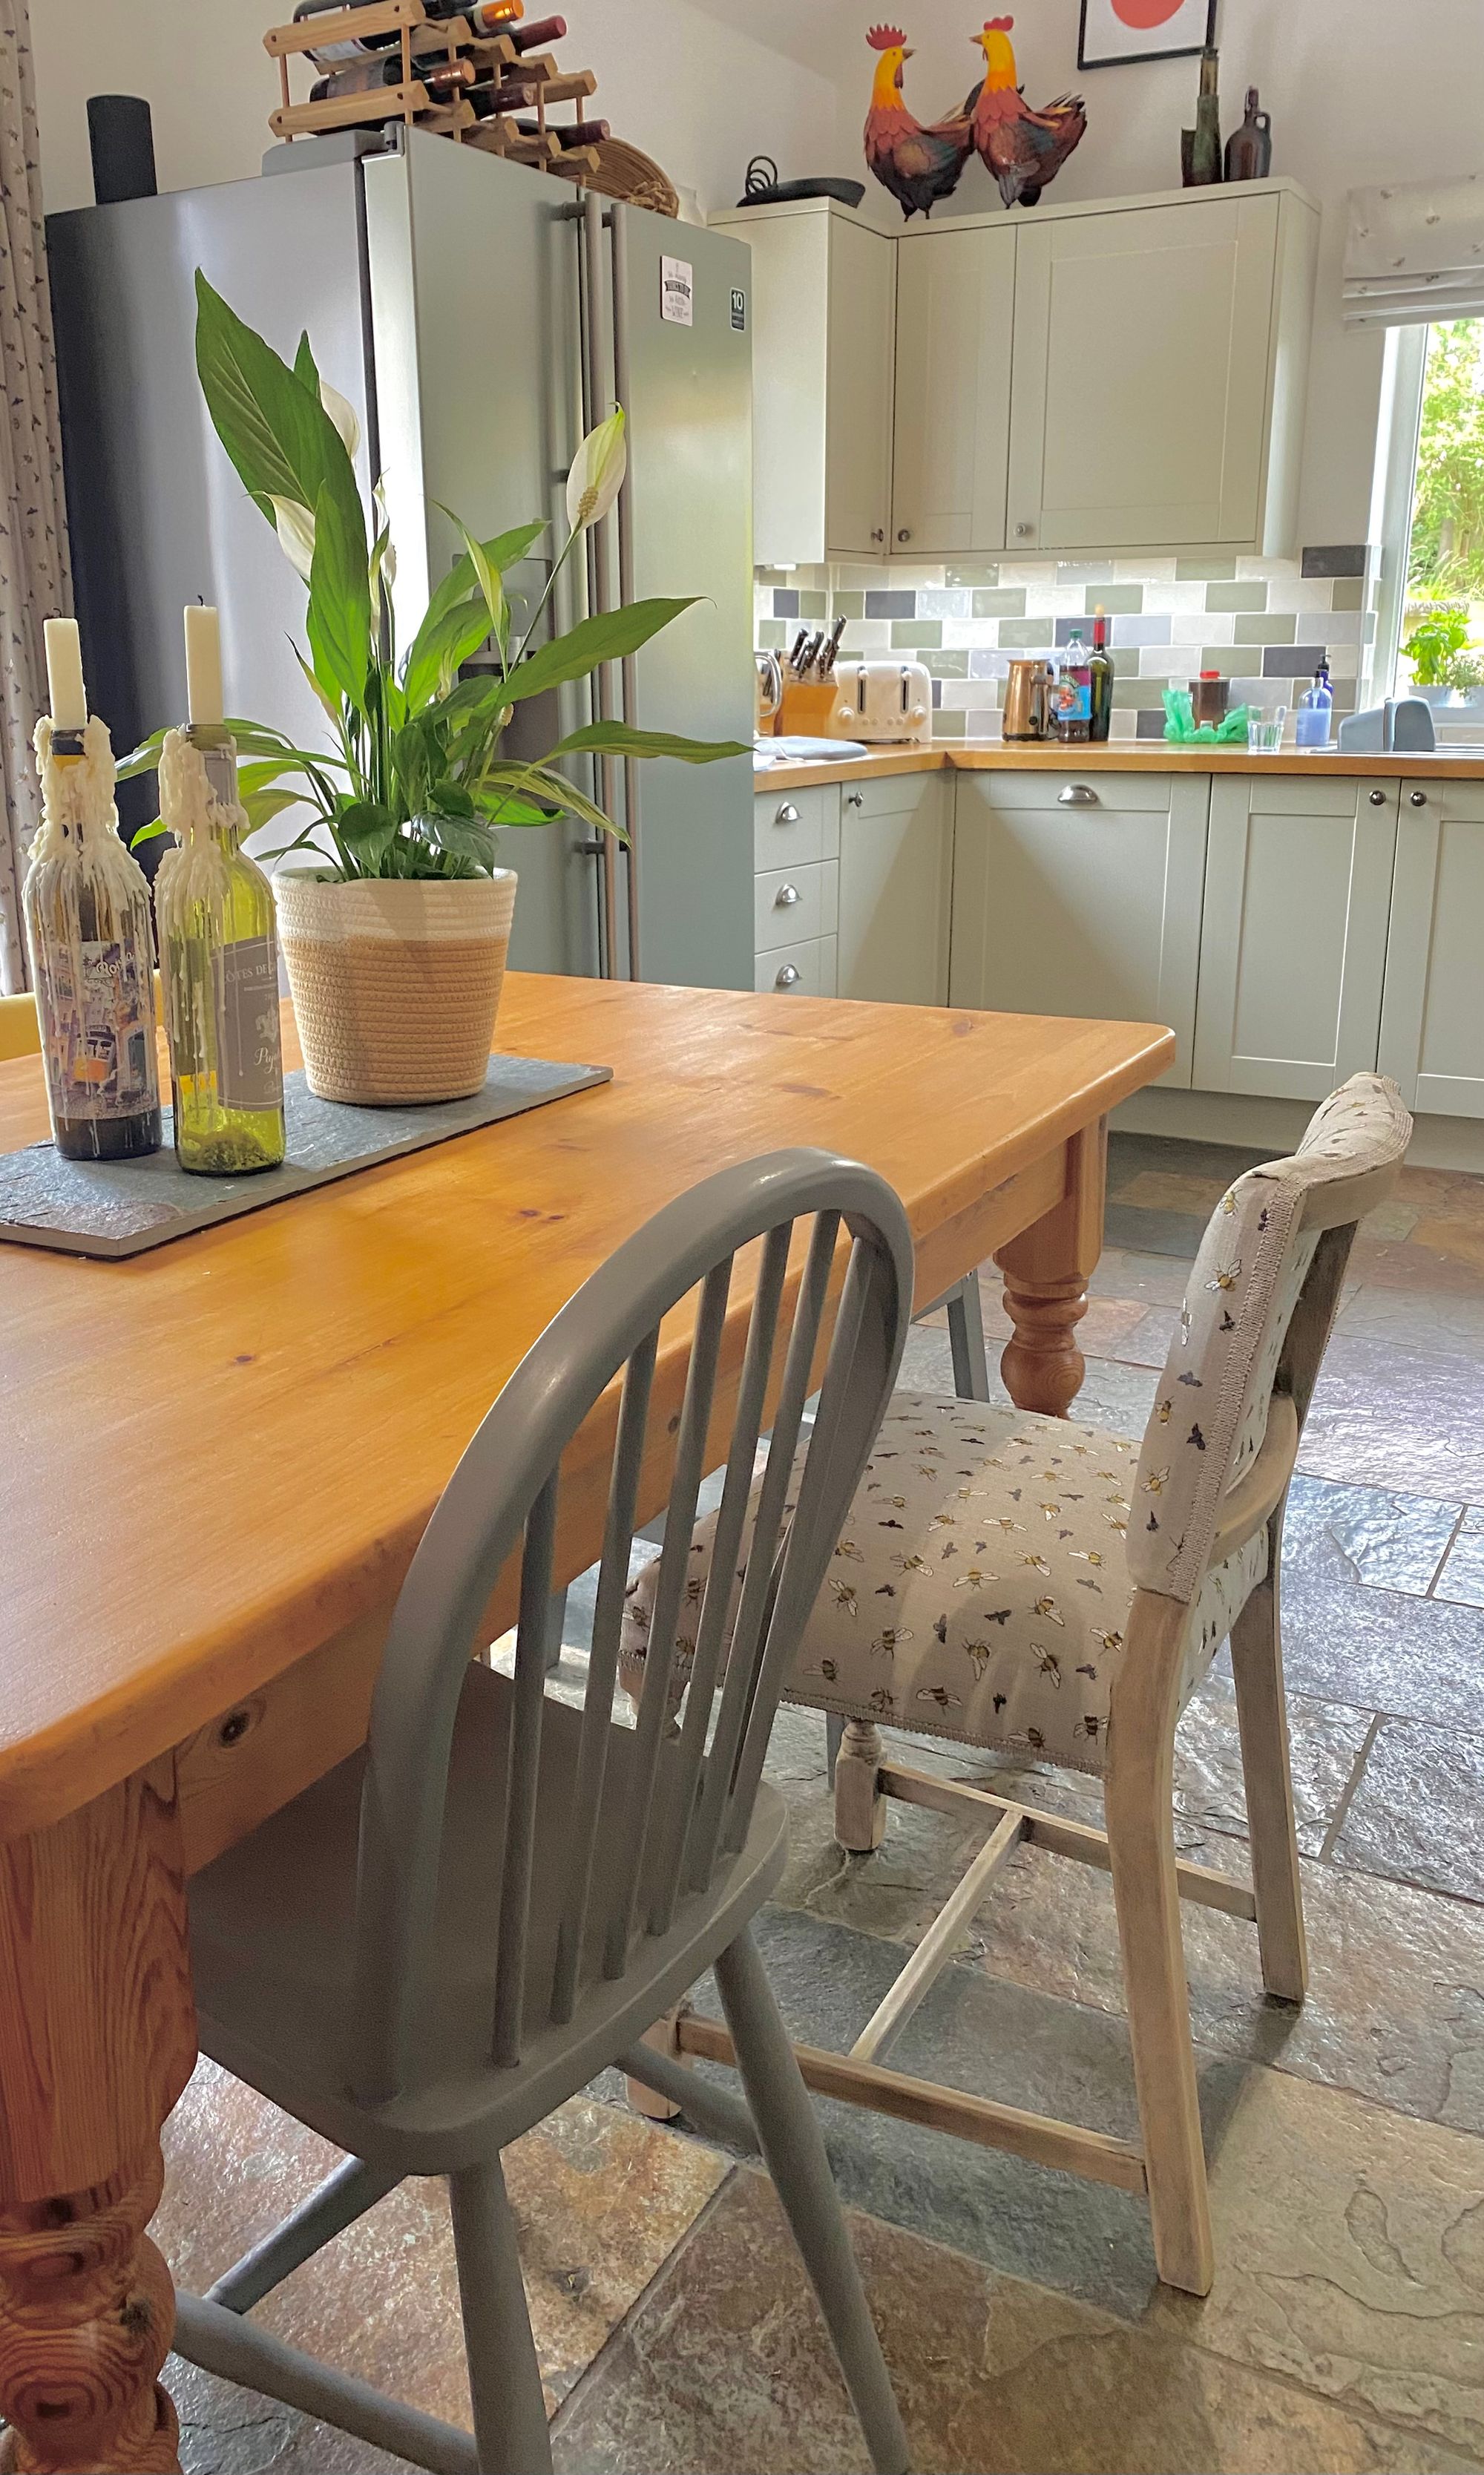
Here is the chair back at my customers home in her kitchen paired with the other refinsihed chairs I completed for her. The customer was very pleased with how the farmhouse chair turned out for her kitchen :)
I hope you enjoyed reading this step by step guide on how to revamp your farmhouse chairs! I have linked all the items I have used in my Amazon Storefront and the link is just below :)
https://www.amazon.co.uk/shop/handcraftedbysev
Sevs Little Finds