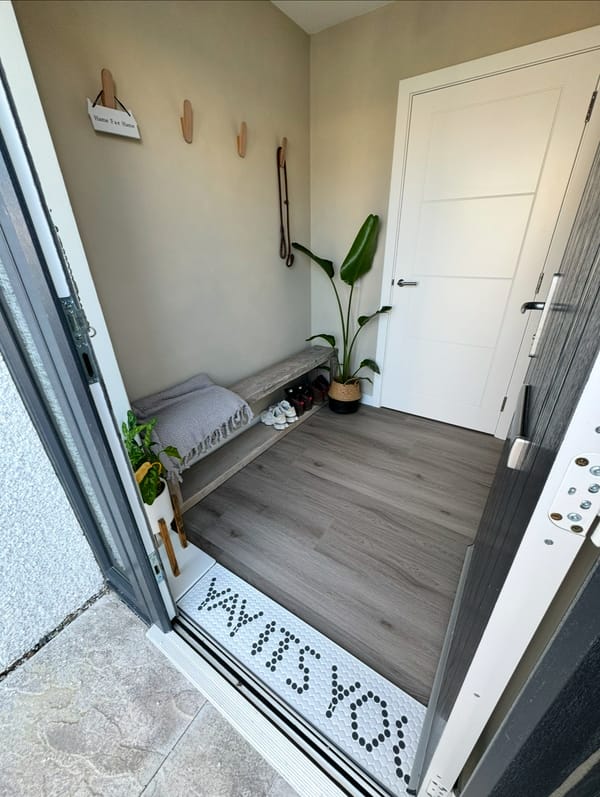
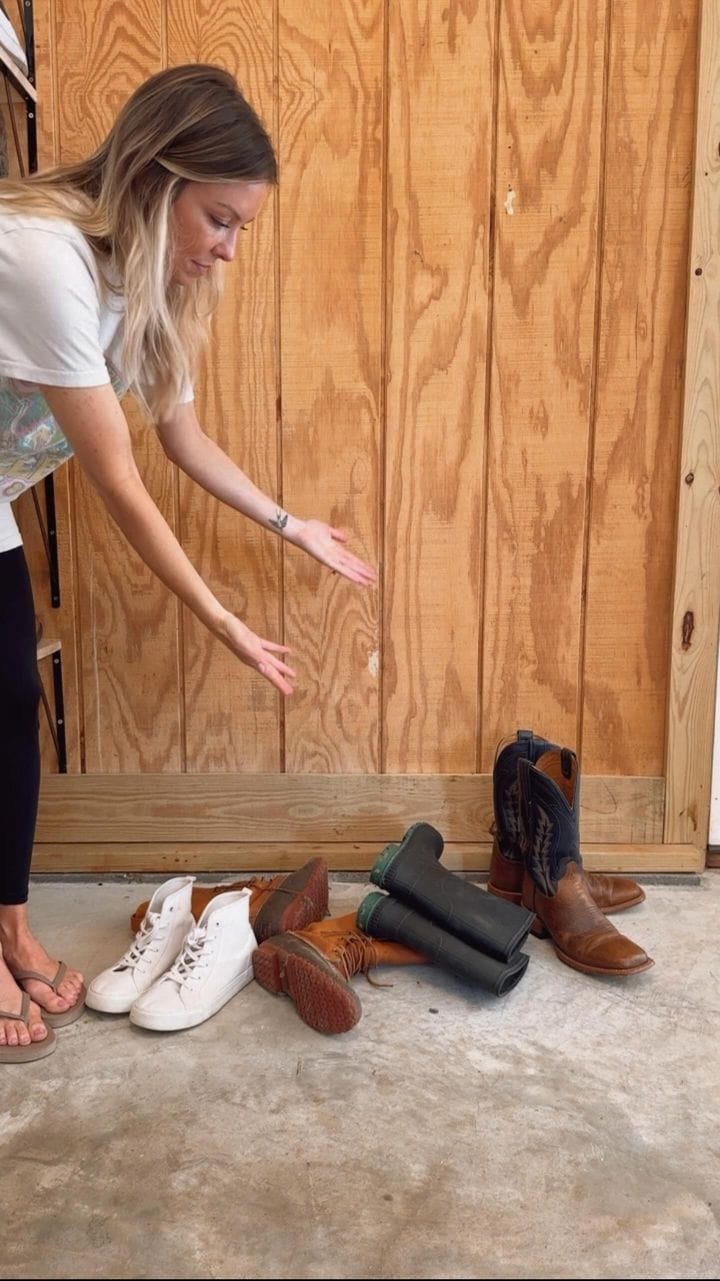
Are you tired of tripping over shoes that clutter your mudroom floor? Want to enjoy a sophisticated dust-free solution that will not drain your pockets? Well, Birdsong Design has got the DIY for you! Not only does this shoe storage hack keep your shoes off the floor and organized, but it also adds a little rustic charm to any room! This shoe organizer is not only stylish but super practical too and you can do it in 20 minutes with only $10 or stuff you already have around your house. Let’s dive into the details!
Materials You’ll Need:
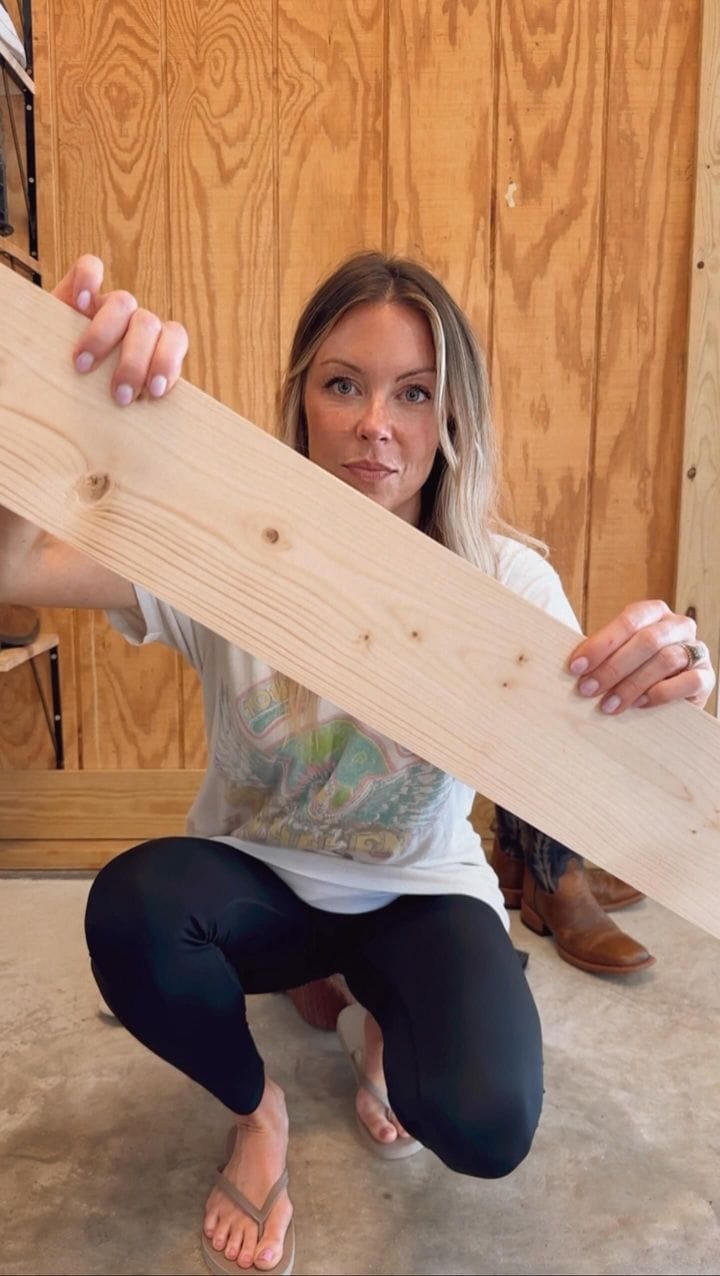
- Six foot long 1×4 board (we cut ours in half to make two racks)
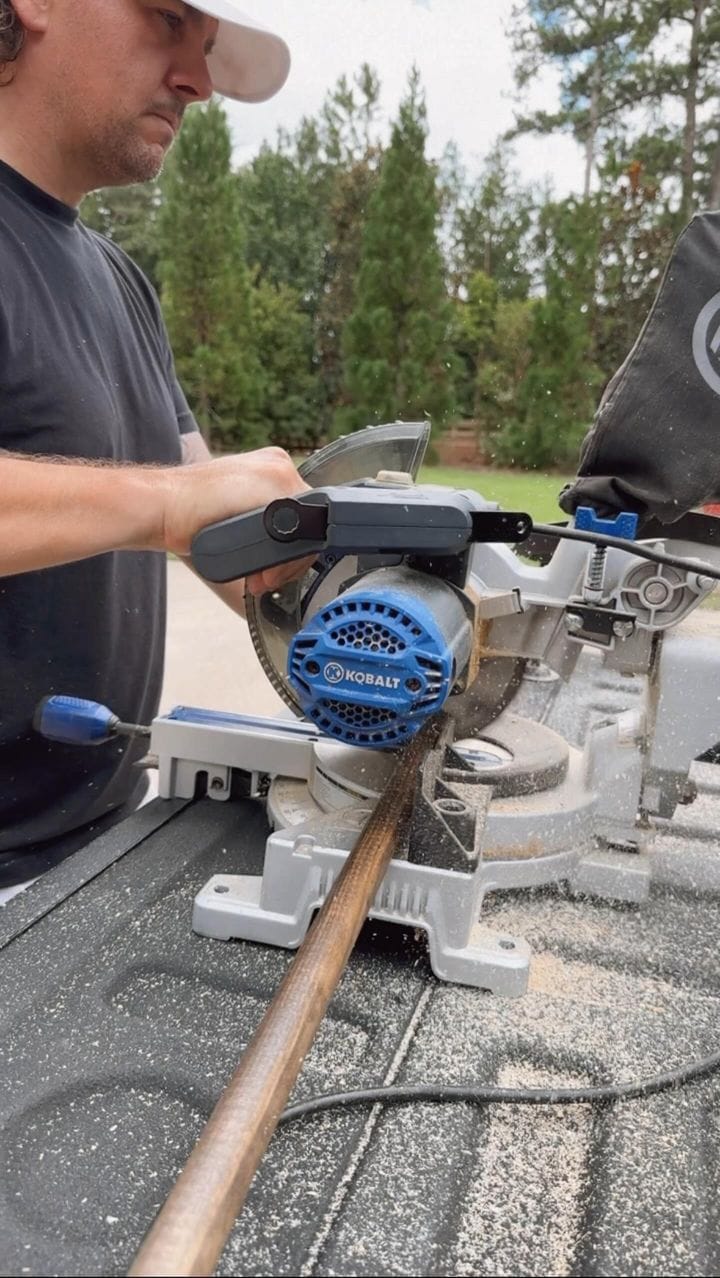
- Dowel (about six inches total of 3/8″ dowel rod)
- Saw (to cut board and dowel rod)
- Mounting materials (like the drill and screws for attaching dowels on board)
- Wood stain (if you want to give your board a clean look)
- Level (to straighten your shoe rack)
Step-by-Step Instructions:
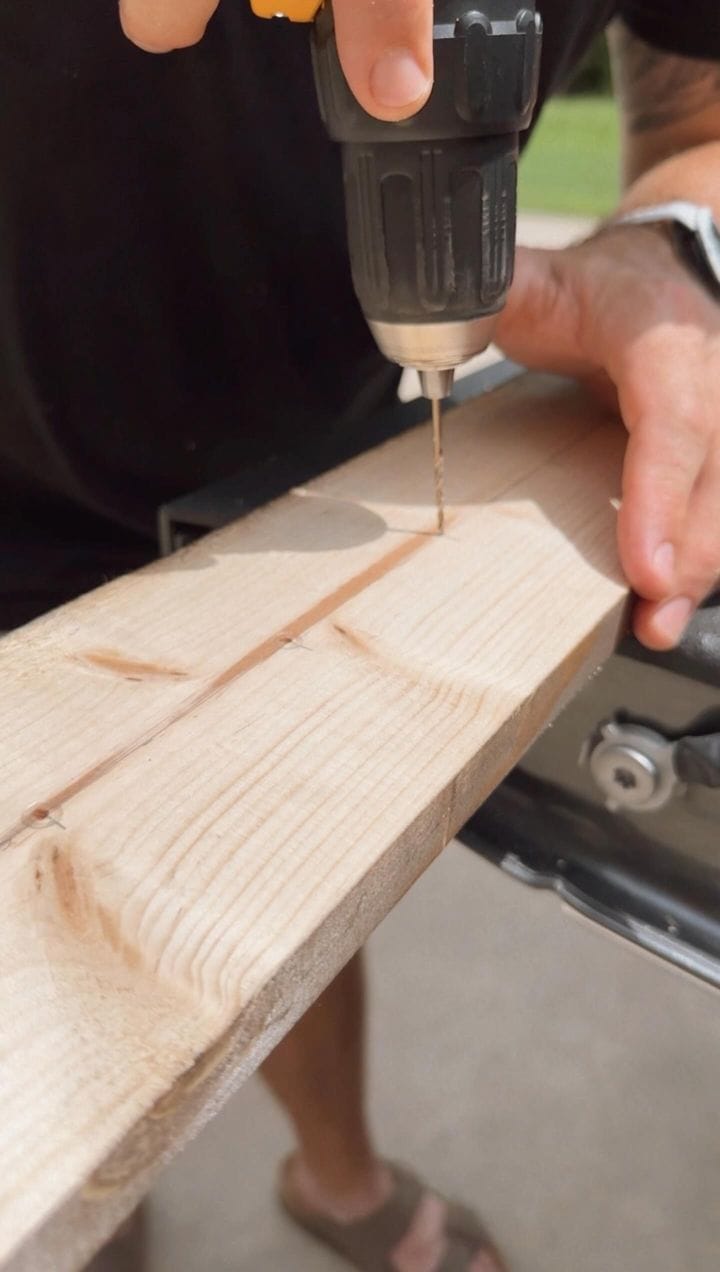
- Cut the Board: Begin by cutting your 1×4 board in half to have two separate three-foot sections. This will be the base of your shoe racks.
- Make the Dowels: Cut a 3/8” dowel rod into six-inch sections. Depending on how many shoes you need to store, a few of those might be in order. We used a couple of dowels to leave 4 inches in between each one.
- Spacing & Marking: Establish your space between each dowel. We went with 4 inches between them, which did the job just fine for our purposes. Mark (and measure) the locations on your board where each dowel will be fixed.
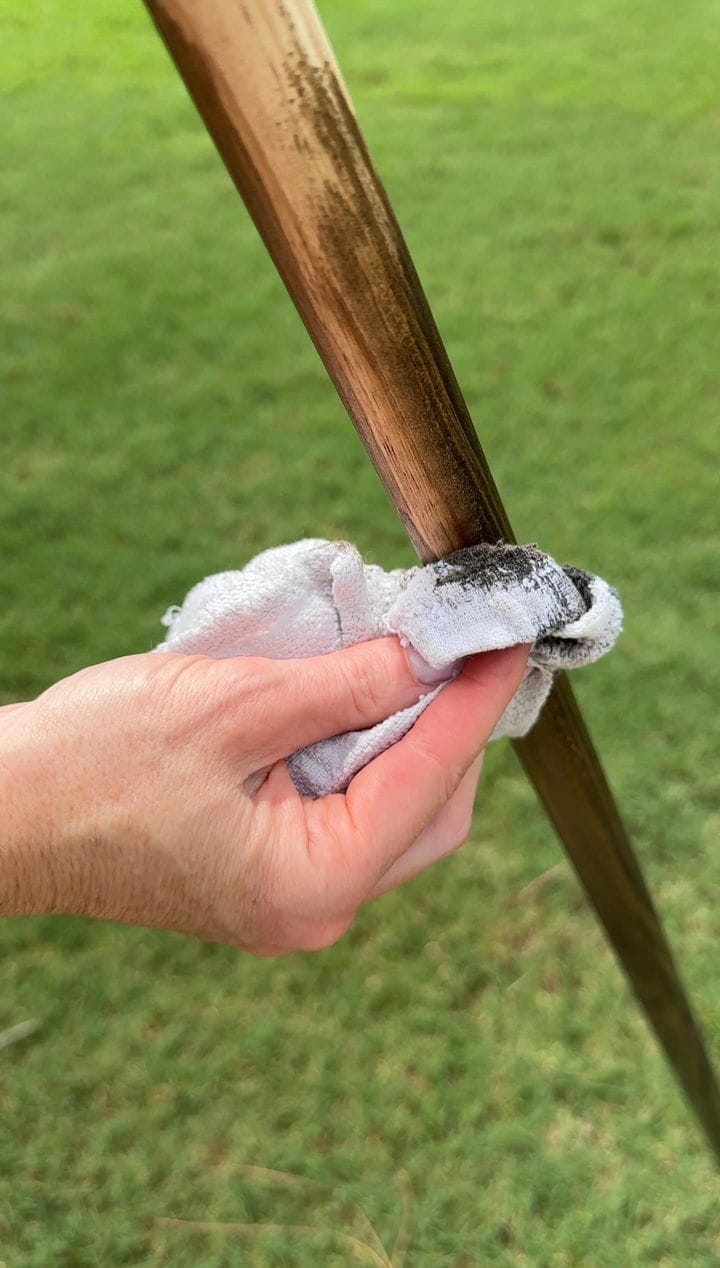
- Stain the Board (Optional): Now it is time to move towards other steps, You can also complete the look by using stain or paint. Select a finish that fits within your space, and allow it to dry.
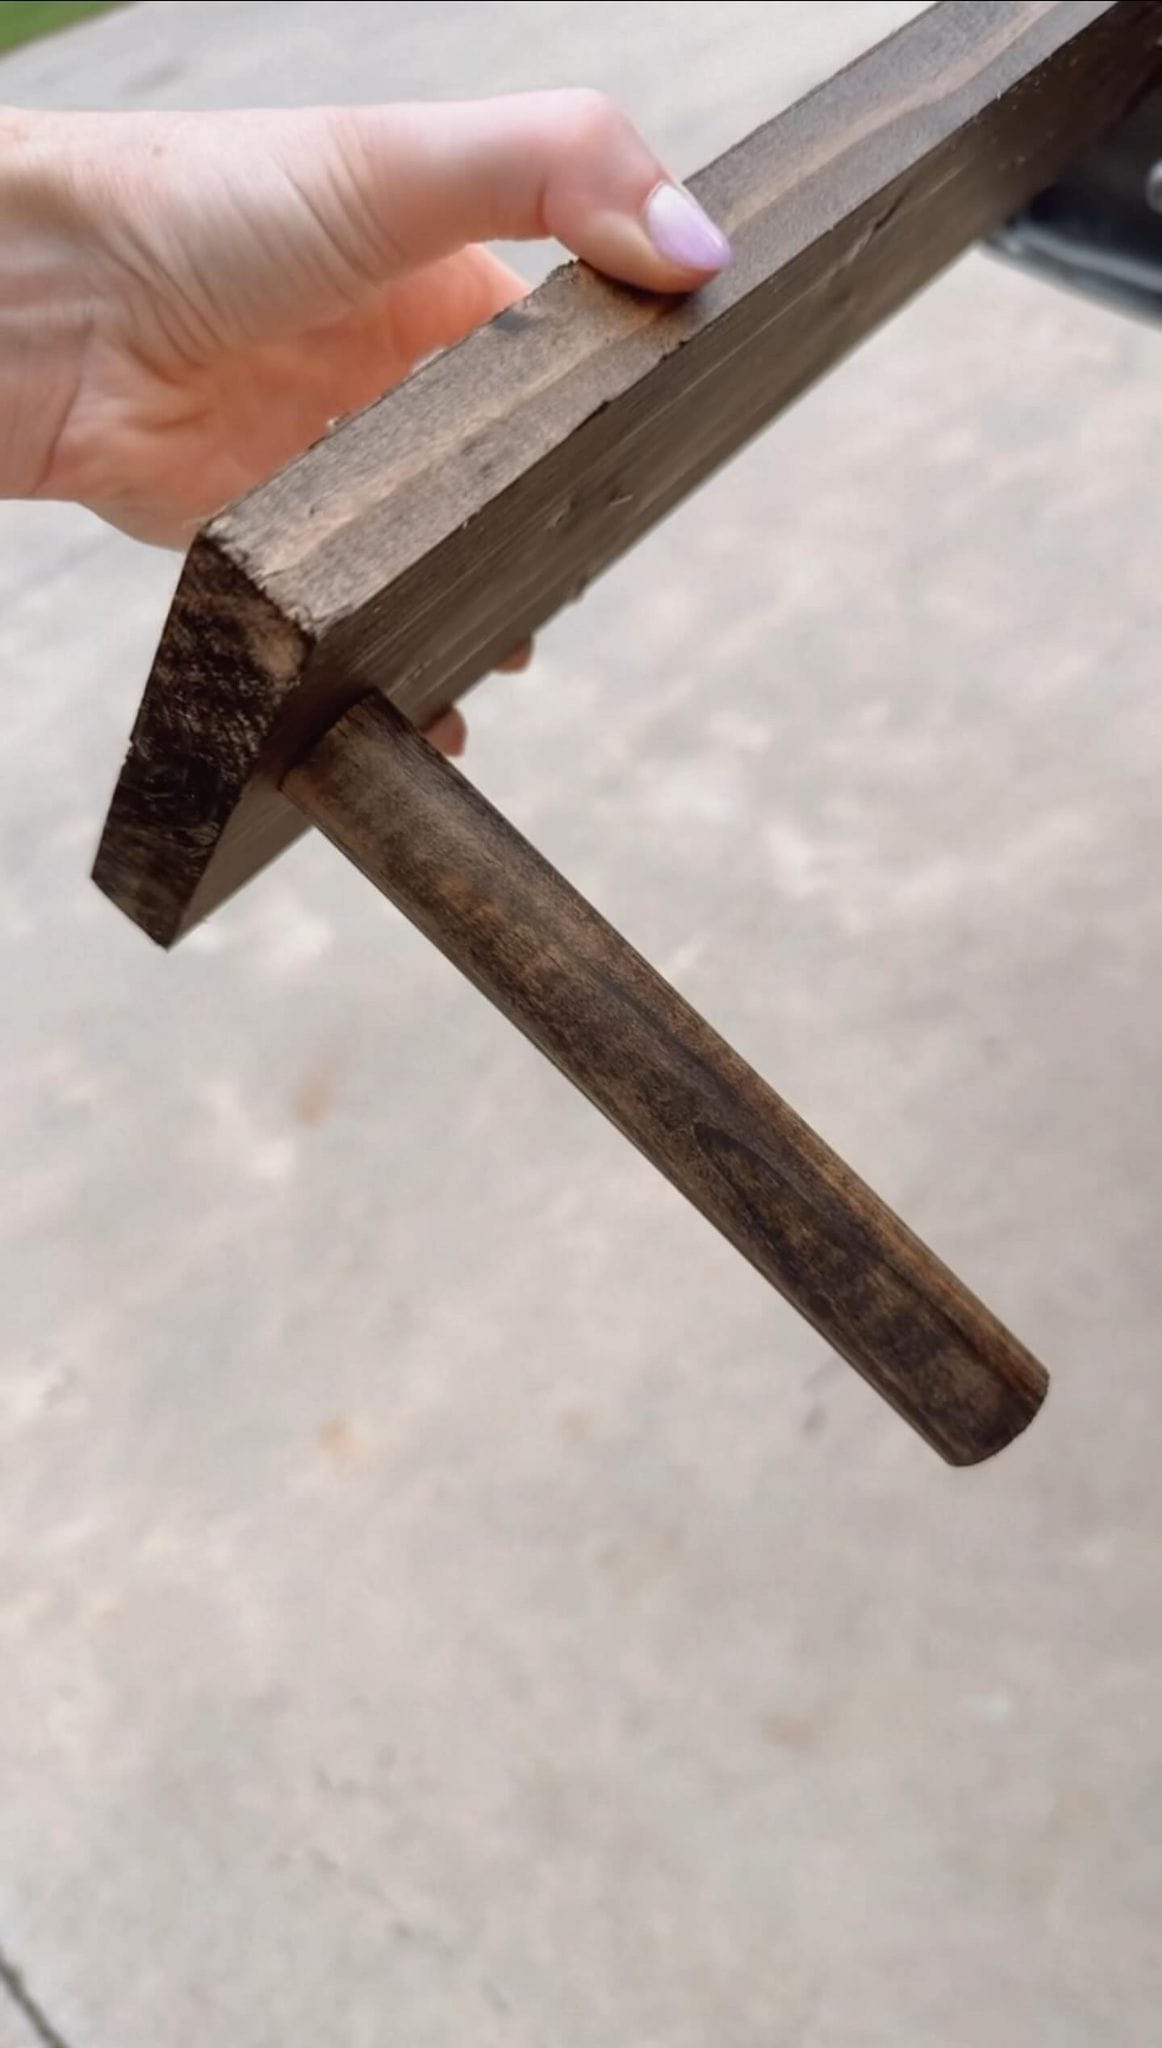
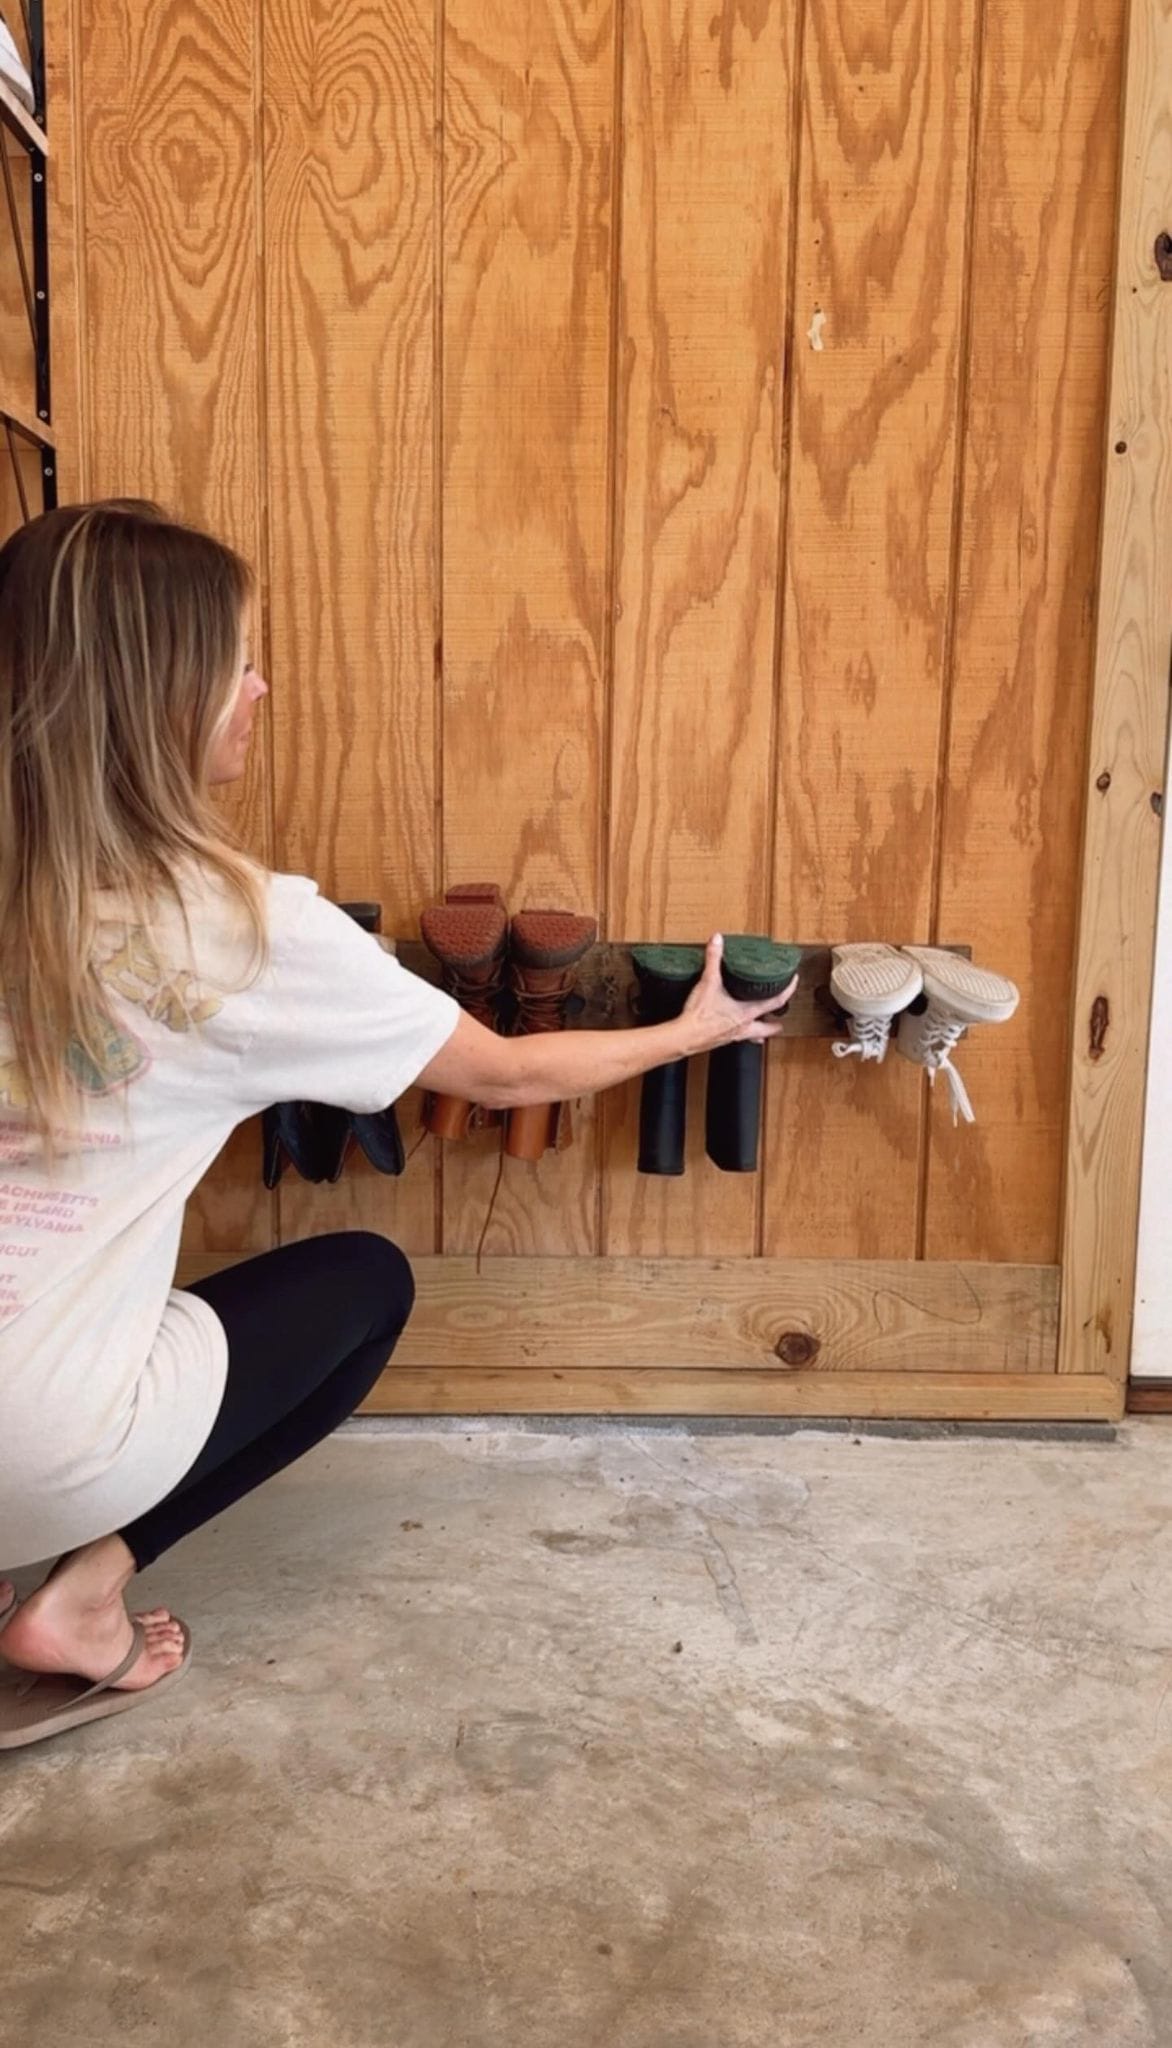
- Drill the Dowels: Take your time to securely screw each dowel into place wherever was marked on the board. Go ahead and attch from the back of your board; this way, you won’t see any screws once everything is mounted. We gave ourselves about 4″ between each dowel (enough room to accommodate our different shoe sizes).
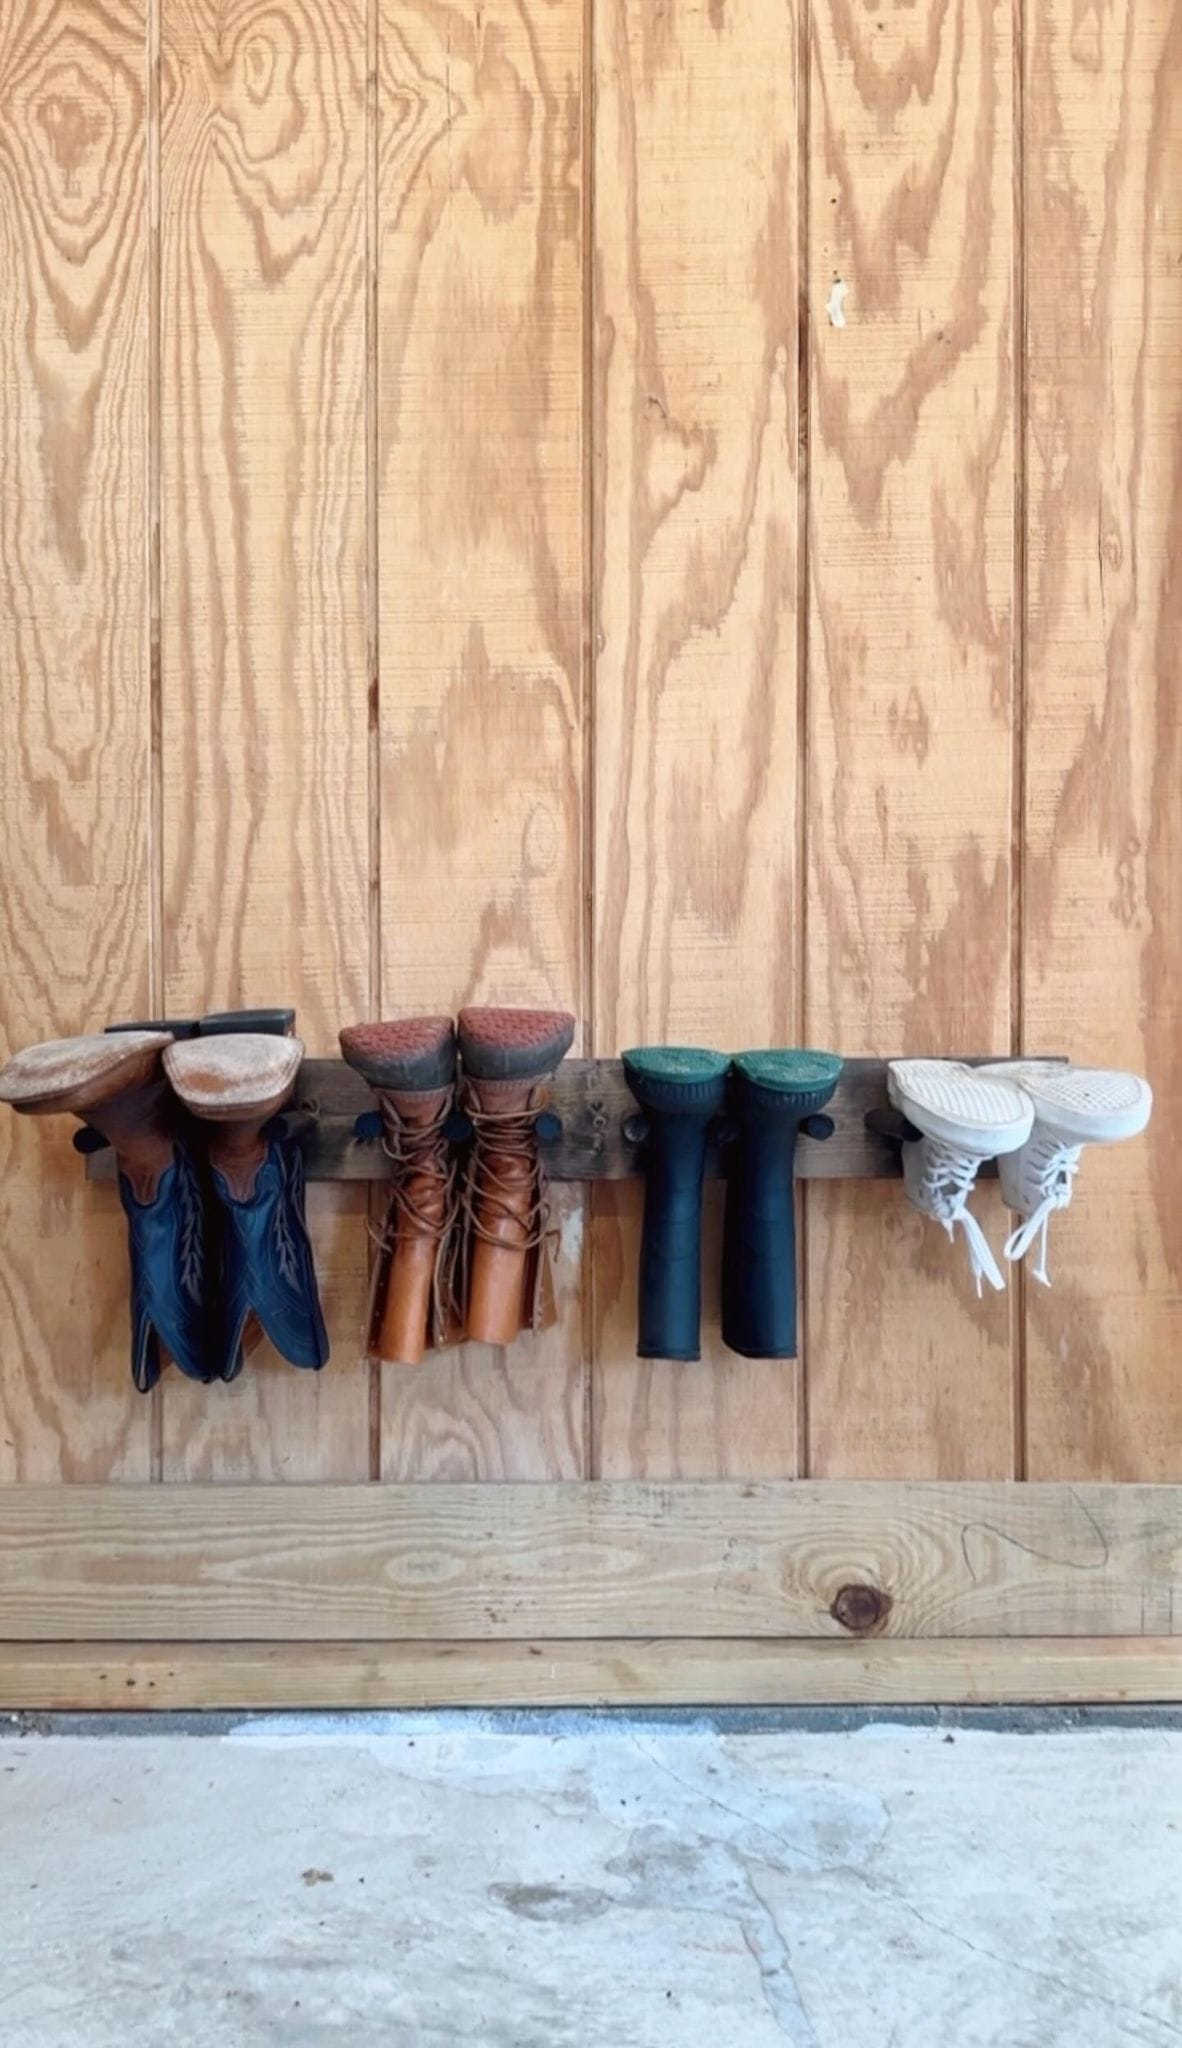
- Installing the Rack: Once your dowels are all nicely attached, you can hang that baby on a wall. Position your bracket, use a level to make sure that is straight and then screw it into the wall at the desired height.
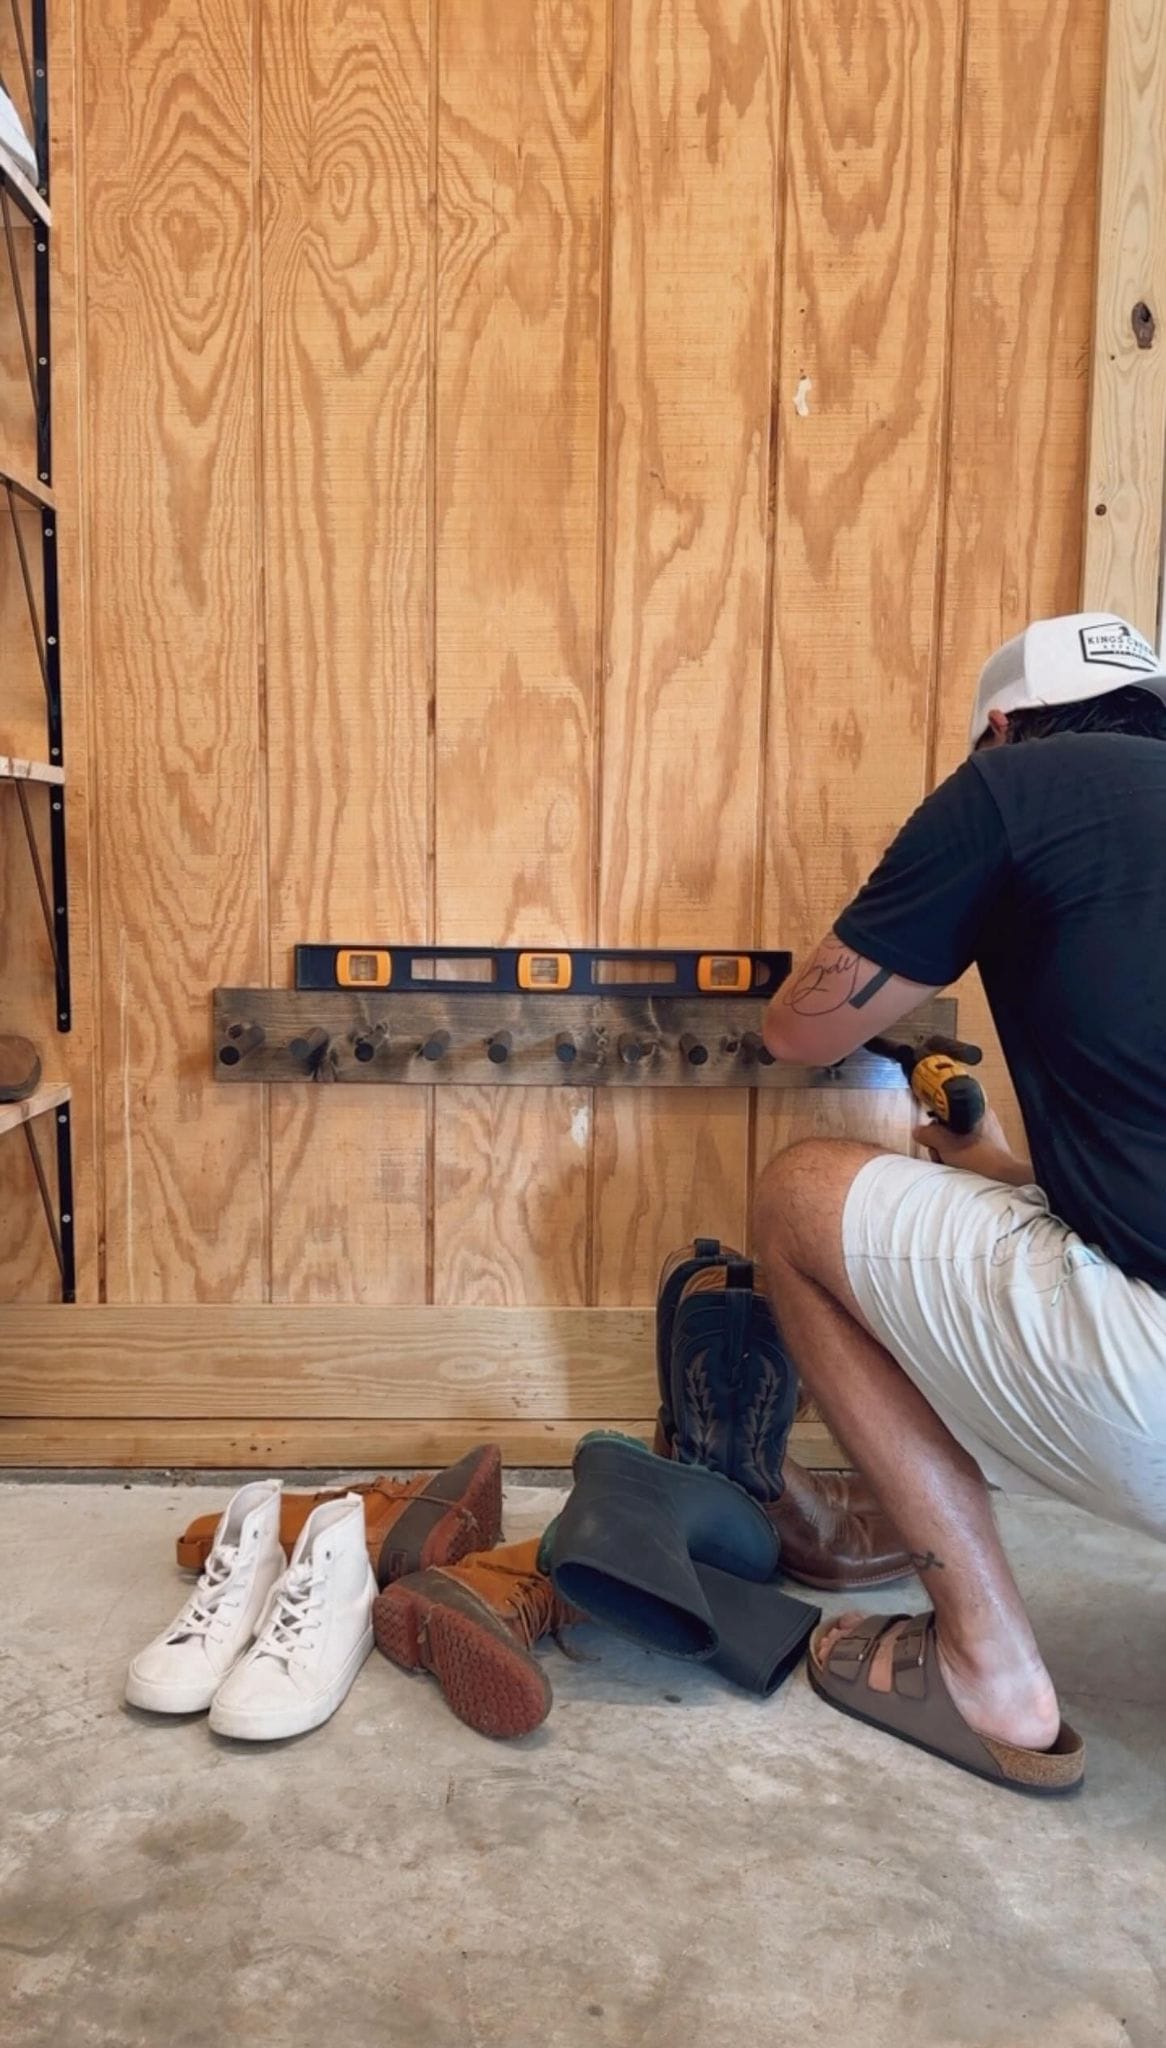
- Bringing in the Shoes: Voila! A neat and dust-free way to keep your shoes organized. Sit them on the dowels like so and have all that open floor space.
Not only is this a good-looking solution it’s very functional too. In 20 minutes, and a mere $10 you have created yourself a piece specific to your needs that will help keep the shoes off of the floor & tidy up your space…and adds more barn-wood wonderfulness. The best part? This is truly a customizable shelf that will fit into any area and can be stained to match your home. So bust out your tools and get going on this simple project, you will thank us for it!

Creator: Amanda

Instagram: @birdsong.design
Link to shop the materials: here