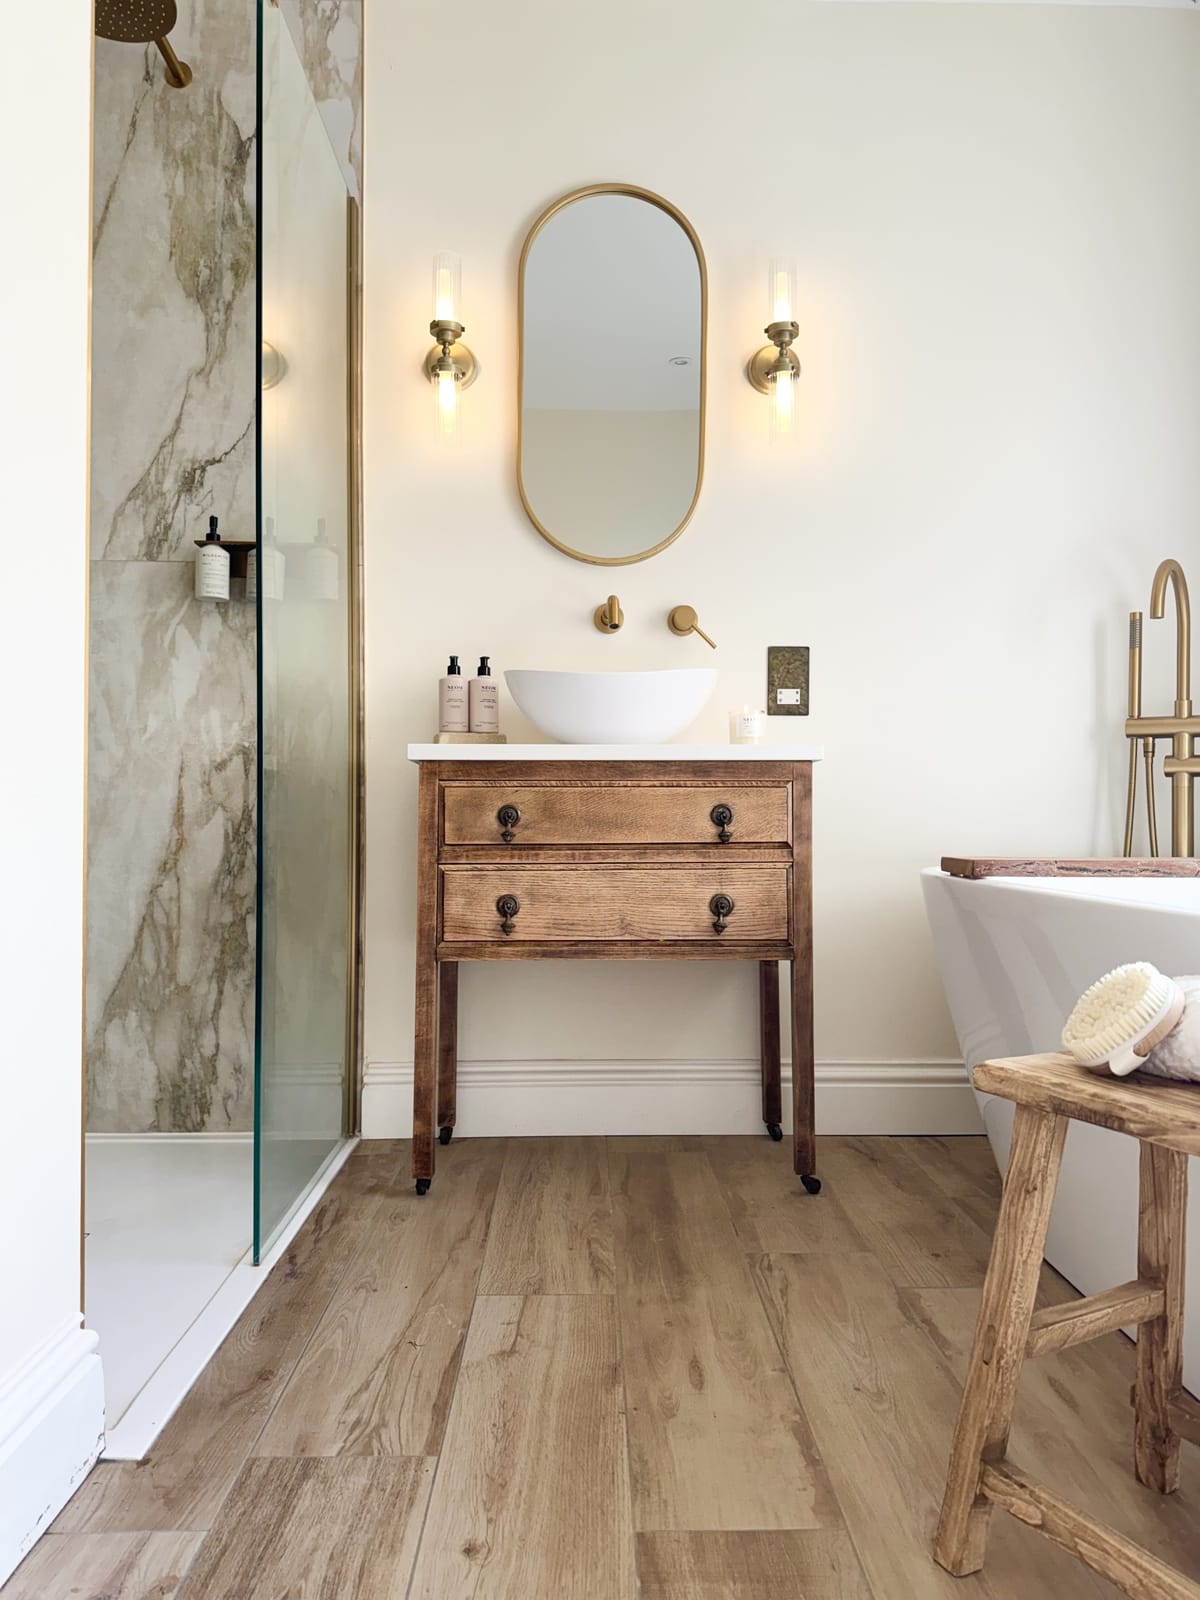
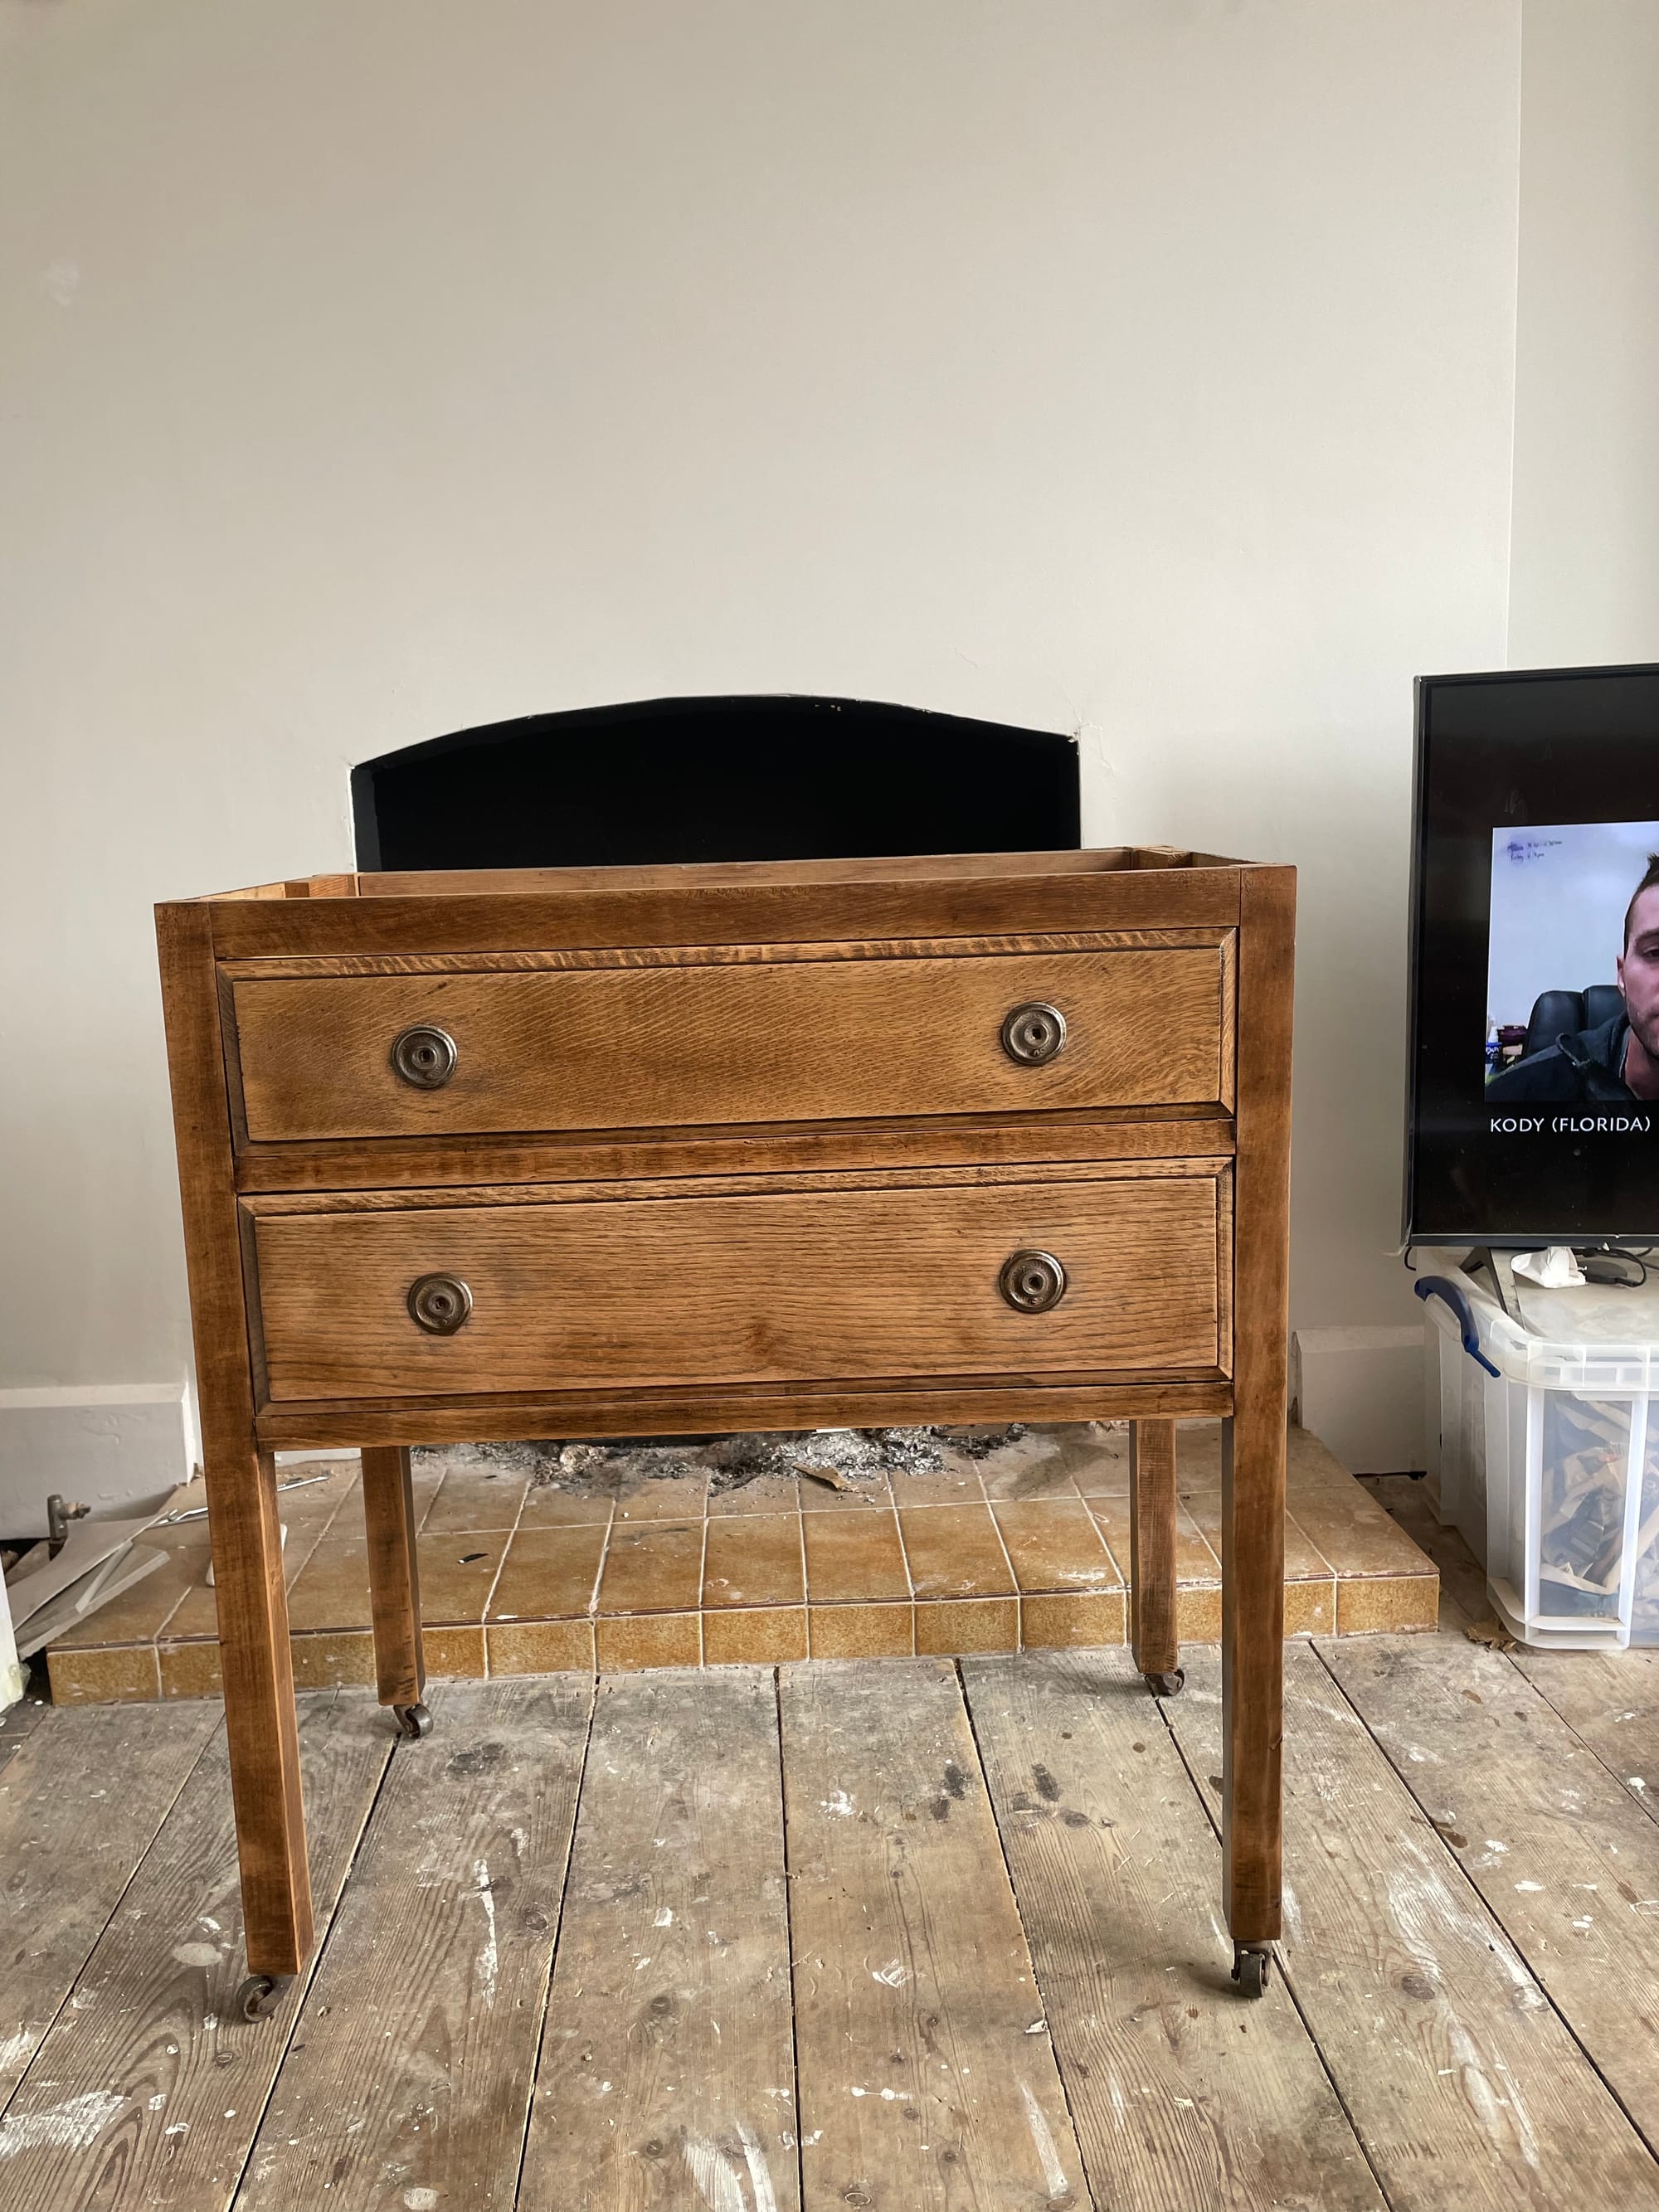
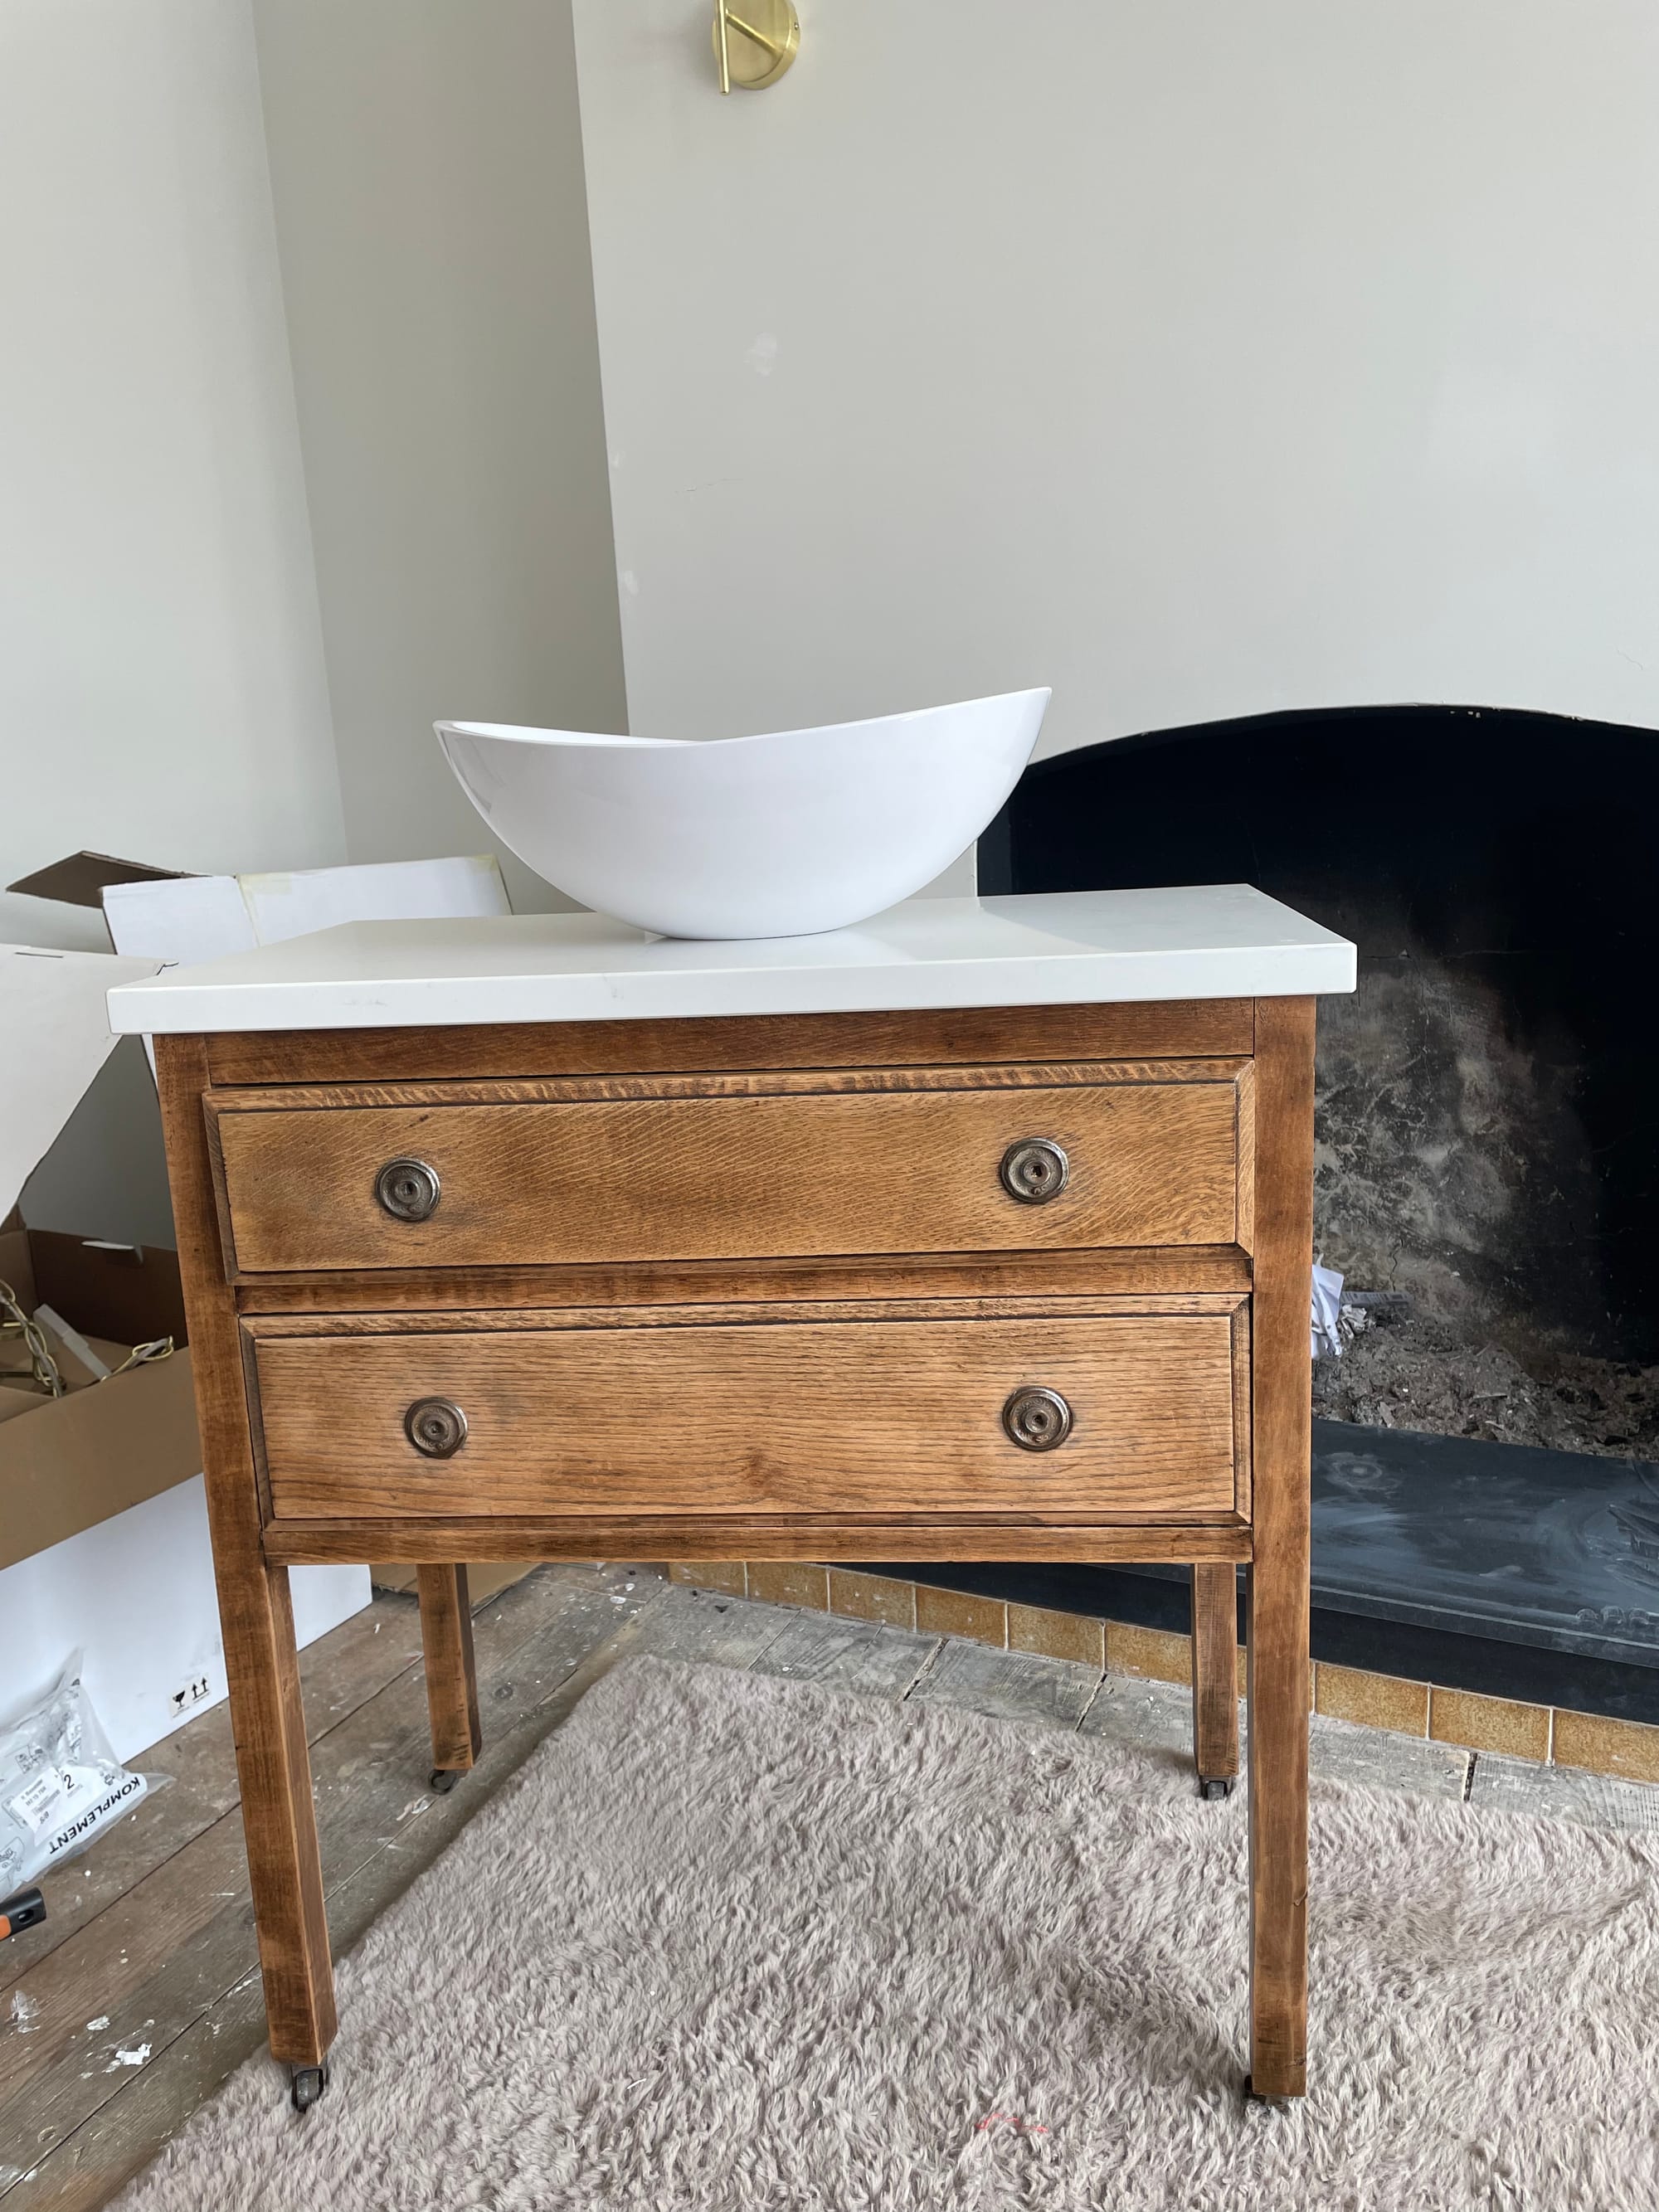
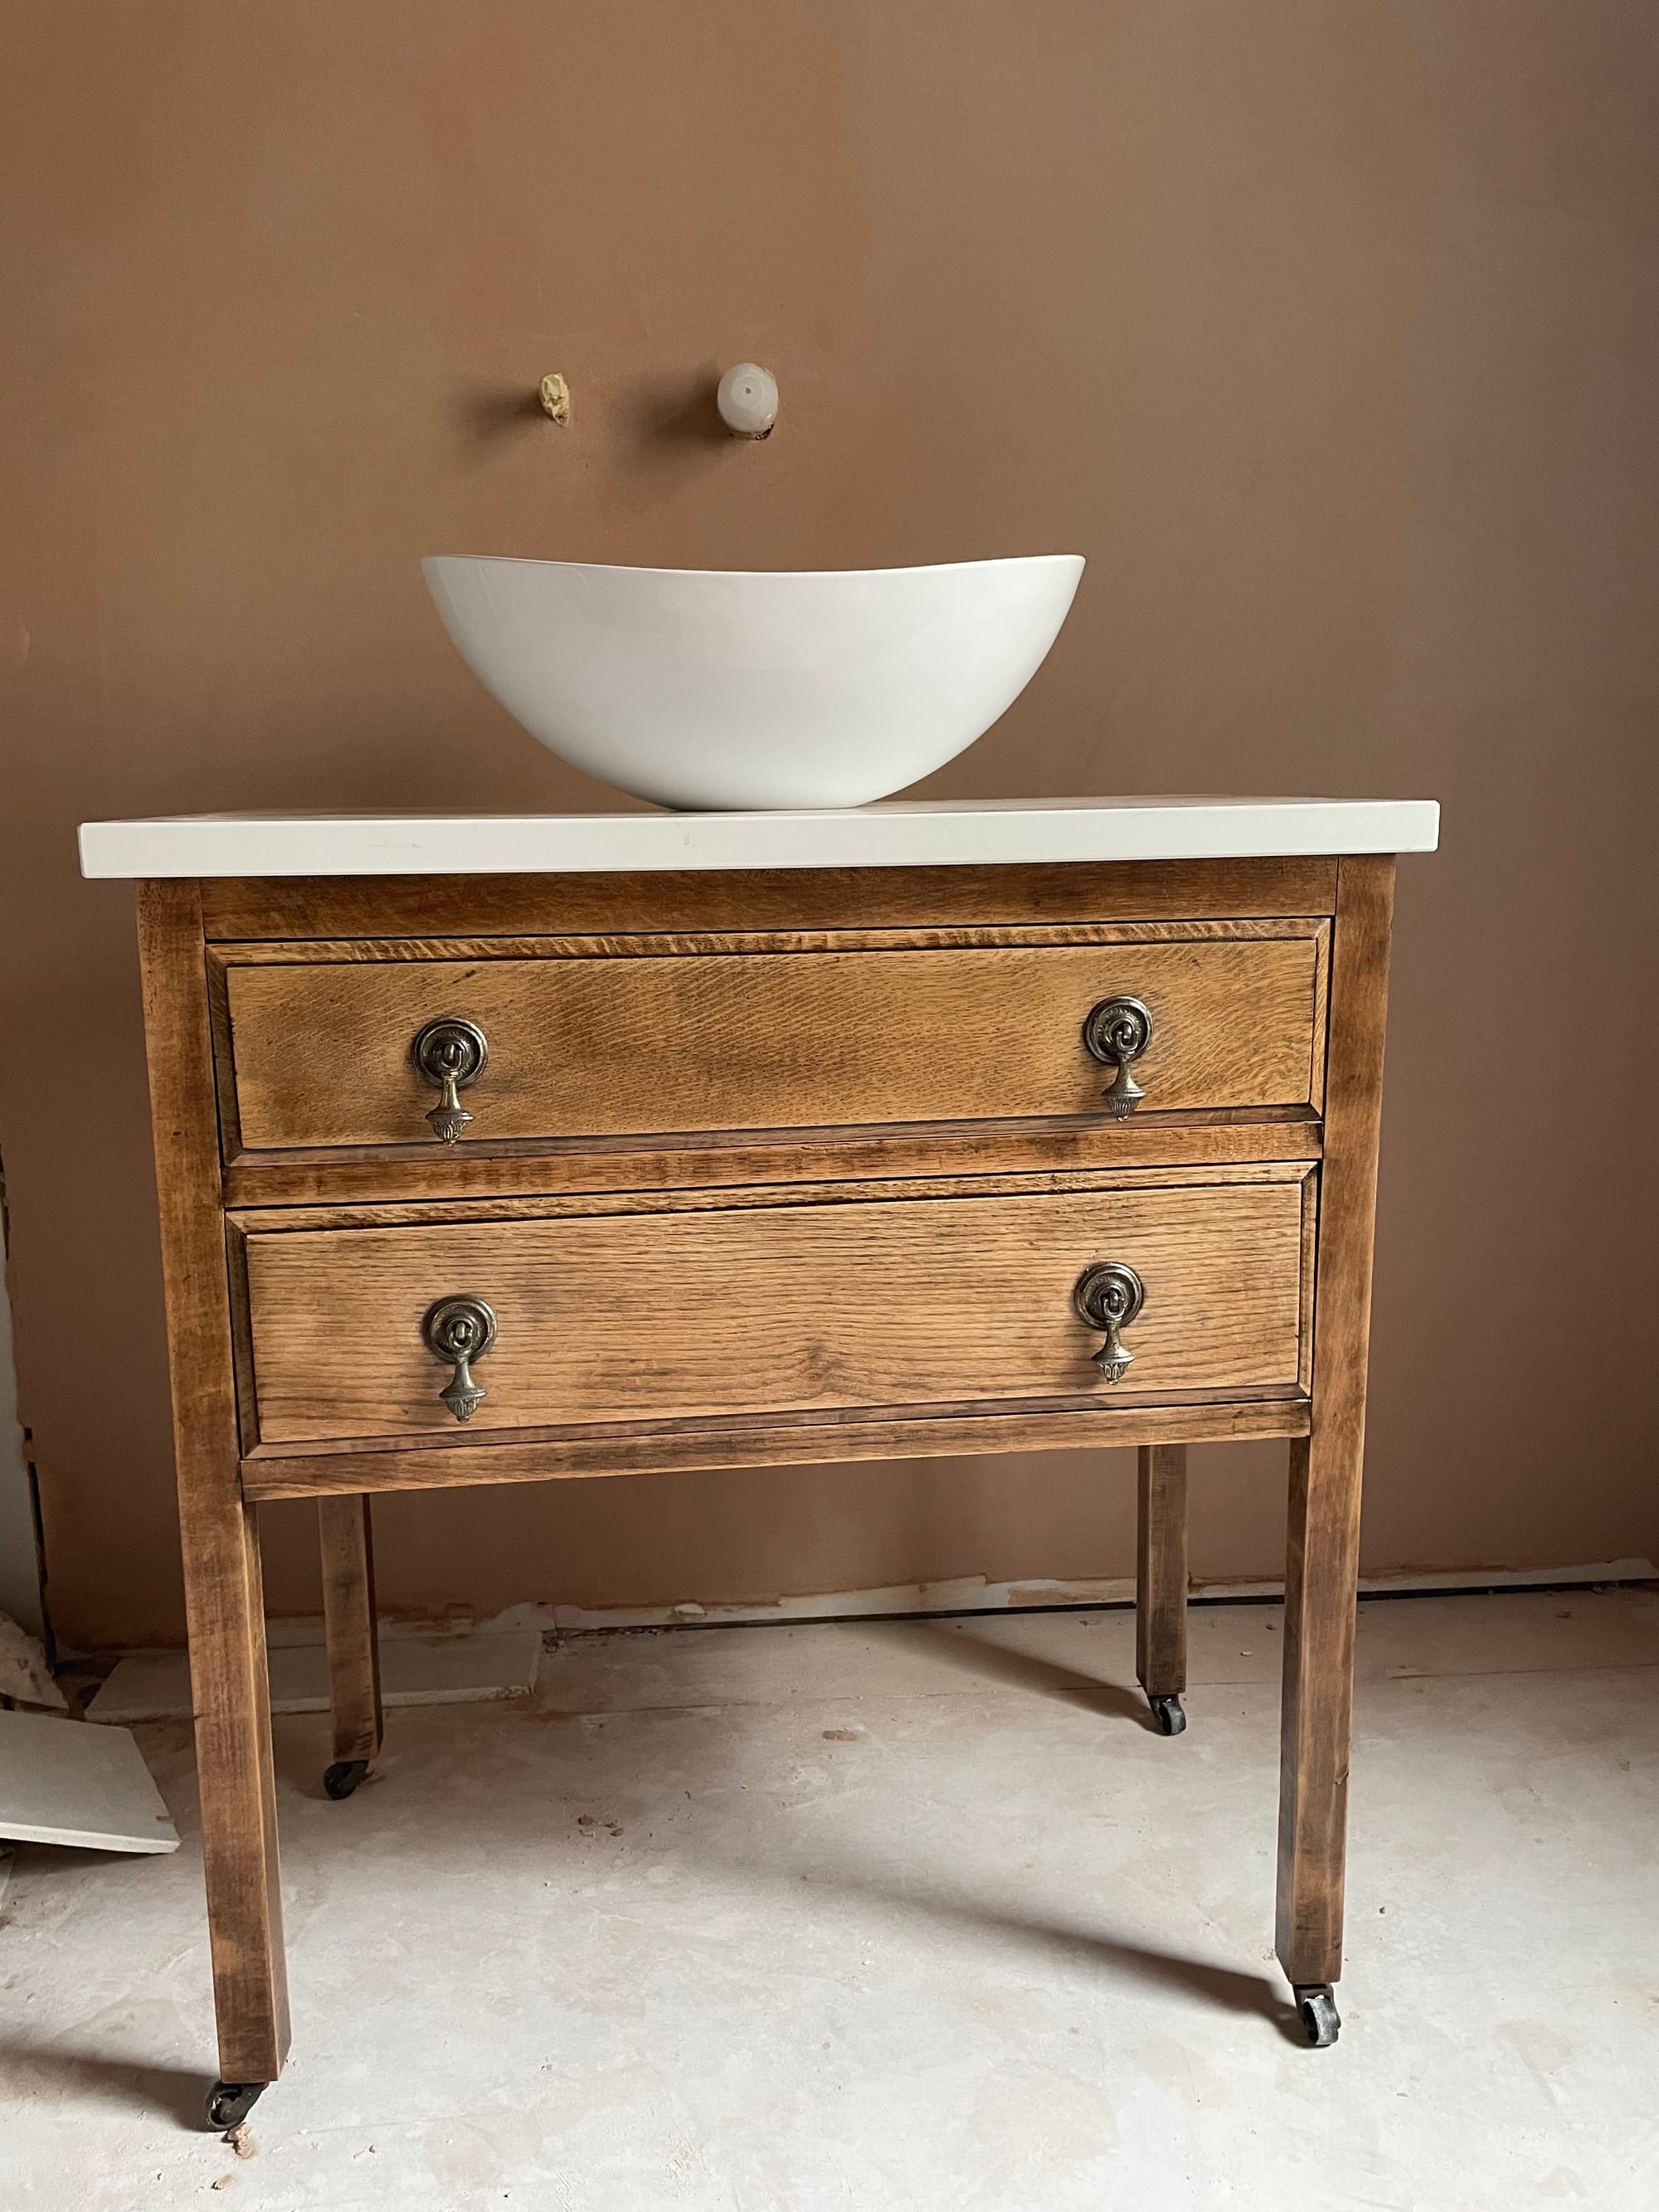
A beautiful upcycled bathroom vanity can easily cost upwards of £1,300, but I knew I could achieve the same look for much less. After searching Facebook Marketplace, I found a charming secondhand sideboard for just £25, making it the perfect base for my DIY transformation. With some sanding, varnishing, and a new quartz top, I was able to create a stylish and functional vanity that fits my space perfectly. Here’s how I did it:
Materials Needed:
- Sideboard (secondhand or new)
- Quartz, marble, or granite (for the new top)
- Rustins Varnish (waterproof, clear)
- Sander
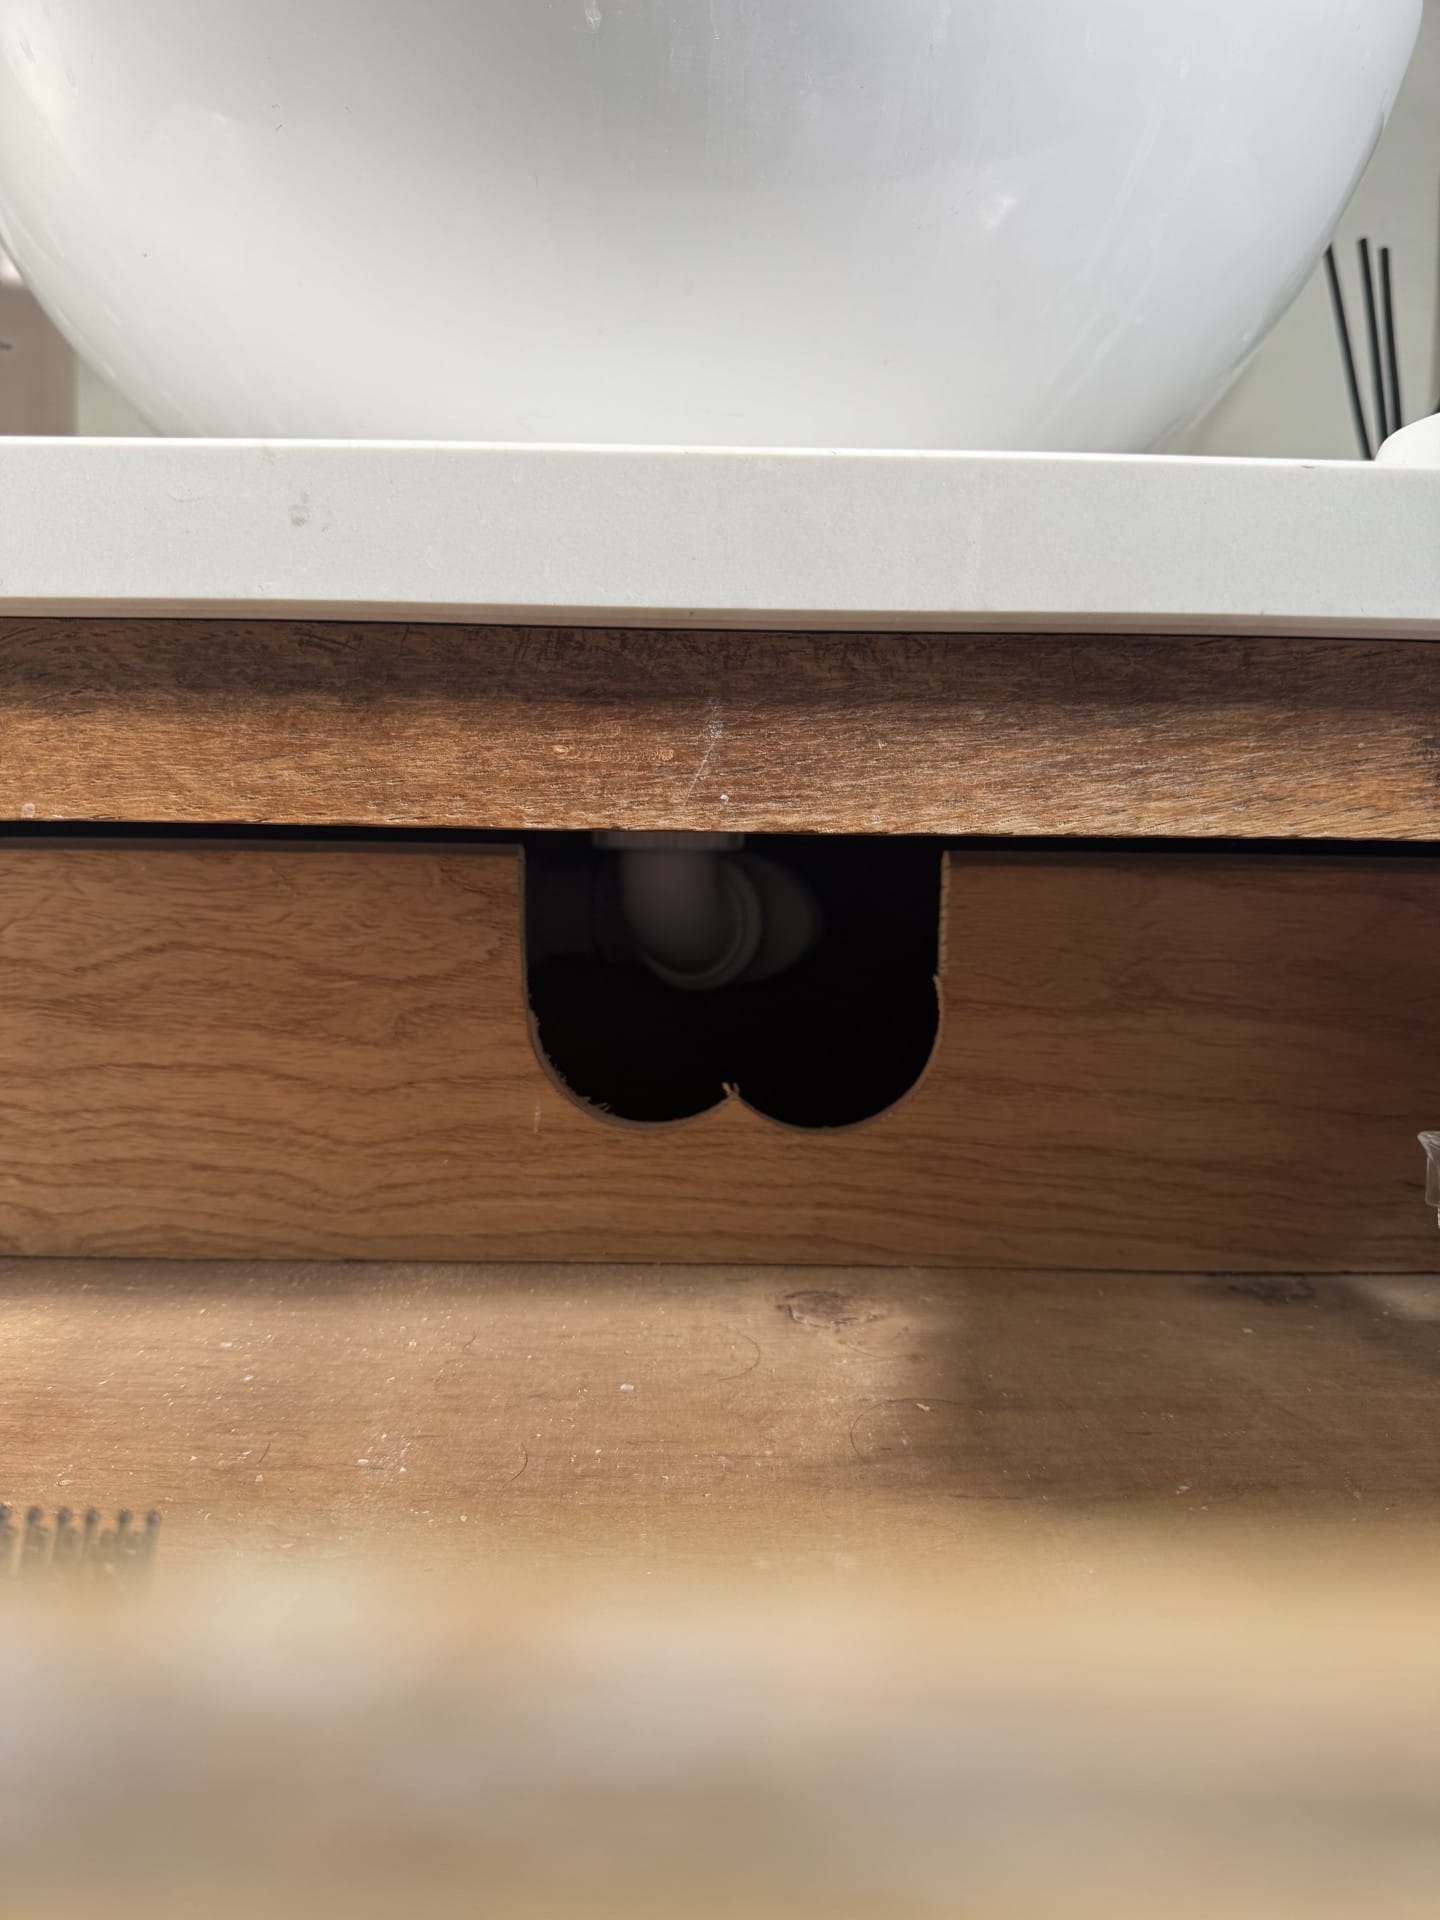
- Space-saving waste trap
- Sealant (for edges)
- Granite glue (for attaching the top)
Step-by-Step Guide:
Step 1: Find a Suitable Sideboard
I spent time searching for a sideboard that would fit my limited bathroom space. Eventually, I found one that was just the right size for only £25!
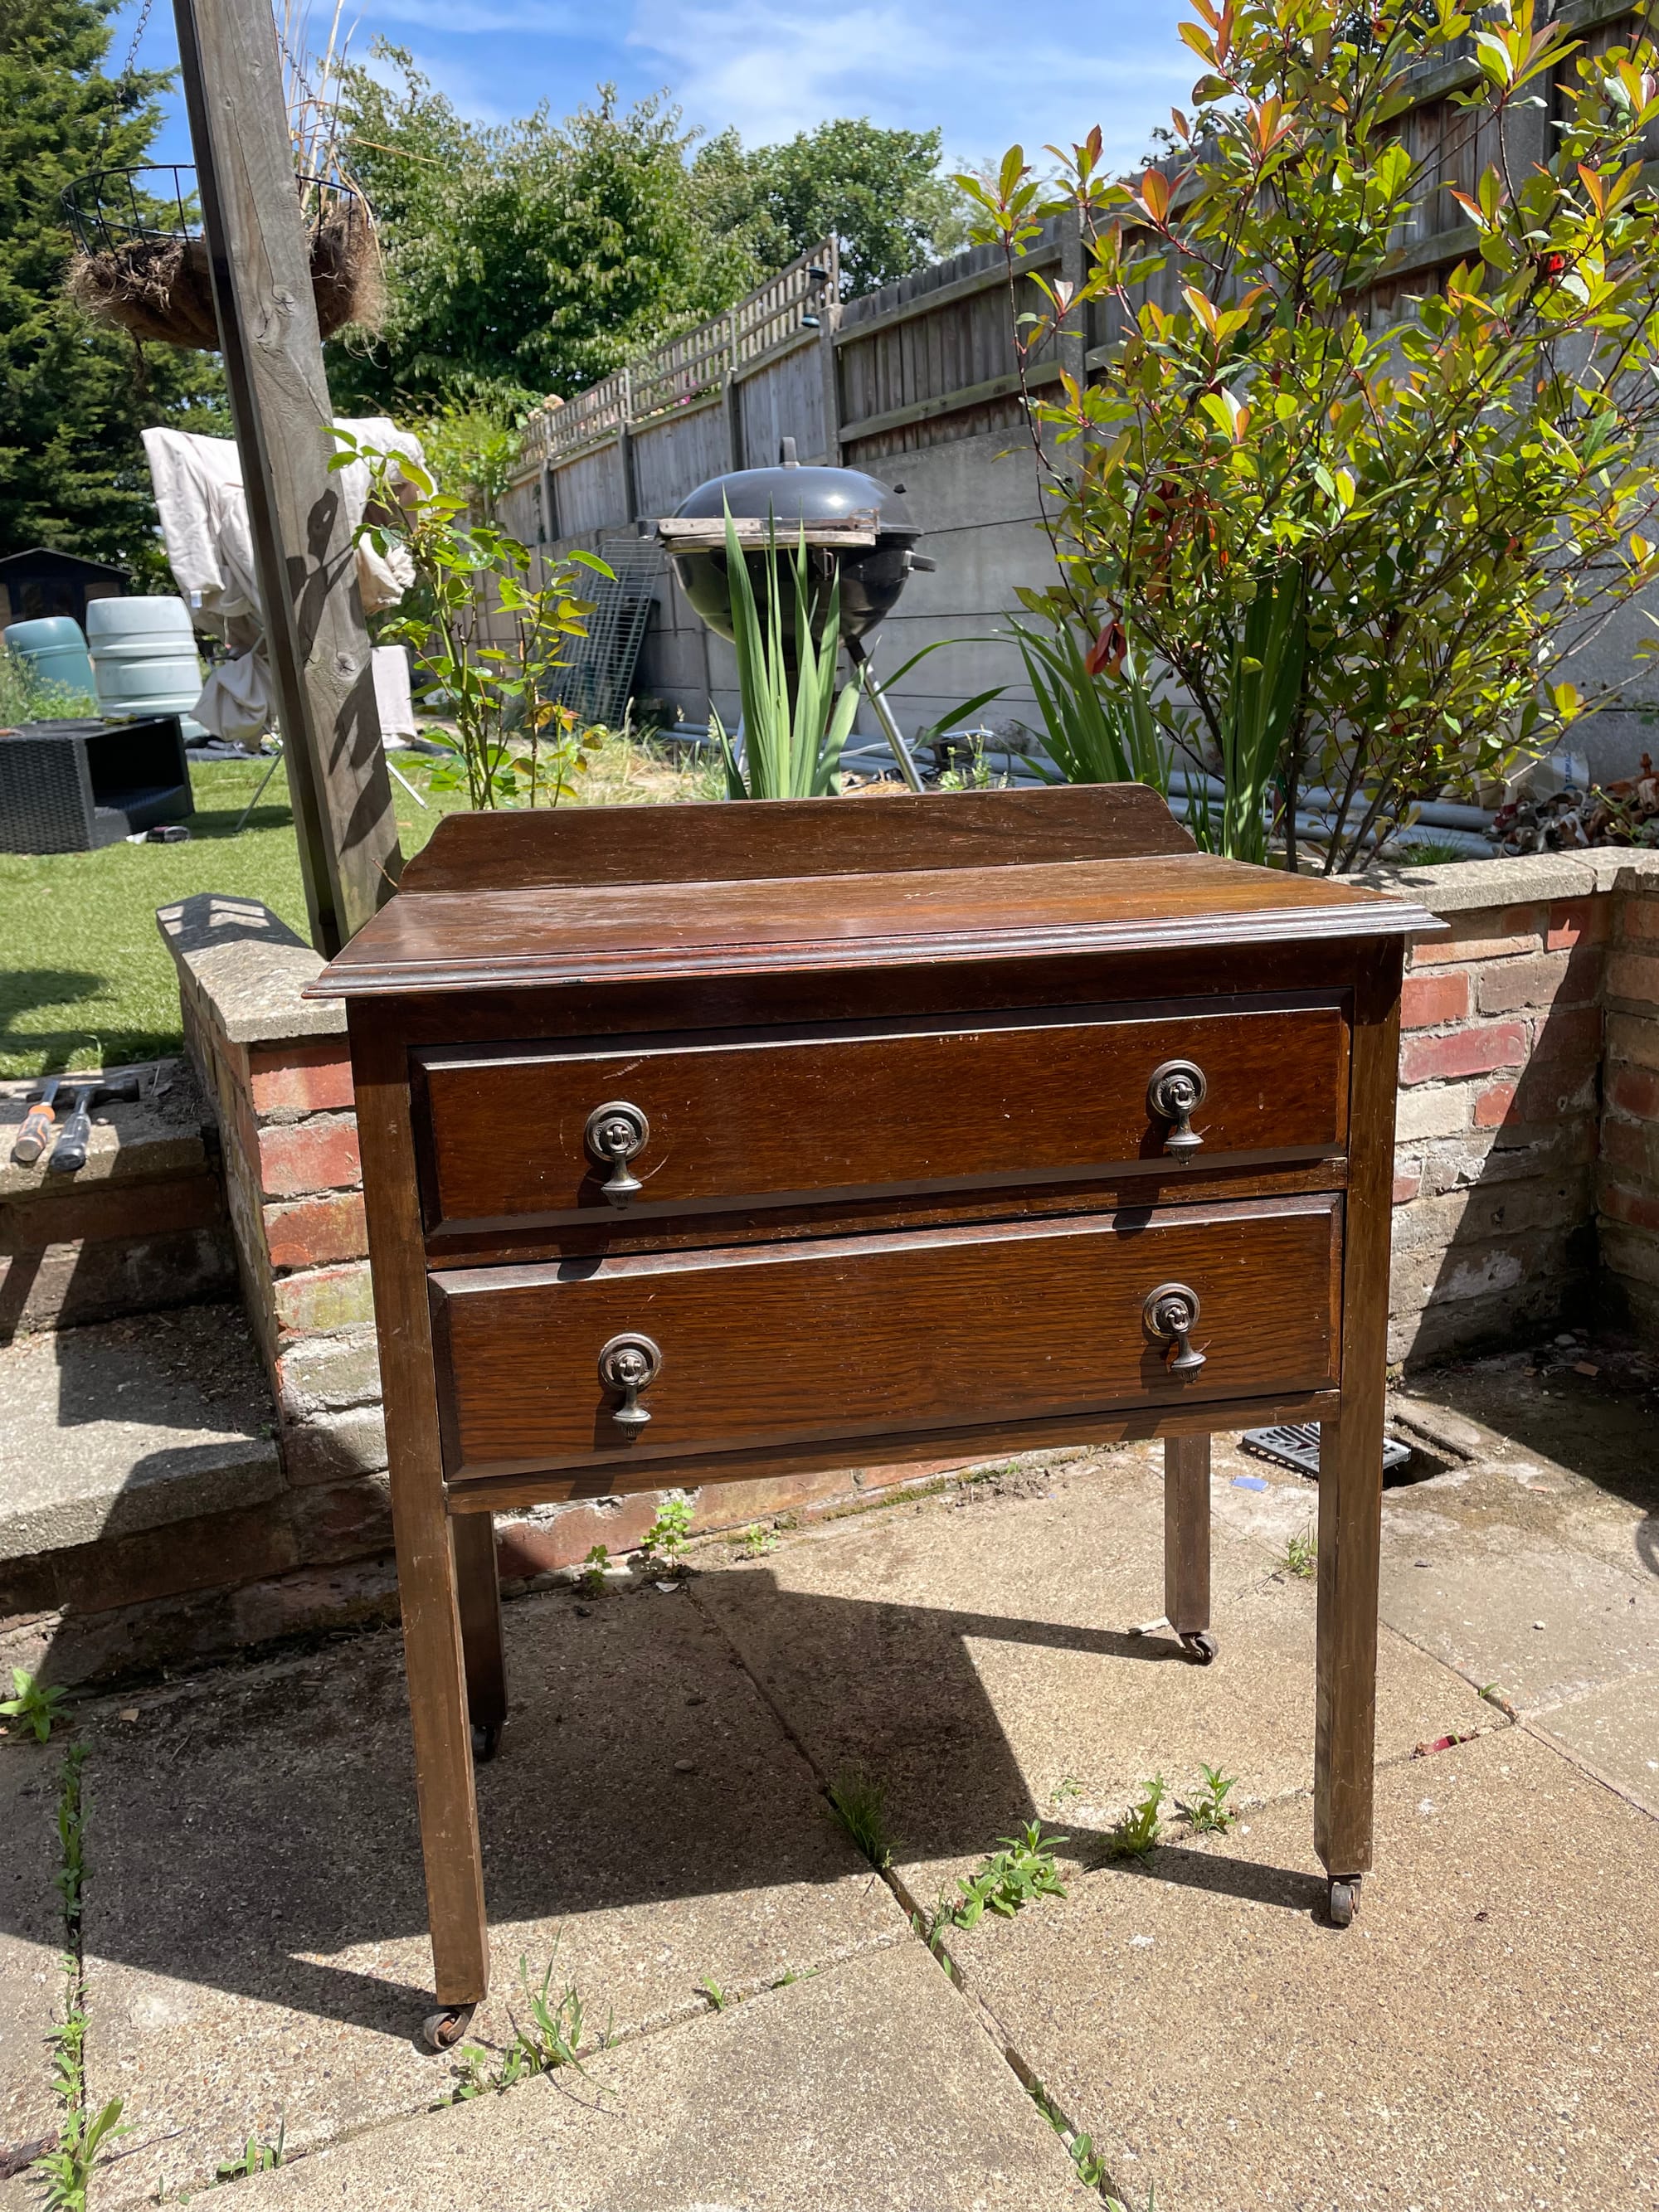
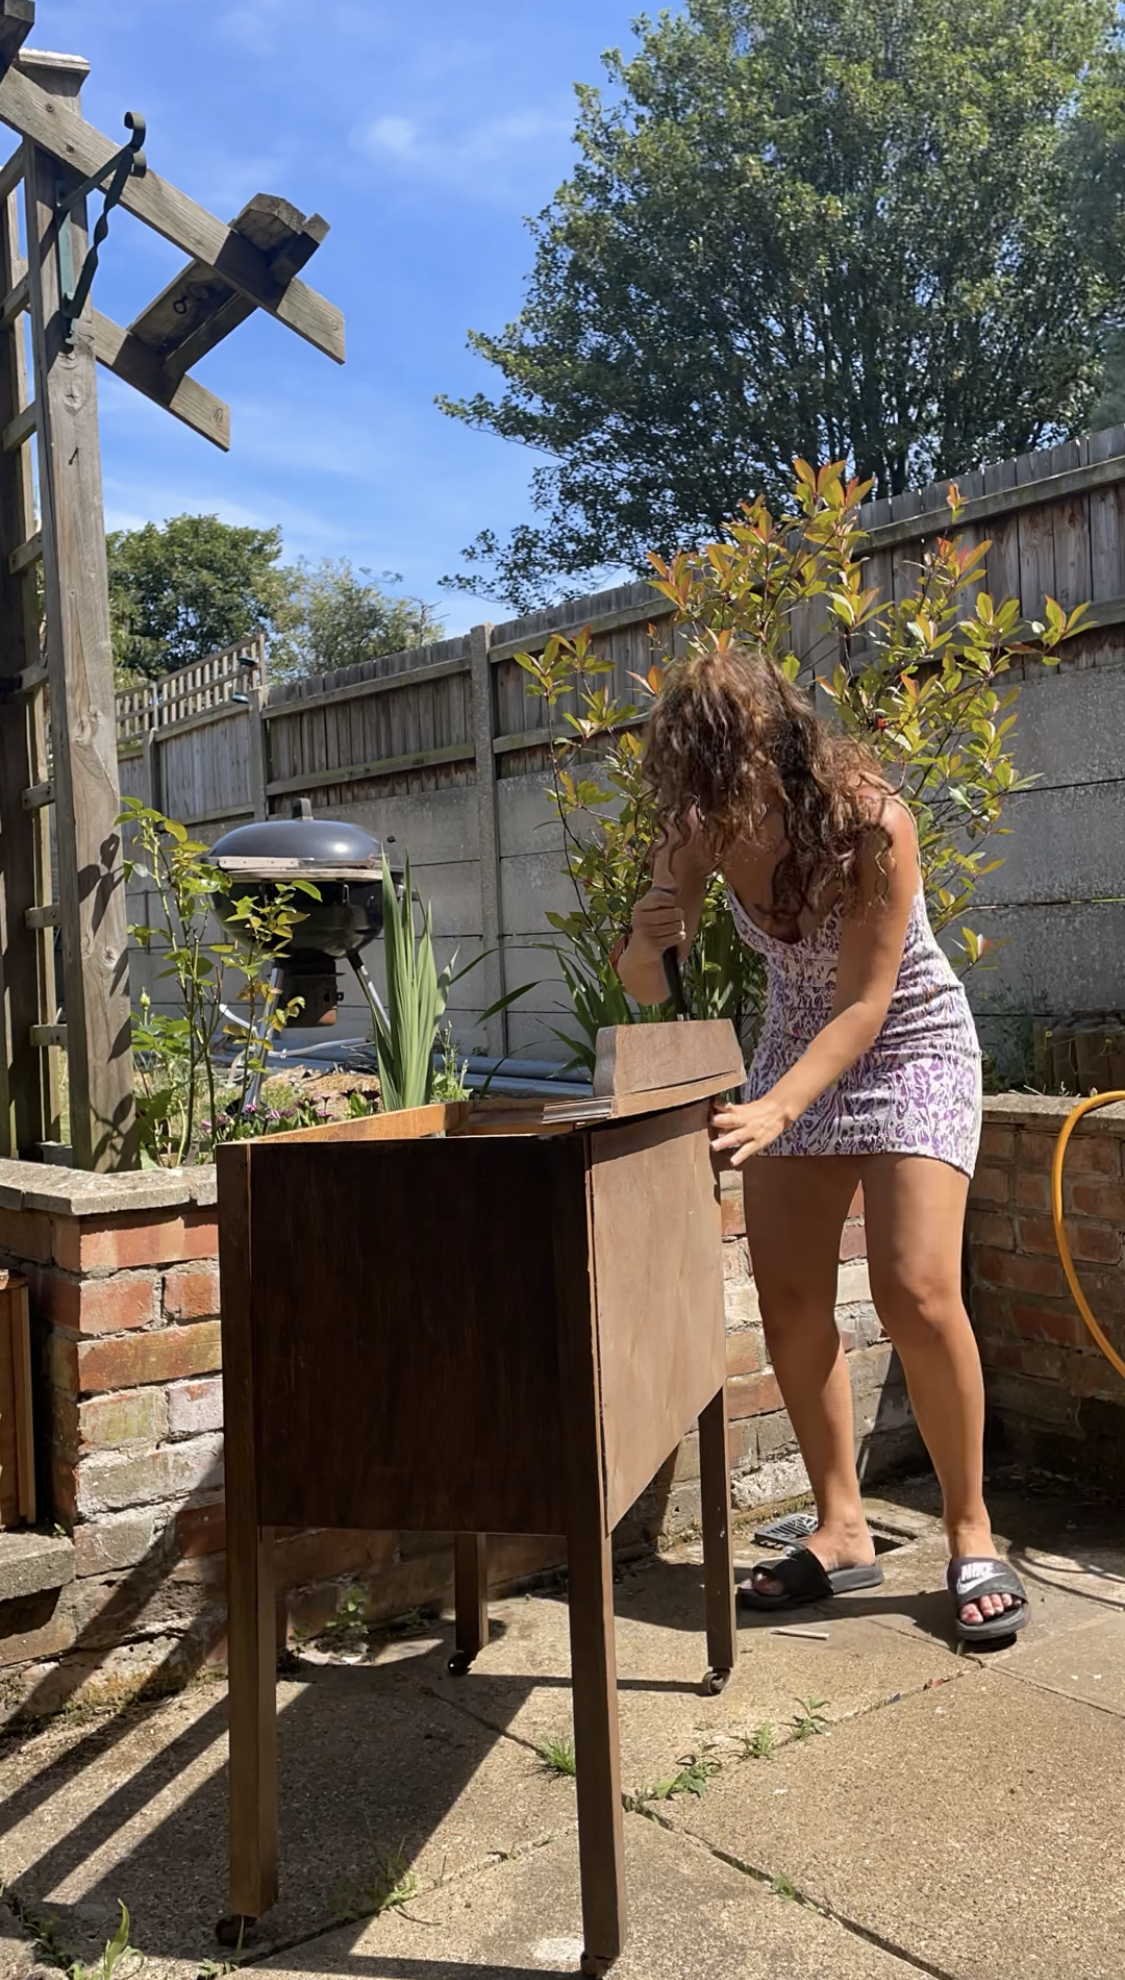
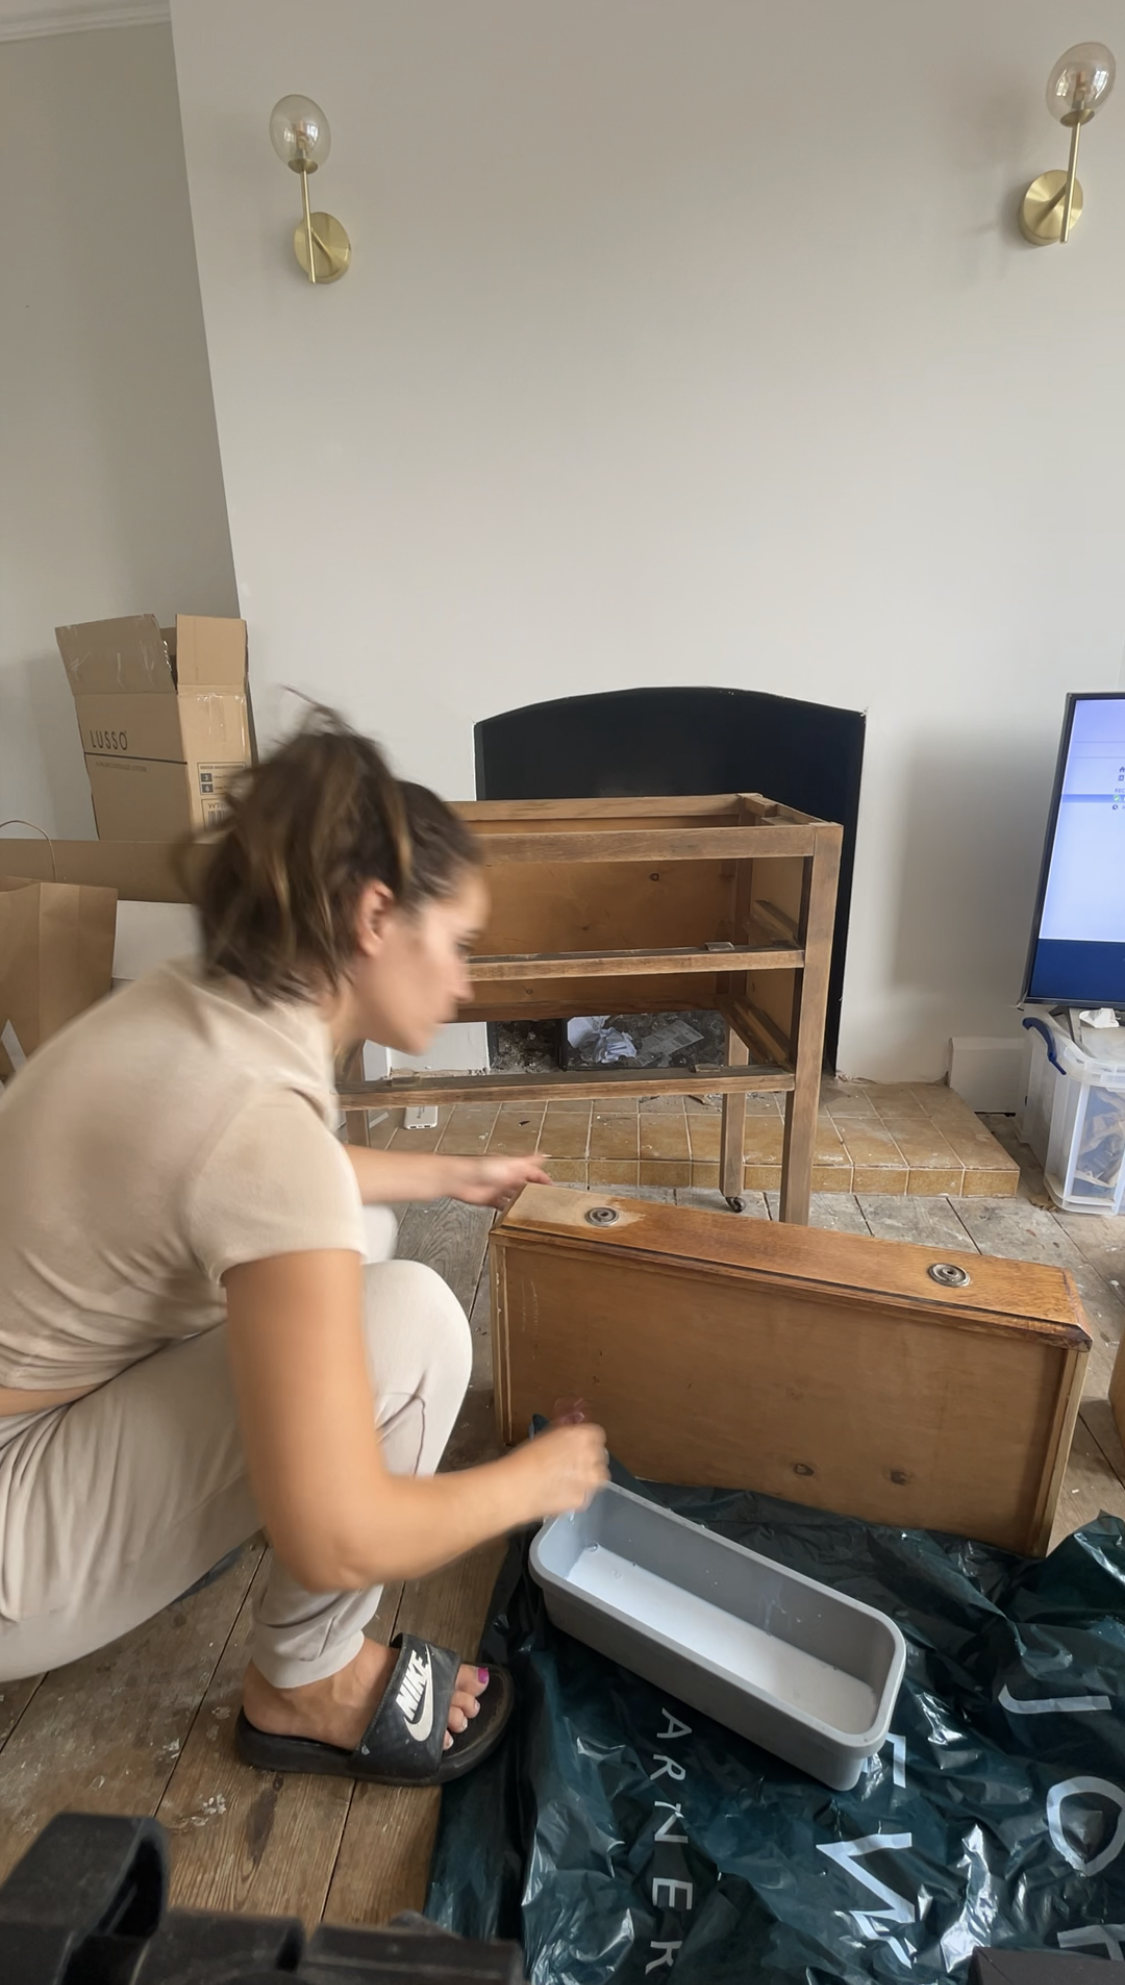
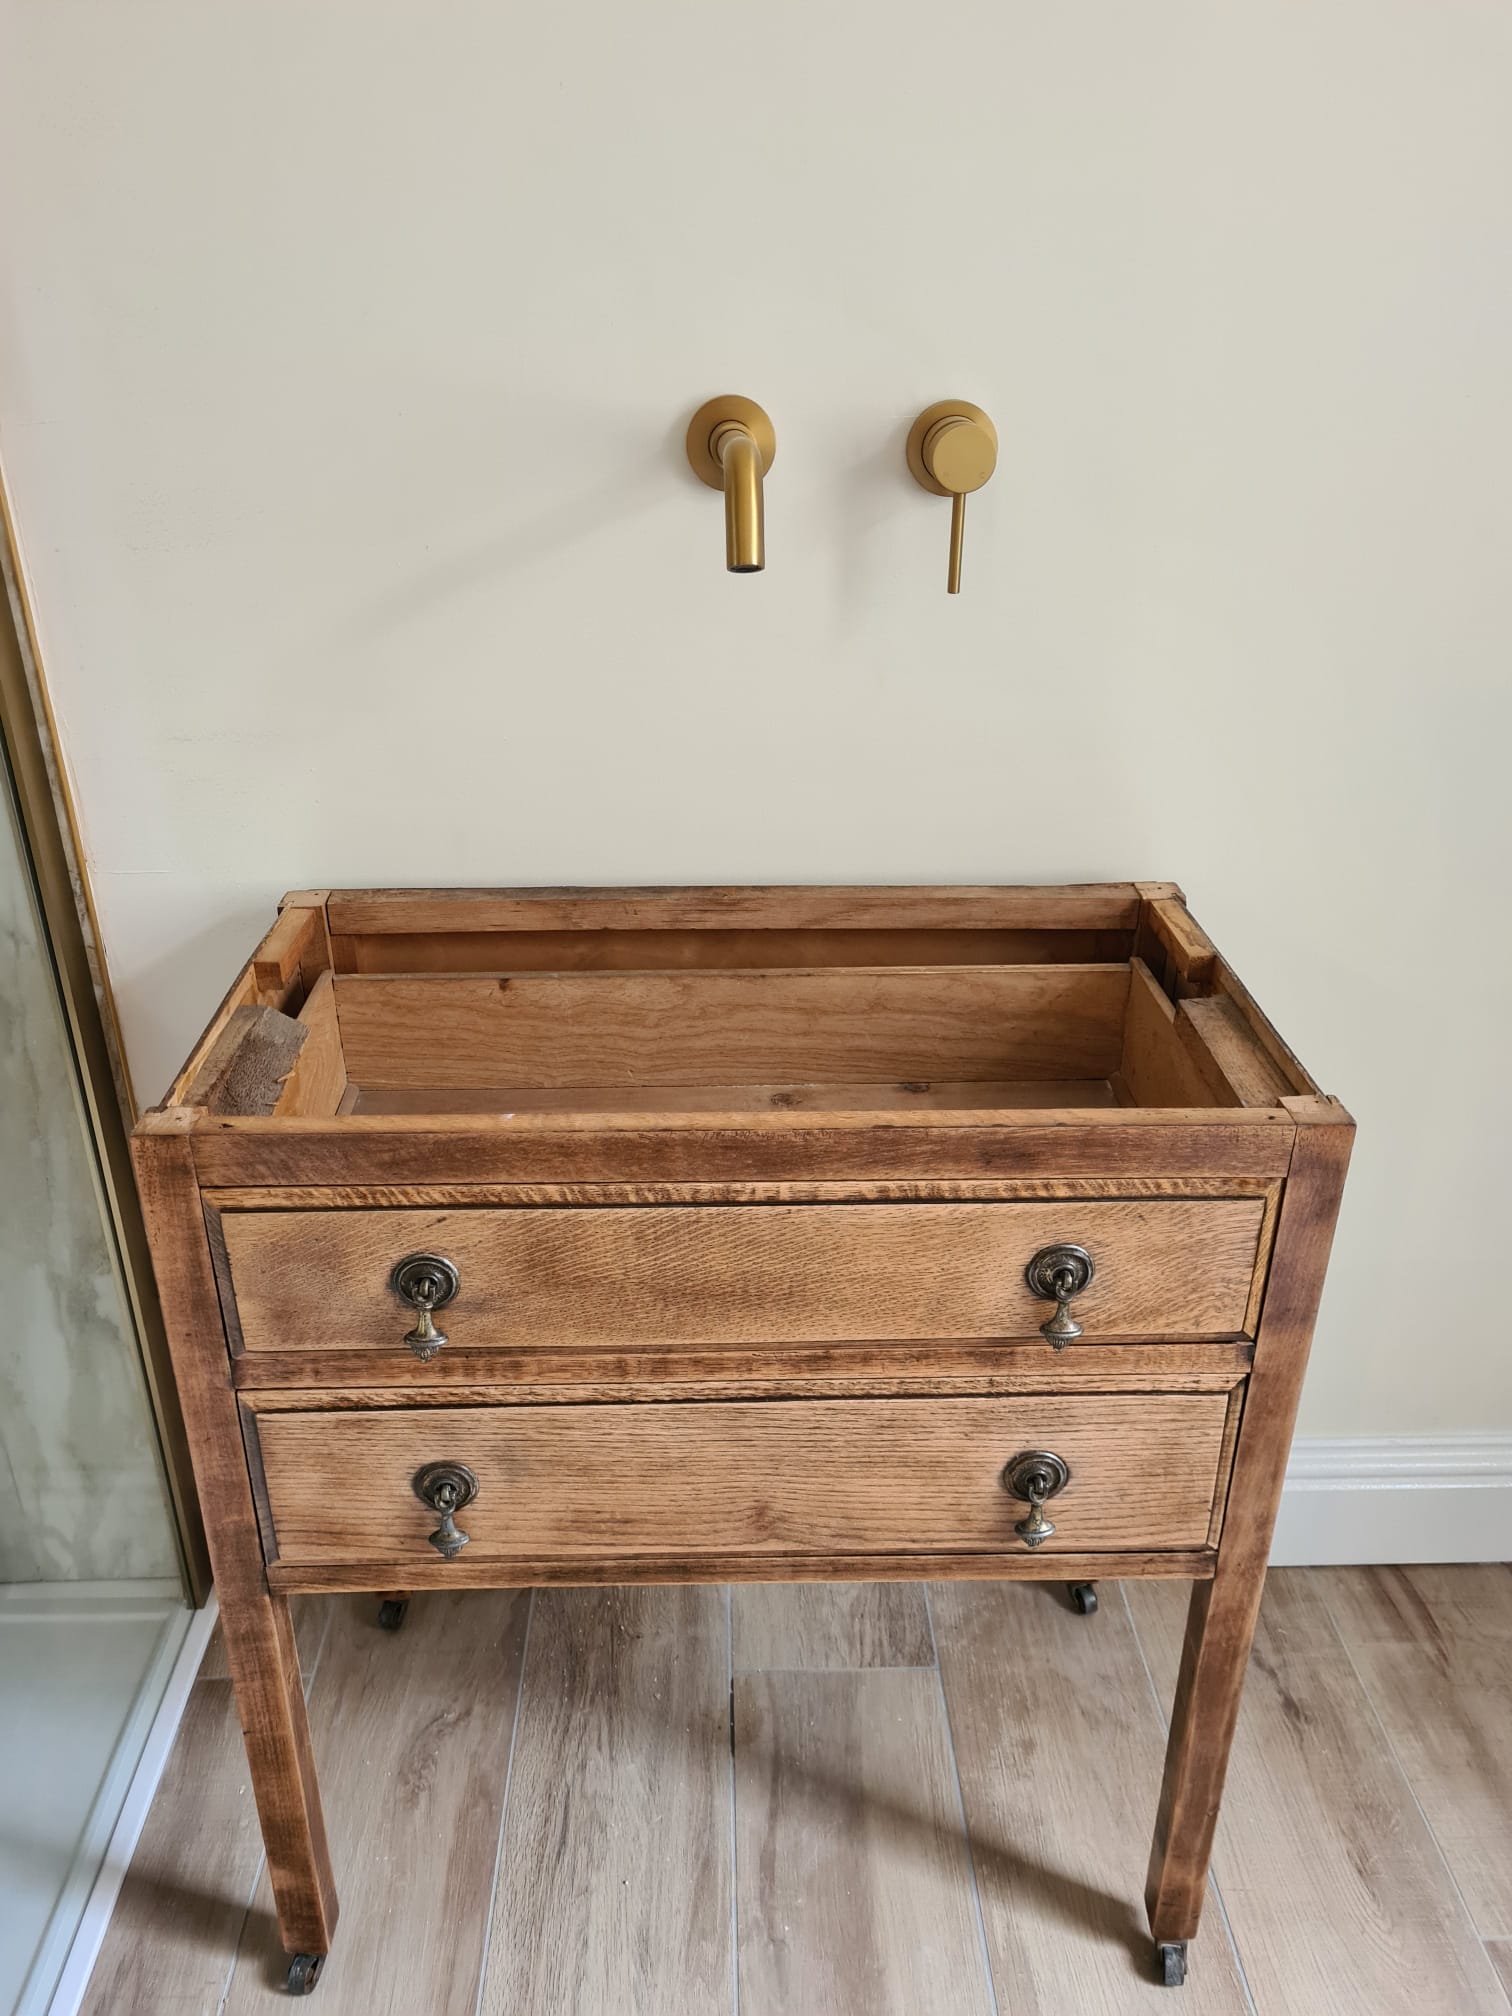
Step 2: Remove the Drawers and Handles
To achieve a clean and polished look, I removed all the drawers and handles.
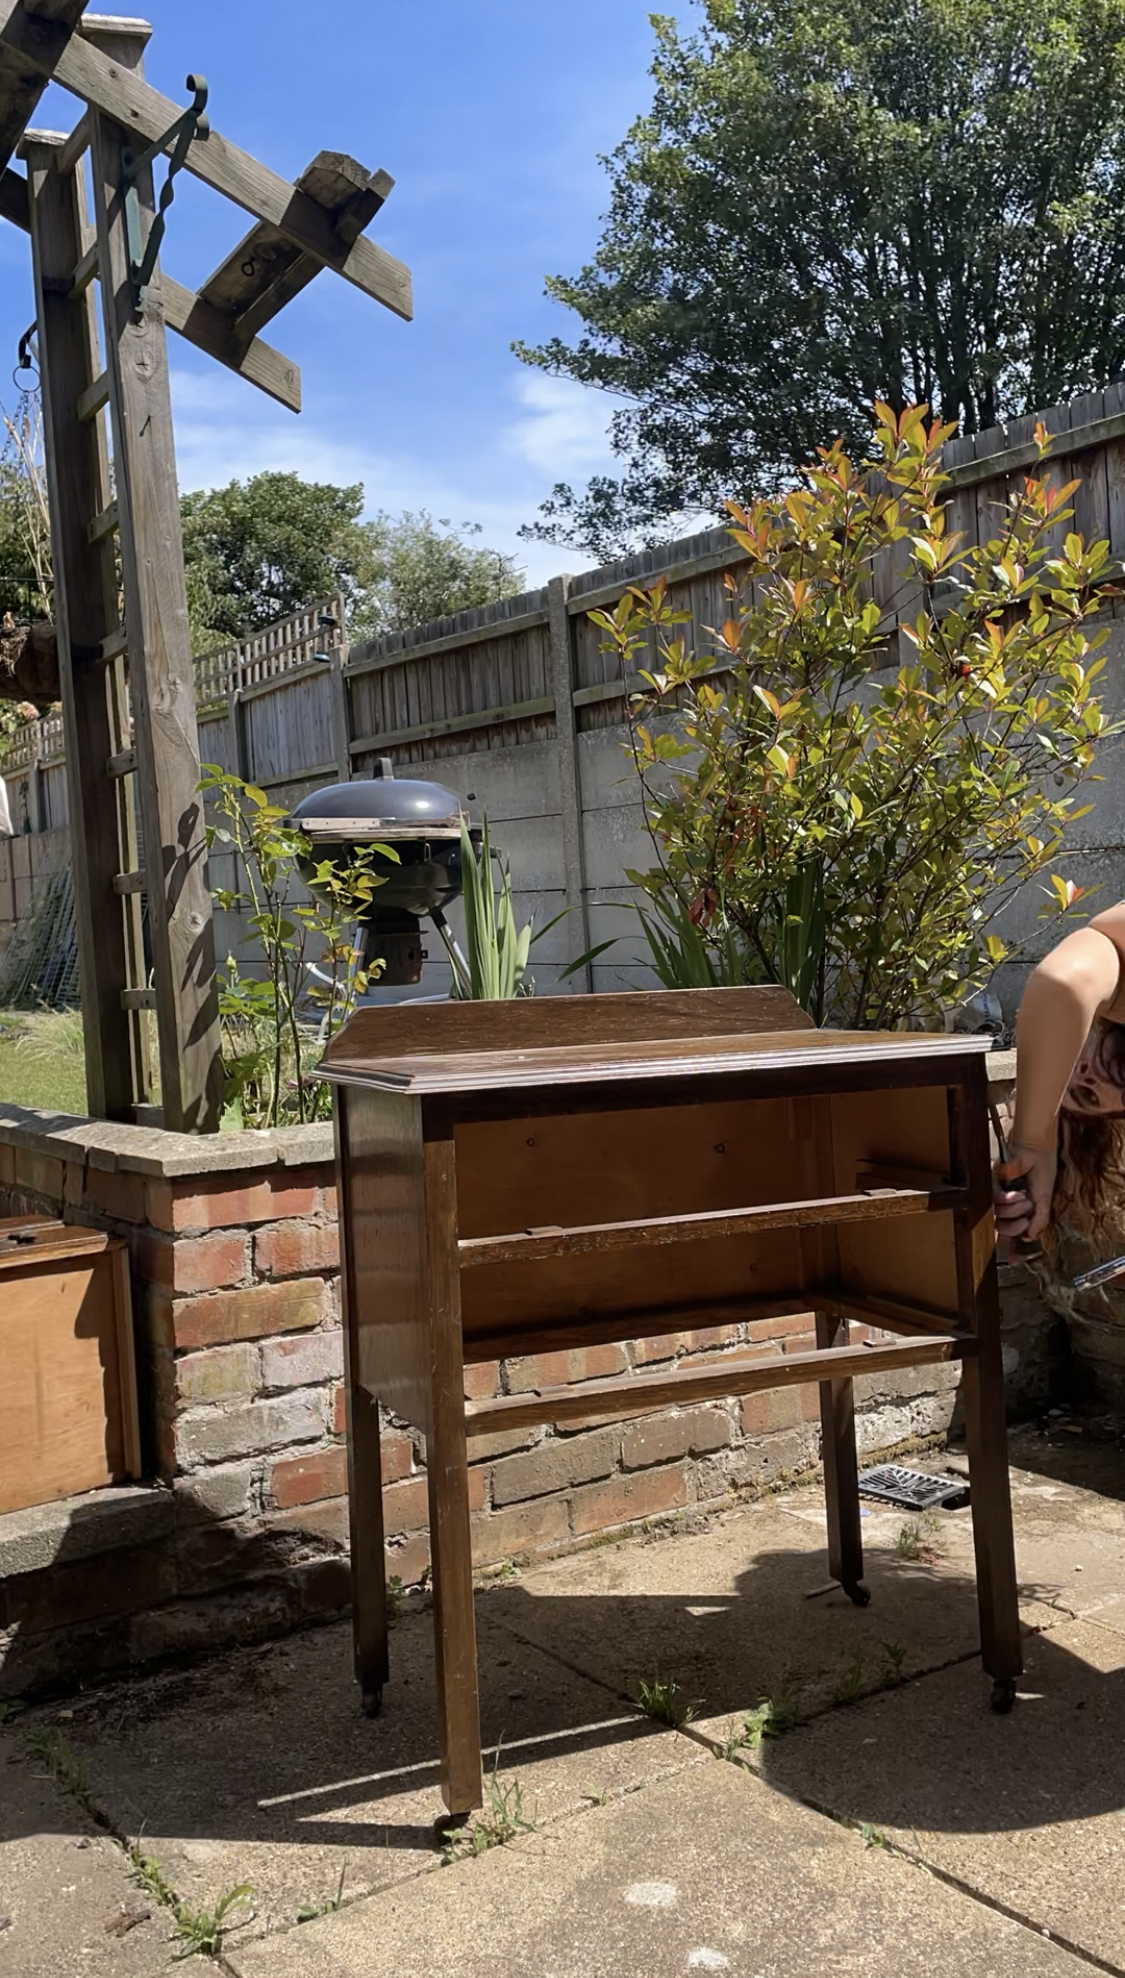
Step 3: Remove the Top
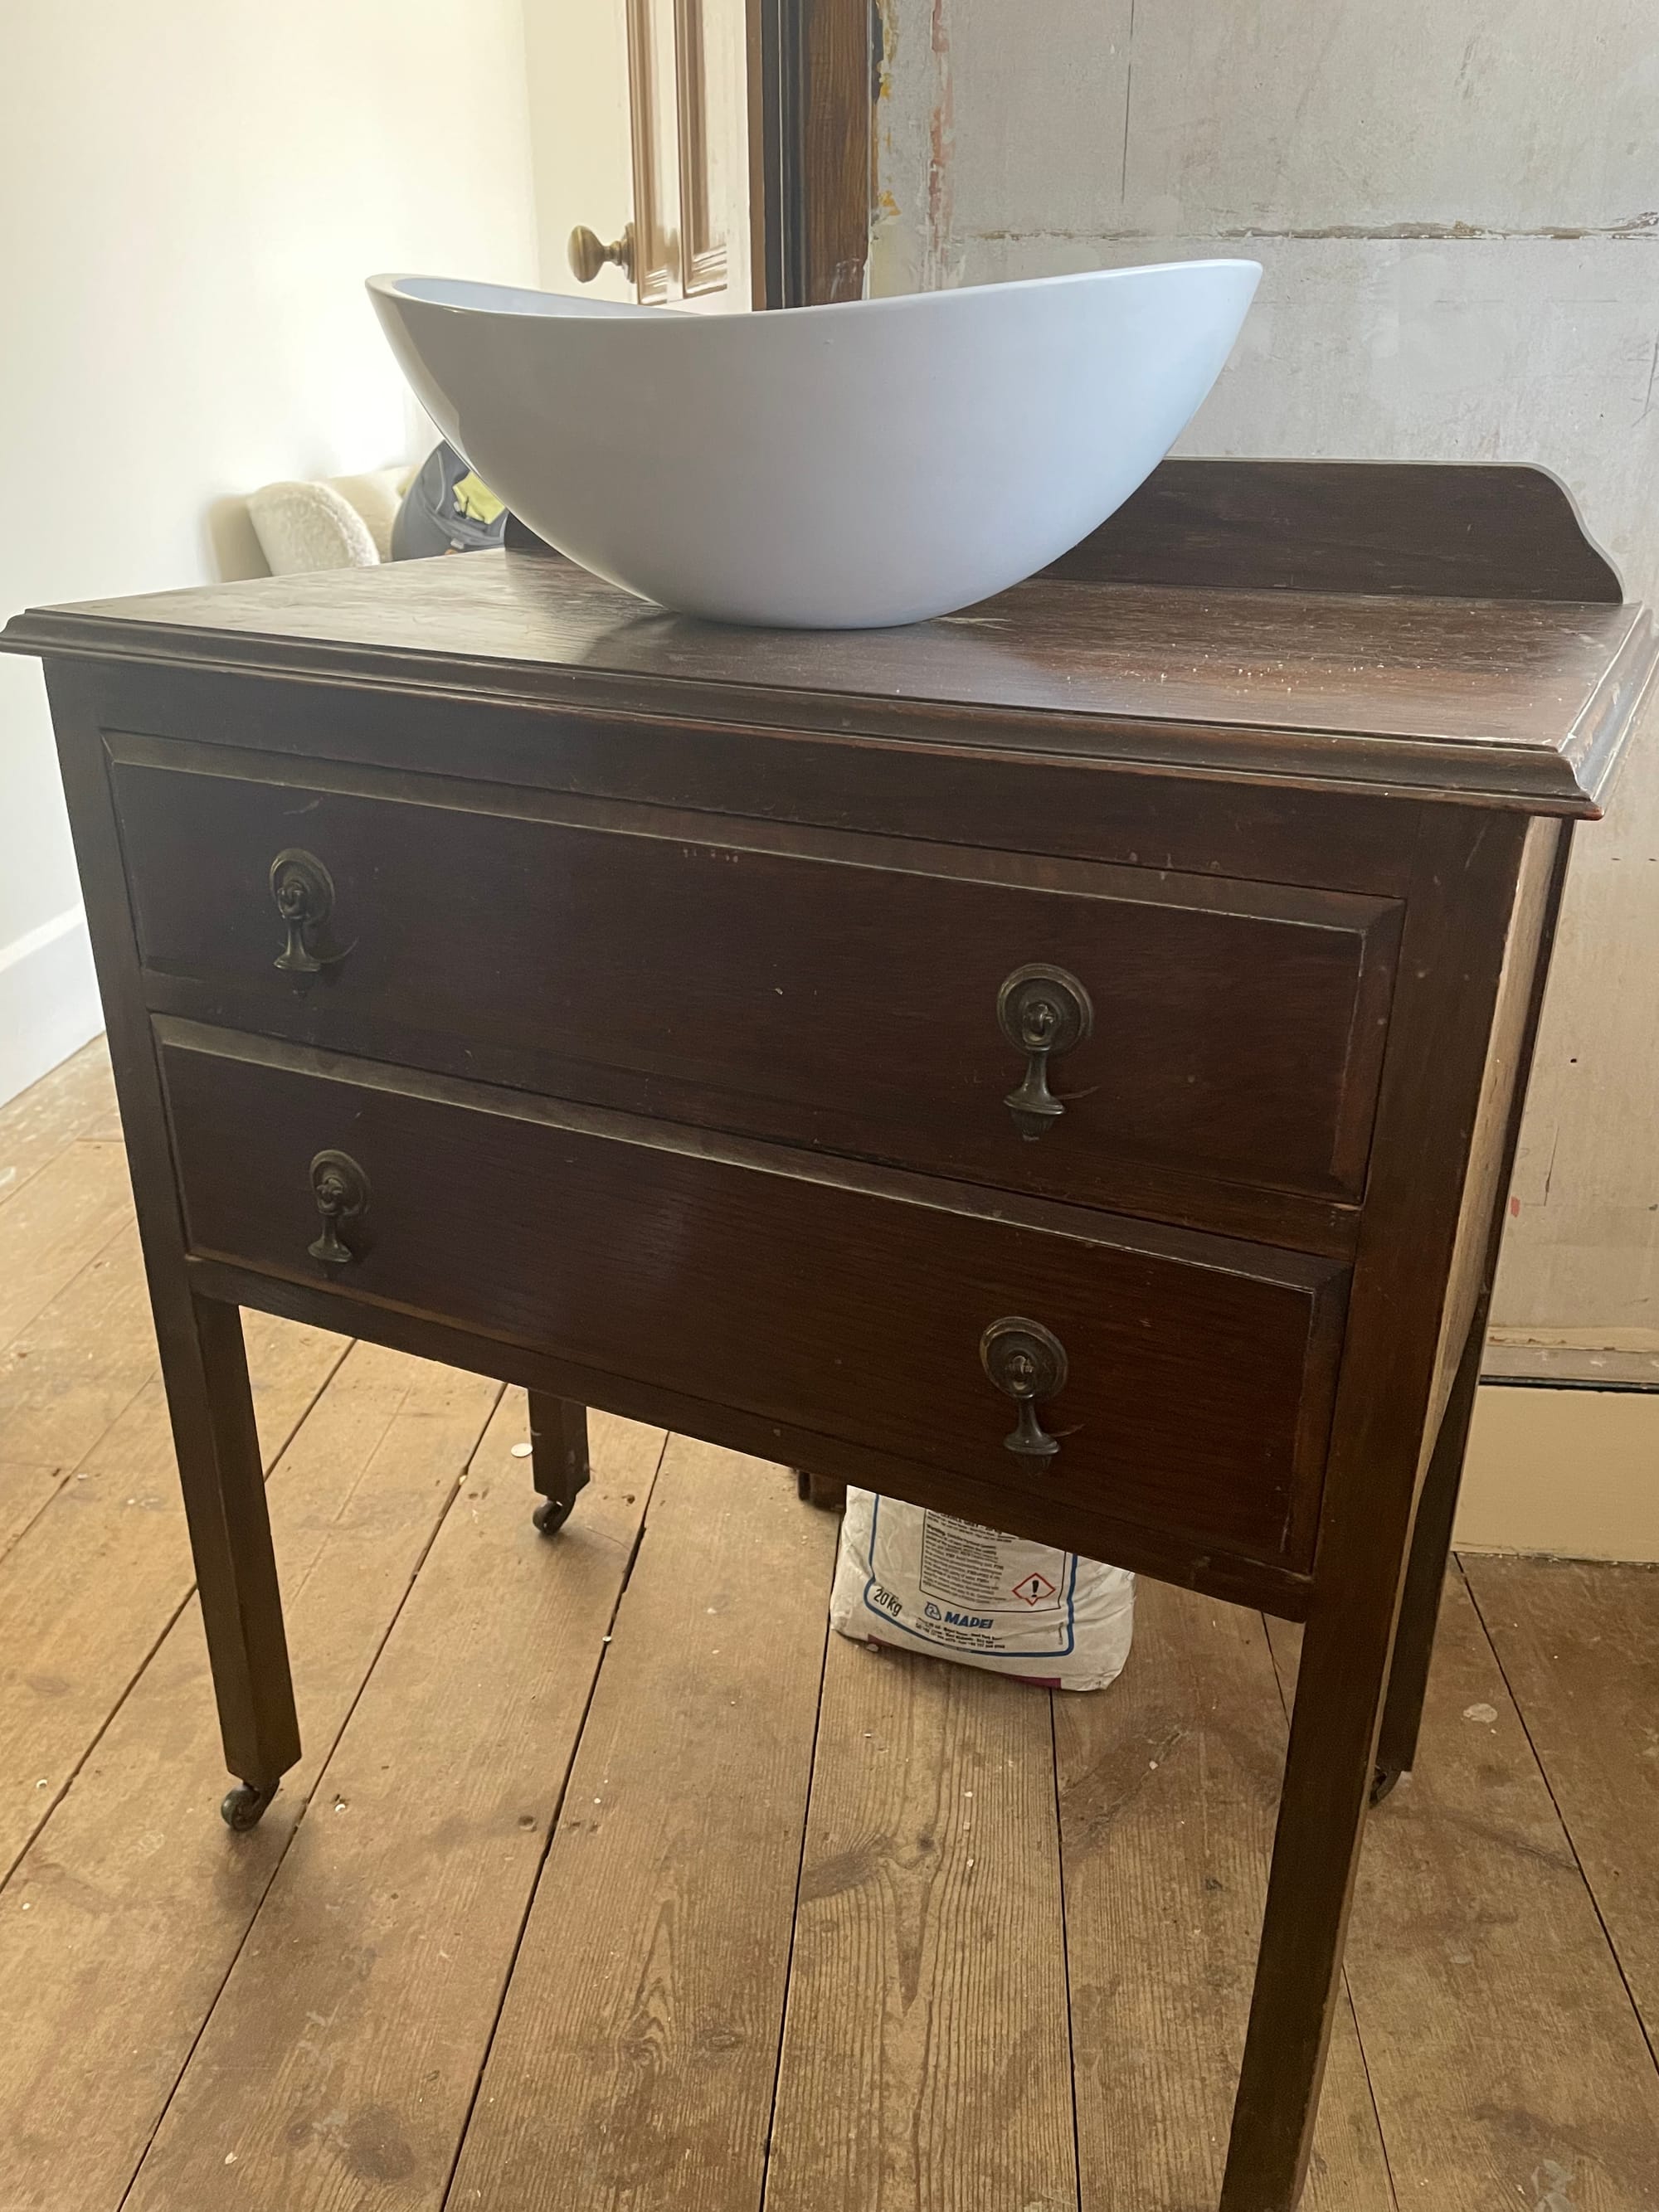
I wanted a more luxurious feel, so I decided to swap out the existing top for a quartz piece. If you prefer a more rustic look, you could keep the wooden top instead.
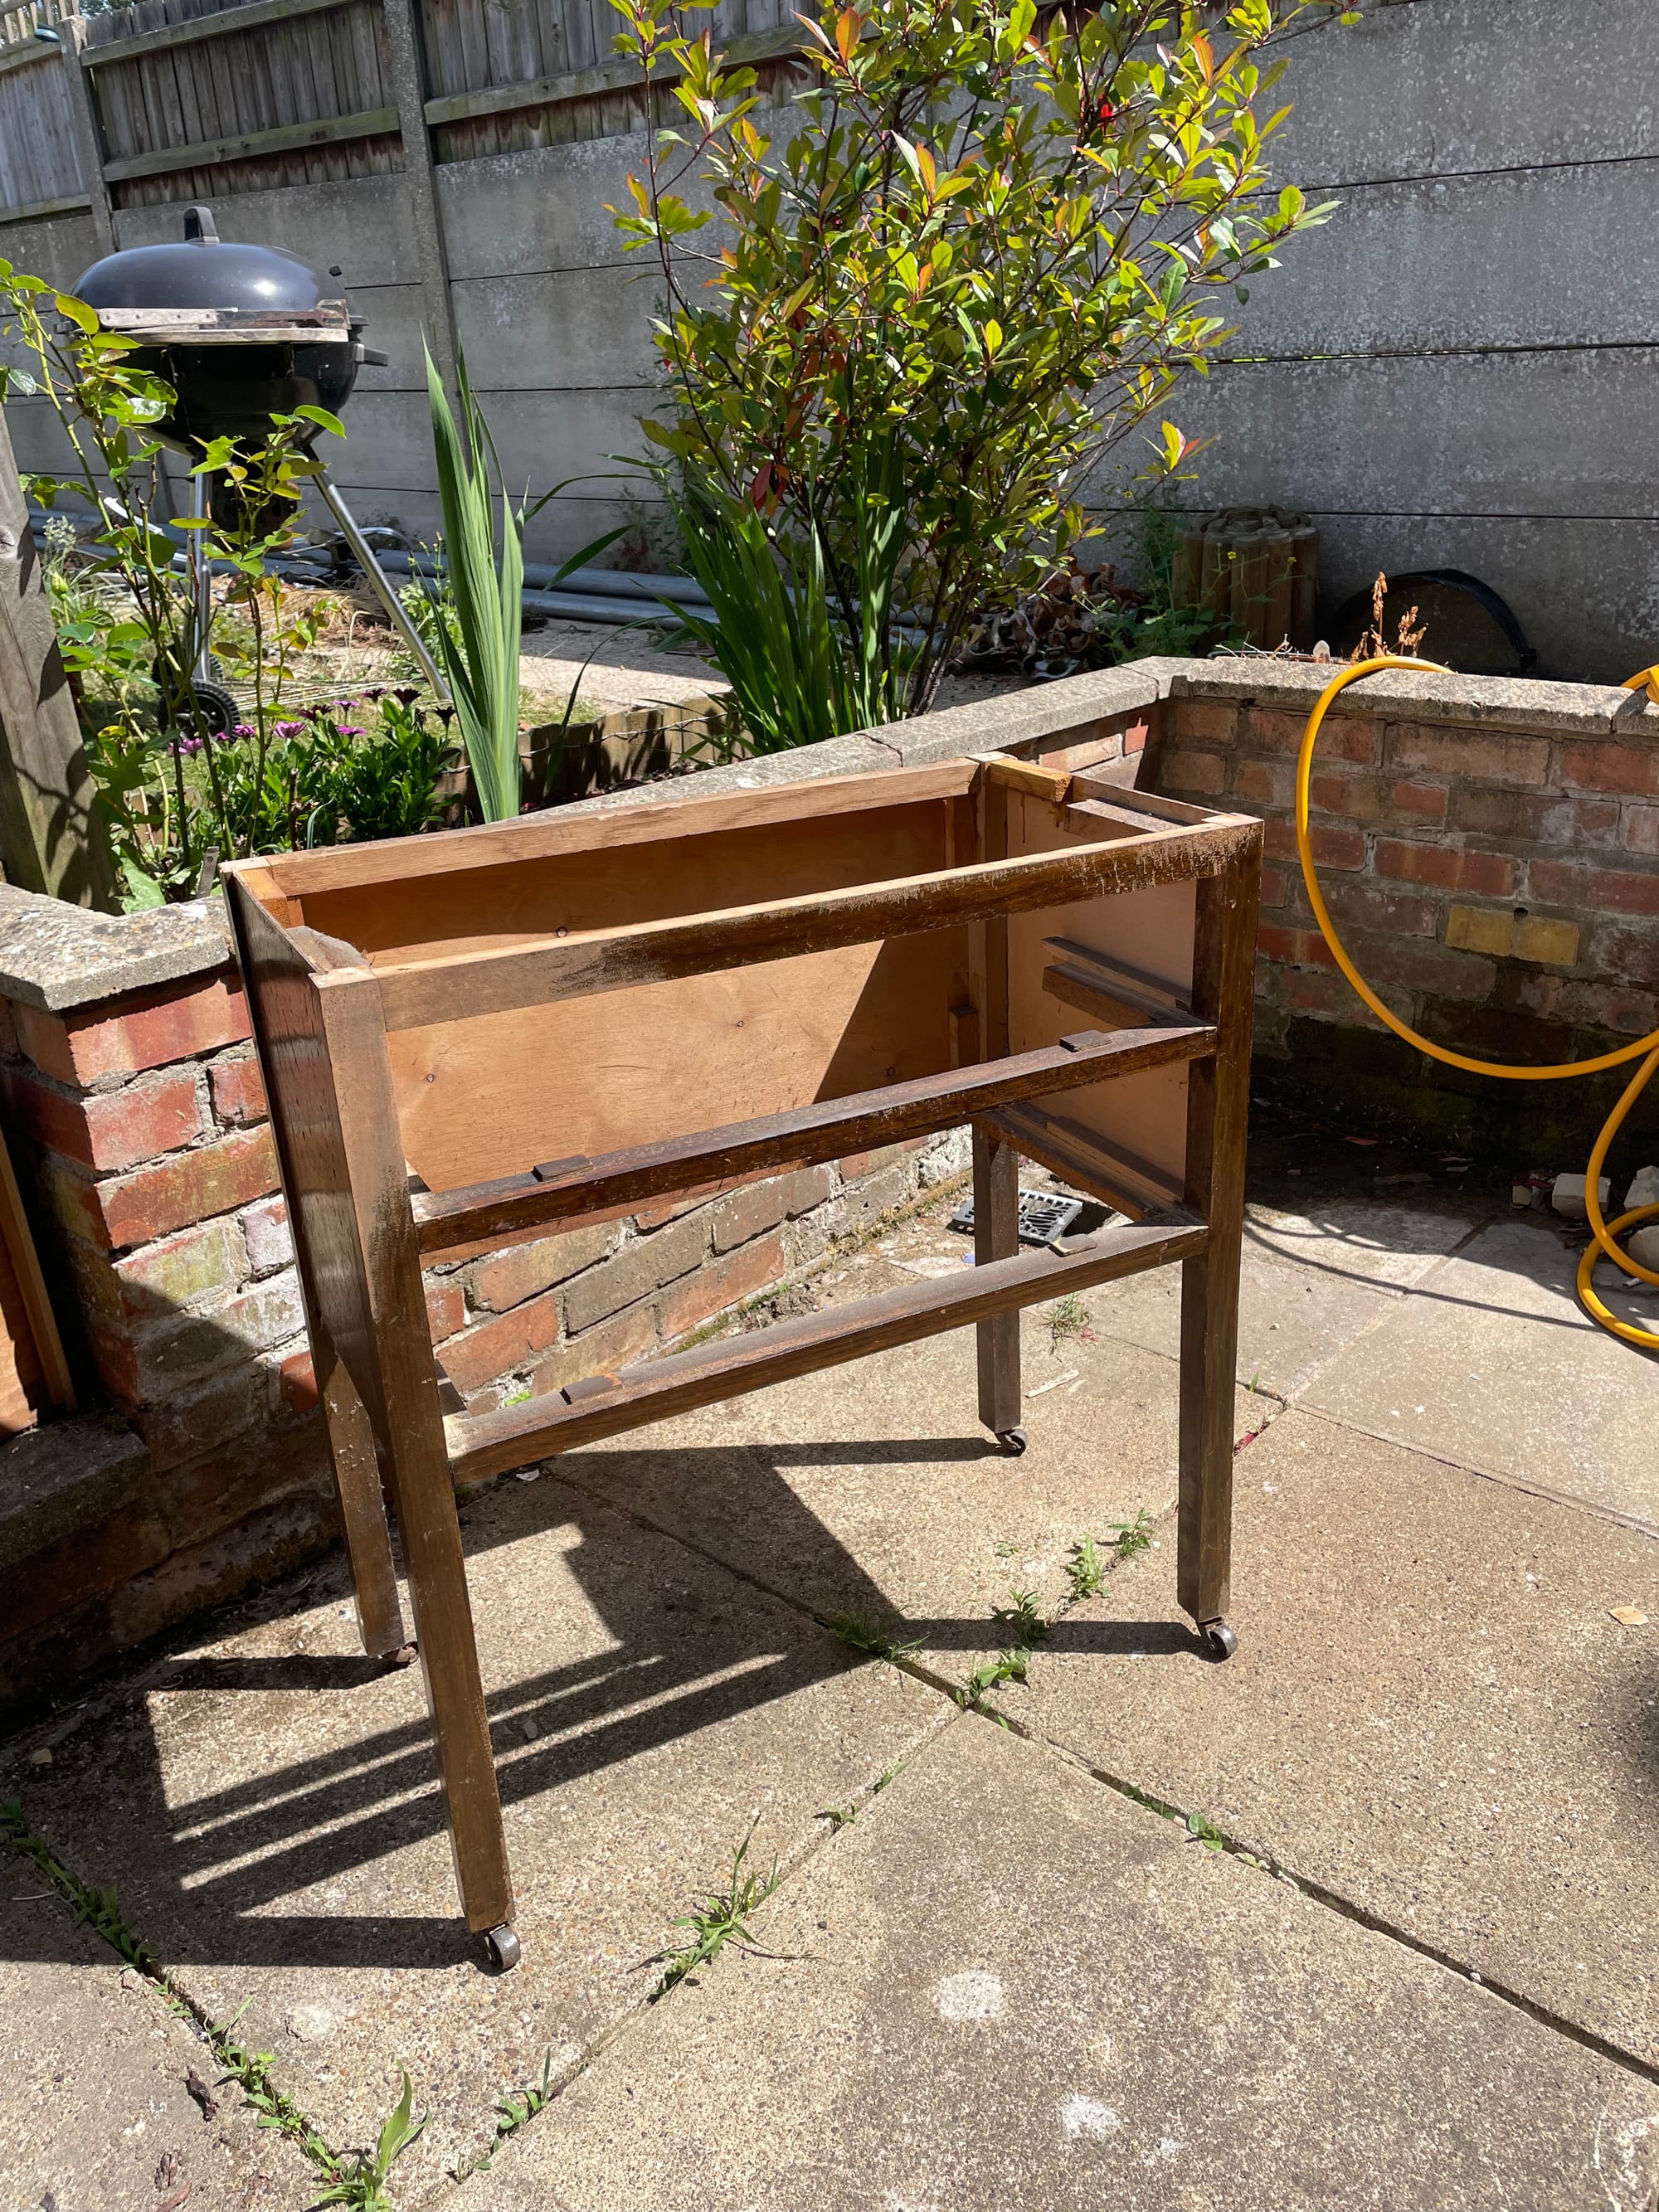
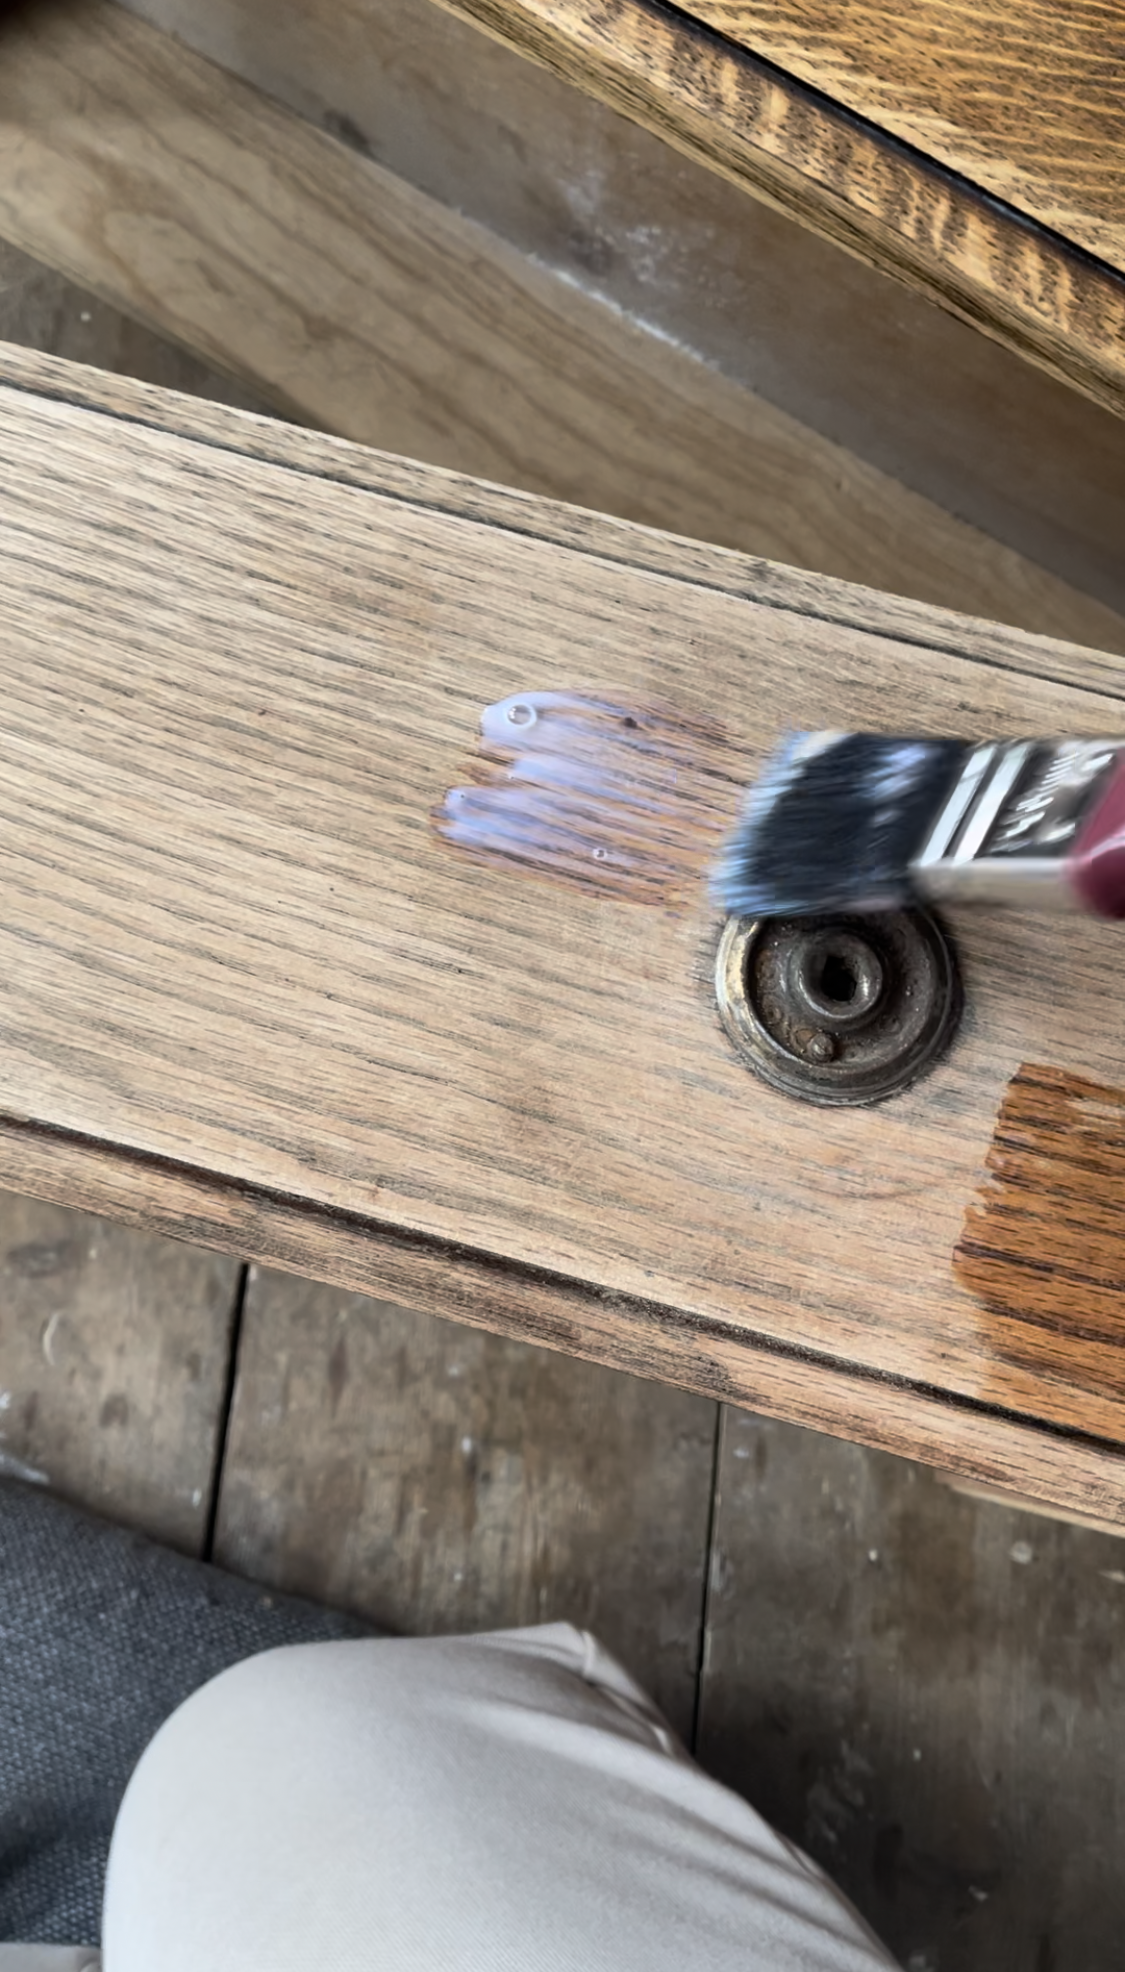
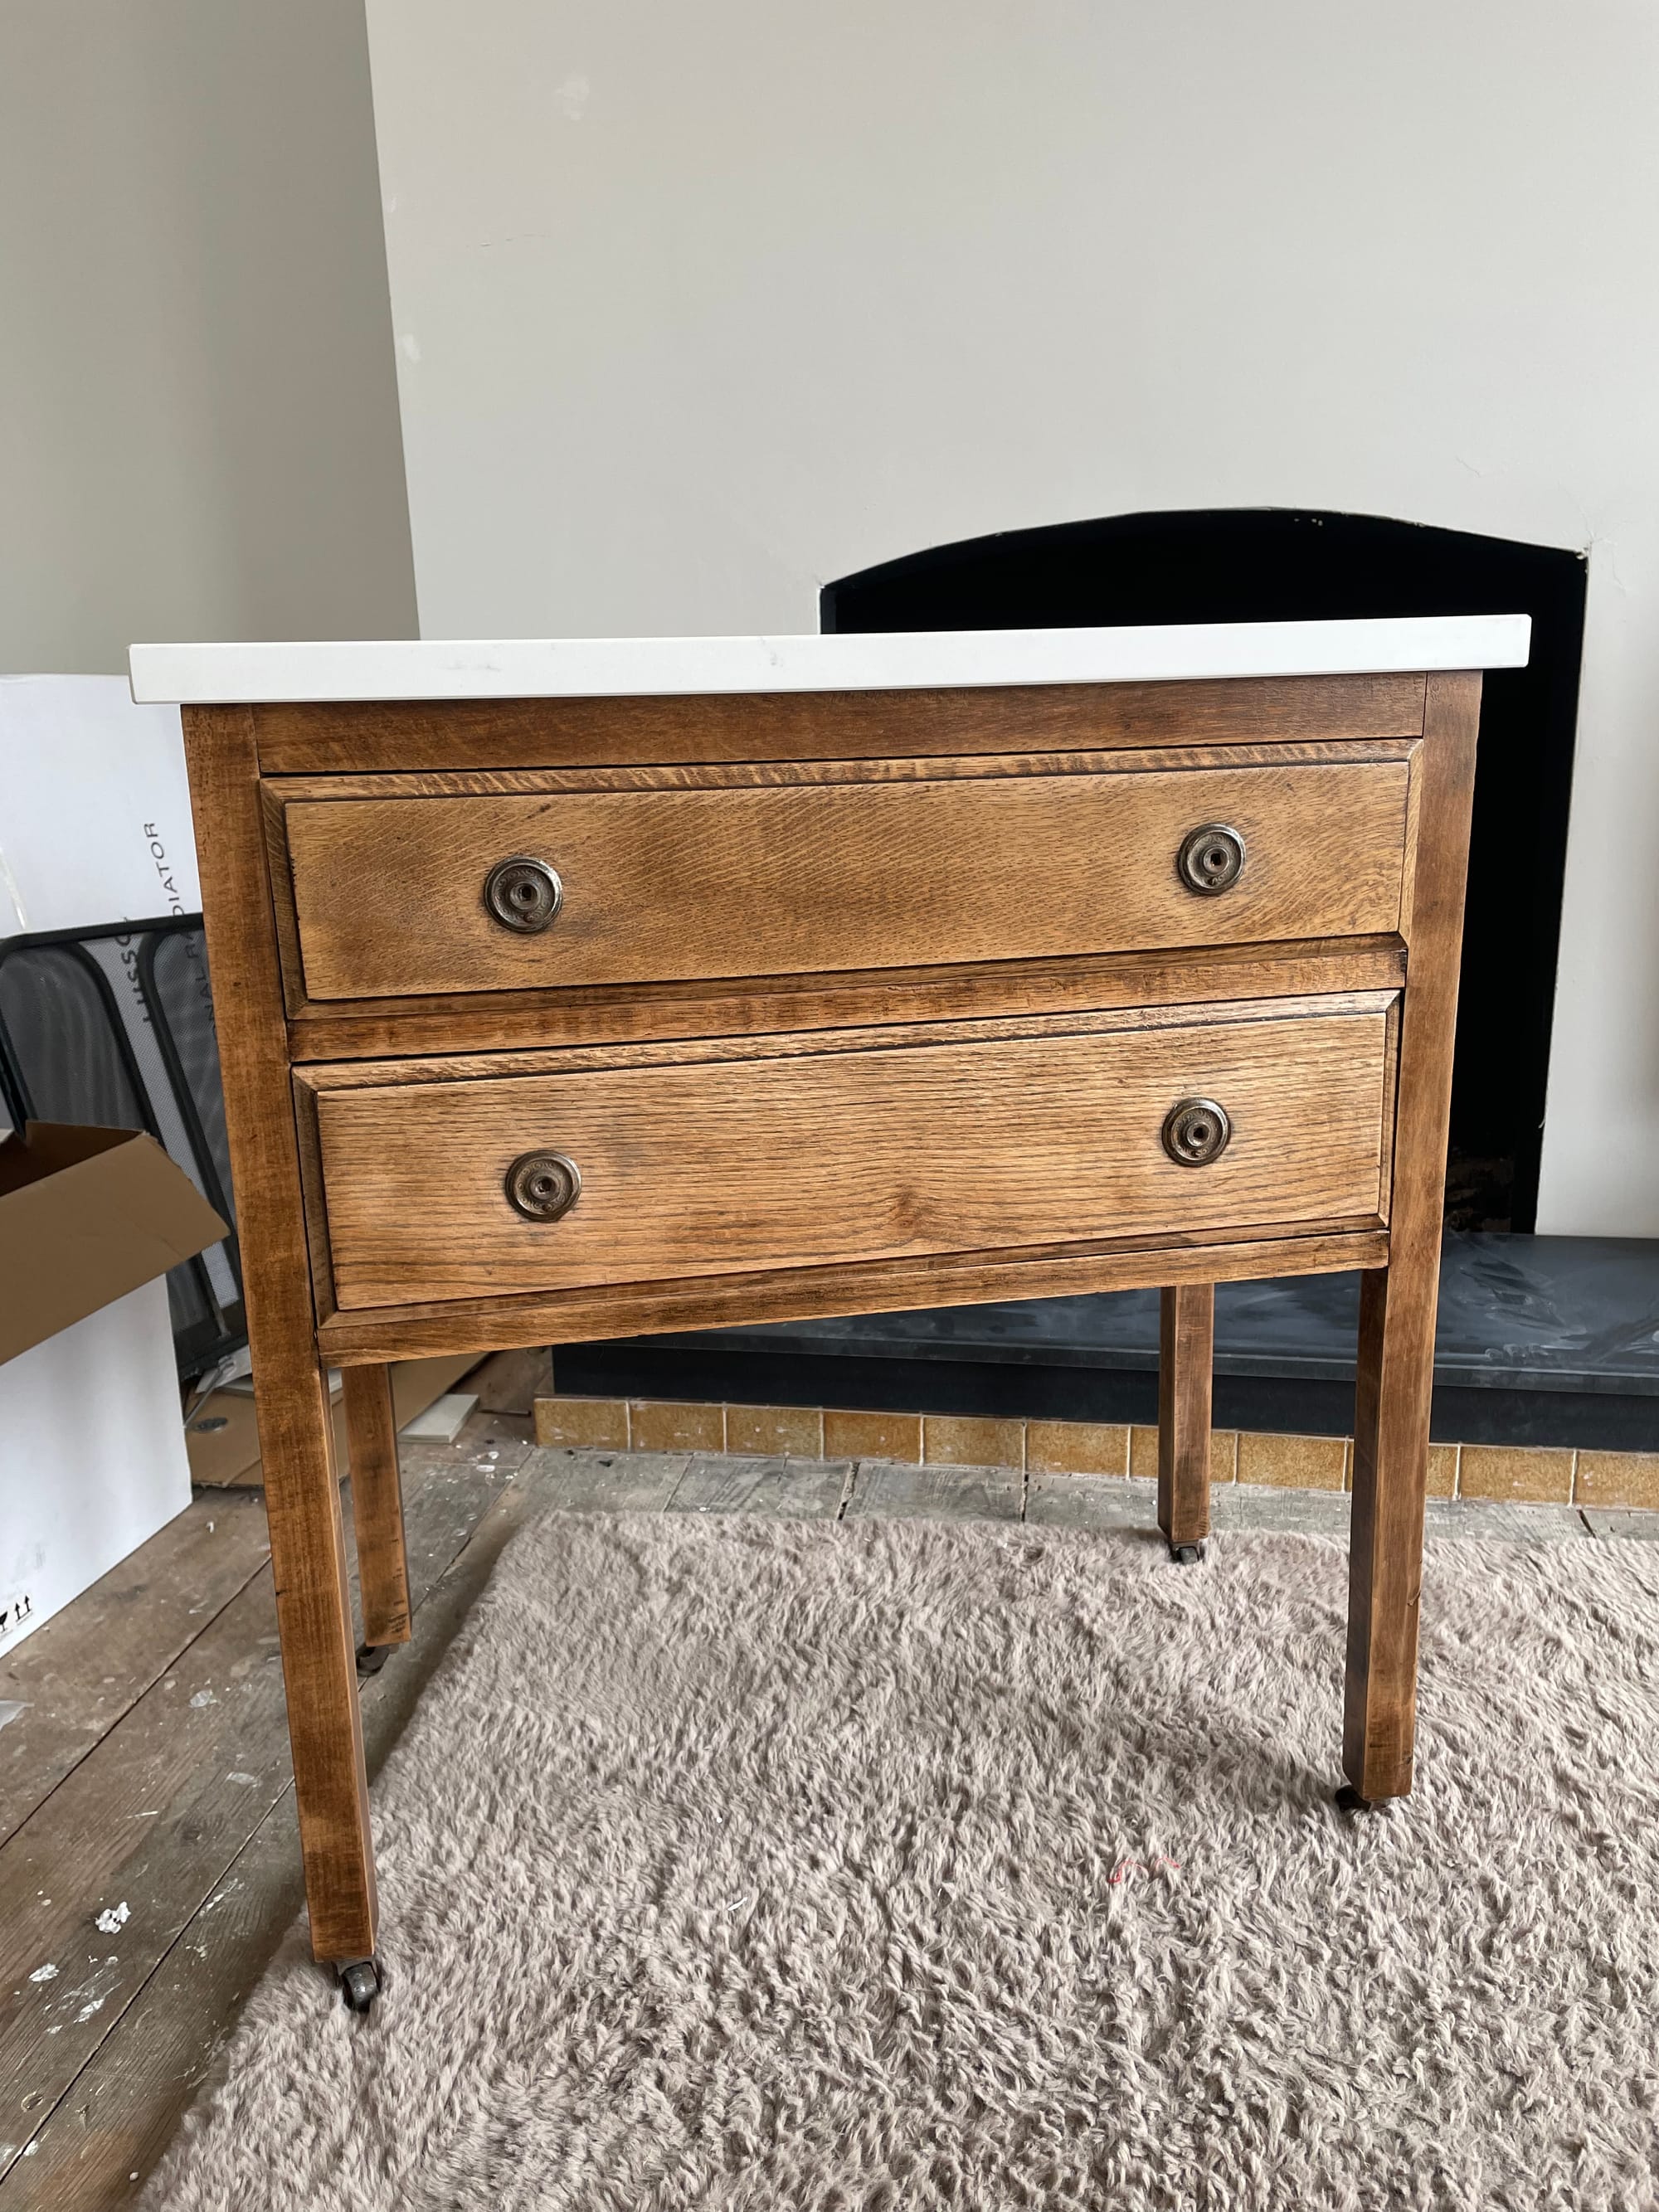
Step 4: Sand the Furniture
I sanded the entire sideboard to create a smooth, even surface. This step is essential to help the varnish adhere properly.
Step 5: Varnish the Sideboard
Using Rustin's waterproof clear varnish, I sealed the wood to protect it from bathroom moisture. I made sure to follow the product instructions carefully for the best results.
Step 6: Choose a New Vanity Top
I purchased a quartz piece from a local granite yard, where they also cut a waste hole to fit my sink. Marble or granite are great alternatives if quartz isn't your style.
Step 7: Modify the Drawer for the Waste Pipe
Since the waste pipe needed space, I cut a small section out of the drawer to allow it to close properly while accommodating the plumbing.
Step 8: Attach the Quartz Top
With the help of my plumber, I secured the quartz top onto the sideboard and fixed the vanity to the wall for extra stability.
Step 9: Install the Basin
The basin was placed on top of the quartz and plumbed in.
Step 10: Seal Everything
To ensure a watertight finish, I sealed all the edges with caulk.

This DIY upcycled bathroom vanity turned out beautifully and cost just a fraction of what I would have spent on a pre-made version. It’s proof that with a little creativity and effort, you can achieve a high-end look on a budget. If you’re considering a vanity makeover, why not give upcycling a try? You might just end up with something even more special than store-bought options!

Creator: Isobel
Instagram: @renovation_no55