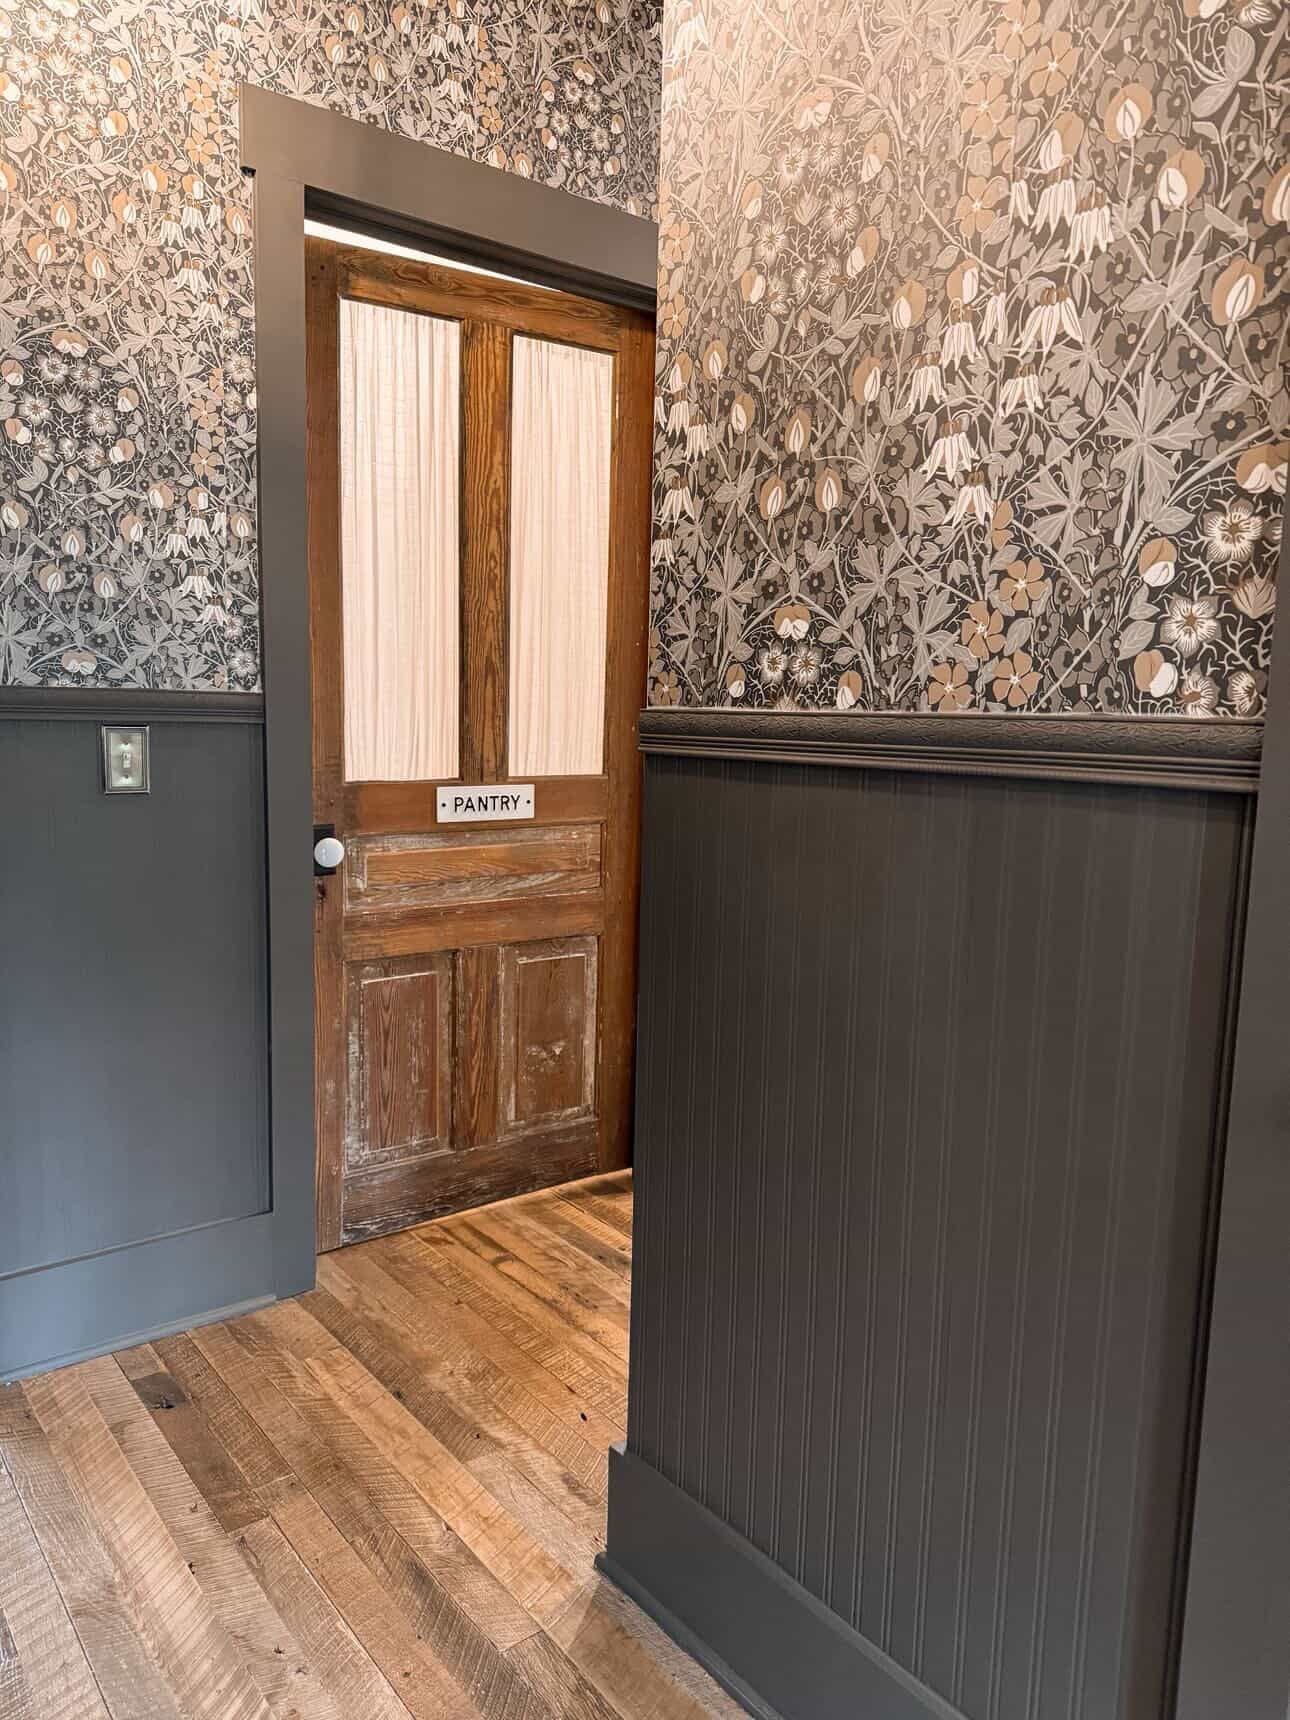
I've always wanted a hallway that felt intentional — moody florals, beadboard wainscoting, warm wood floors — but I was not about to spend a weekend with power tools and a nail gun. So when I found this beadboard wallpaper, everything changed. I redid this entire hallway with zero power tools, no glue, no nails, and honestly? It was a game changer.
What You'll Need
Materials:
- Graham & Brown Superfresco Easy Paintable Pre-Pasted Beadboard Wallpaper (Amazon)
- NextWall Tulip Garden Floral Peel and Stick Wallpaper — Wrought Iron & Chamois
- Sherwin-Williams Urbane Bronze paint, flat finish
- Wallpaper smoothing tool
- Sponge or damp cloth
- Scissors or craft knife
Tools:
- Measuring tape
- Level
- Pencil
- Small paintbrush and roller
Step-by-Step Guide
Step 1: Measure your wall height
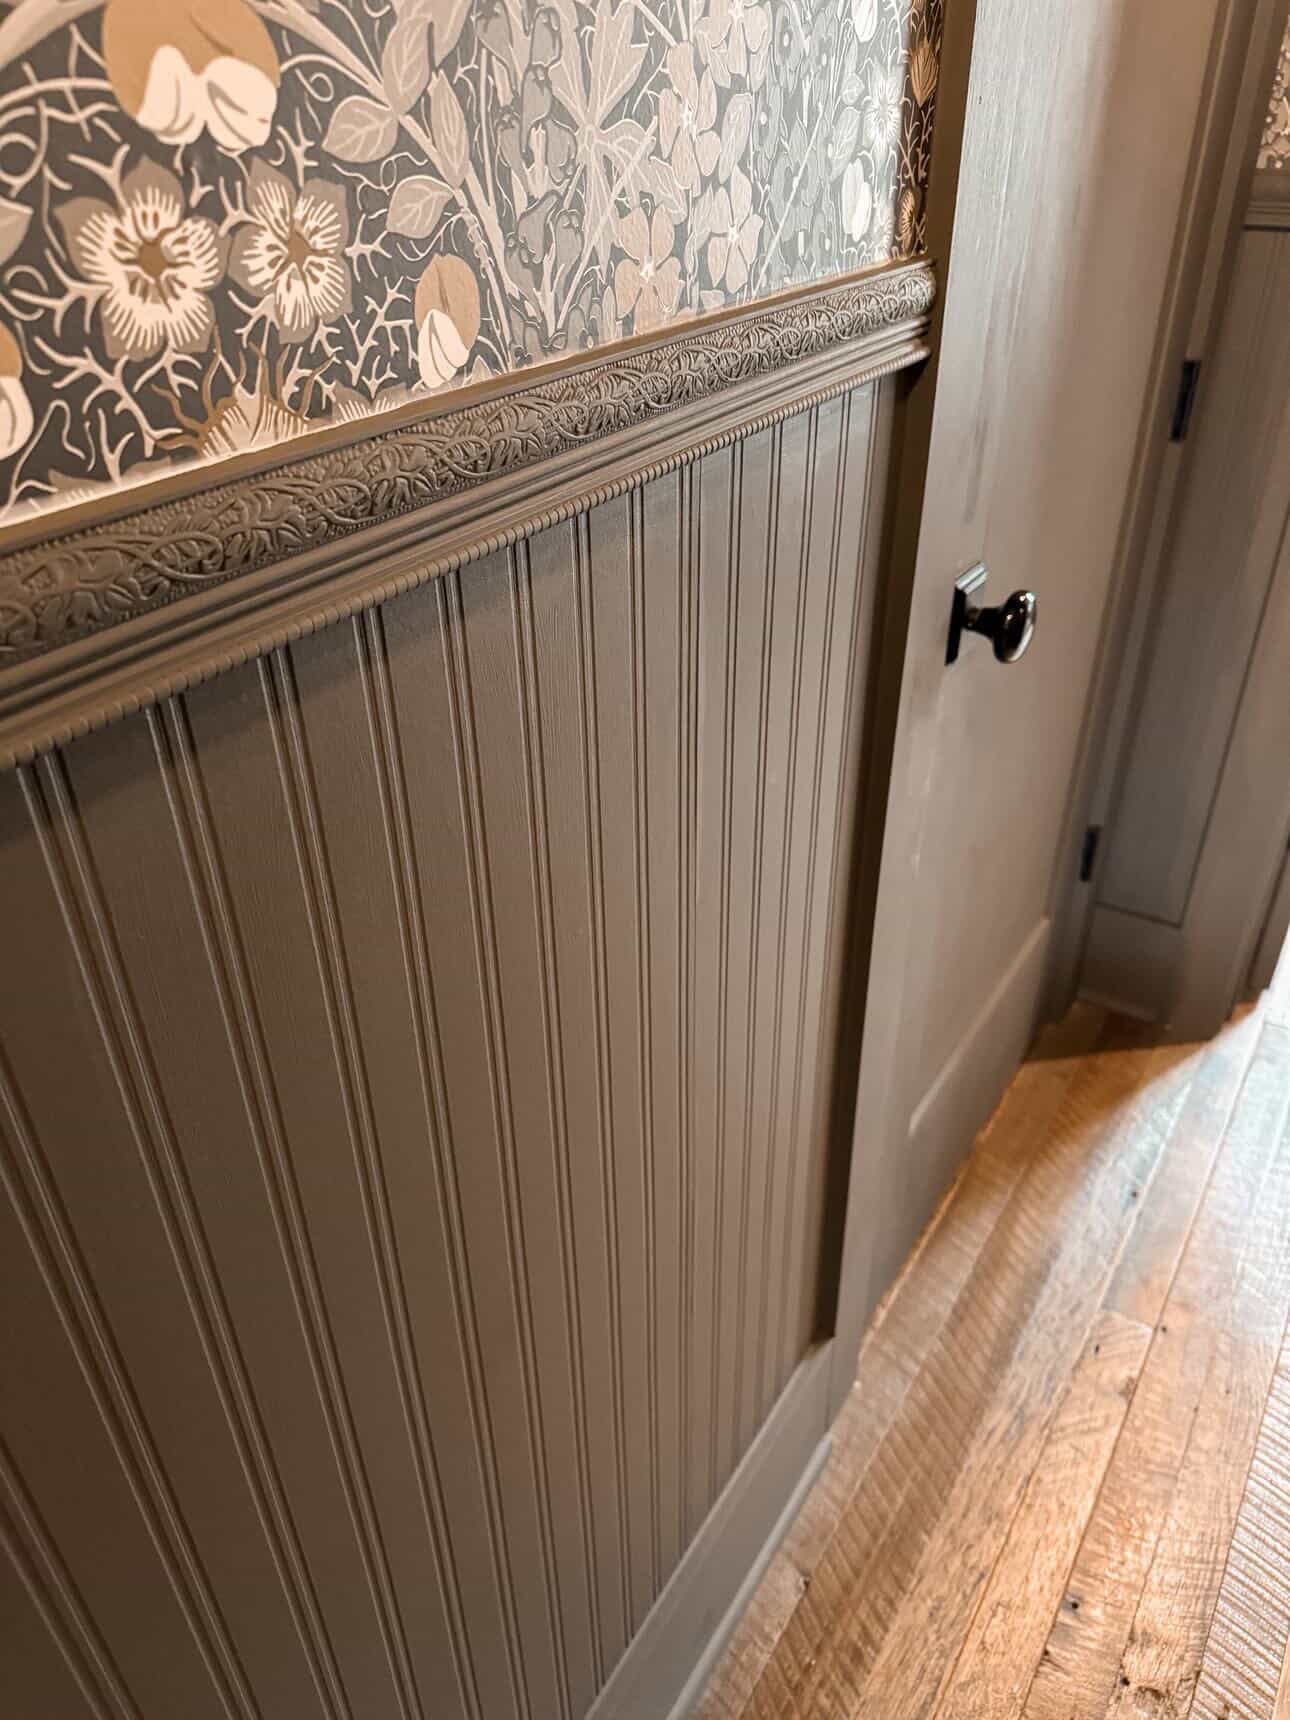
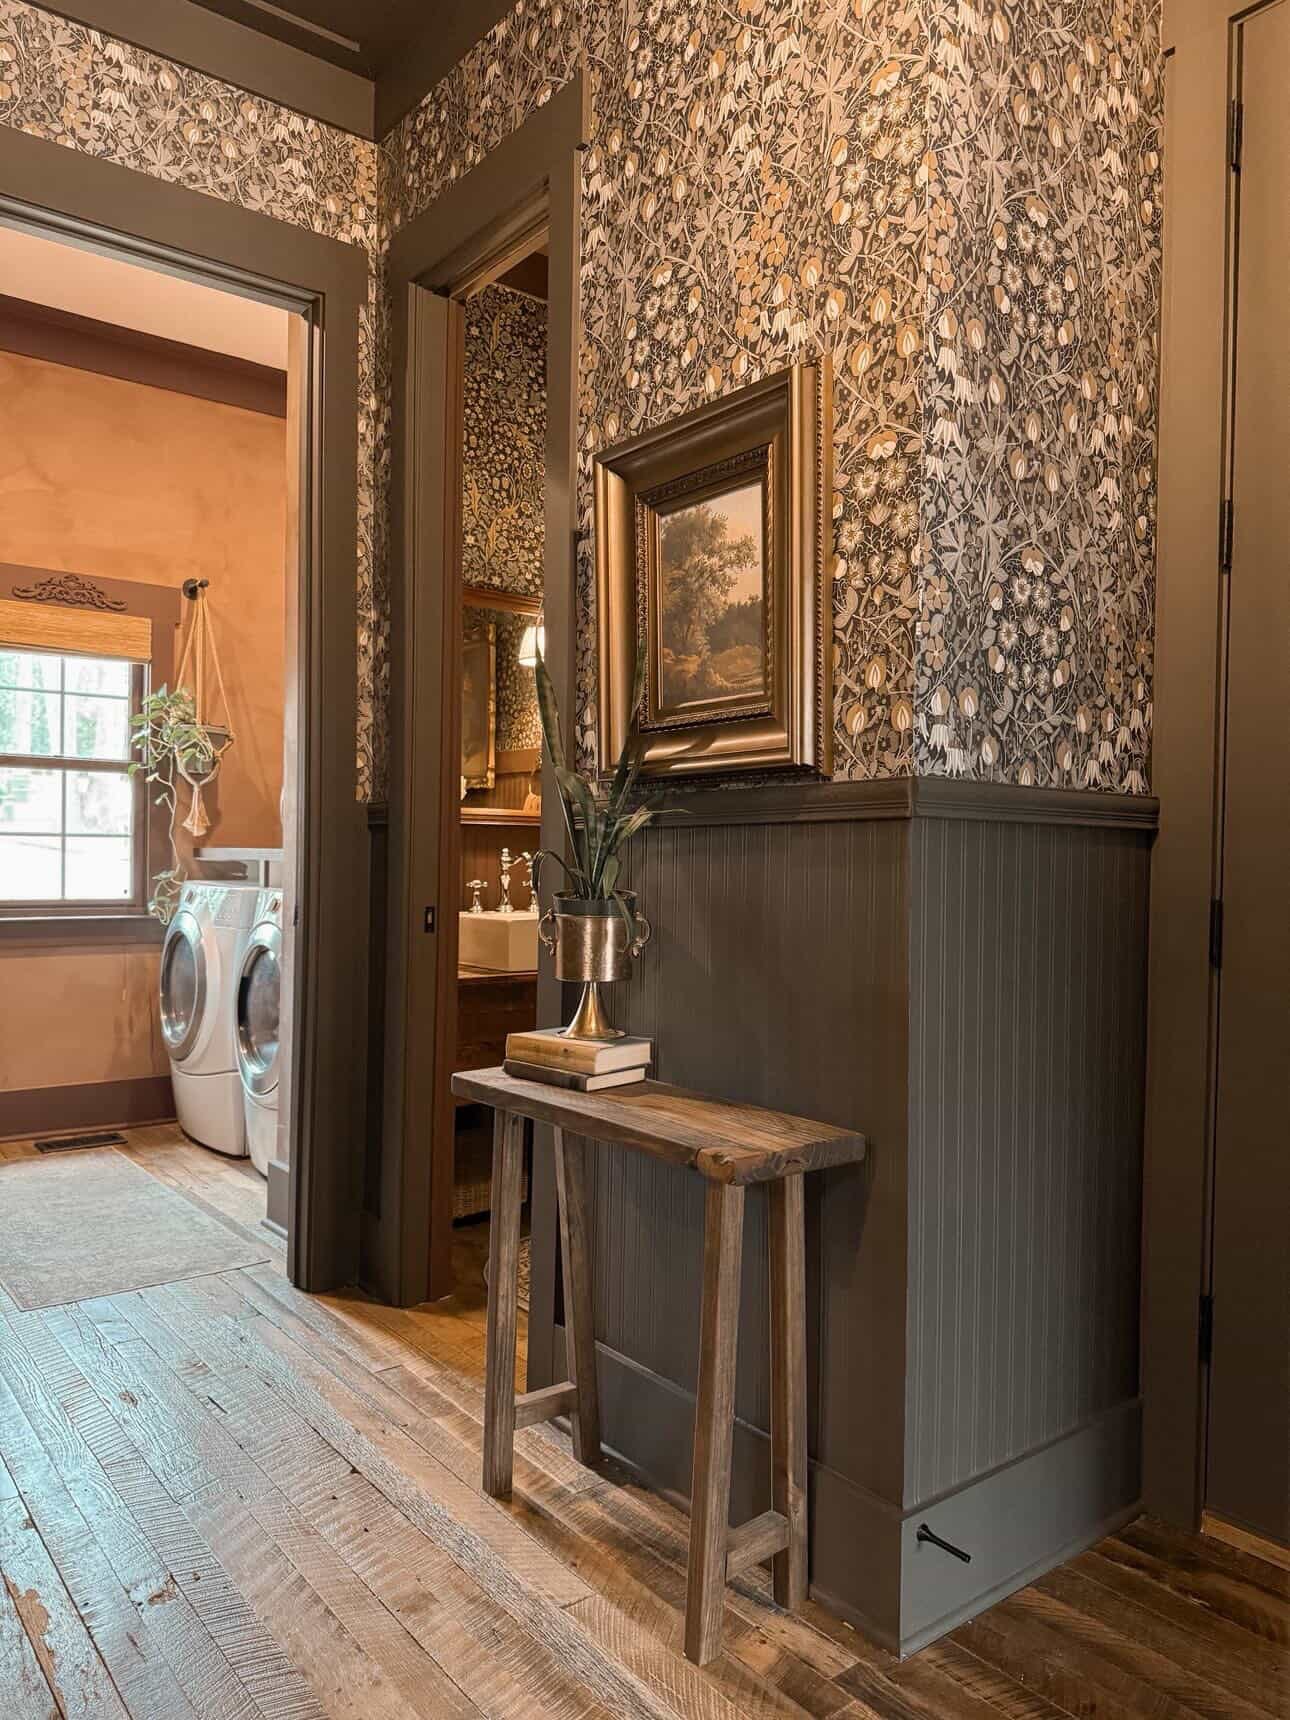
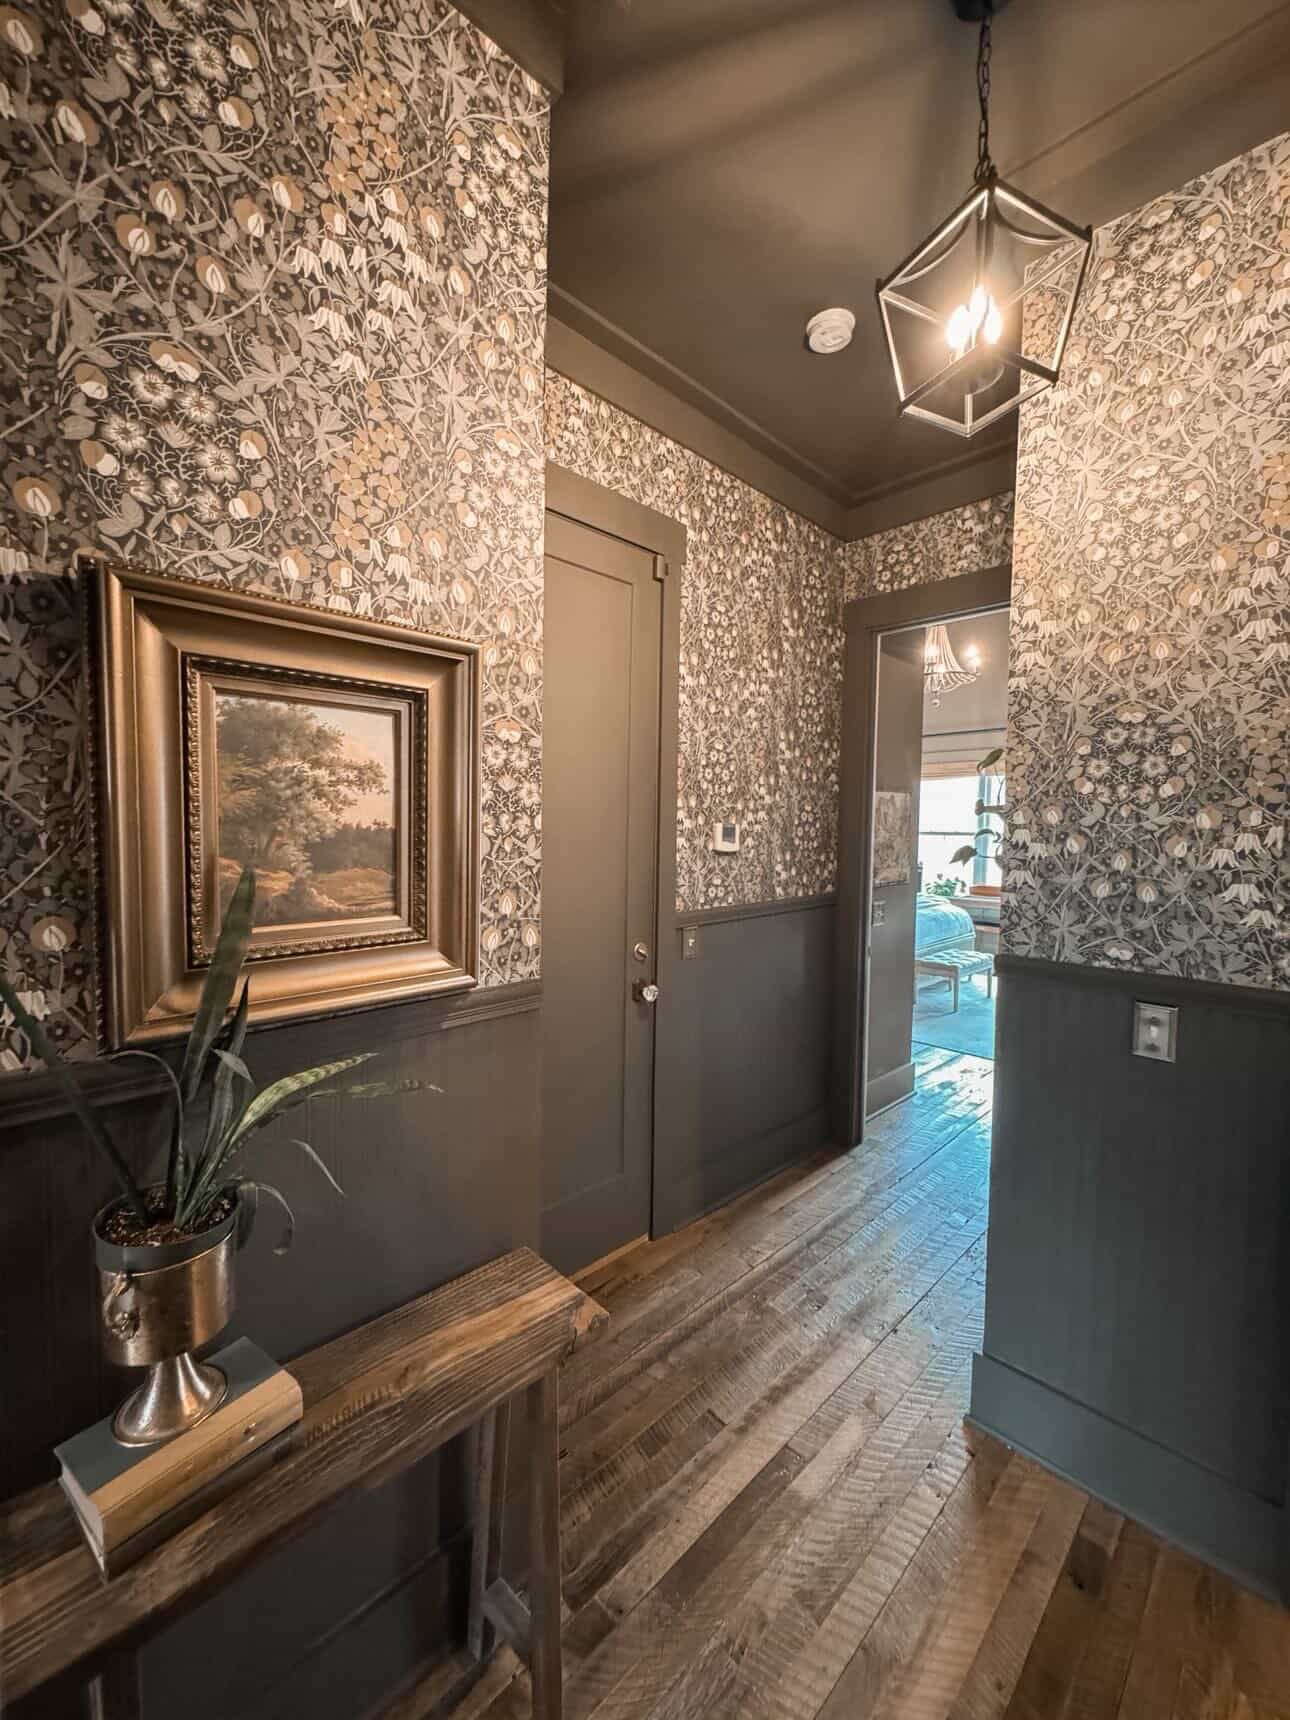
First thing I did was figure out how high I wanted the beadboard to go. I knew I wanted to use a fun peel-and-stick print as the focal point above, so getting that split right was really important. I'd say a good starting point is one-third of your wall height — but I went a little higher for that bold, dramatic look I was going for. Mark a level pencil line all the way around before you touch anything else.
Step 2: Wet the adhesive and let it book
Cut your panel to length, then wet the adhesive side with a damp sponge or cloth. Fold it paste-to-paste — this is called booking — and let it sit for about 5 minutes. This is what activates the glue and relaxes the paper so it goes on smoothly. Don't skip this step, I promise it makes a difference.
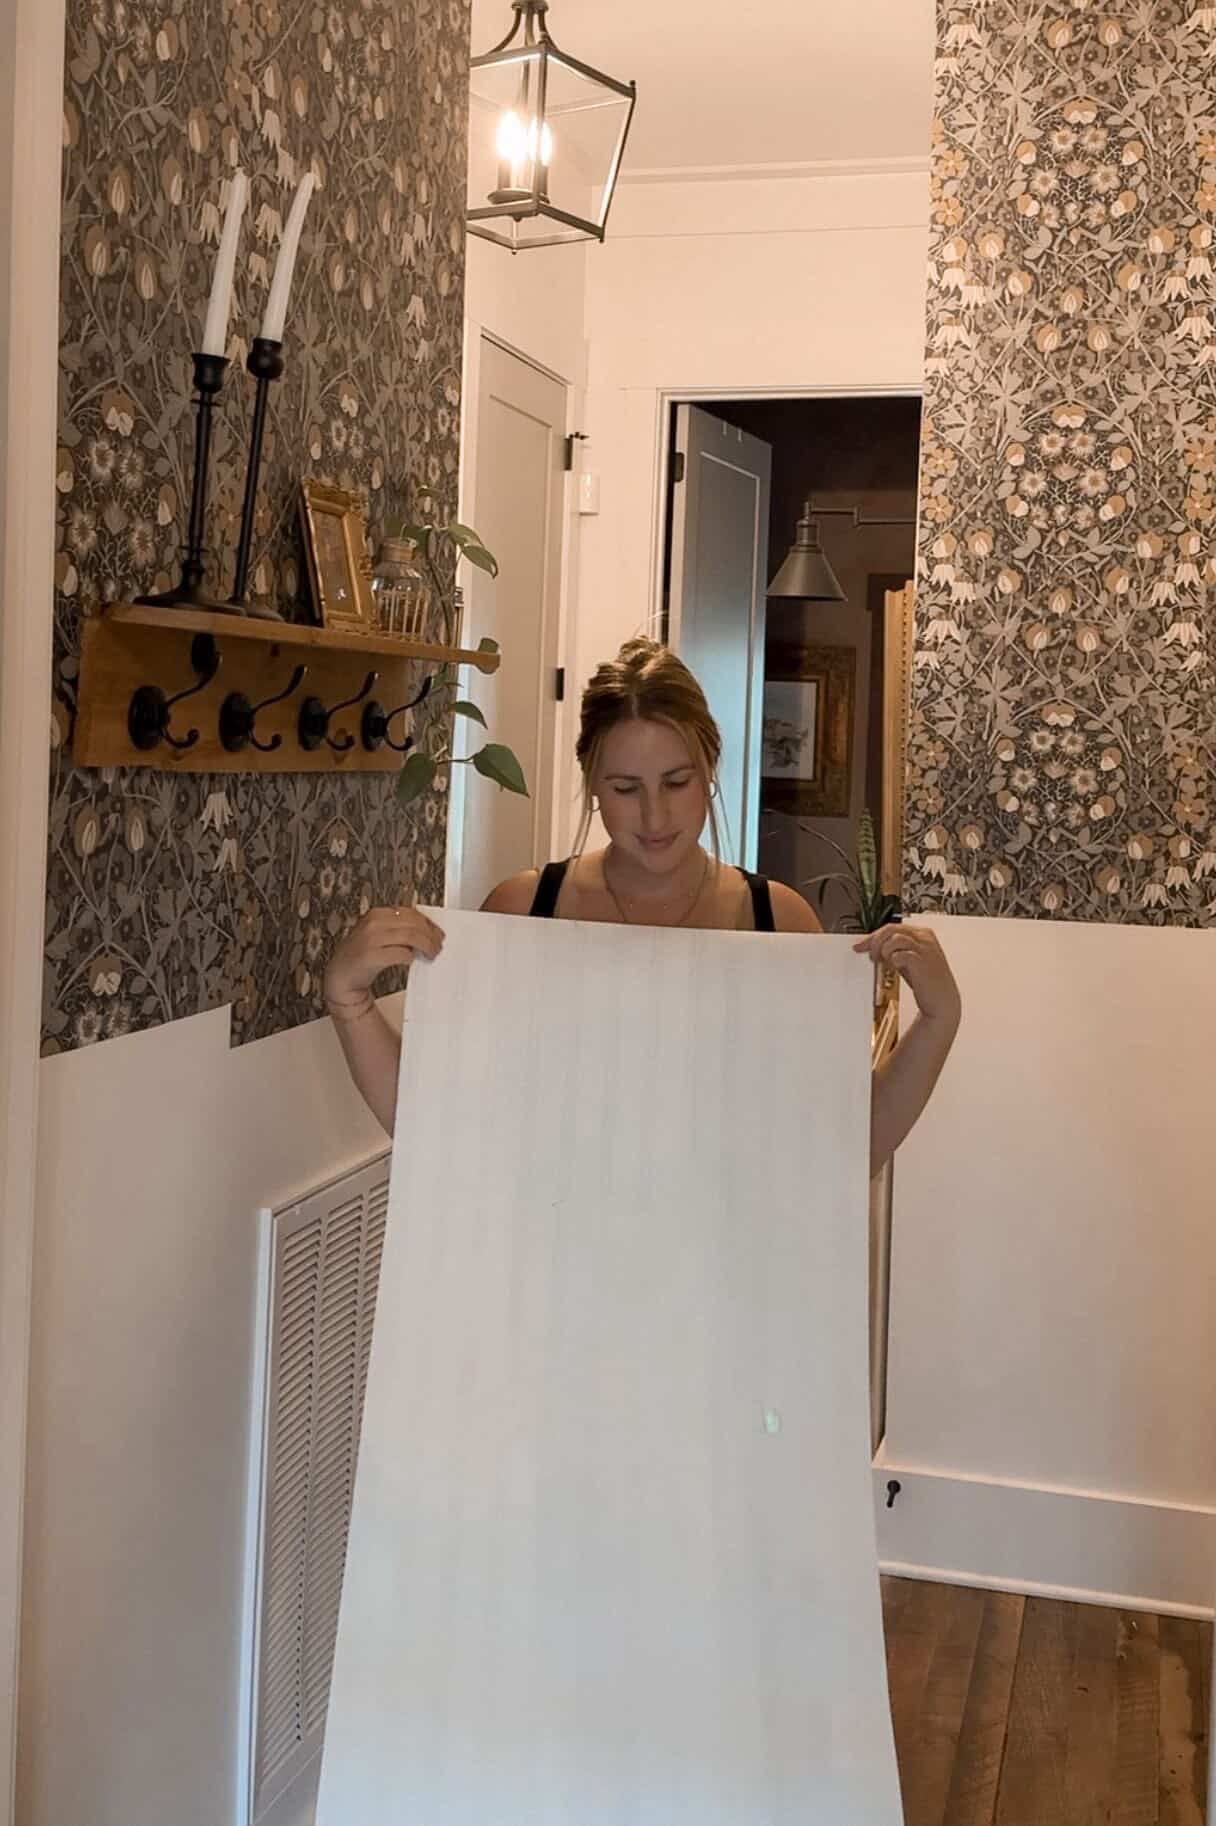
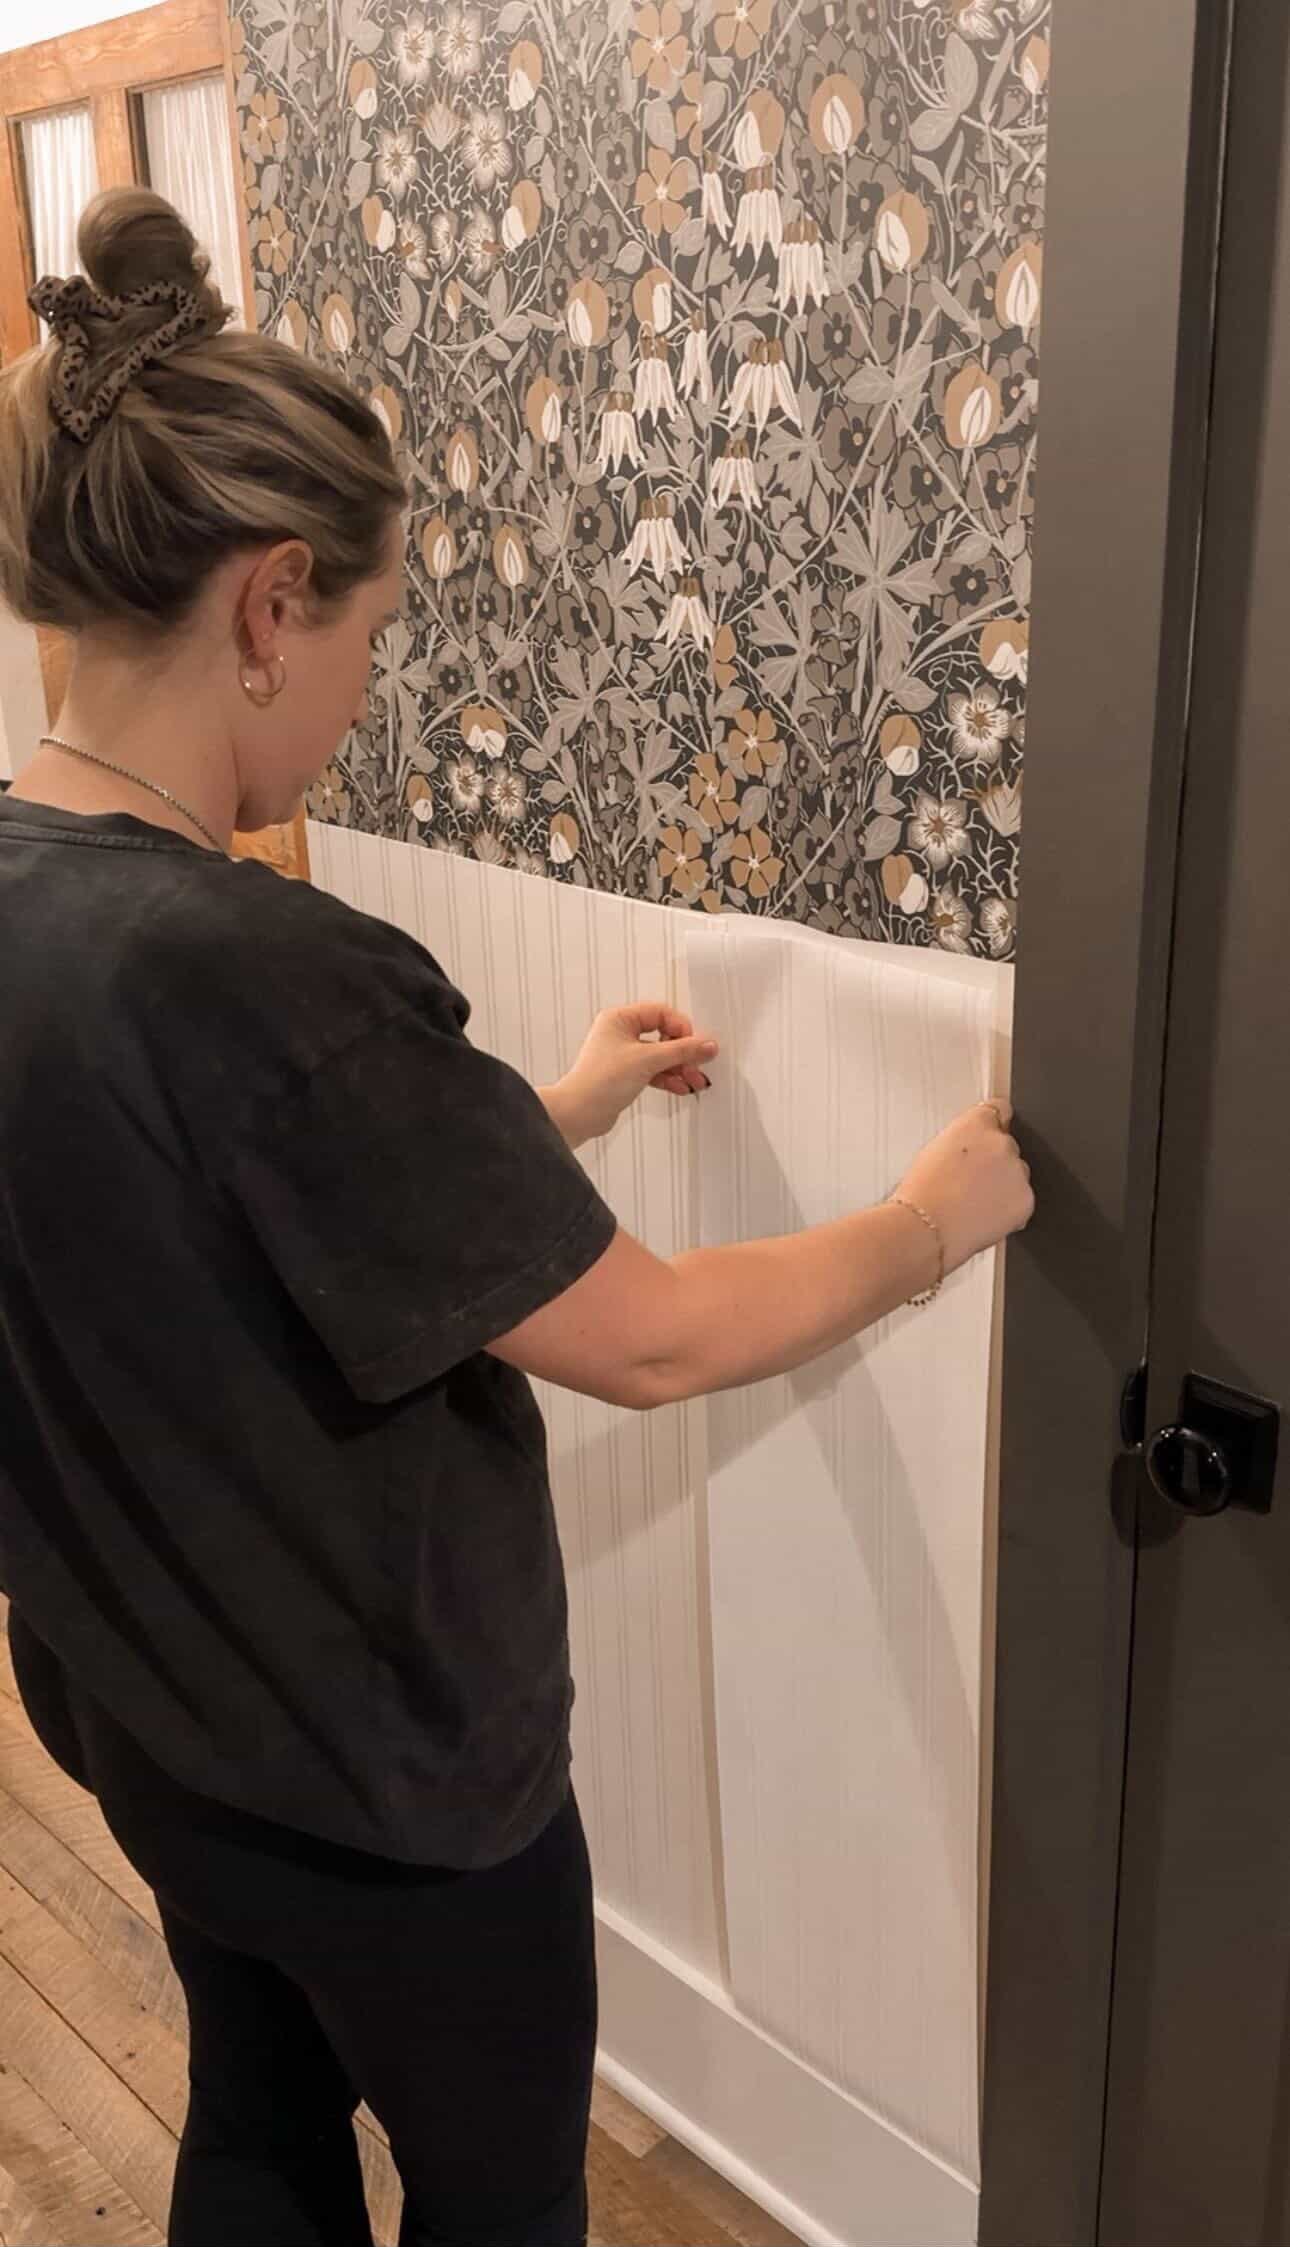
Step 3: Apply the panels
Press the panel to the wall along your pencil line. What I loved most about this wallpaper is how forgiving it is — if your measurement is slightly off, you can just slide it while it's still wet. Use your smoothing tool to work out any bubbles from the centre outward, trim the edges with scissors or a craft knife, and butt each panel tight against the last so the grooves line up. It cuts so cleanly too, which I was not expecting.
Step 4: Paint straight over the wallpaper
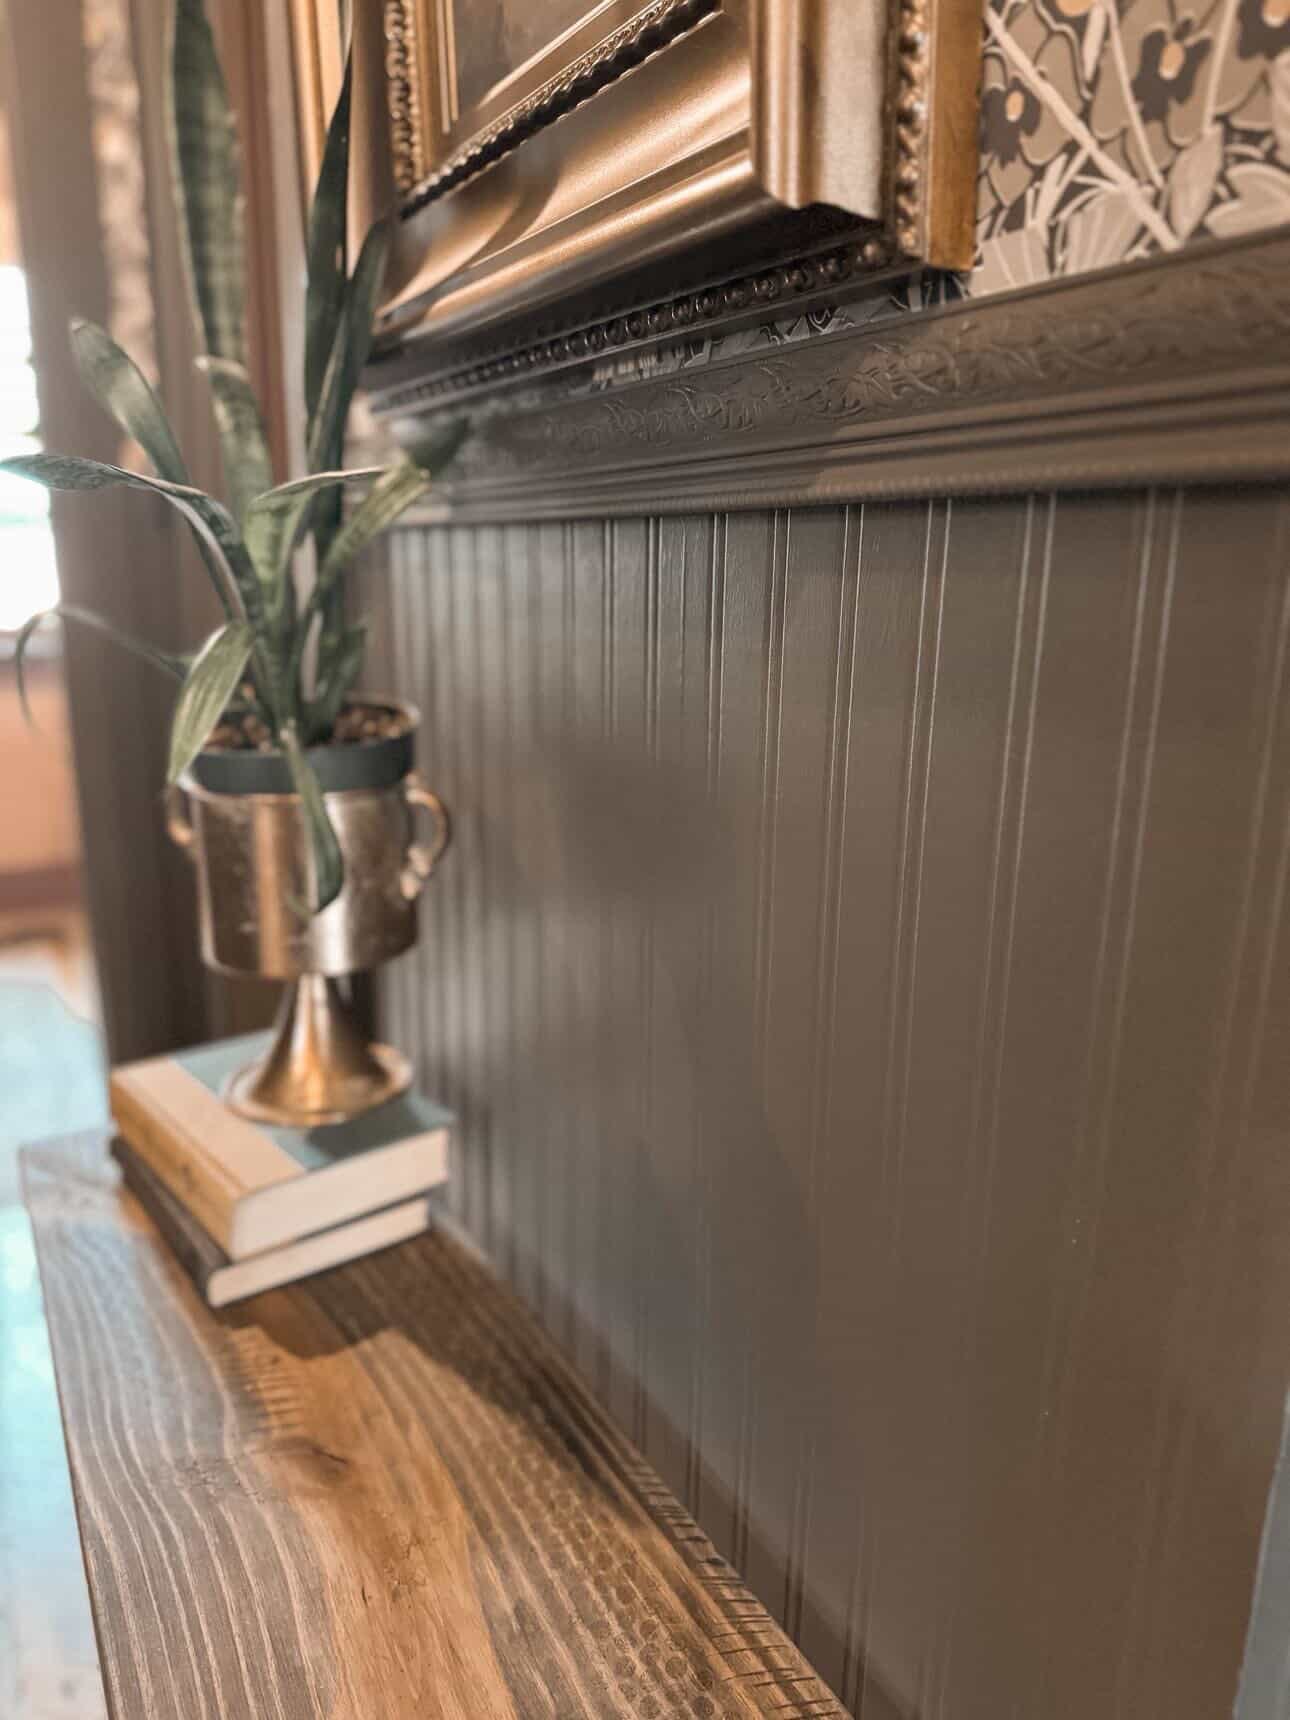
Once everything is dry, you can paint directly over it — no primer needed, which honestly blew my mind. I used Sherwin-Williams Urbane Bronze in a flat finish and it gave the beadboard that deep, warm, built-in look I was after. Work the paint into the grooves with a small brush first, then roll over the flat sections. Two coats and you're done.
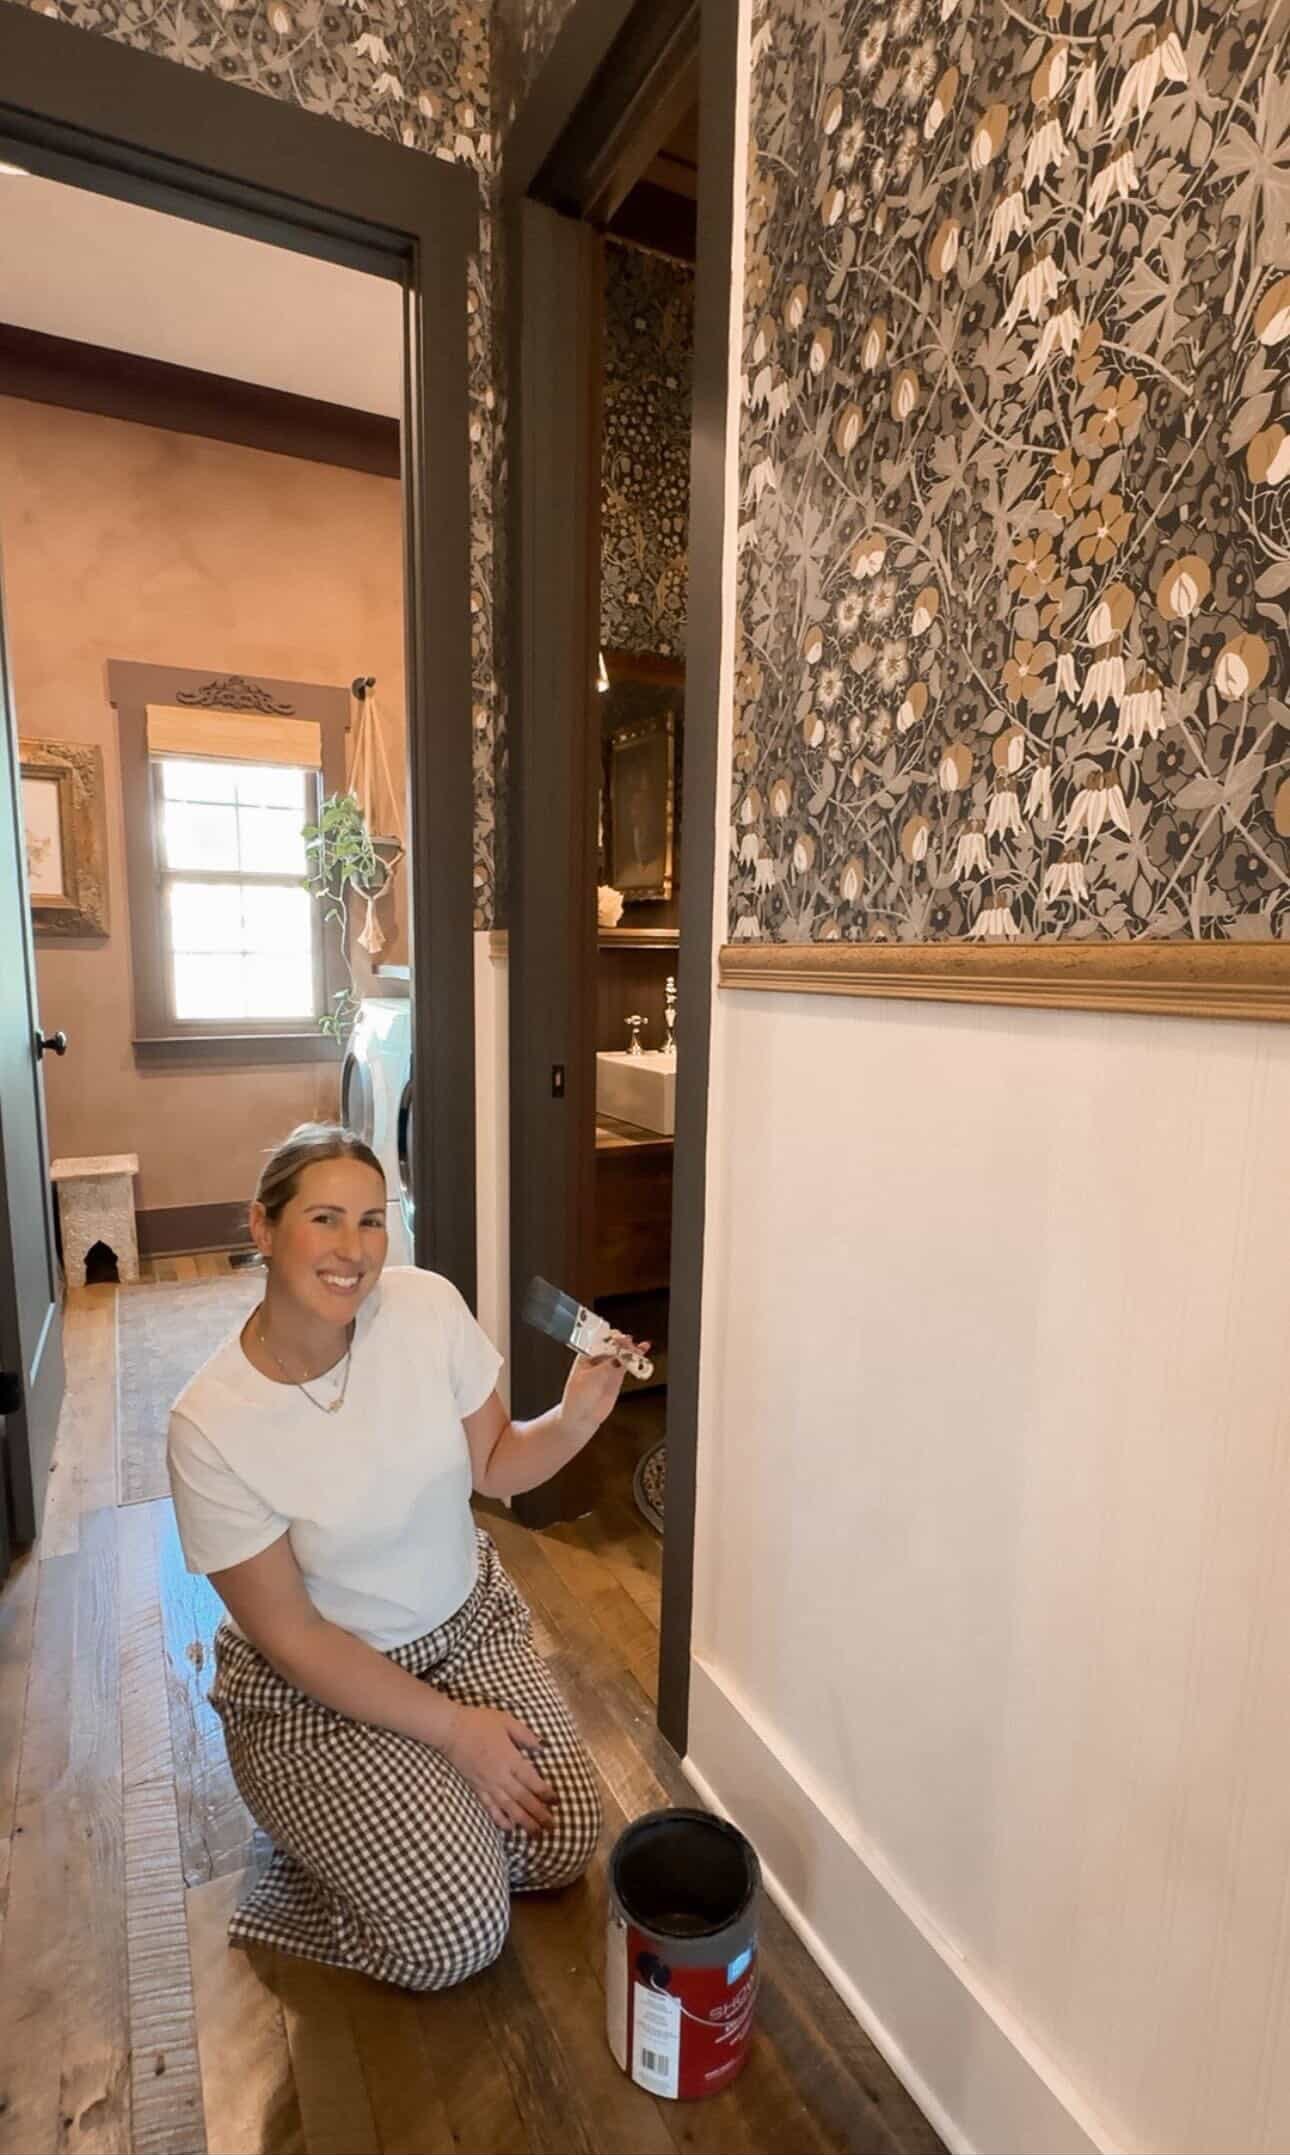
Step 5: Add trim and style the space
I added a decorative trim along the seam between the beadboard and the floral wallpaper to make the join look intentional and polished. Then came my favourite part — styling it with vintage art, gold frames, a slim console table, and a few plants. This is where it really came together.
This DIY beadboard wallpaper project proves that you don’t need power tools or complicated techniques to completely transform a room. It’s quick, beginner-friendly, and surprisingly versatile—perfect for adding character without the commitment of traditional panelling.
End Result
If you’ve been putting off a wall makeover because it felt too overwhelming, this is your sign to go for it. Simple, stylish, and seriously satisfying—this might just be one of the easiest DIY upgrades you’ll ever do.

Creator: Danielle
Instagram: @mama_Layton
TikTok: @daniellelayton94