How to spruce up your current
bathroom on a budget - Part 1
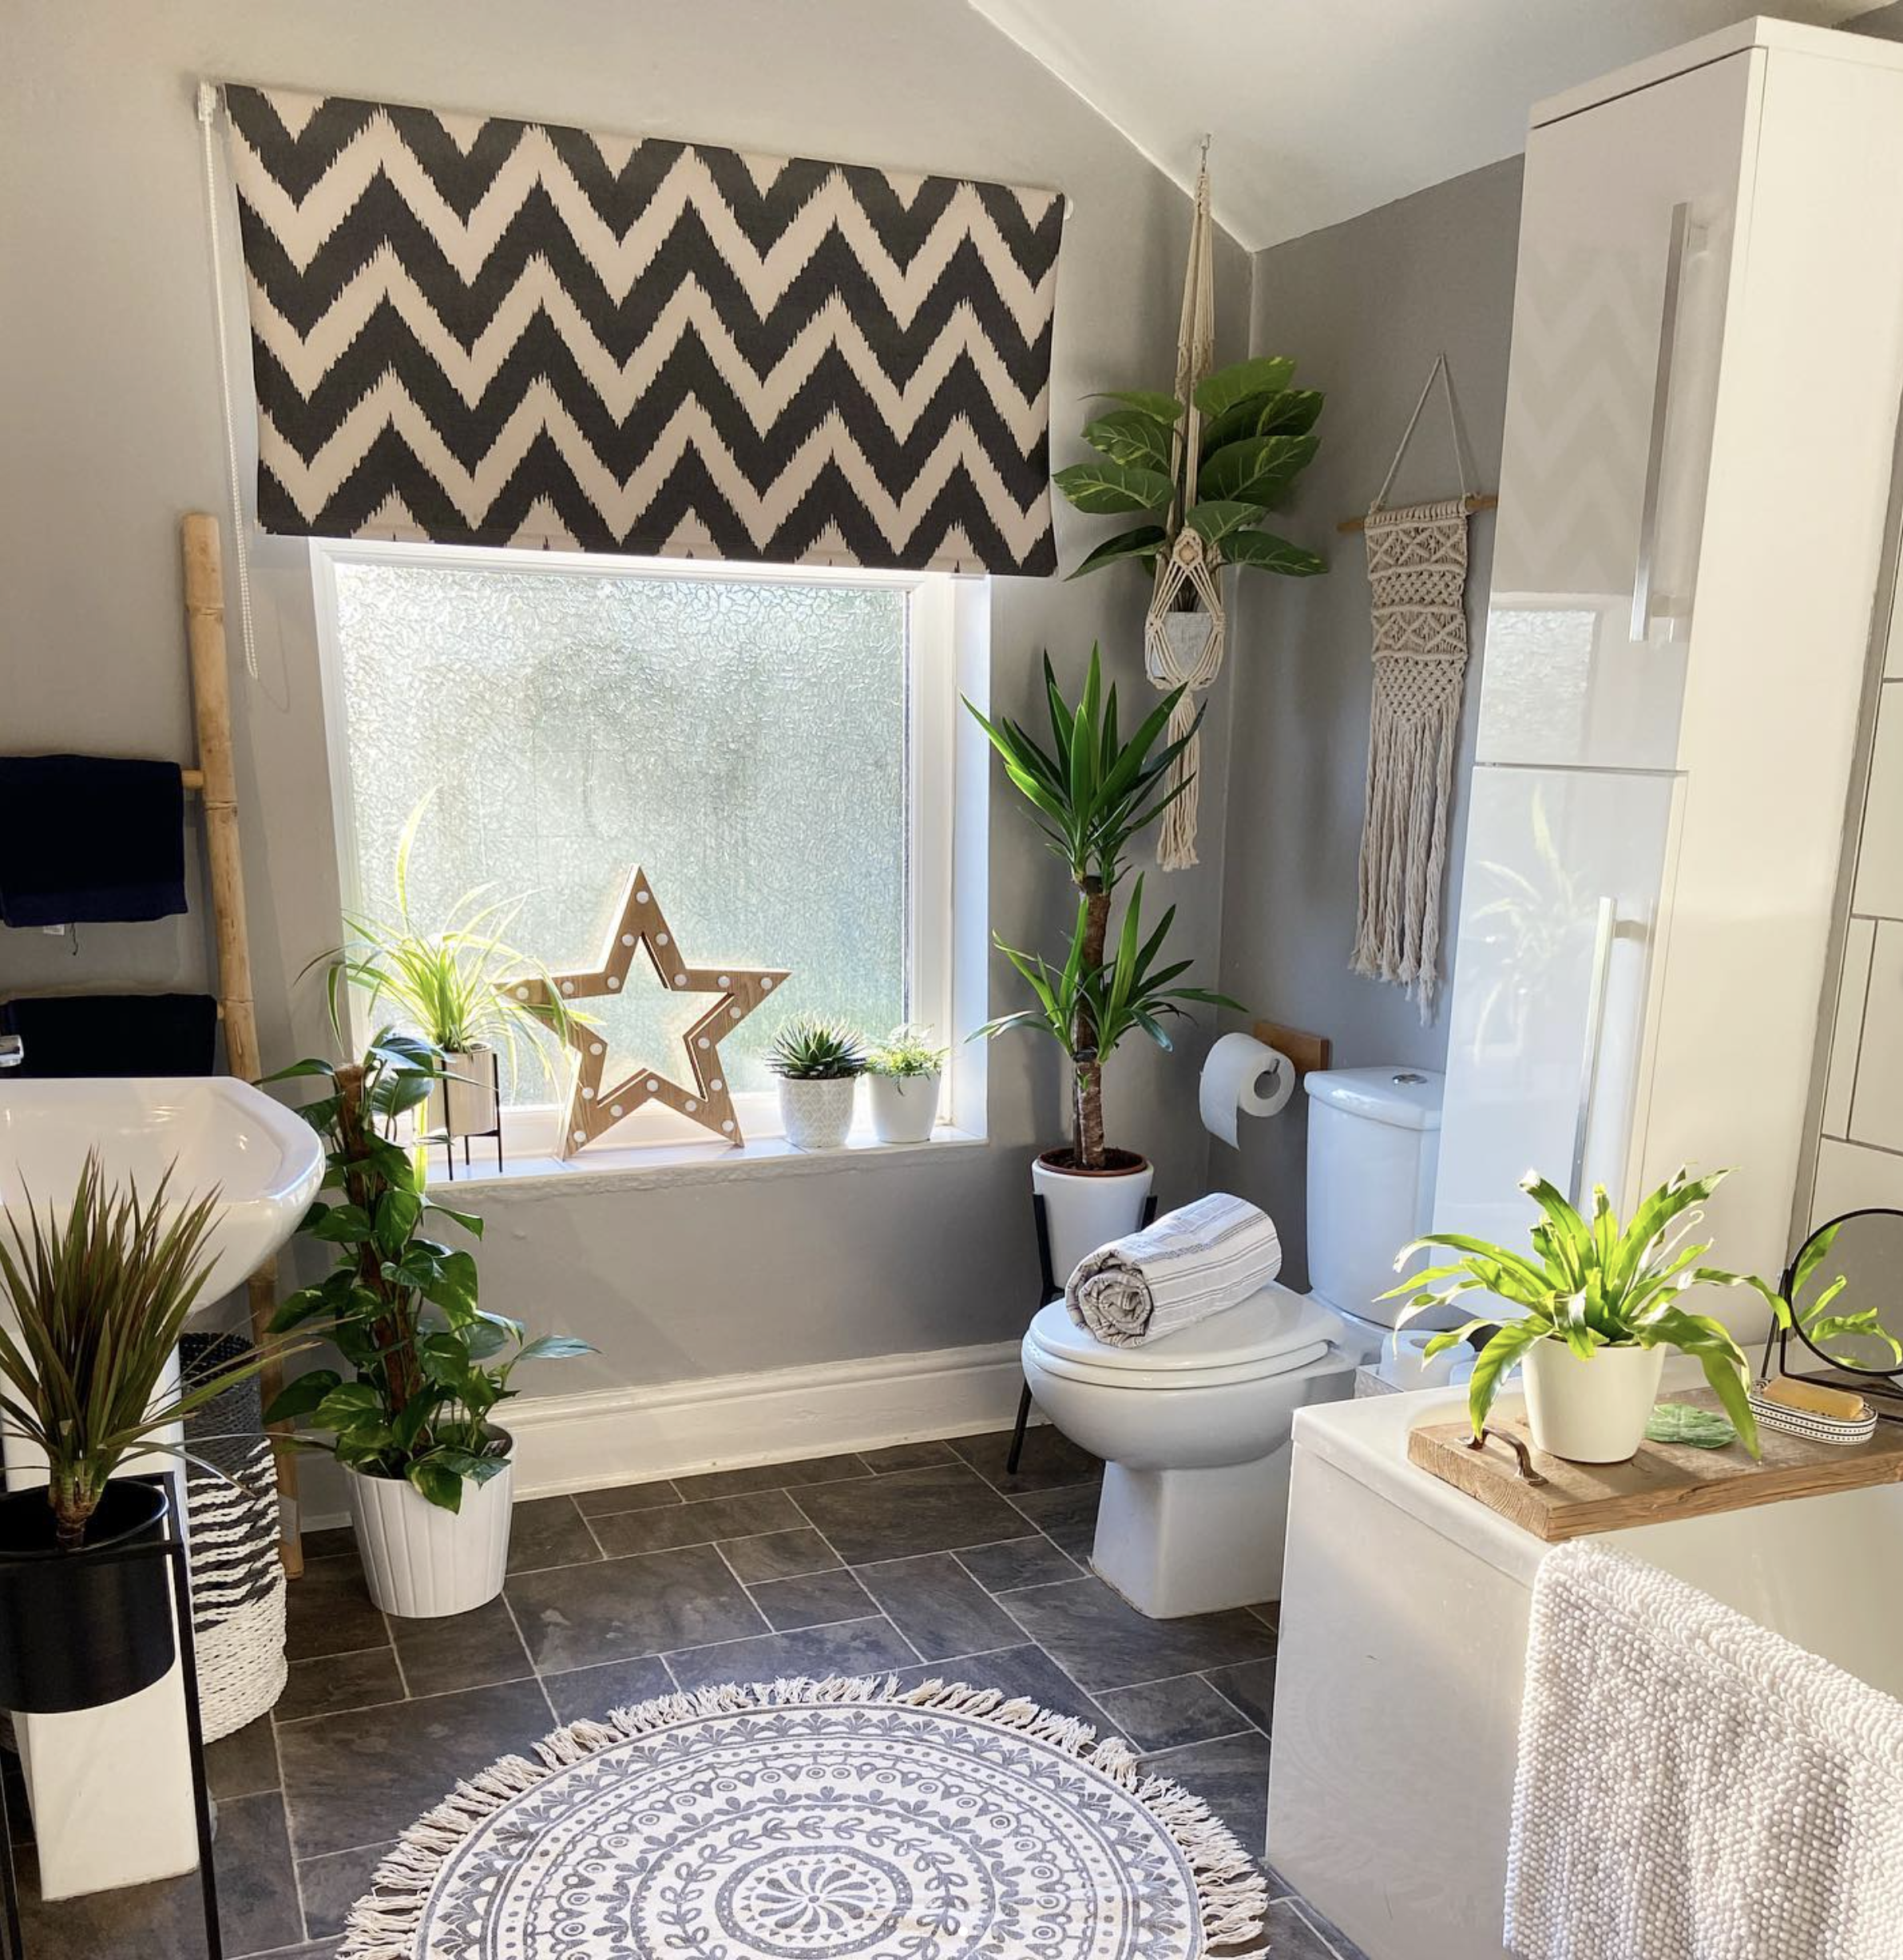
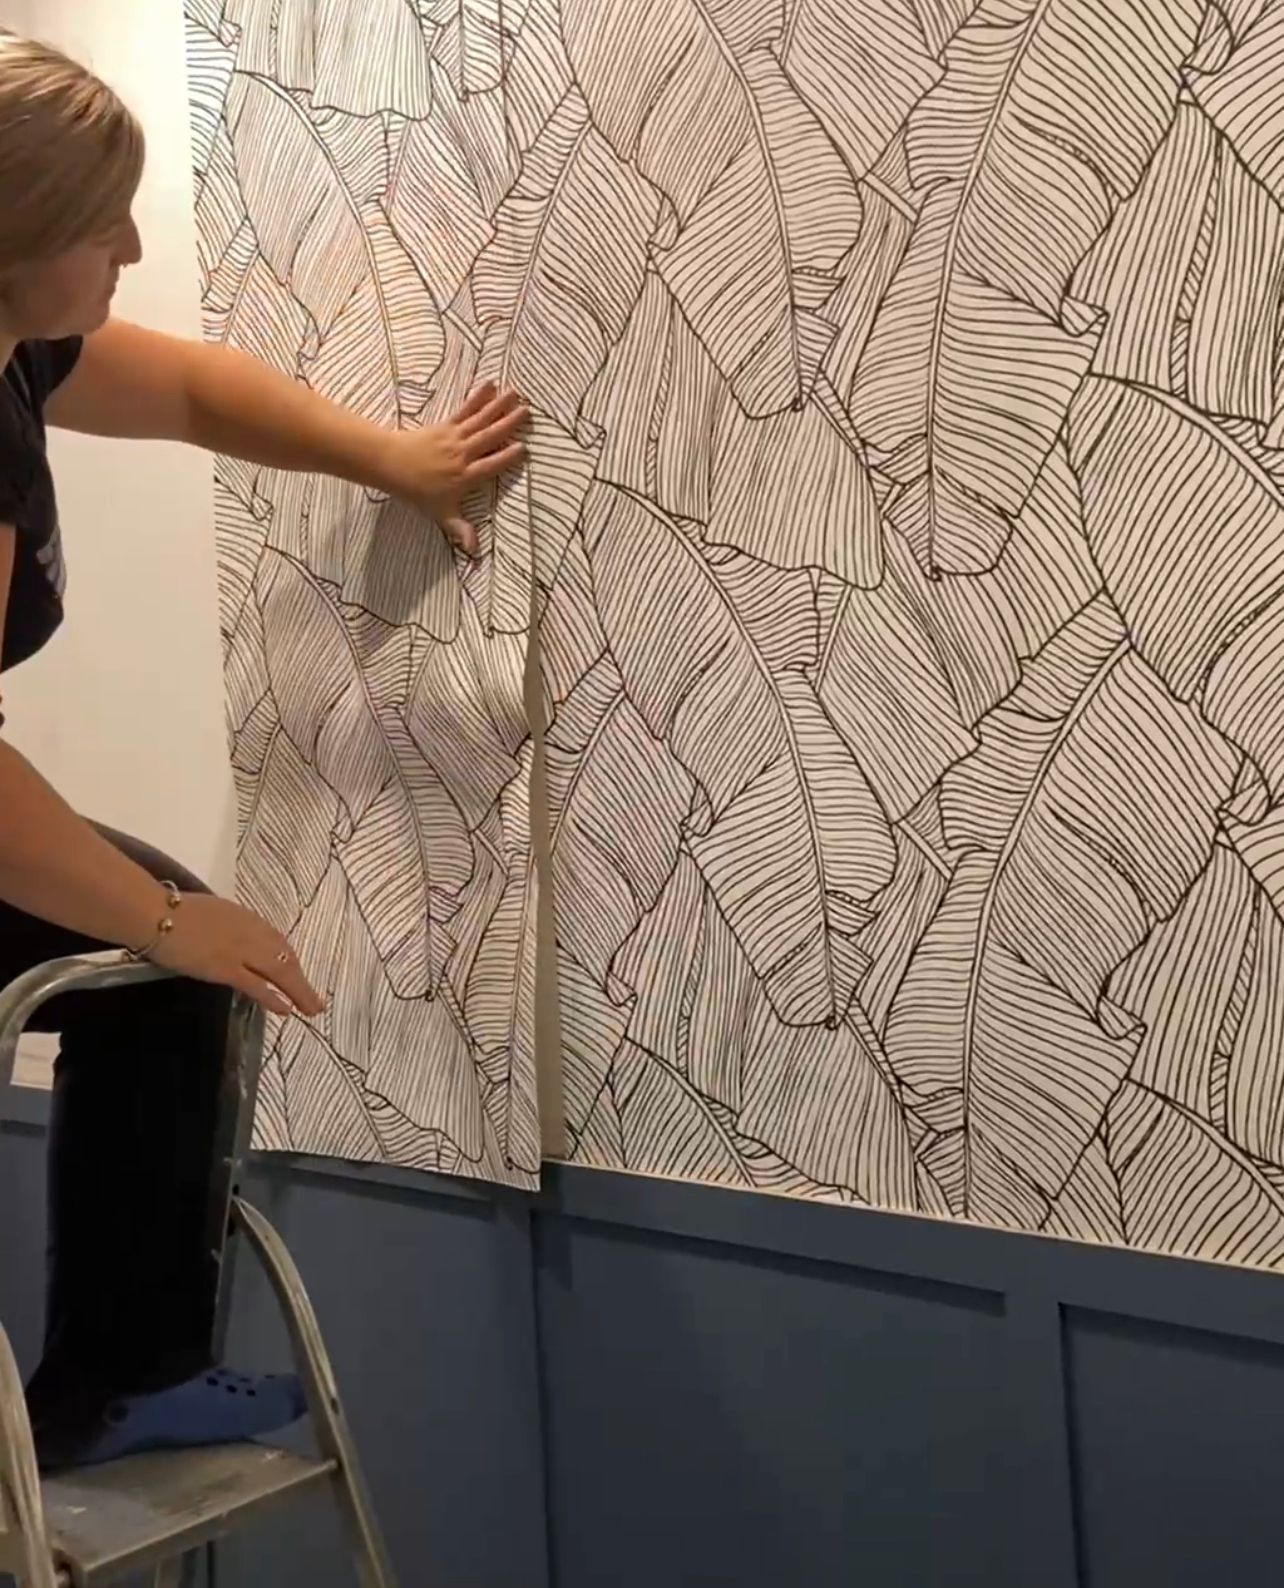
When we moved in the bathroom was okay, nicely decorated like the rest of the house. Grey and plain but it was abit character less for me. So I just did my best to accessorise it up and throw a few plants in there and a rug. But then I was offered a collaboration with ilovewallpaper.co.uk and it was a offer I could not pass up.
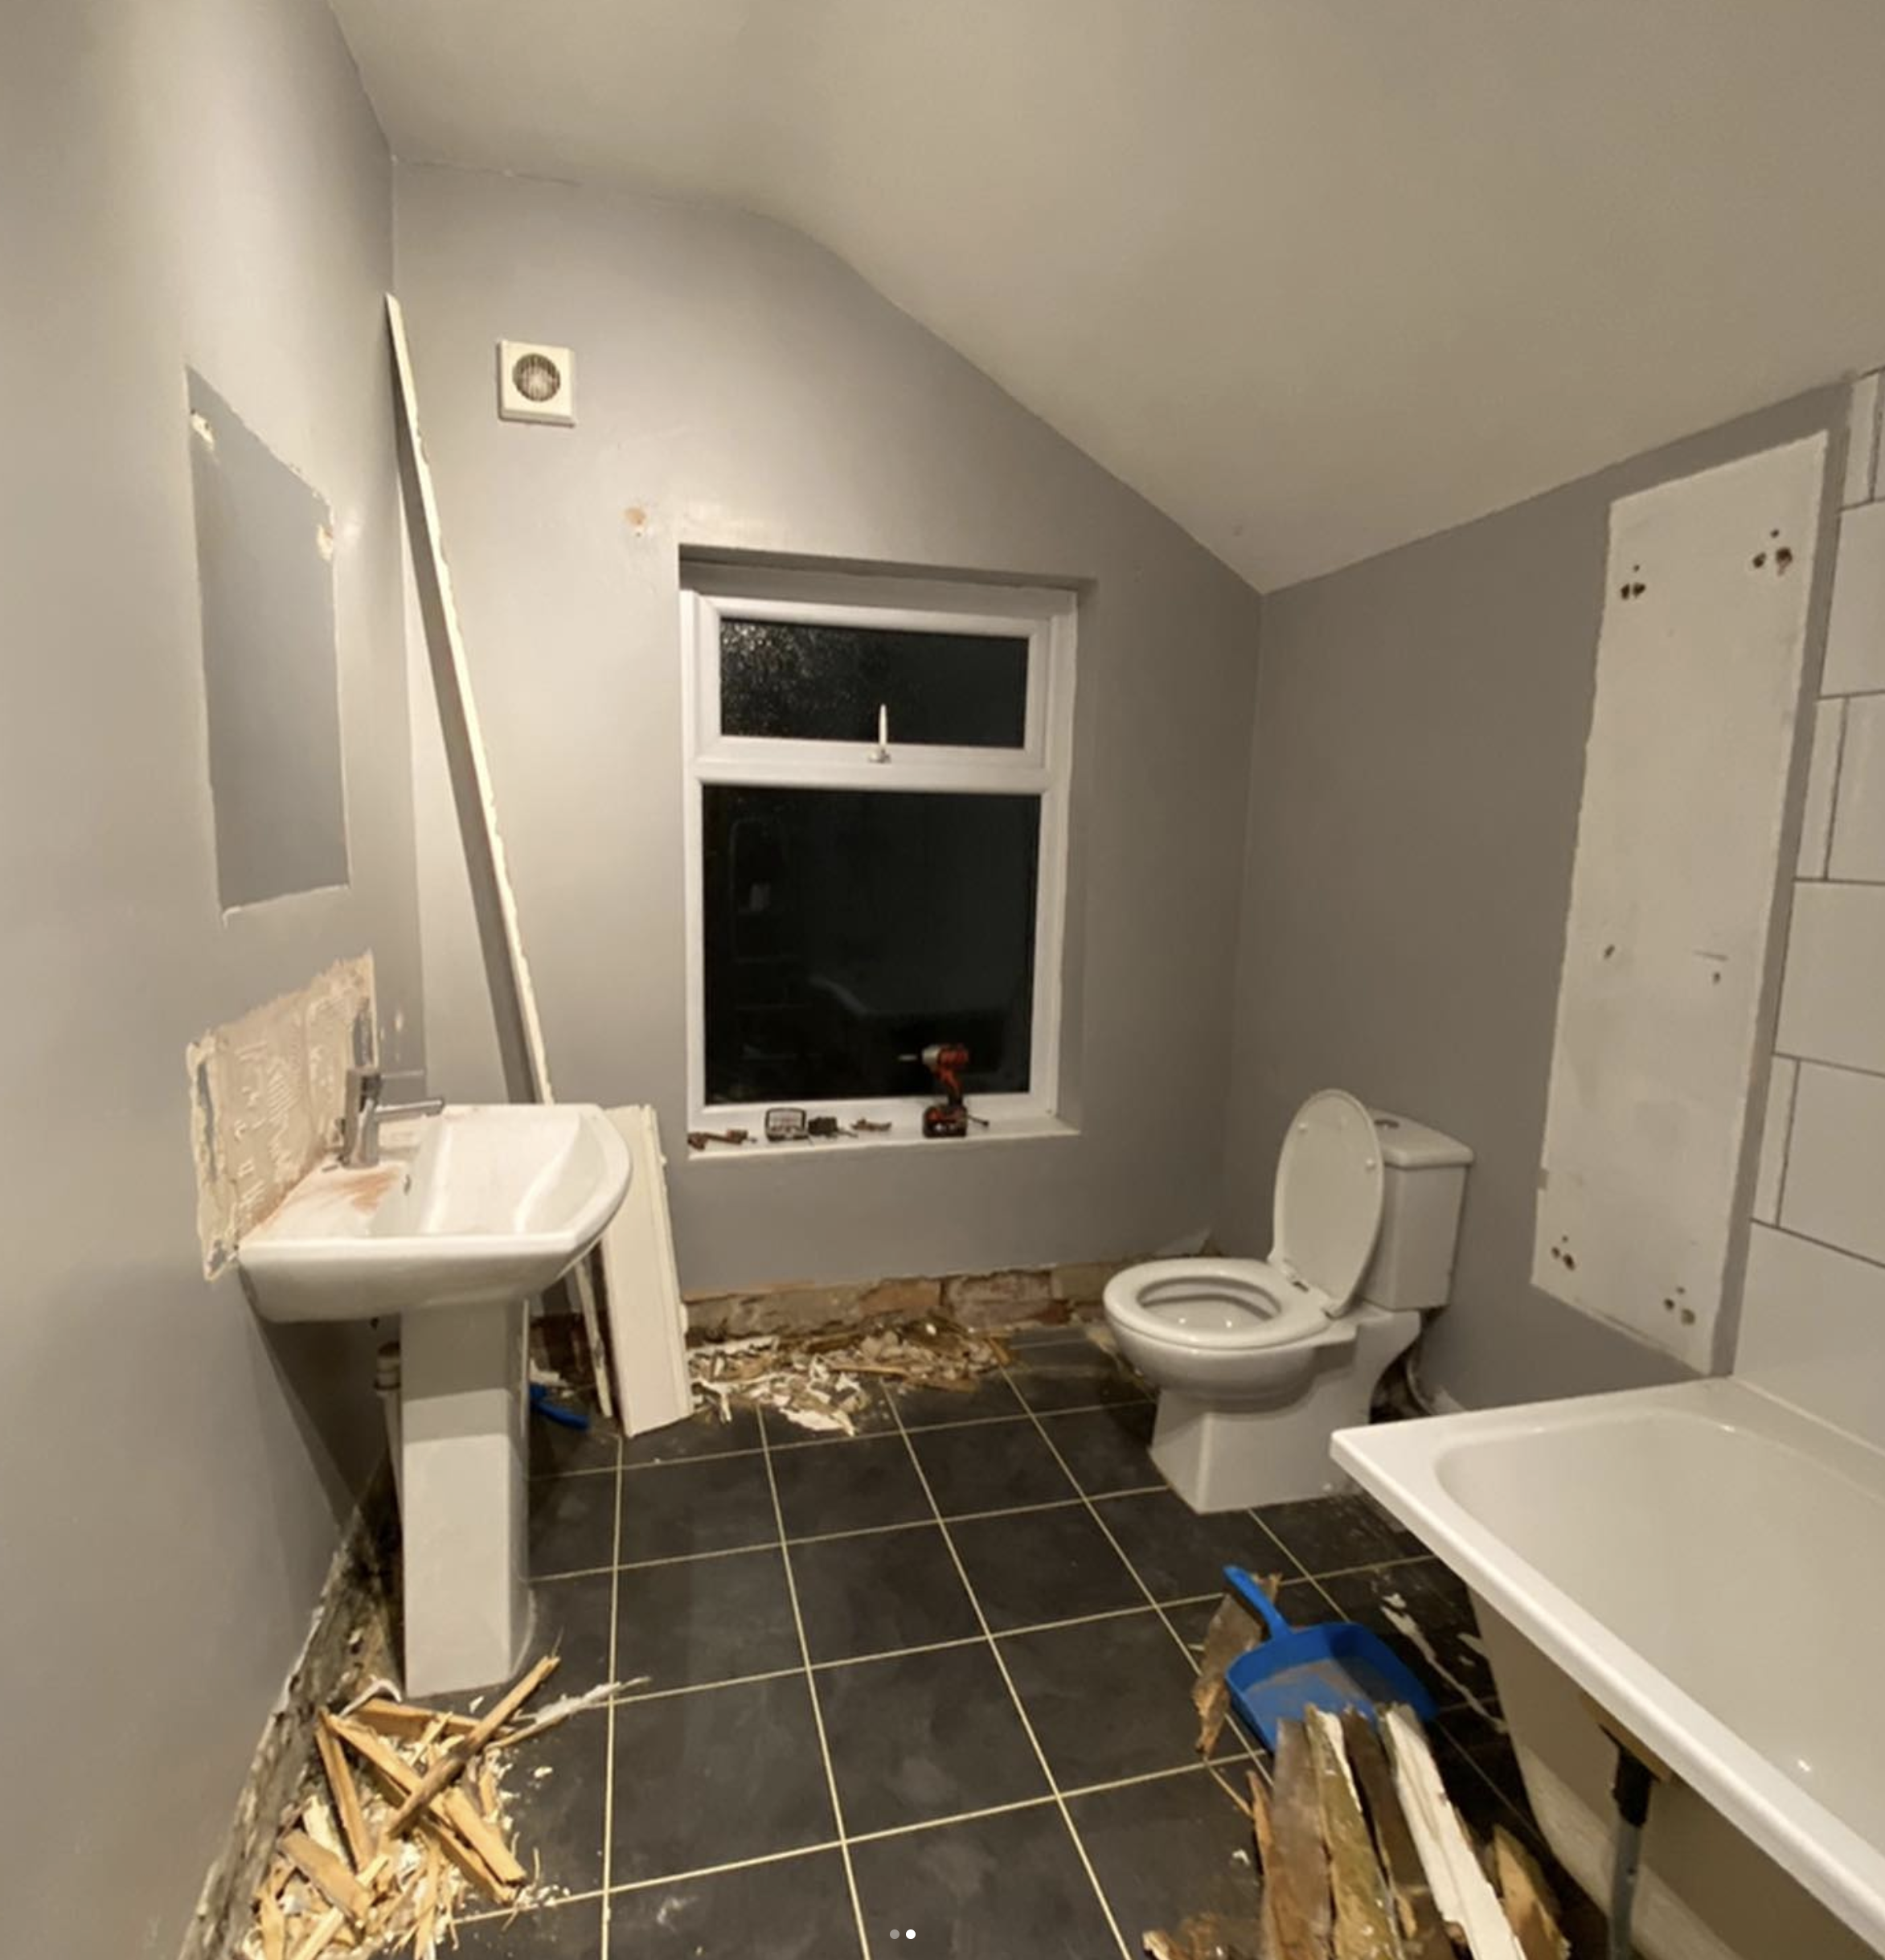
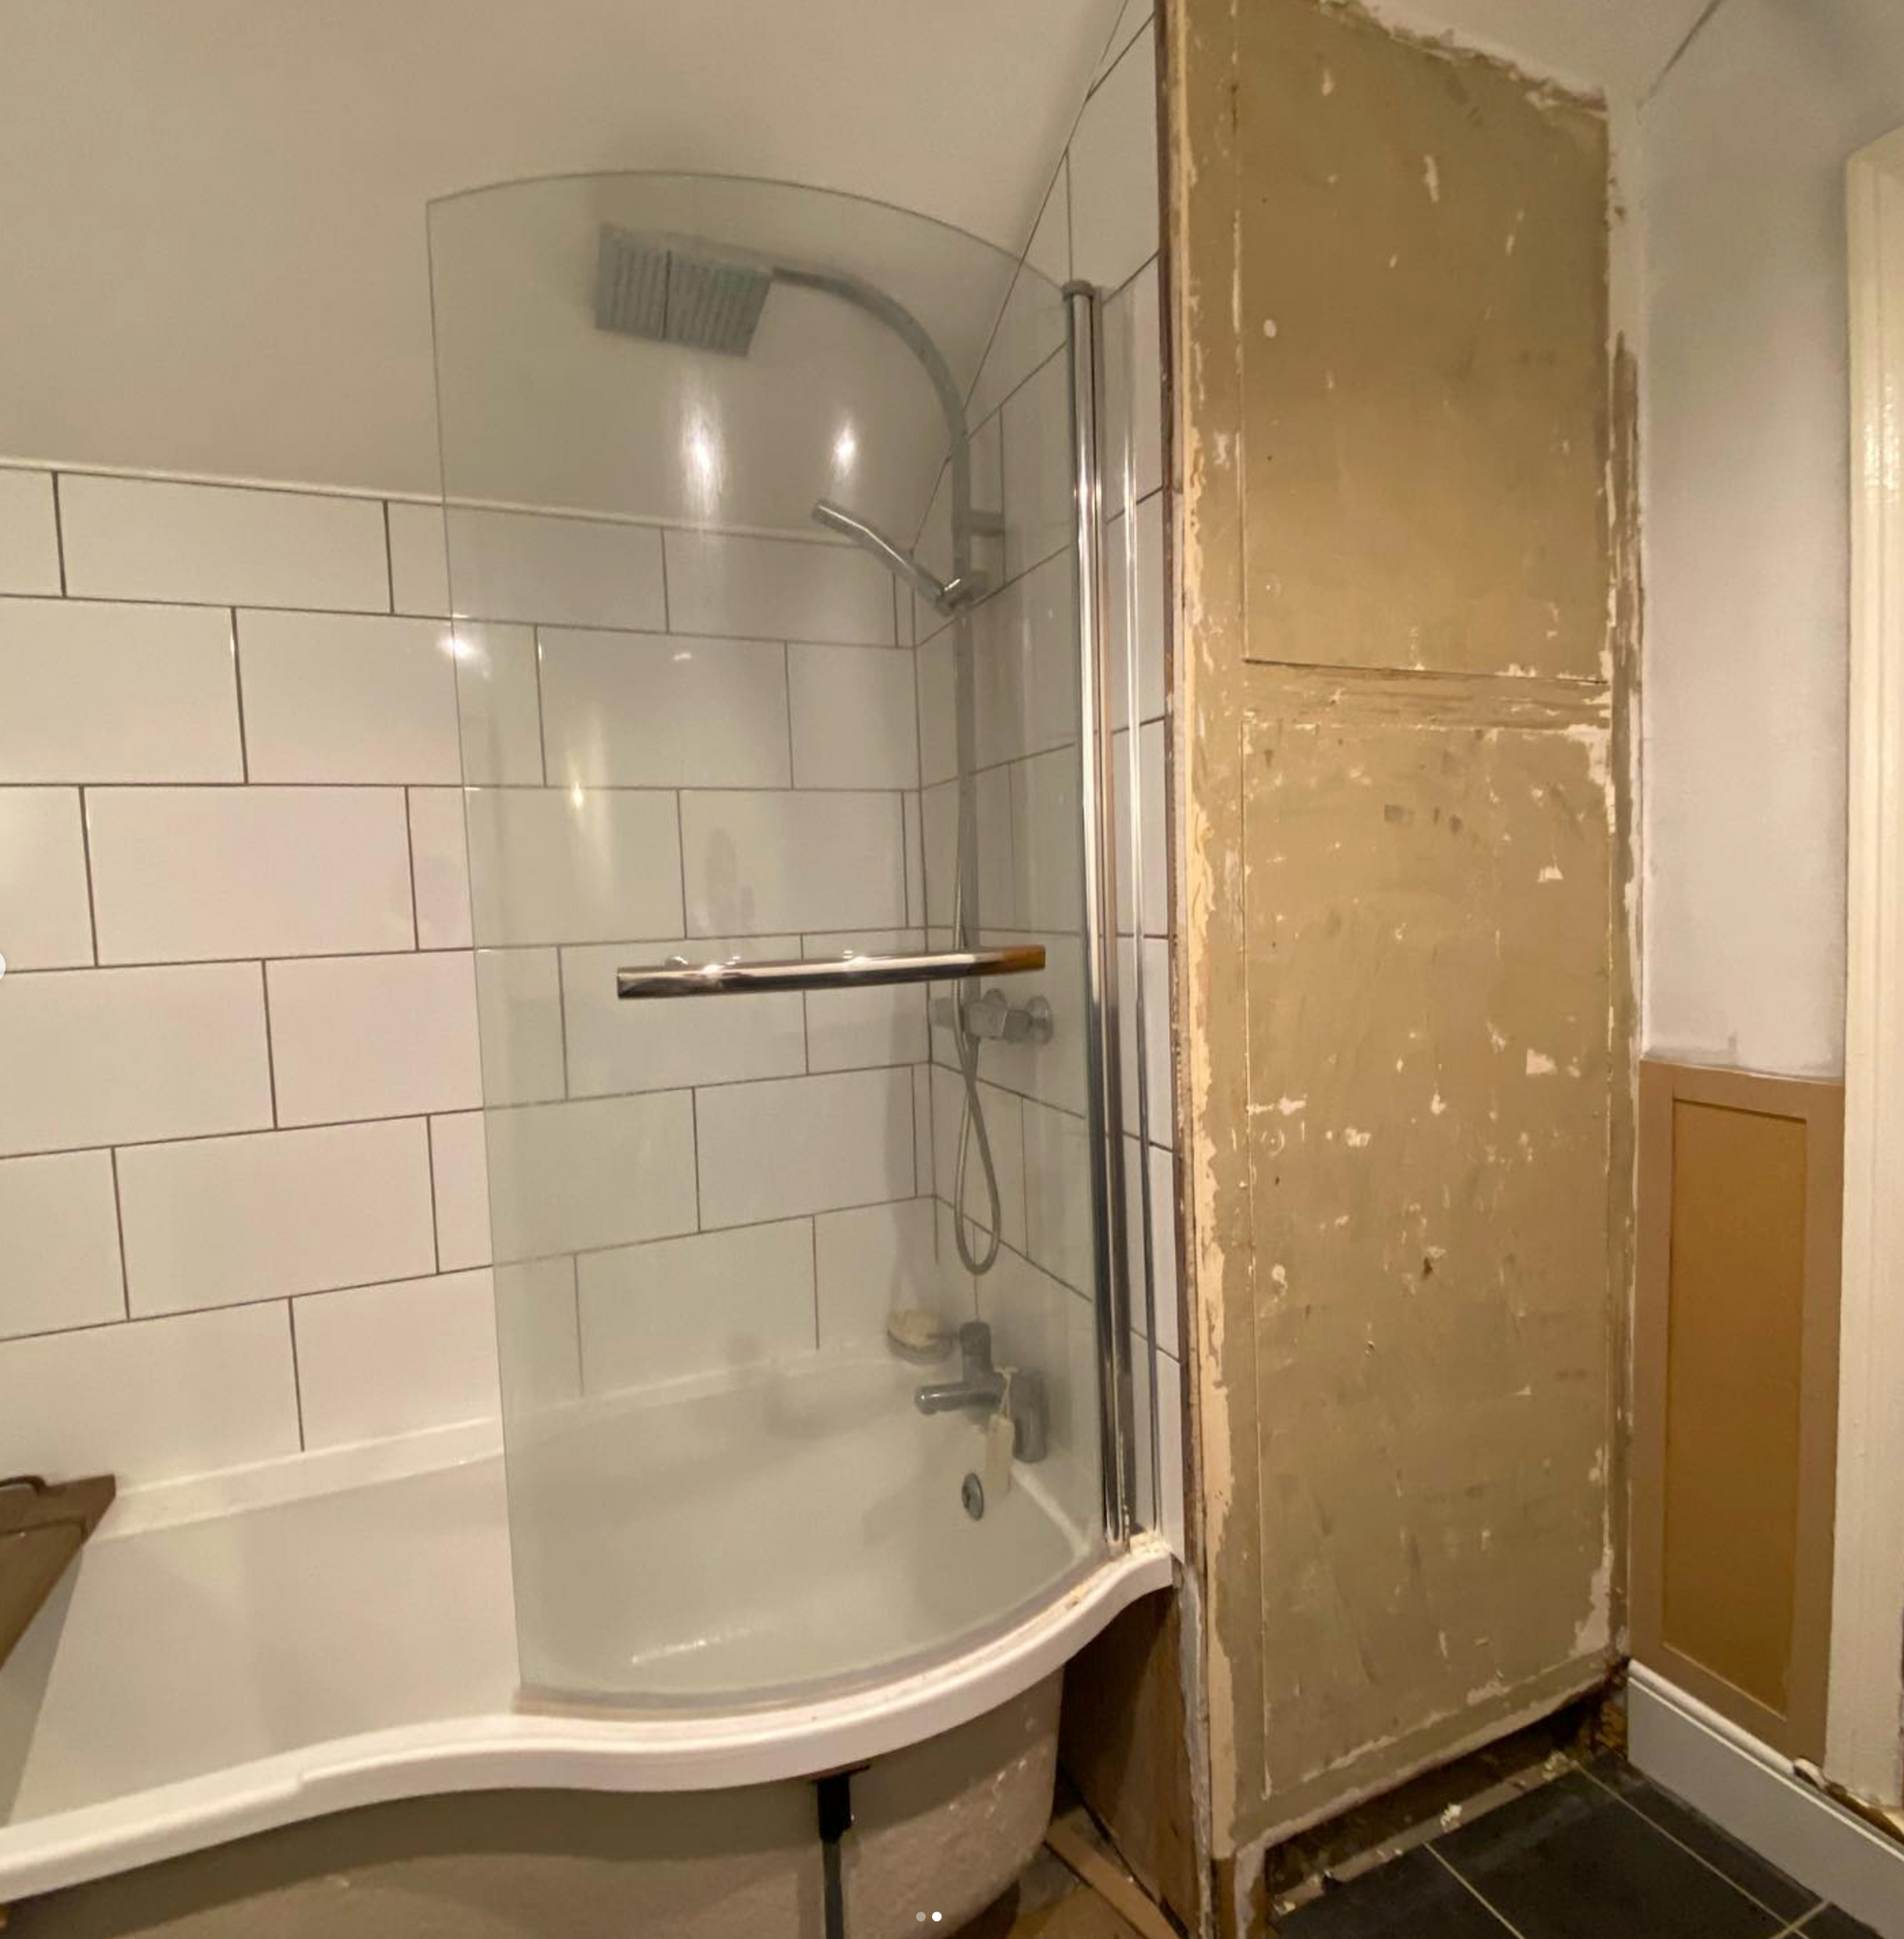
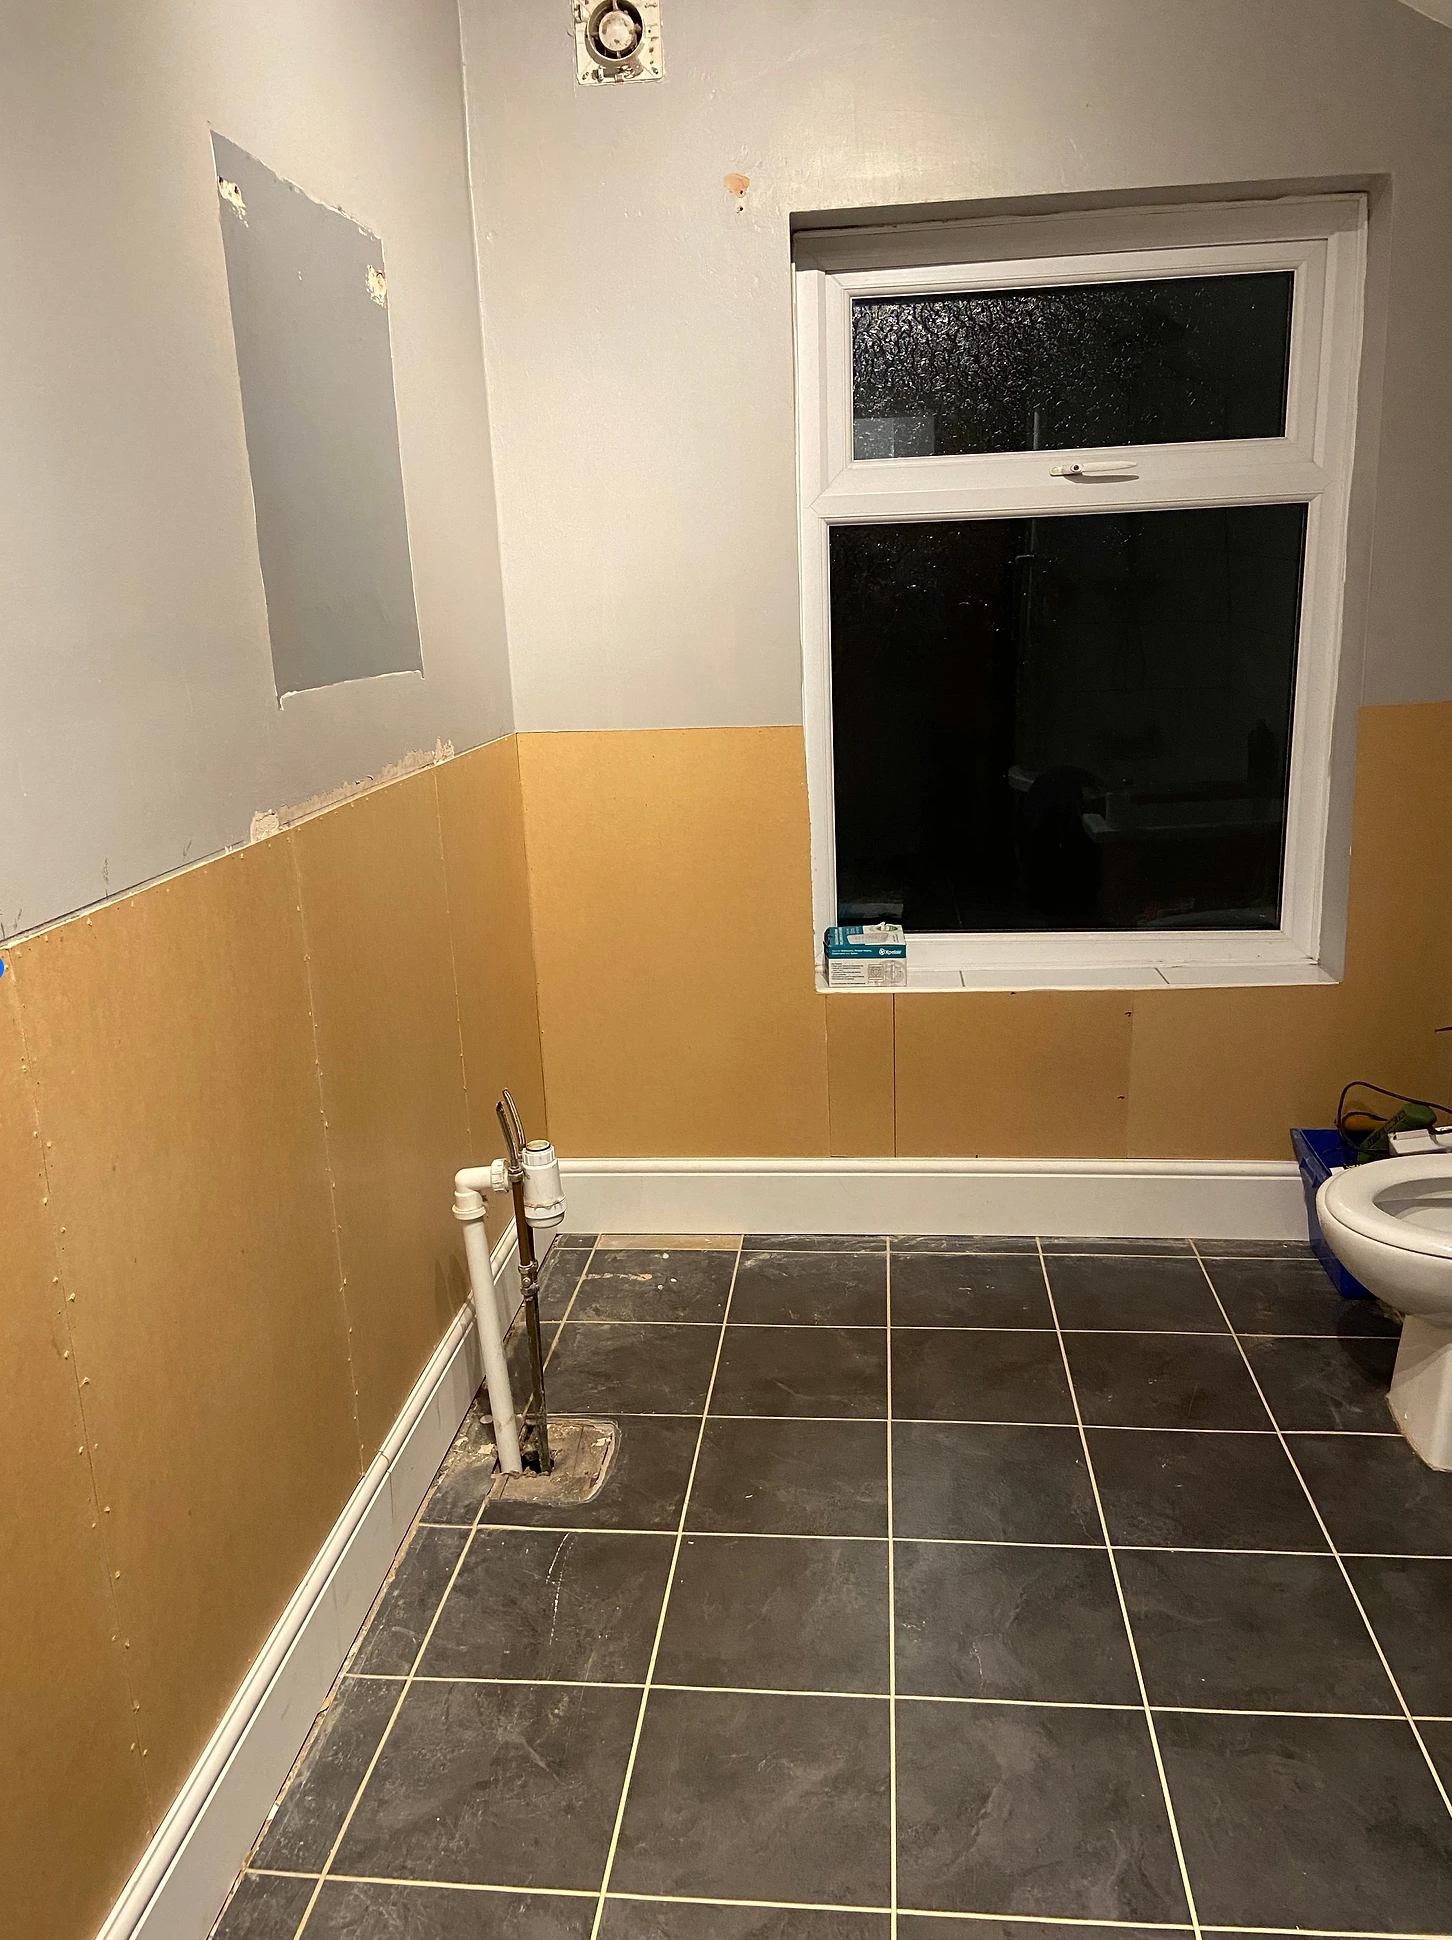
Firstly we had to remove all the old skirting boards. These looked original to the house and they were damaged and rotten in places. Then we removed the tiles above the sink area, as I had a plan was to use an old chest of drawers as a vanity unit. Also the white high gloss unit has to go. It looked nice from a distance but inside there was rusty metal brackets, that would not clean up!
So the bathroom got worst before looking better!
We removed the old plastic bath panel and managed to salvage this cupboard. By stripping of the old gloss off and my idea was to maybe clad them to make them look abit nicer, as it would have been expensive to replace these.
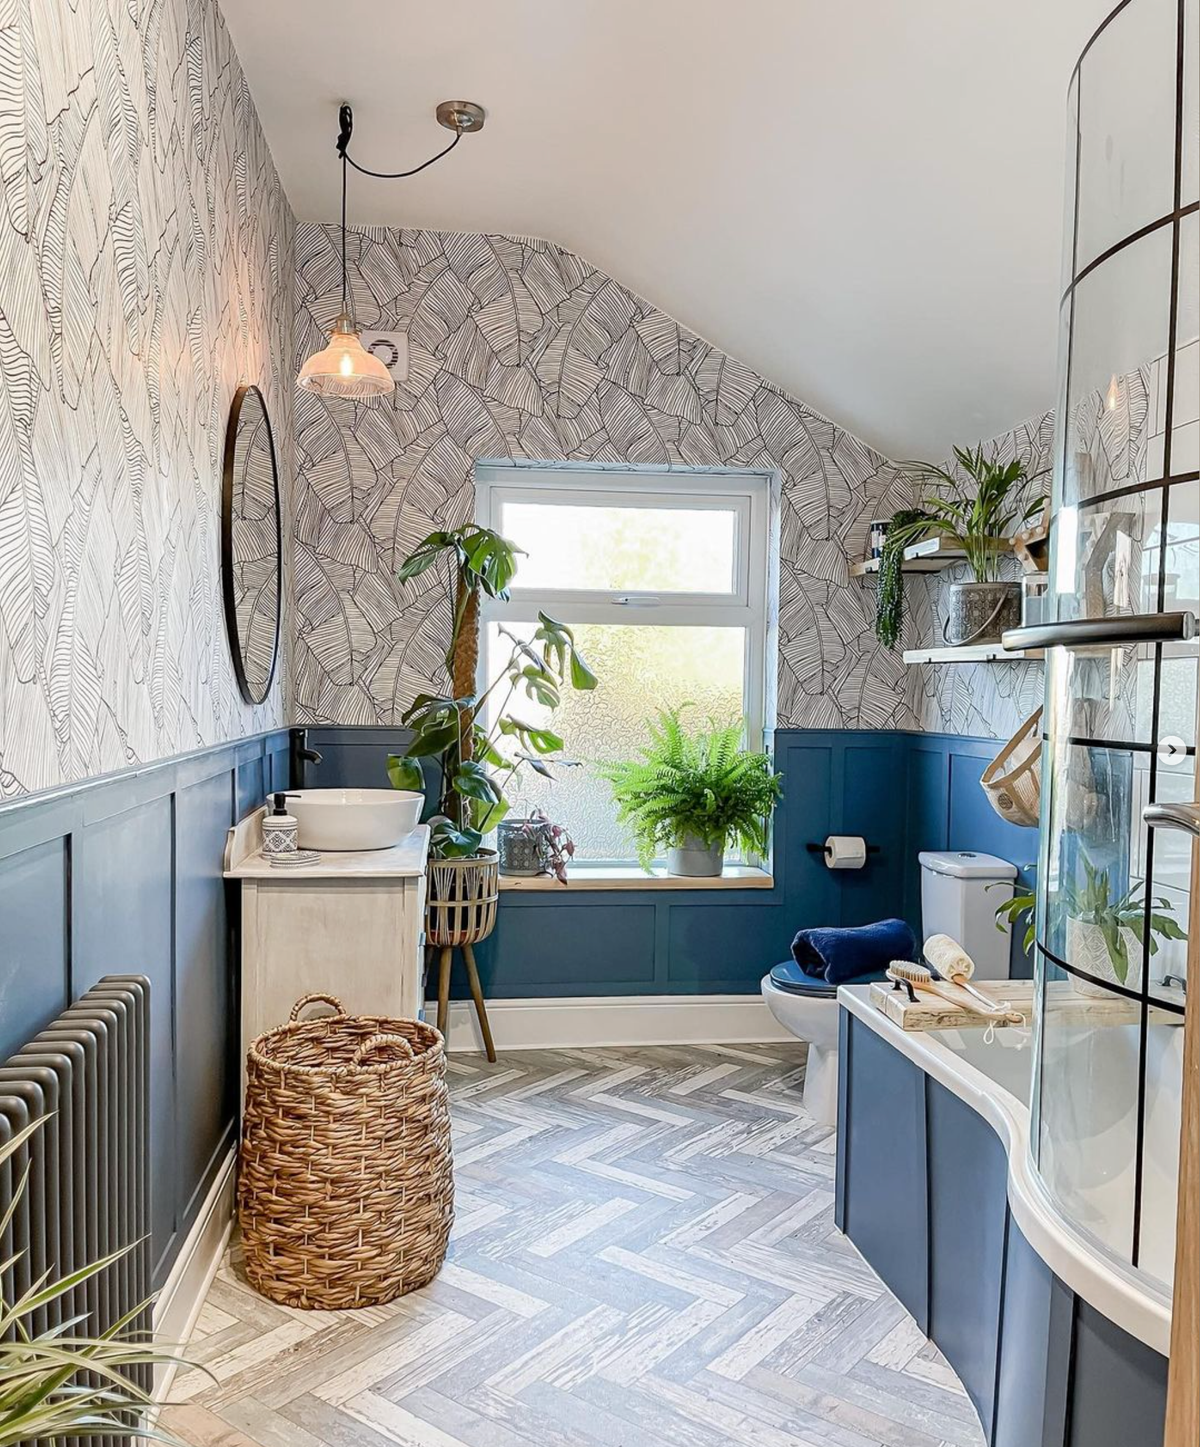
My overall idea was to clad the bottom half of the room and wallpaper the top. So we used grab adhesive and a nail gun to fix the hardboards in place along the bottom of the room on top of the newly fitted skirting boards.
Then we cut up a large sheet into strips to cover the joins.
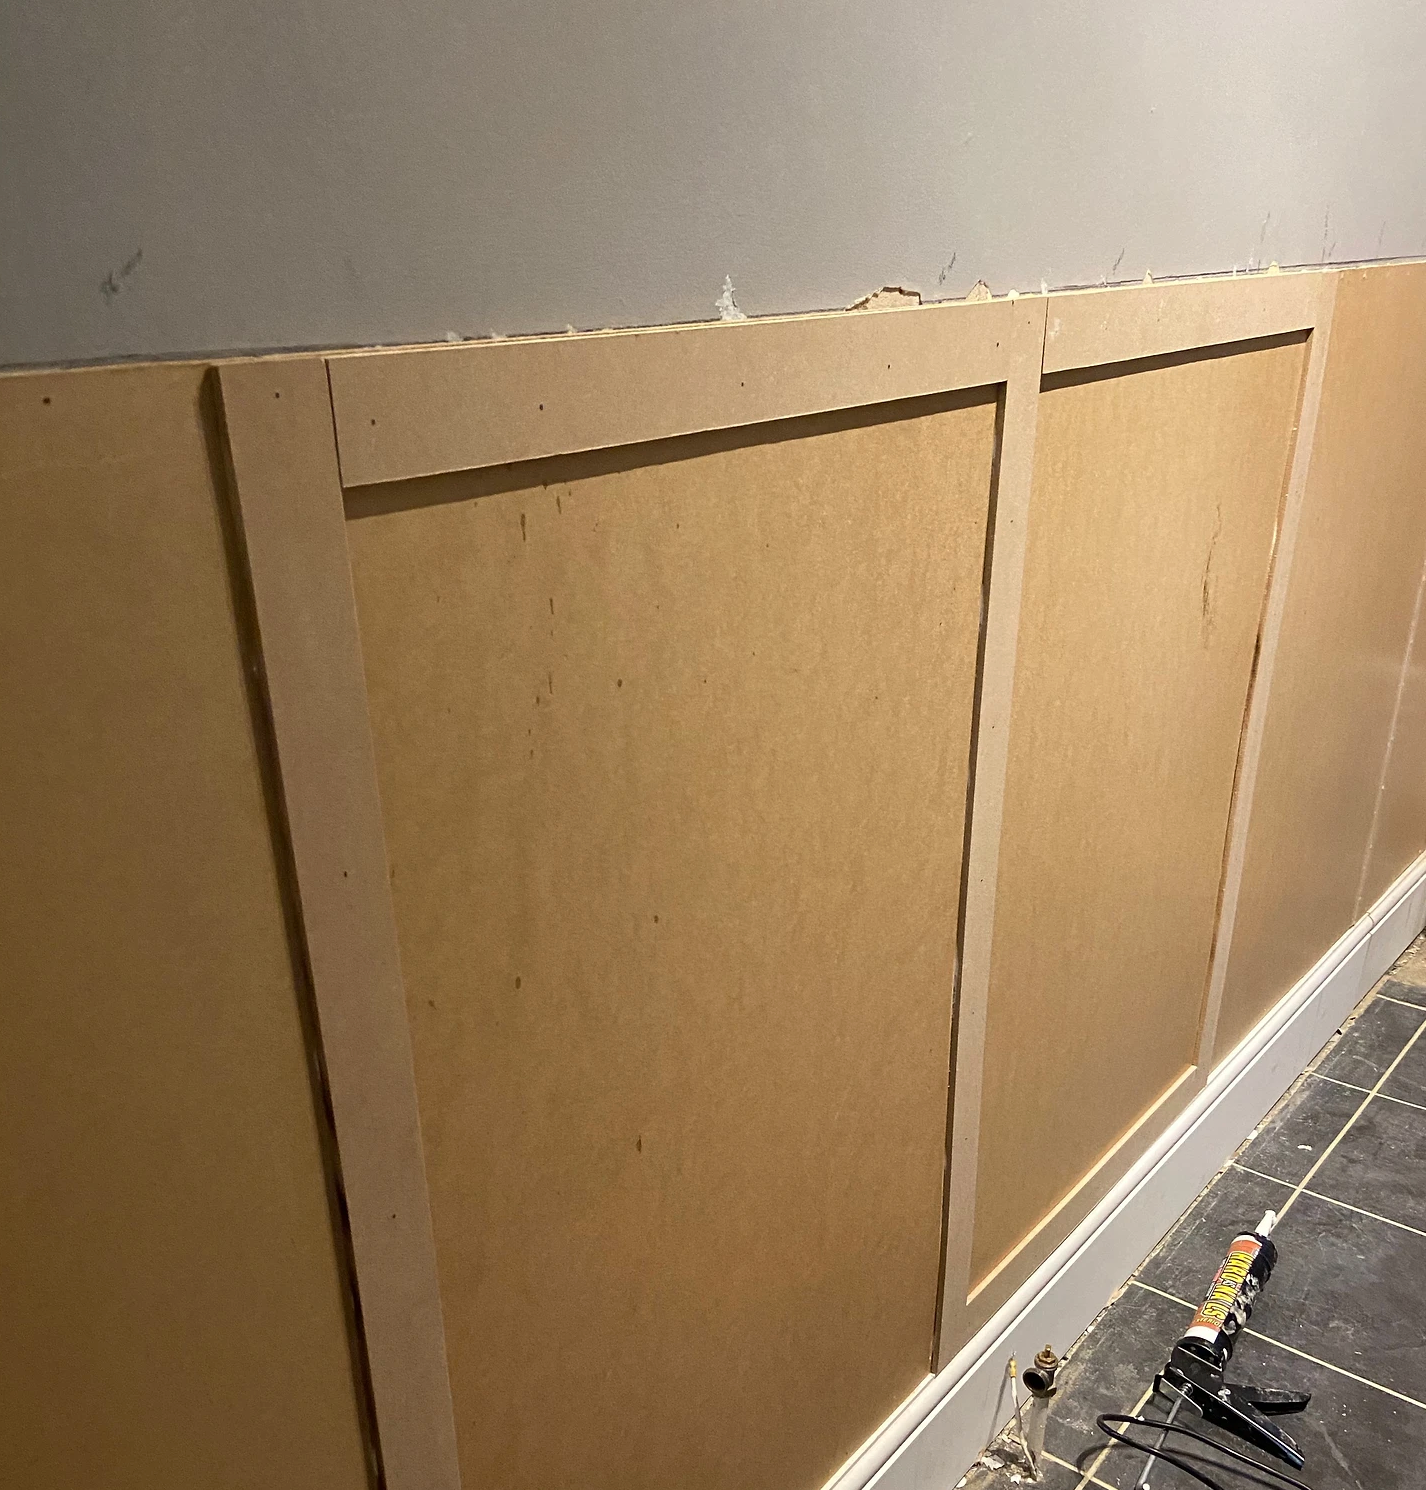
We also grab adhesive to fix these. It was looking better already.
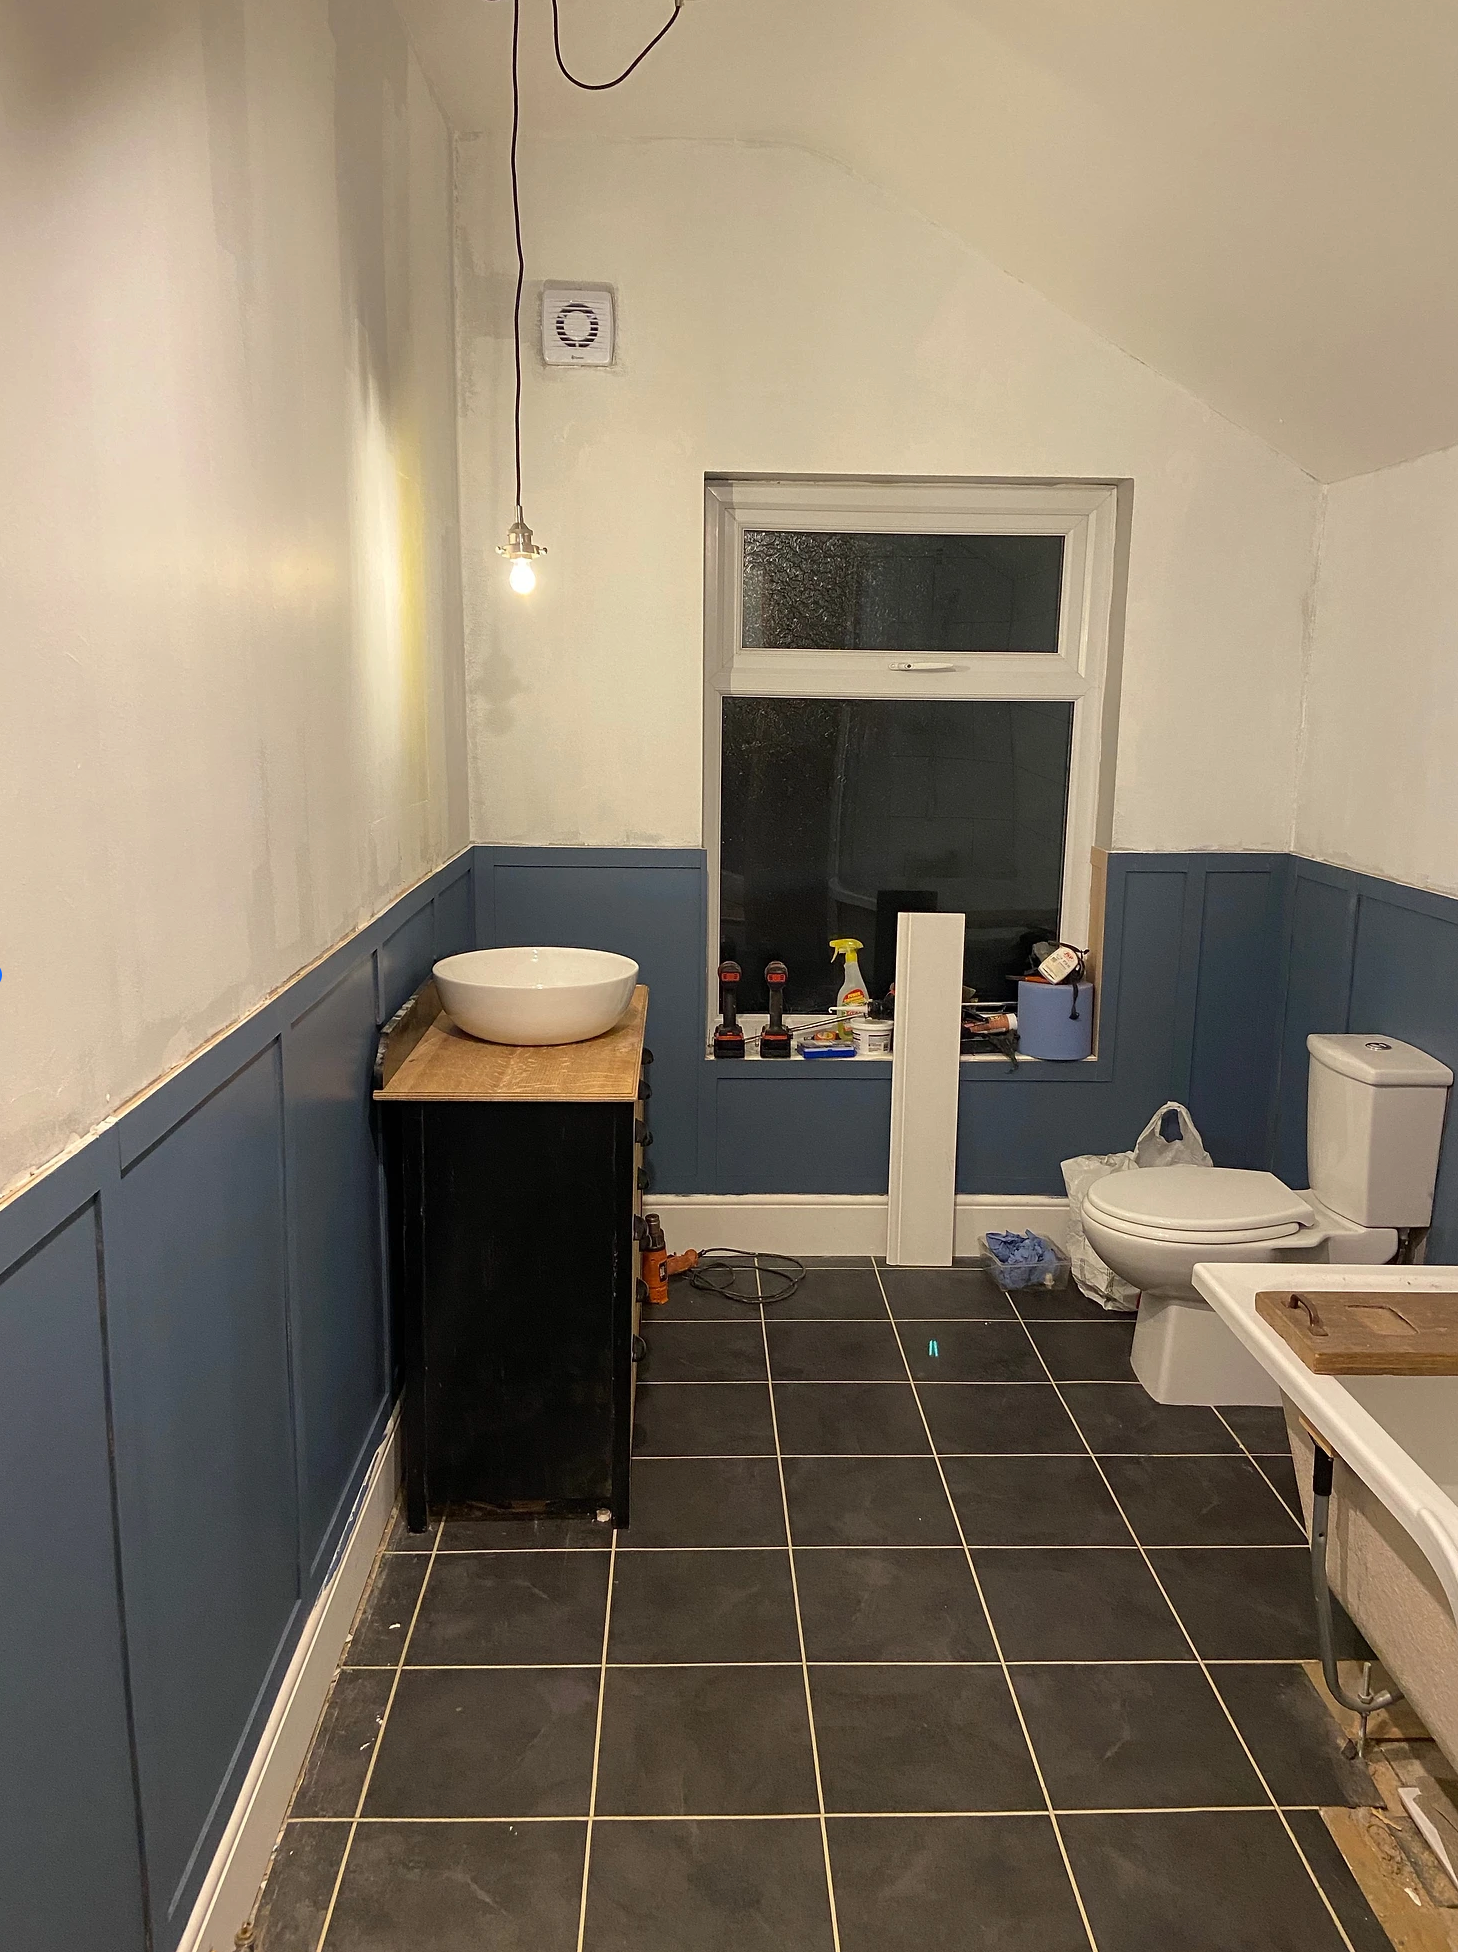
Progress, we painted the panelling in a wipeable bathroom emulsion and painted the walls in bathroom brilliant white emulsion, as the wallpaper had a white background and the grey might have shown through the paper.
We also added a hanging light fitting where I was hoping to hang a mirror above my upcycled vanity. (See DIY vanity unit post)
Back to those ugly doors in the corner. We used the same hardboard to clad them and make them blend in more with the panelling around the room.
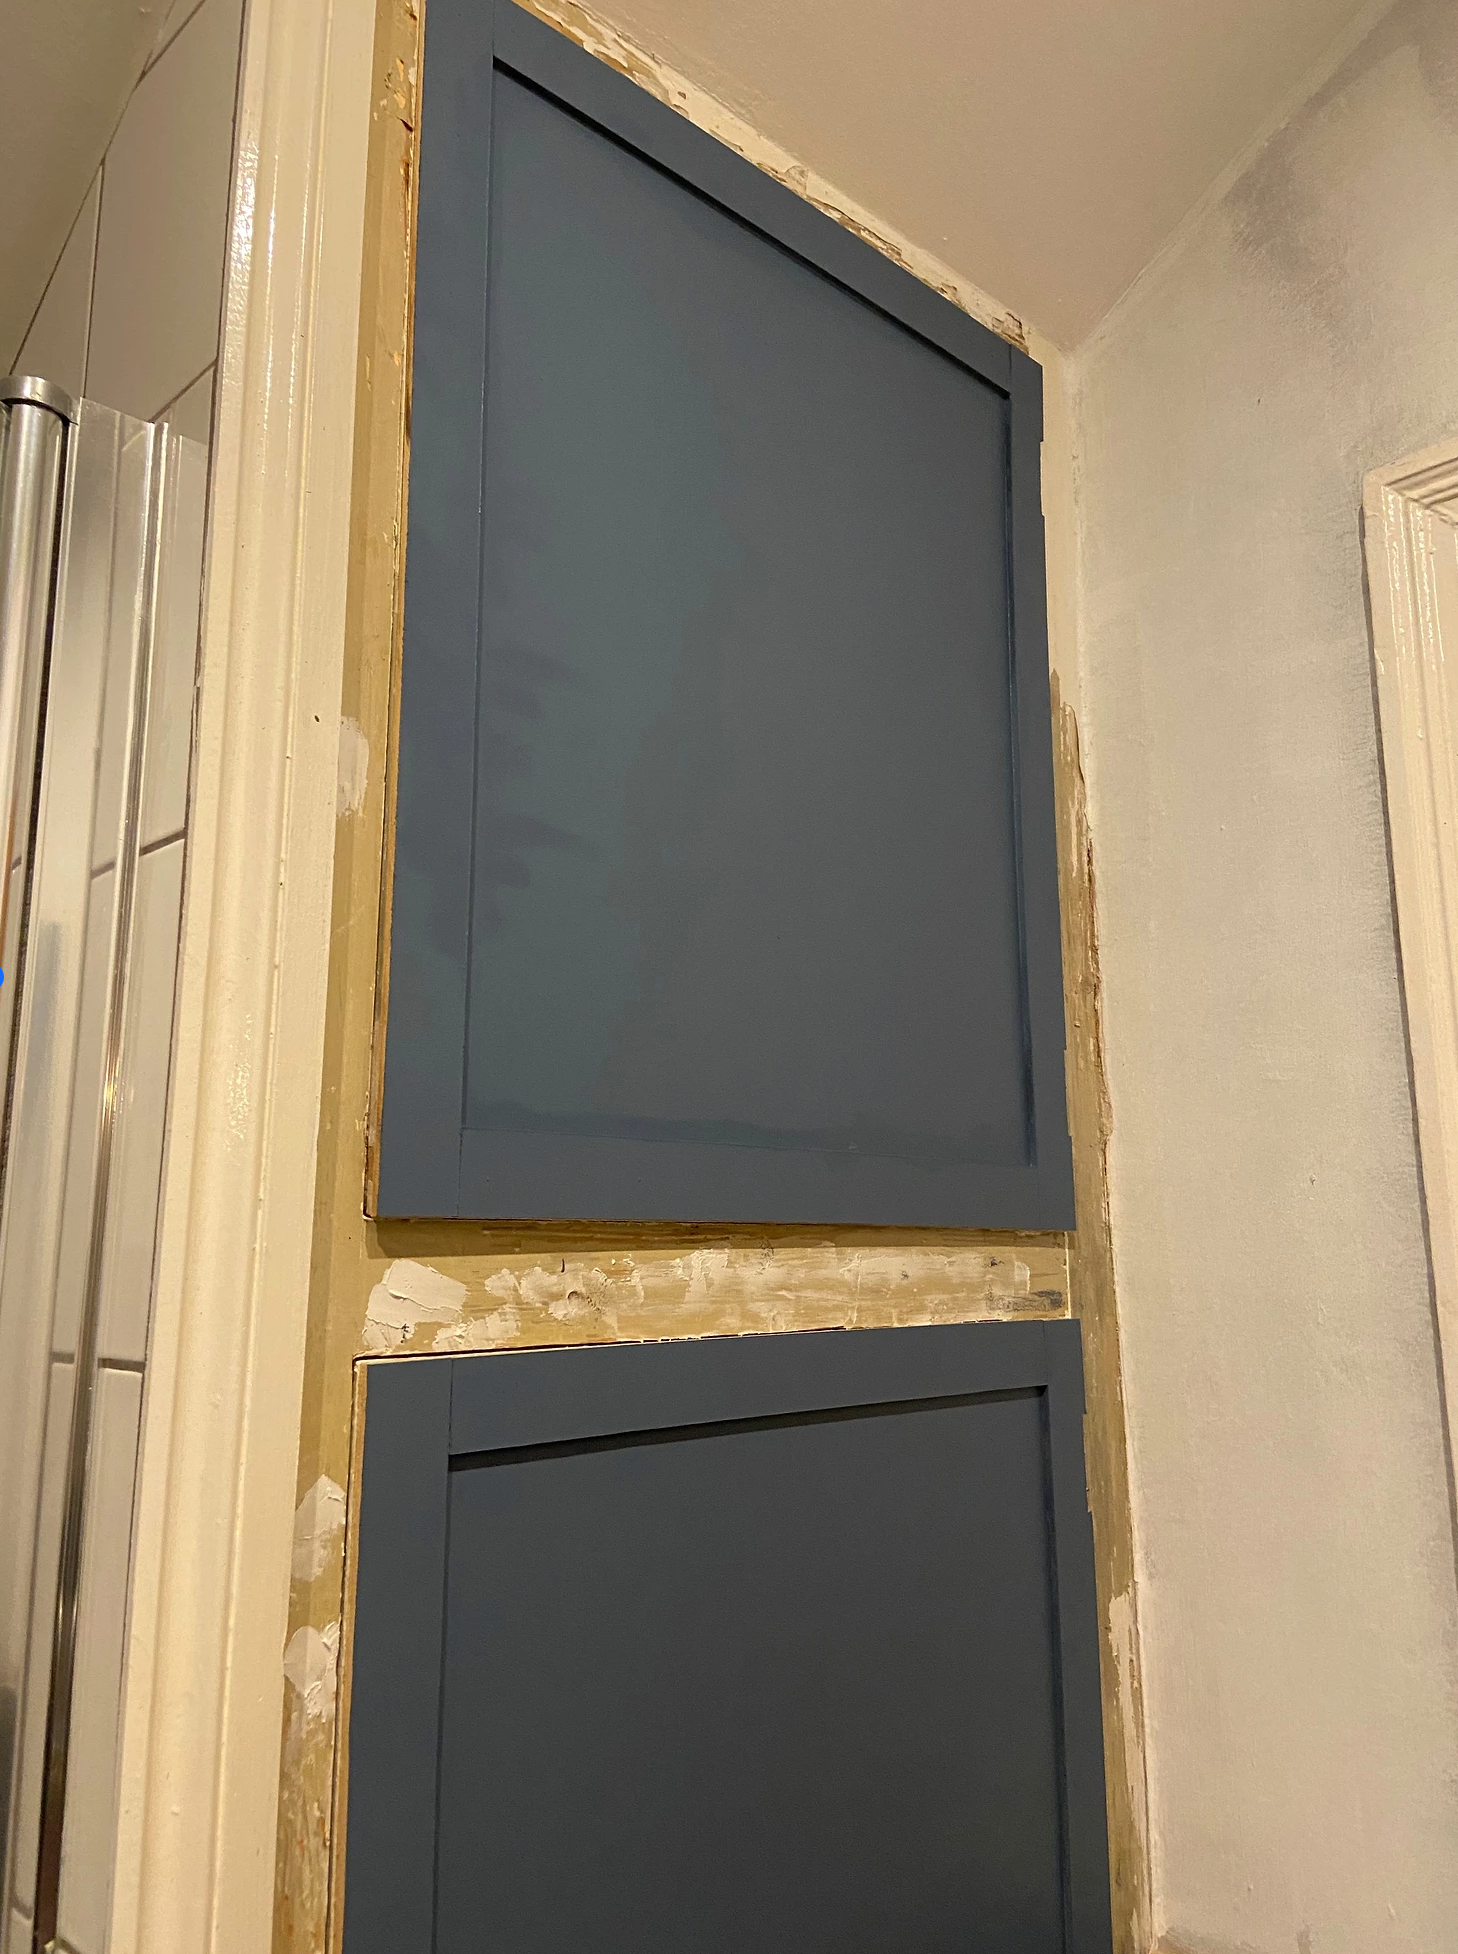
They look so much better than before, we just had to prep the wood frame around them with wood filler, as we were not cladding this part. We recycled the handles from the white gloss cupboard we removed and sprayed them black. As well as the shower screen handle. (See washi tape crittal hack post)
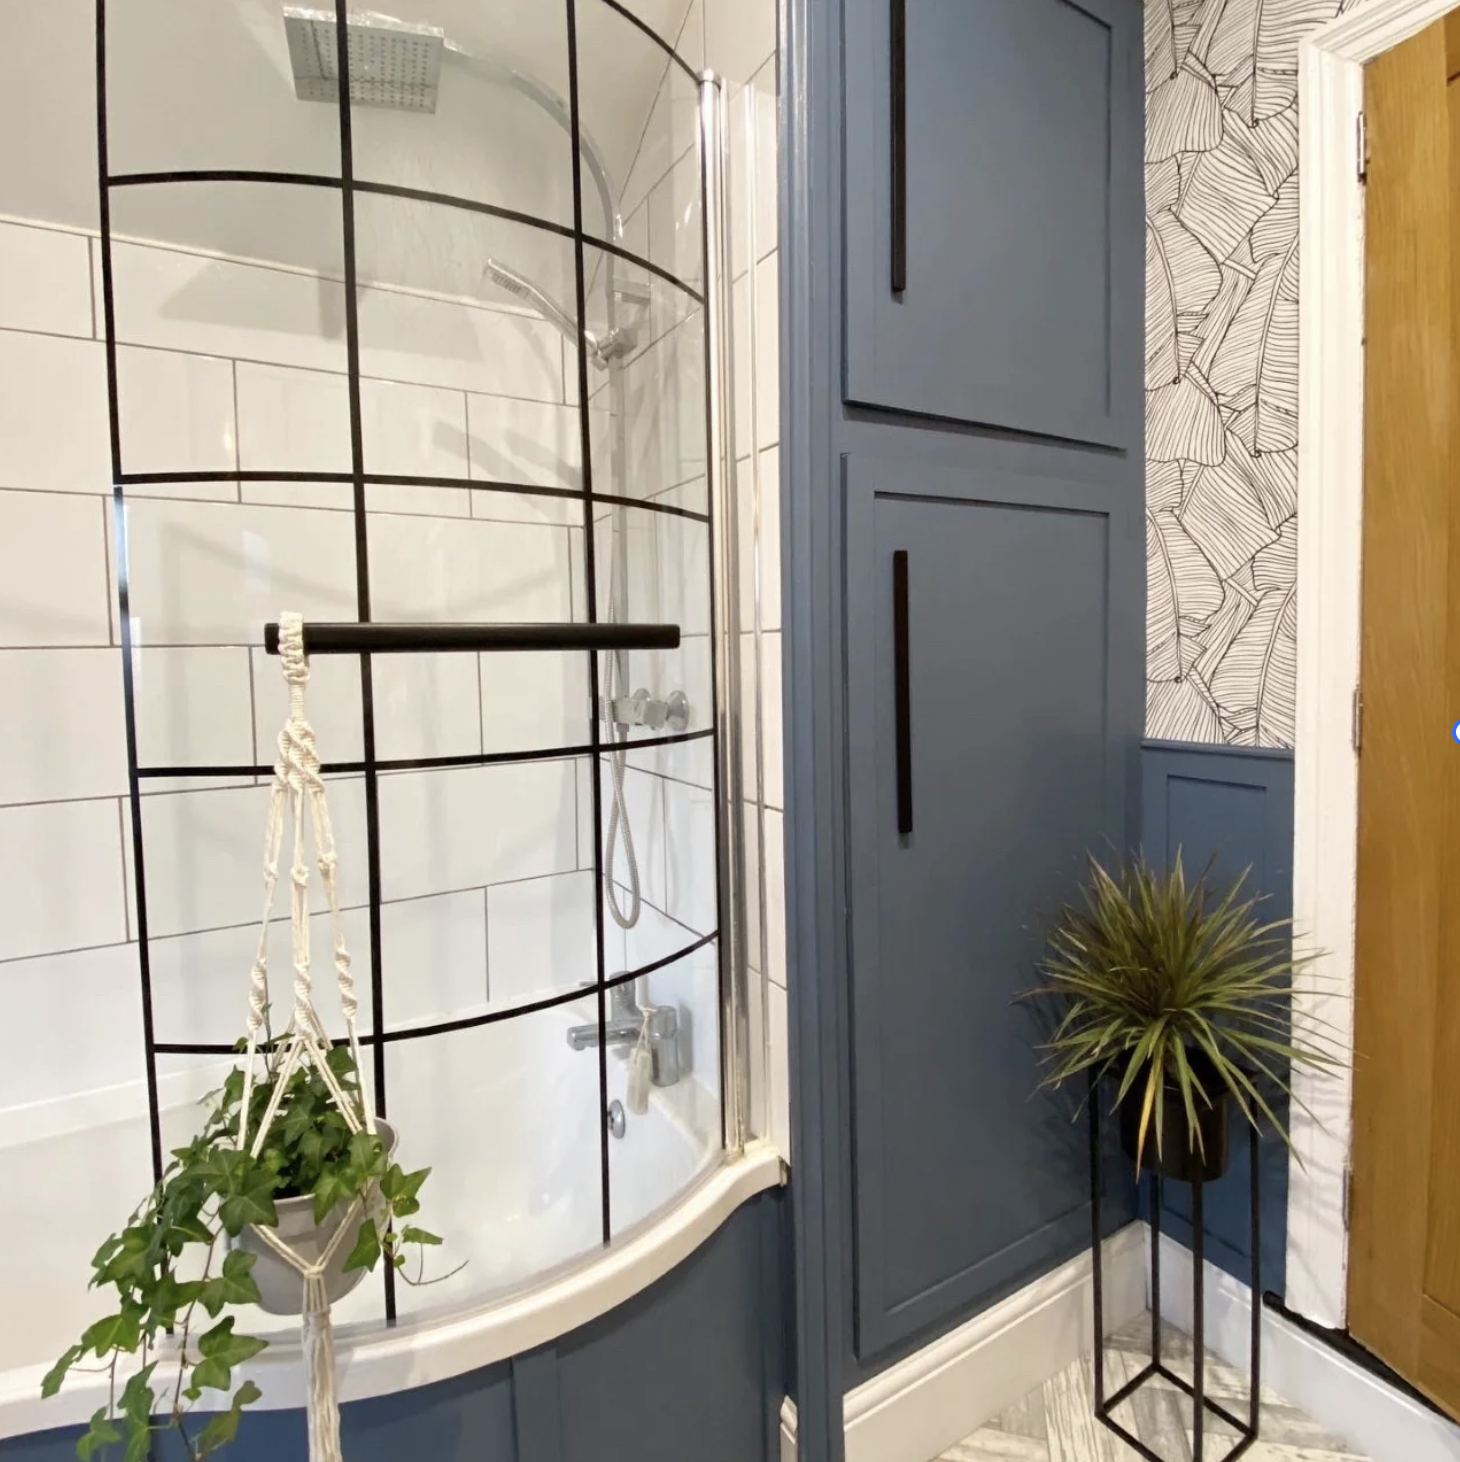
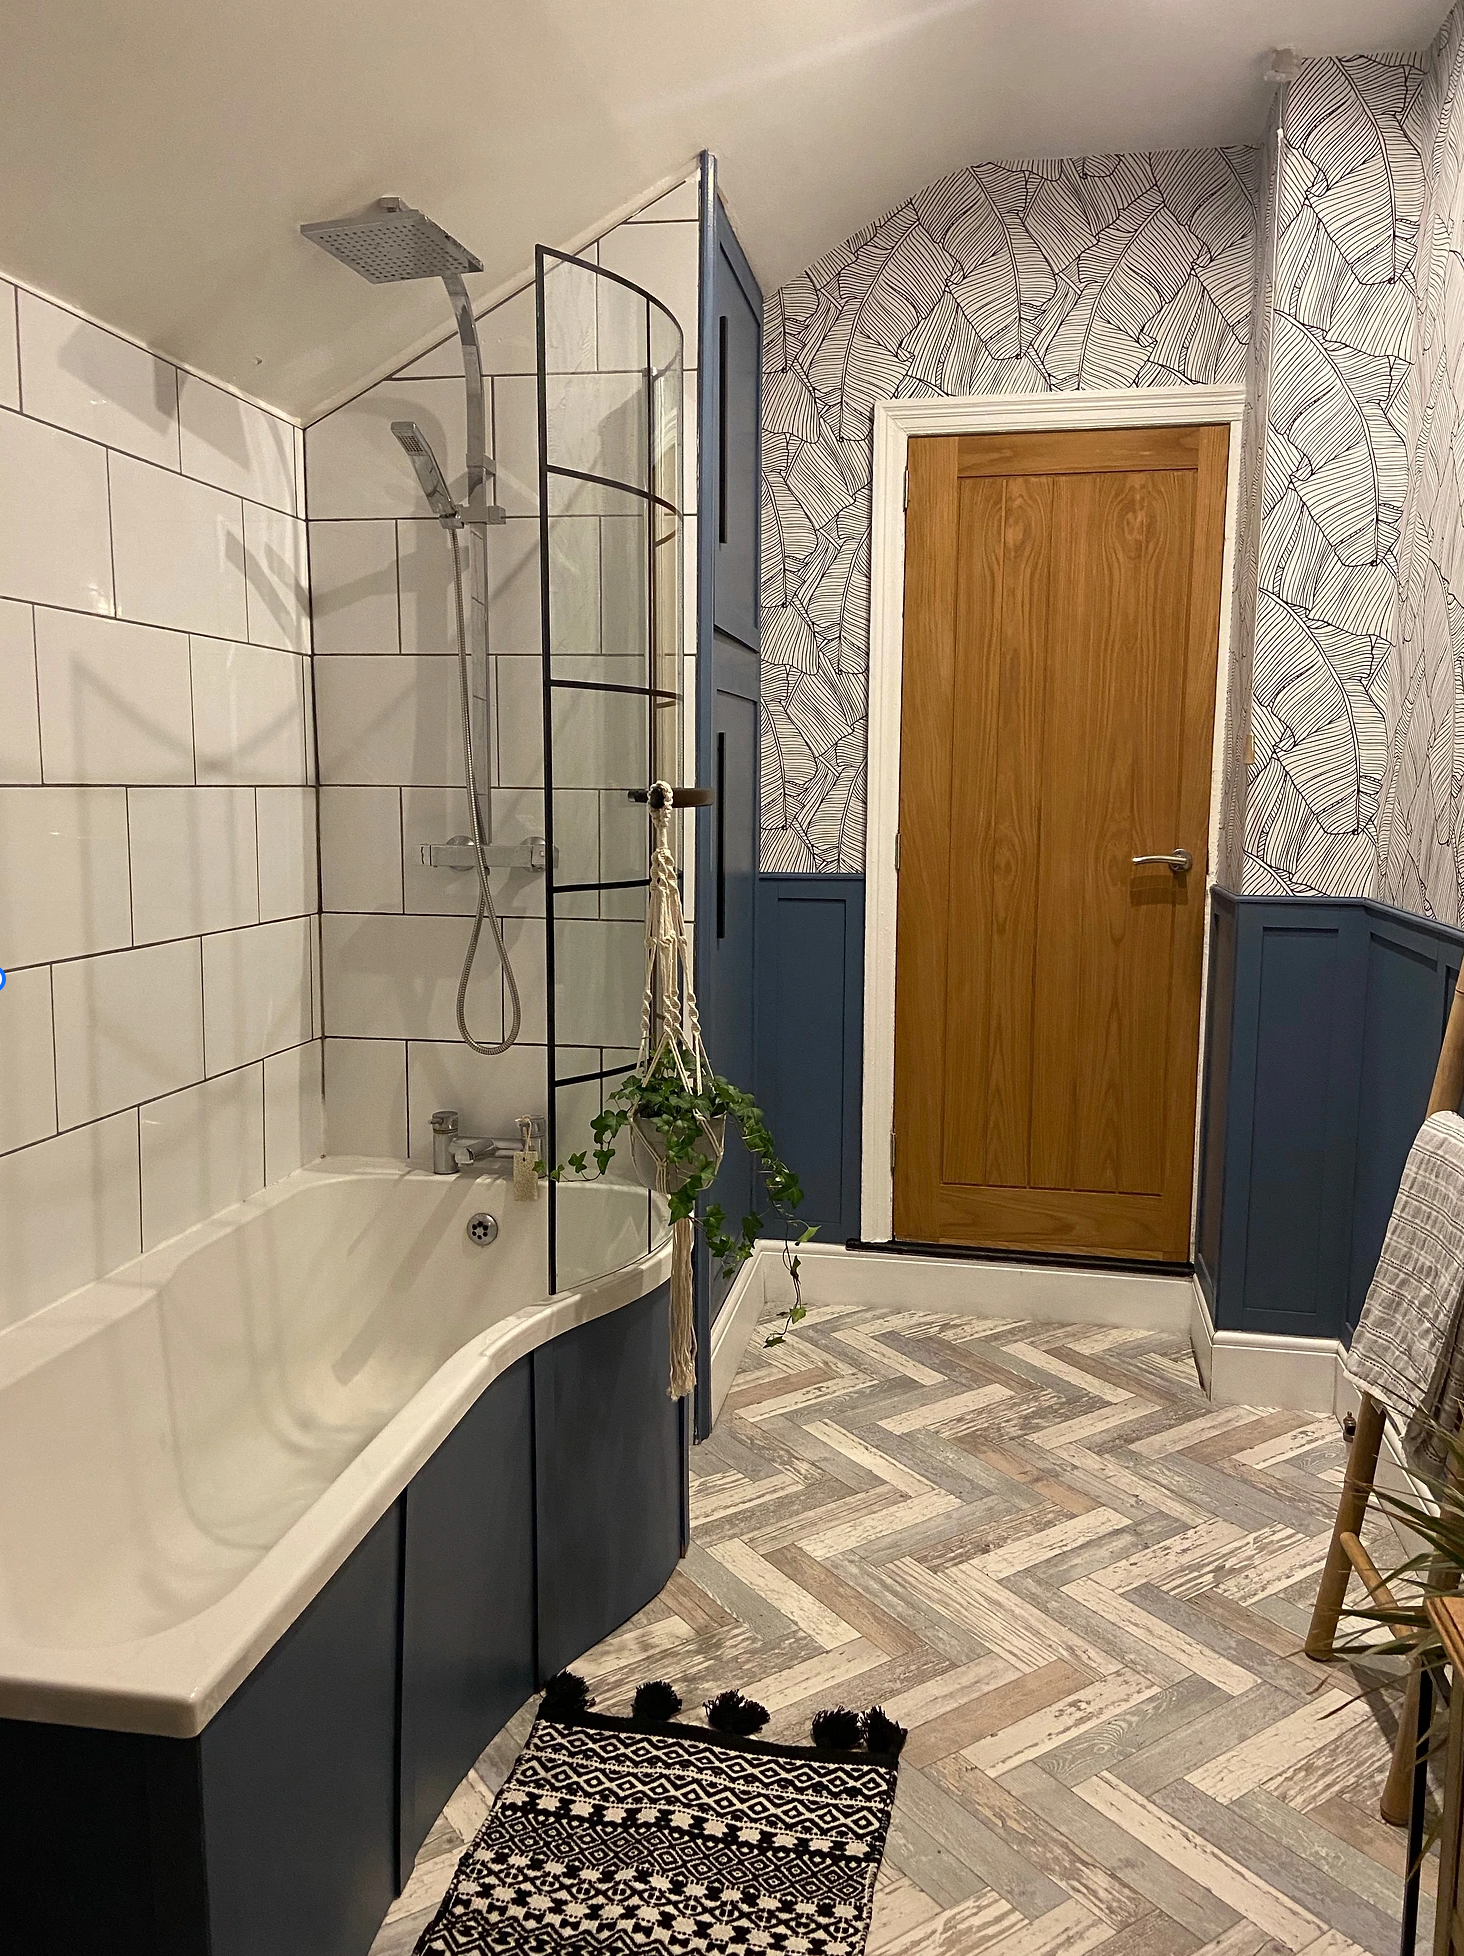
Lastly, we added some herringbone plank style lino. I went to a local flooring company and told them I wanted a herringbone pattern and was working to a budget, so its always worth telling them what you are willing to spend and you might get lucky, as this cost me under a £100. I totally love my finished bathroom spruce up and it was all achieved for less than £300. Thanks for reading.