
Creating a home workspace that is both stylish and functional doesn’t have to break the bank. With a little bit of creativity and some IKEA hacks, you can build a custom desk setup that fits your space perfectly. This project utilizes IKEA Platsa and Metod units, along with MDF boards, to create a sleek and minimalistic workstation. The best part? It’s completely customizable, allowing you to achieve the perfect dimensions and color to match your home decor. Follow along as we guide you step by step to build your own stunning and budget-friendly desk setup!
Materials Needed
- IKEA Platsa (80x40cm) – €95
- IKEA Metod (20x60cm) – €65
- Customized MDF boards – €70
- Wall paint (Schöner Wohnen Farben CREMA) – €60
- Furniture lacquer (OBI - D 8.3) – €40
- Wooden slats (6x8 cm) for bookshelf
- Primer for MDF boards
Total Budget: €330
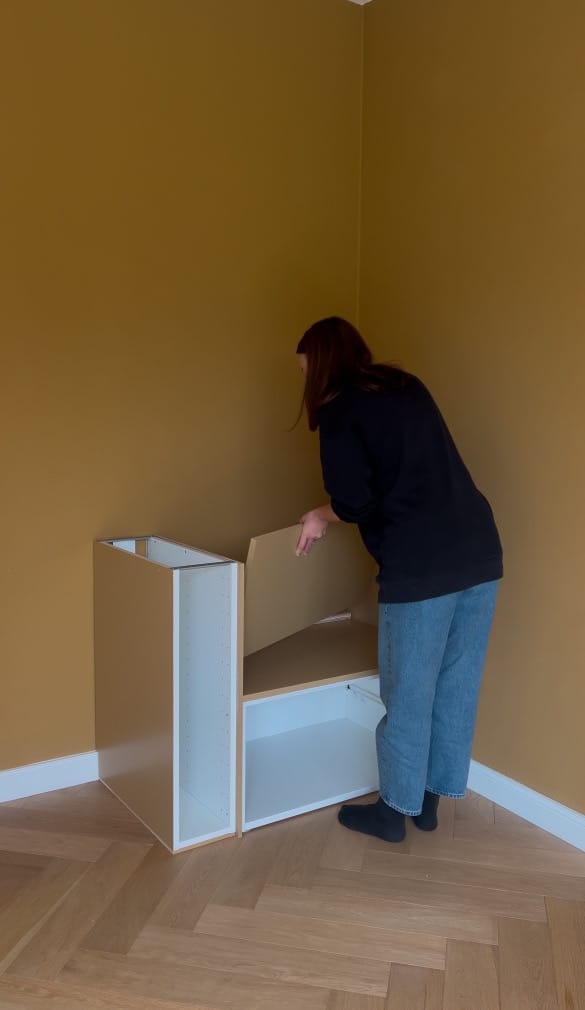
Step 1: Positioning the Base Units
Start by placing the IKEA Metod (20cm width) and IKEA Platsa (80cm width, 40cm height) units in the designated corner of your room. These will serve as the foundation of your desk setup, providing both structure and storage. Make sure they are level and properly aligned before proceeding to the next step.
Step 2: Cutting and Preparing the Wooden Boards
Now it’s time to cut the MDF boards to create the desk surface and side panels. You will need:
- Two MDF side panels measuring 70x60 cm to enclose the desk structure.
- One MDF board for the desktop, with a width of 60 cm and a custom length based on your available space.
- Two wooden slats (6x8 cm) for supporting the bookshelf.
- One MDF front board (12 cm 12 mm thickness, 80 width and 41 cm height) to finish the bookshelf area.
Step 3: Preparing and Painting
Before assembling, prep all MDF surfaces by sanding them and applying a primer to ensure smooth paint adhesion. Once dry, apply two coats of lacquer in your chosen color, allowing sufficient drying time between coats. This will give your desk a sleek, professional finish and help protect the wood from wear and tear.
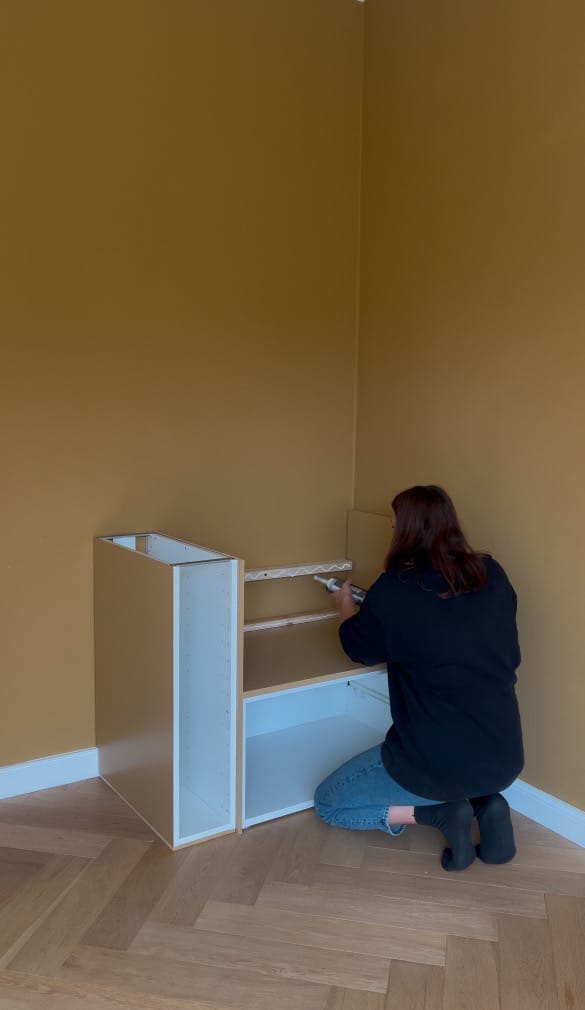
Step 4: Assembling the Desk
Once the paint is fully dry, it's time to put everything together. Secure the MDF side panels to the wall and attach the Metod and Platsa elements. Then, position the desk board on top, ensuring a snug and stable fit. Mount the wooden slats on the wall at your preferred bookshelf height, making sure they are level. Once secured, attach the MDF front board (12 cm 12 mm thickness, 80 width and 41 cm height) to complete the bookshelf structure. Finally, check that all elements are securely fastened and that the desk surface is stable. Make any necessary adjustments before moving on to the finishing touches.
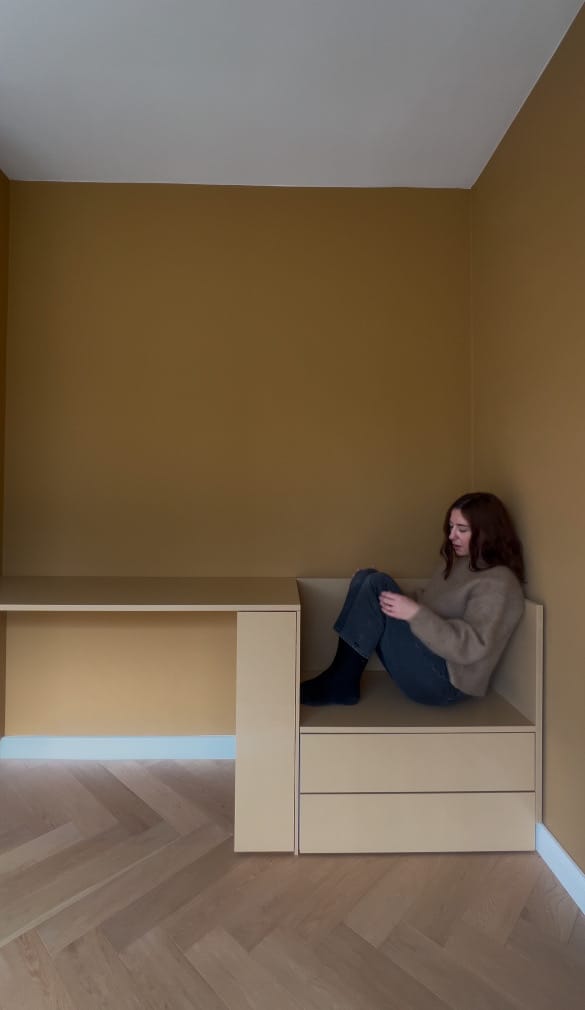
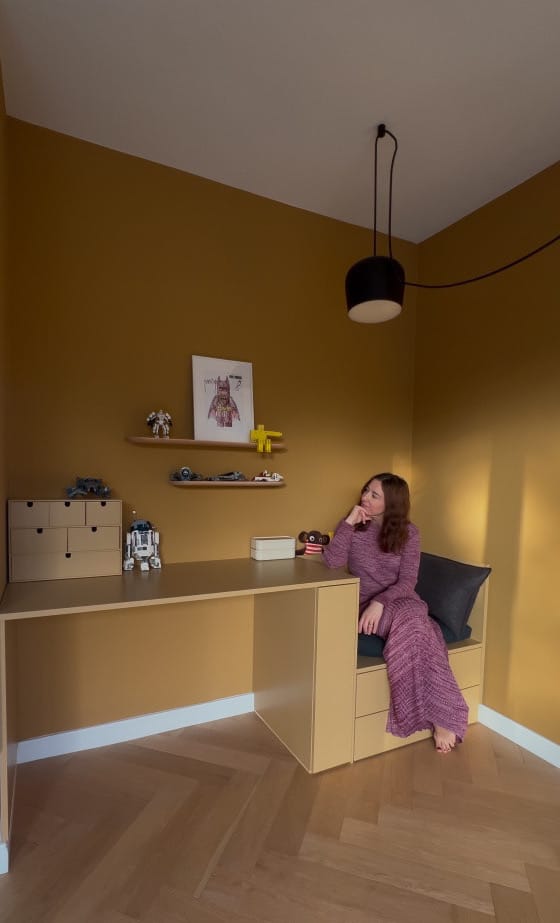
And there you have it—a sleek, modern, and budget-friendly DIY IKEA desk setup! This project is perfect for creating a custom workspace that blends seamlessly with your home decor while maximizing functionality. By using IKEA elements and MDF boards, you get a high-end look at a fraction of the cost. Plus, the ability to customize the dimensions and colors makes this project even more rewarding. After Finishing this project I also added some wall cabinets to maximize the storage space.
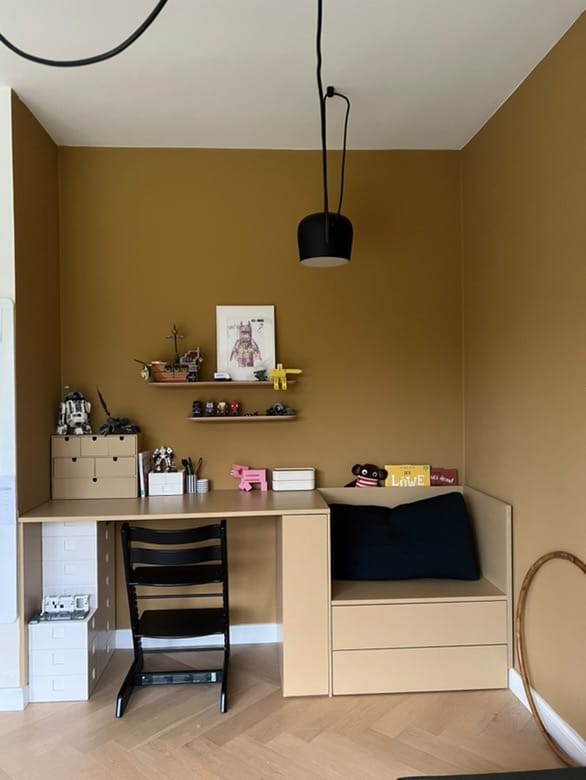

Finished Result Before & After the Cabinets
Now it’s time to style your new desk with some cozy decor, plants, and organizers to make it truly your own.
Happy DIYing!

Creator: Lejla
Instagram: @haus_momster and @conceptdistrict


