
My cats are part of my family, and that's why I wanted to create a space dedicated especially to them. My idea was for it to be beautiful but also practical and easy to clean. So, after looking for options, I found functional and affordable materials that made this small project a success. I'll walk you through the steps so you can replicate it at home. It's very simple!
Materials
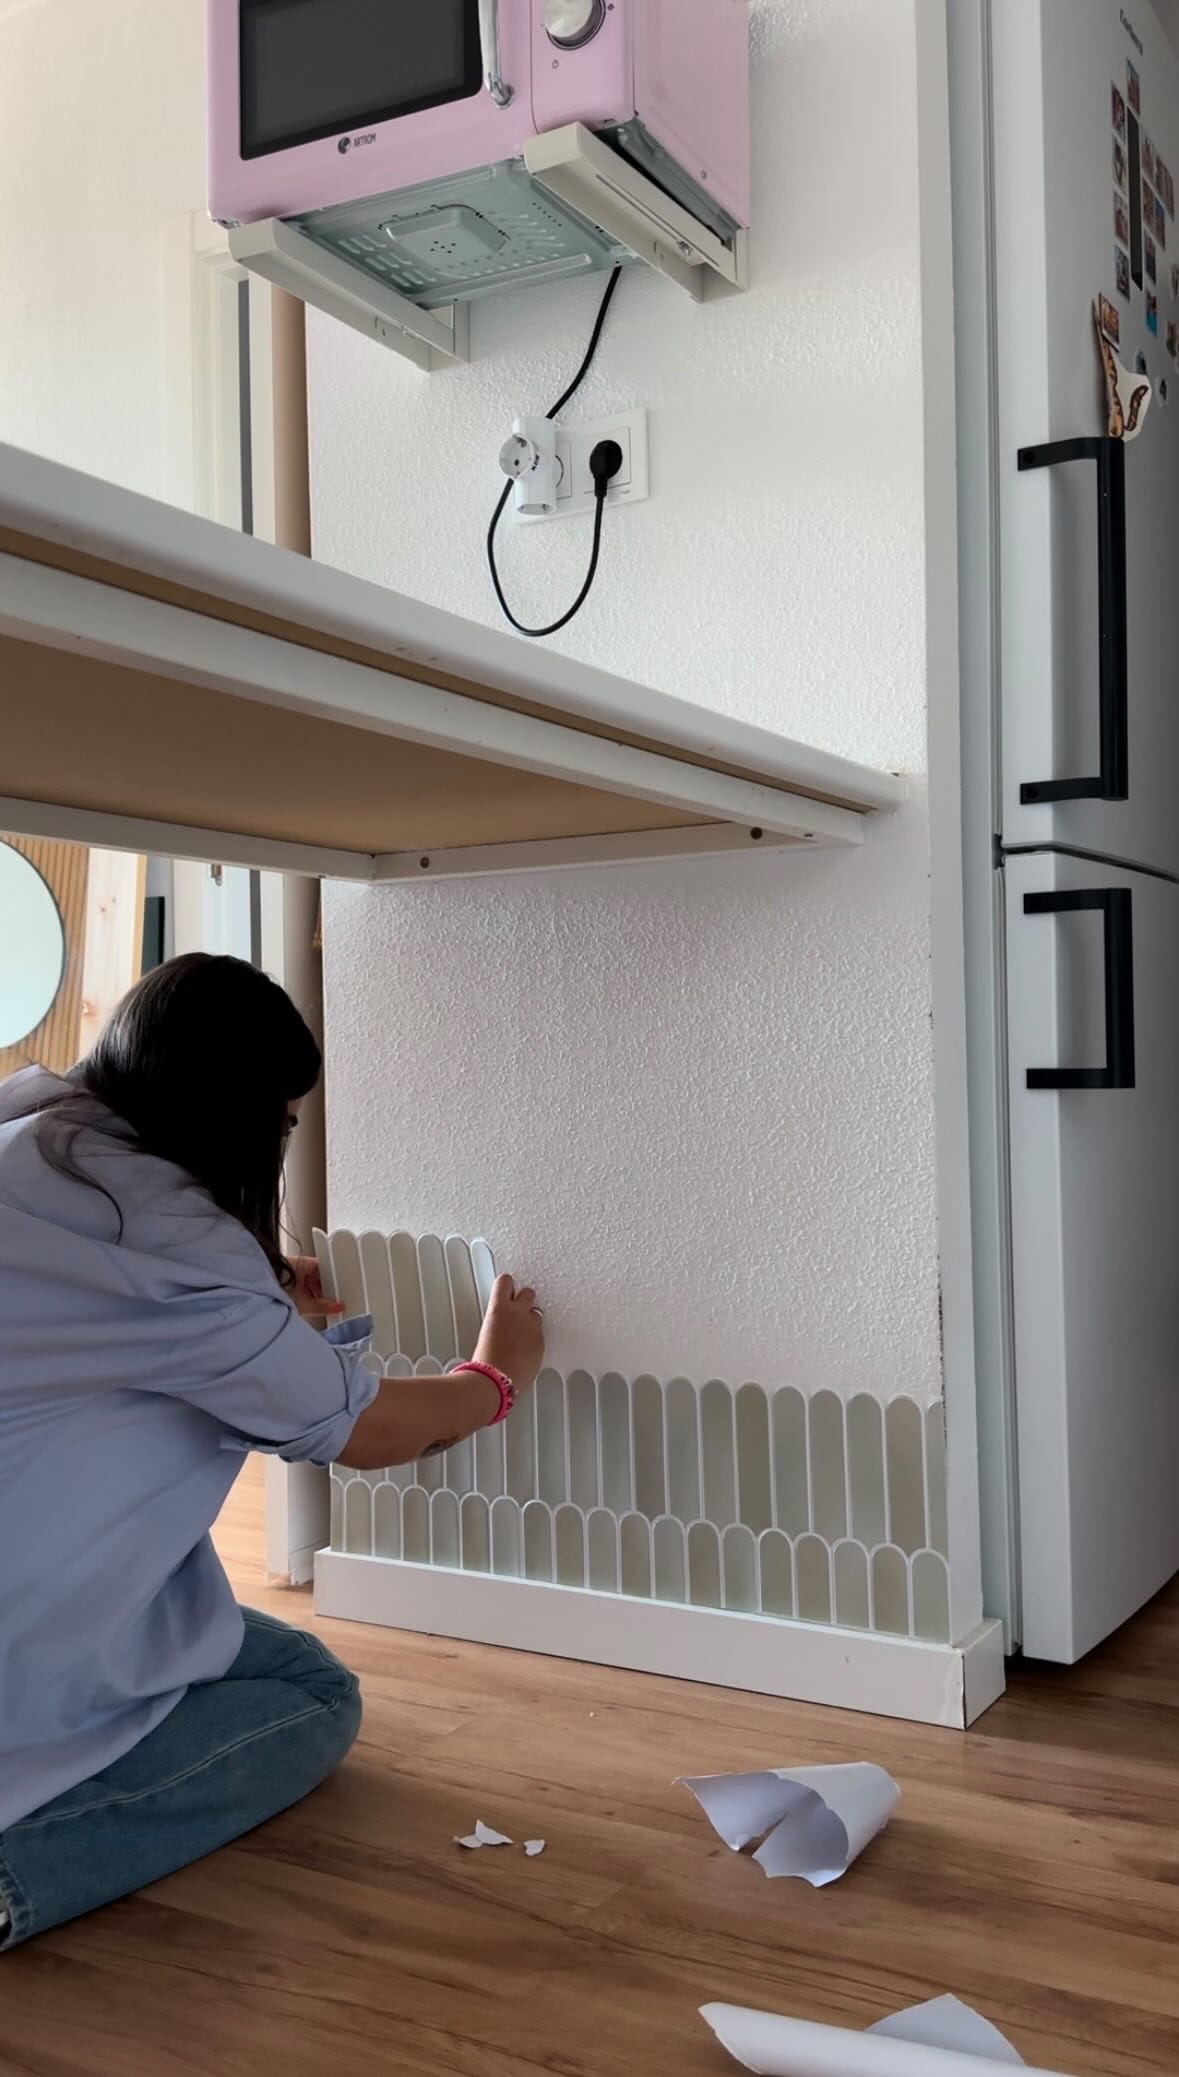
- Adhesive tiles (I bought them on Shein, and they also work on textured walls)
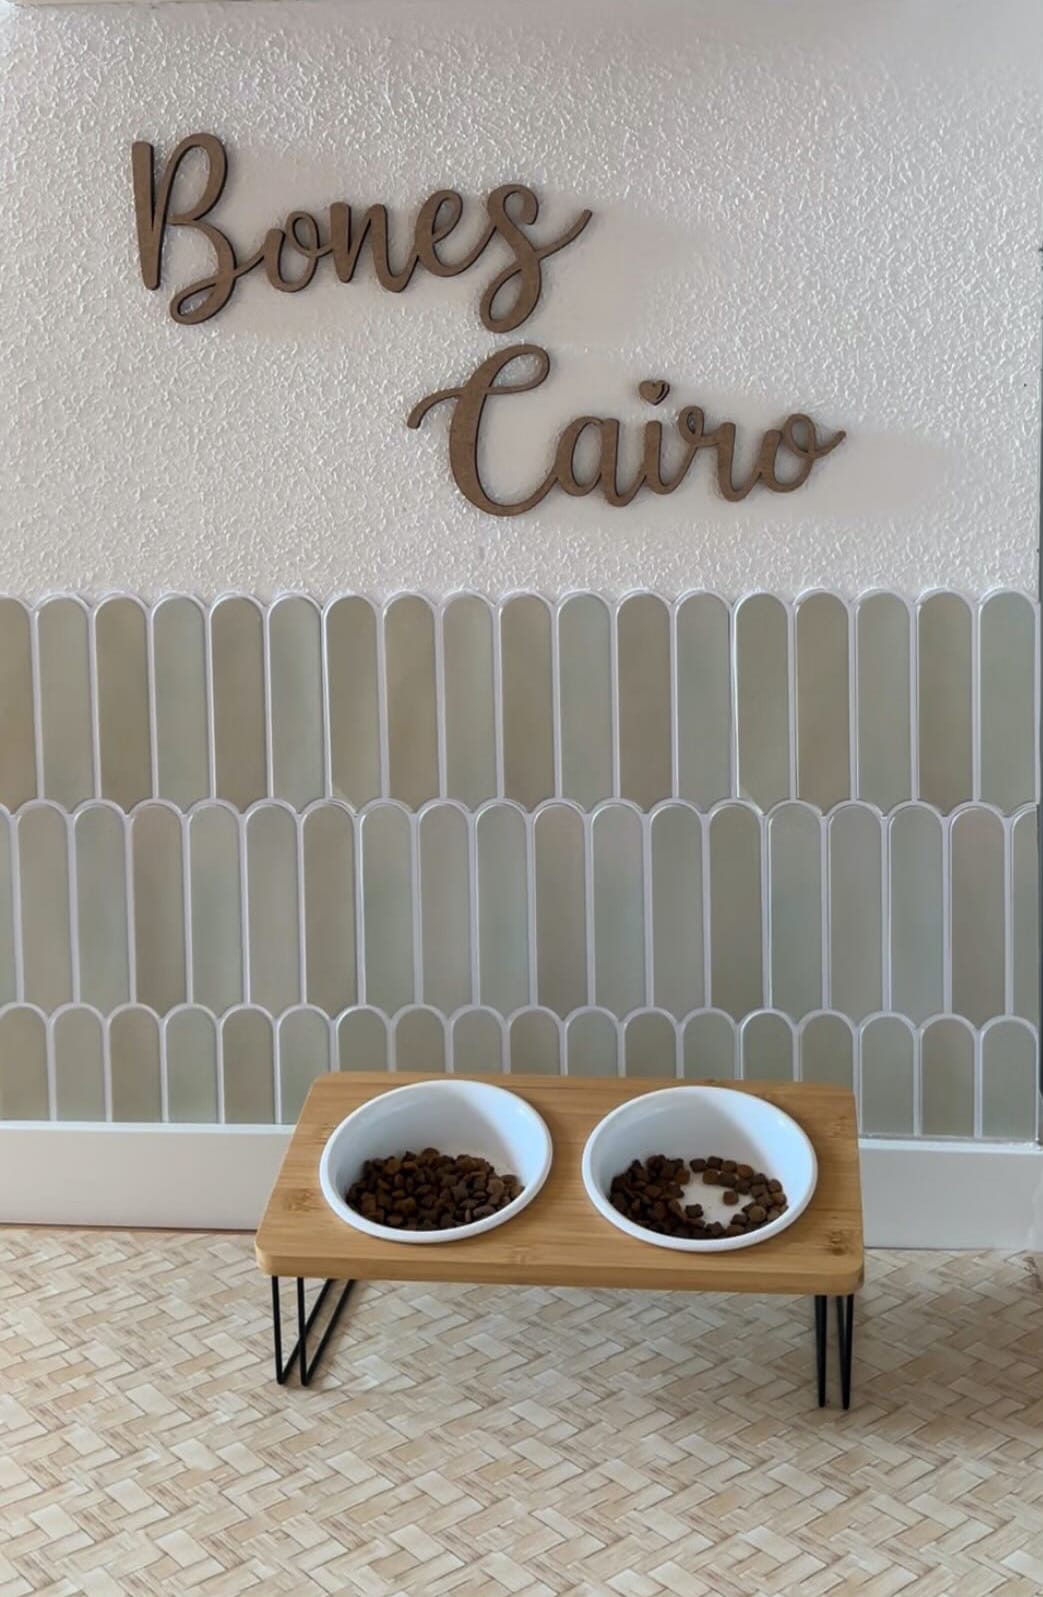
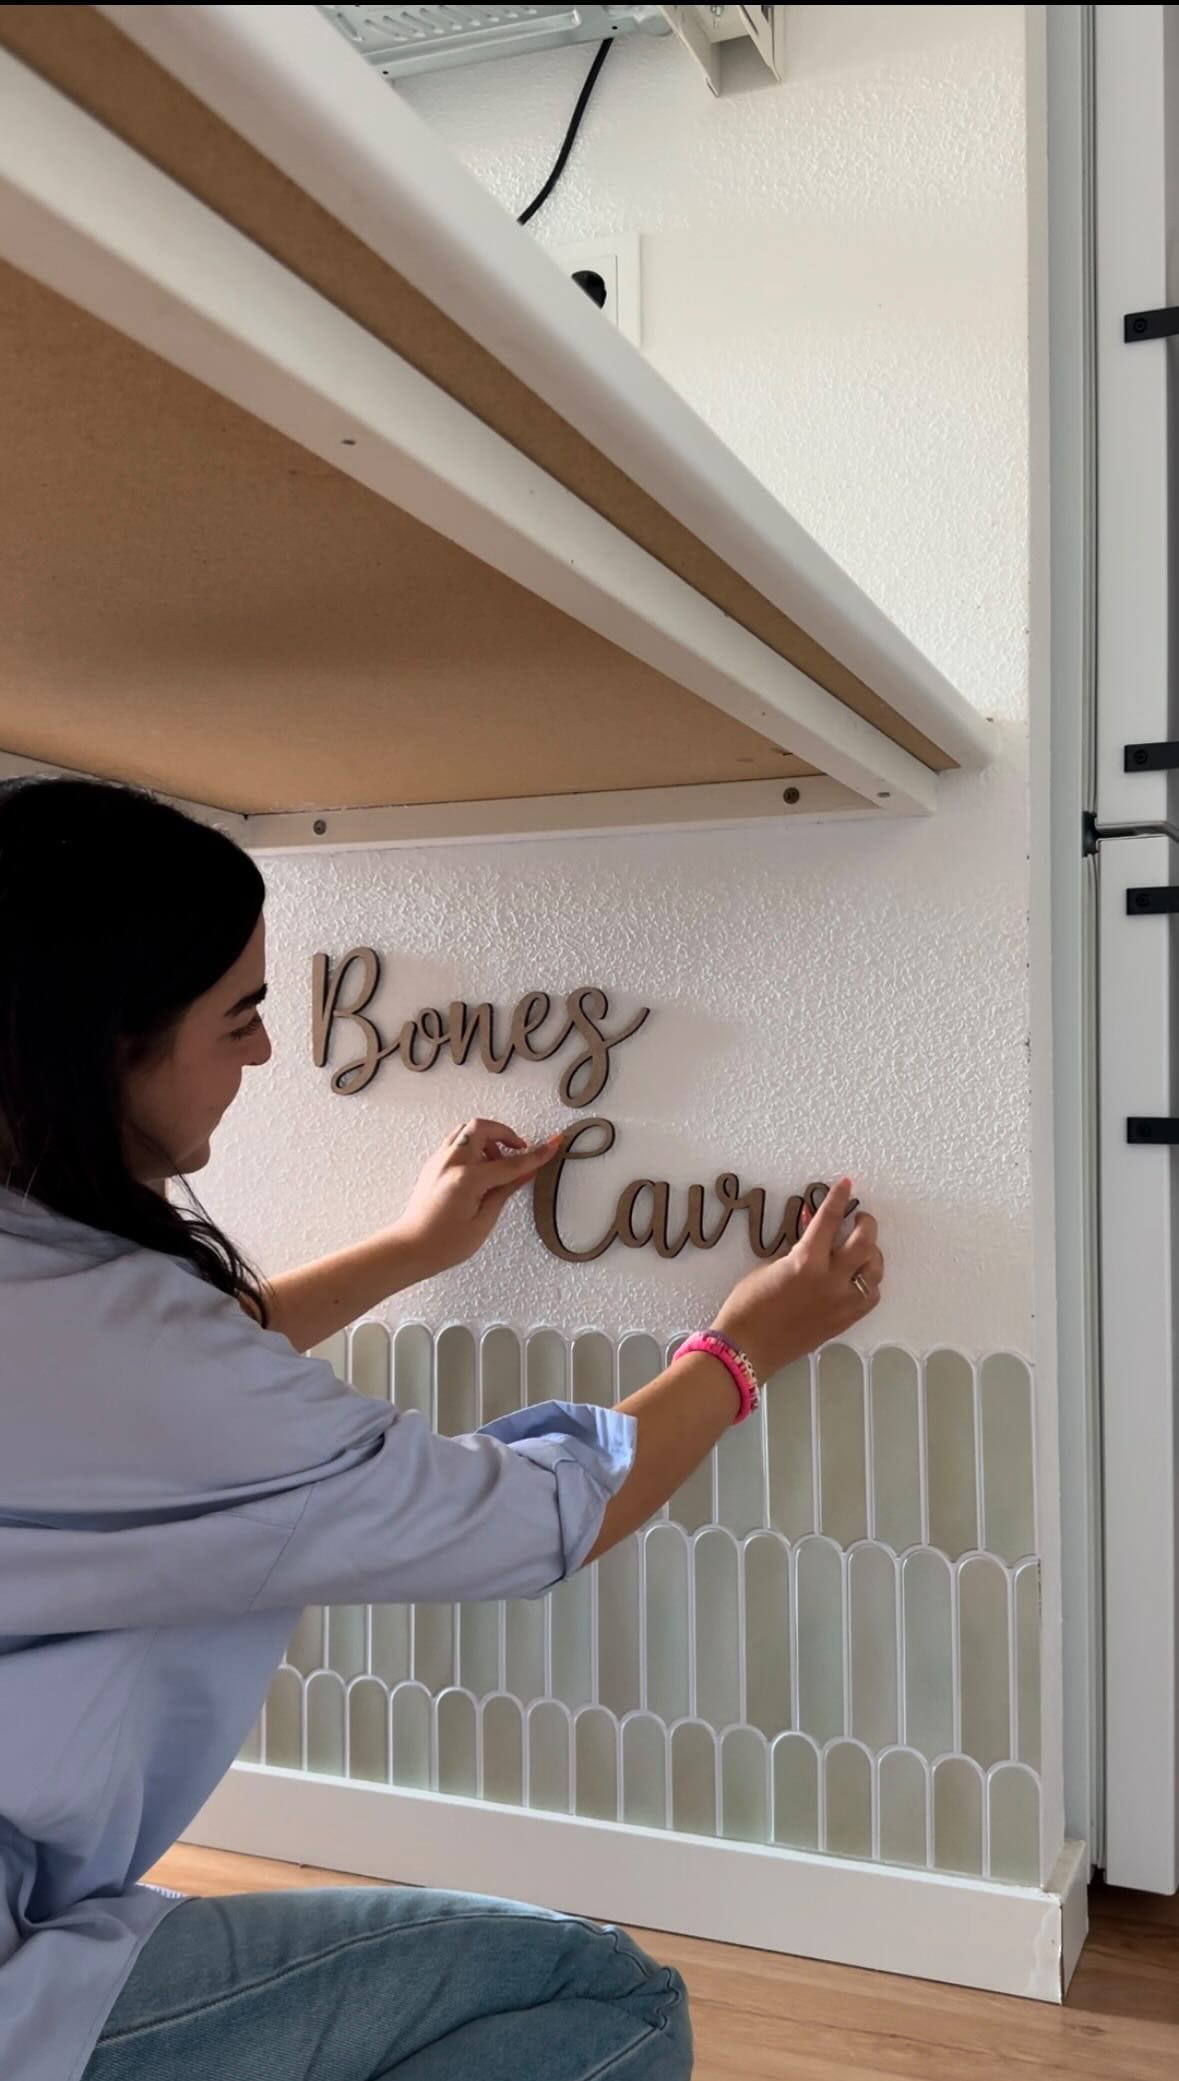
- Personalized MDF letters (I found them on Amazon for about €10 each)
- Double-sided tape
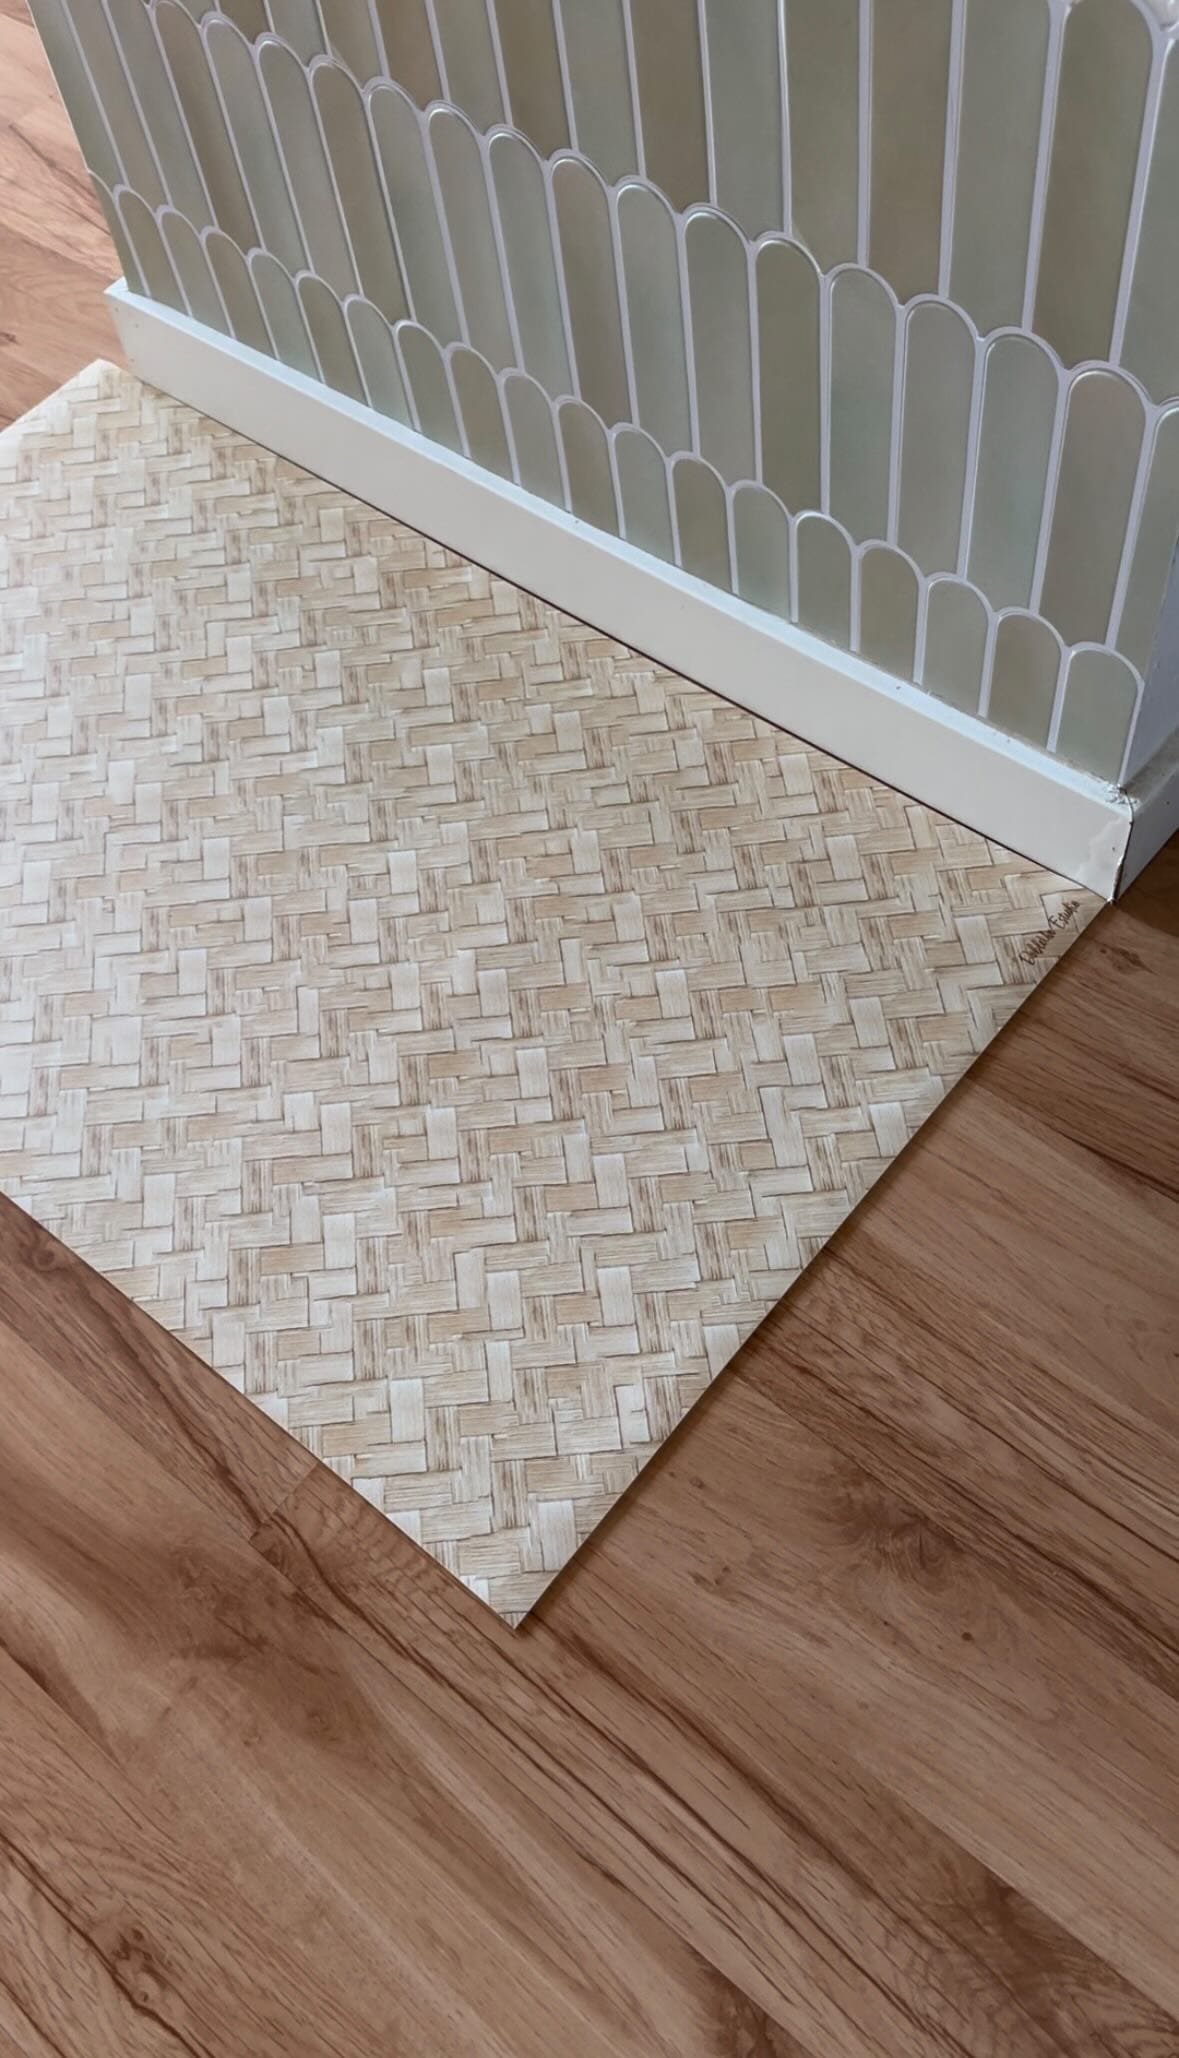
- Vinyl rug
- Cat feeders
Step-by-Step
Step 1. Place the adhesive tiles
The first thing I did was stick the adhesive tiles on the wall. They are an ideal solution because they are not only easy to clean but also aesthetic. I cut them to the exact size of the wall so they would fit perfectly.
Step 2. Attach the names
I bought personalized MDF names on Amazon at an affordable price. To fix them to the wall, I used double-sided tape, which made installation very easy without the need for drilling holes.
Step 3. Place the vinyl rug and feeders
Since I wanted something practical and easy to clean, I chose a vinyl rug that prevents any spills from seeping into the floor. Then, I placed the feeders on top, making sure everything was well organized.
This project is a simple and budget-friendly way to create a special space for our cats without sacrificing aesthetics and functionality. The materials are accessible and easy to work with, so anyone can do it at home without complications. Now my cats have their own beautiful and practical corner, and I'm delighted with the result.

Give it a try!
Instagram: @encuarentametros


