

There’s nothing quite like creating your own furniture pieces that not only serve a purpose but also add warmth and character to your home. I’ve always been drawn to the charm of lived-in furniture, and adding cosy wooden accents is my favorite way to decorate.
Last year, I tackled one of my most satisfying DIY projects: a rustic bench. It was a labor of love, and along the way, I learned plenty of tips to make the process smoother. If you’re thinking about assembling your own bench, here’s everything you need to know!
Materials
Building Materials:
- Pine board
- Pine slats
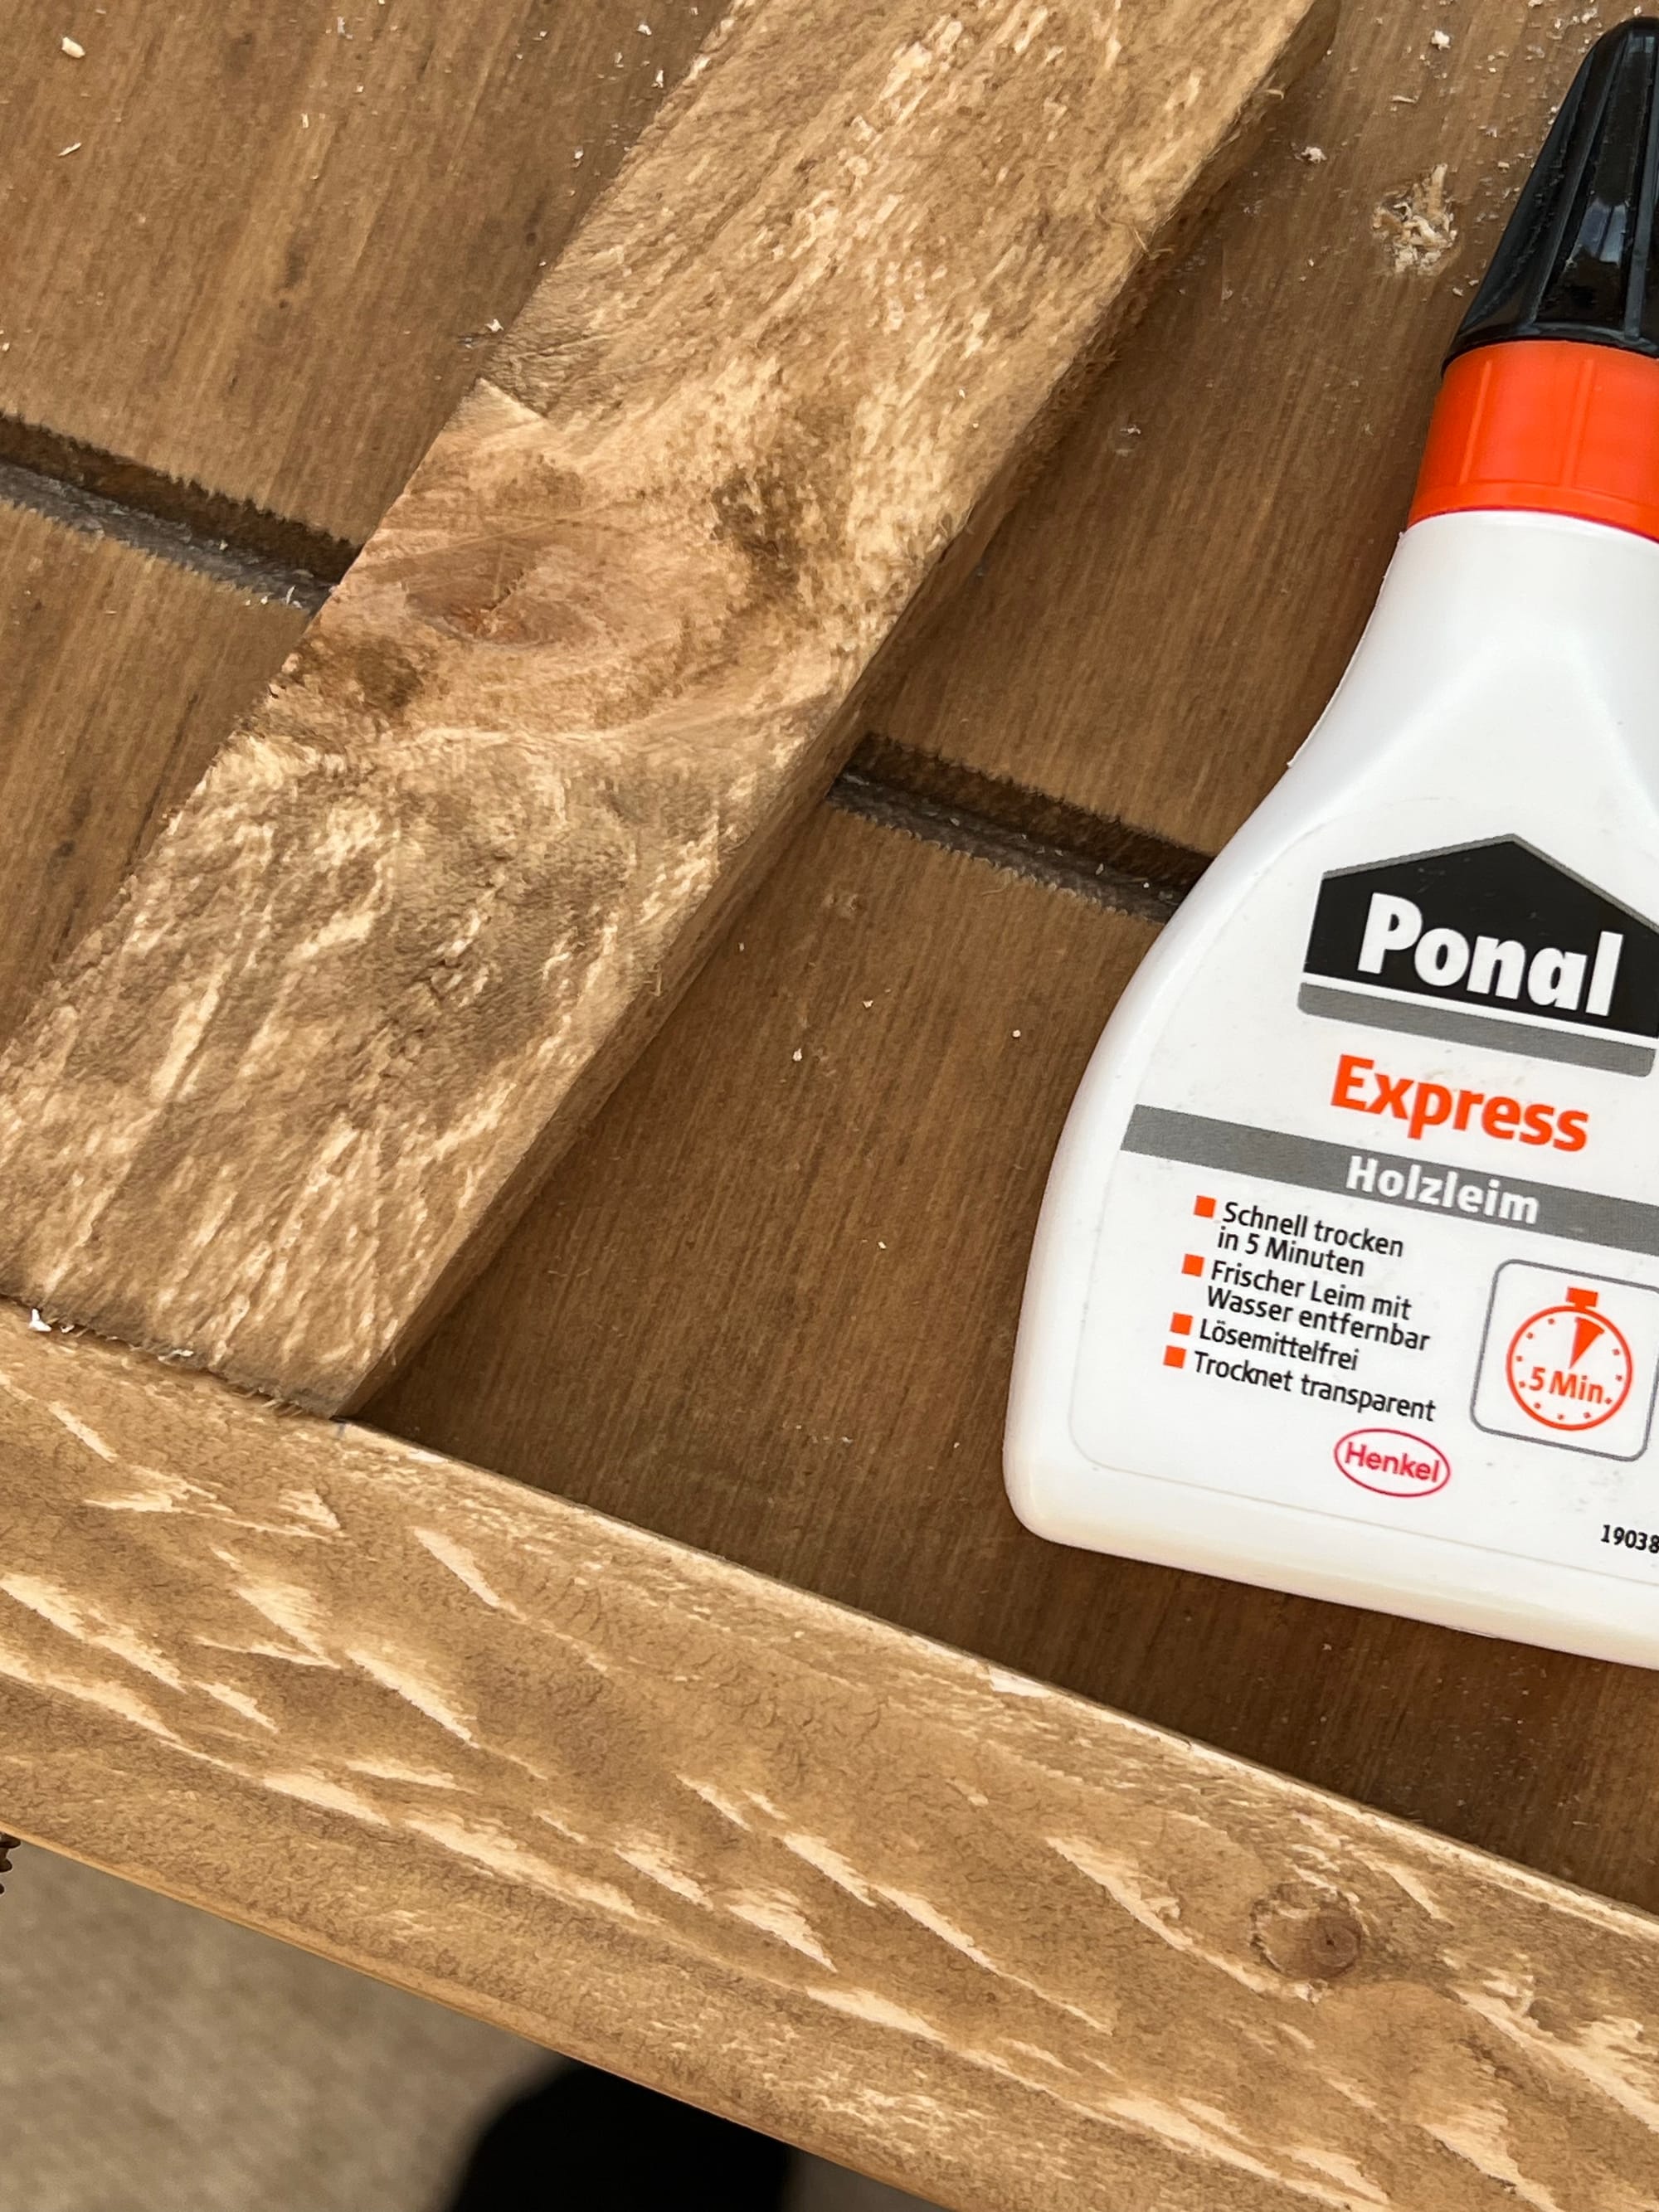
- Wood glue
- 7 mm x 6 cm gold screws (12x)
- 1 cm x 6 cm gold screws (4x)
Finishing Materials:
- Wood stain
- Wood wax
Tools Needed:
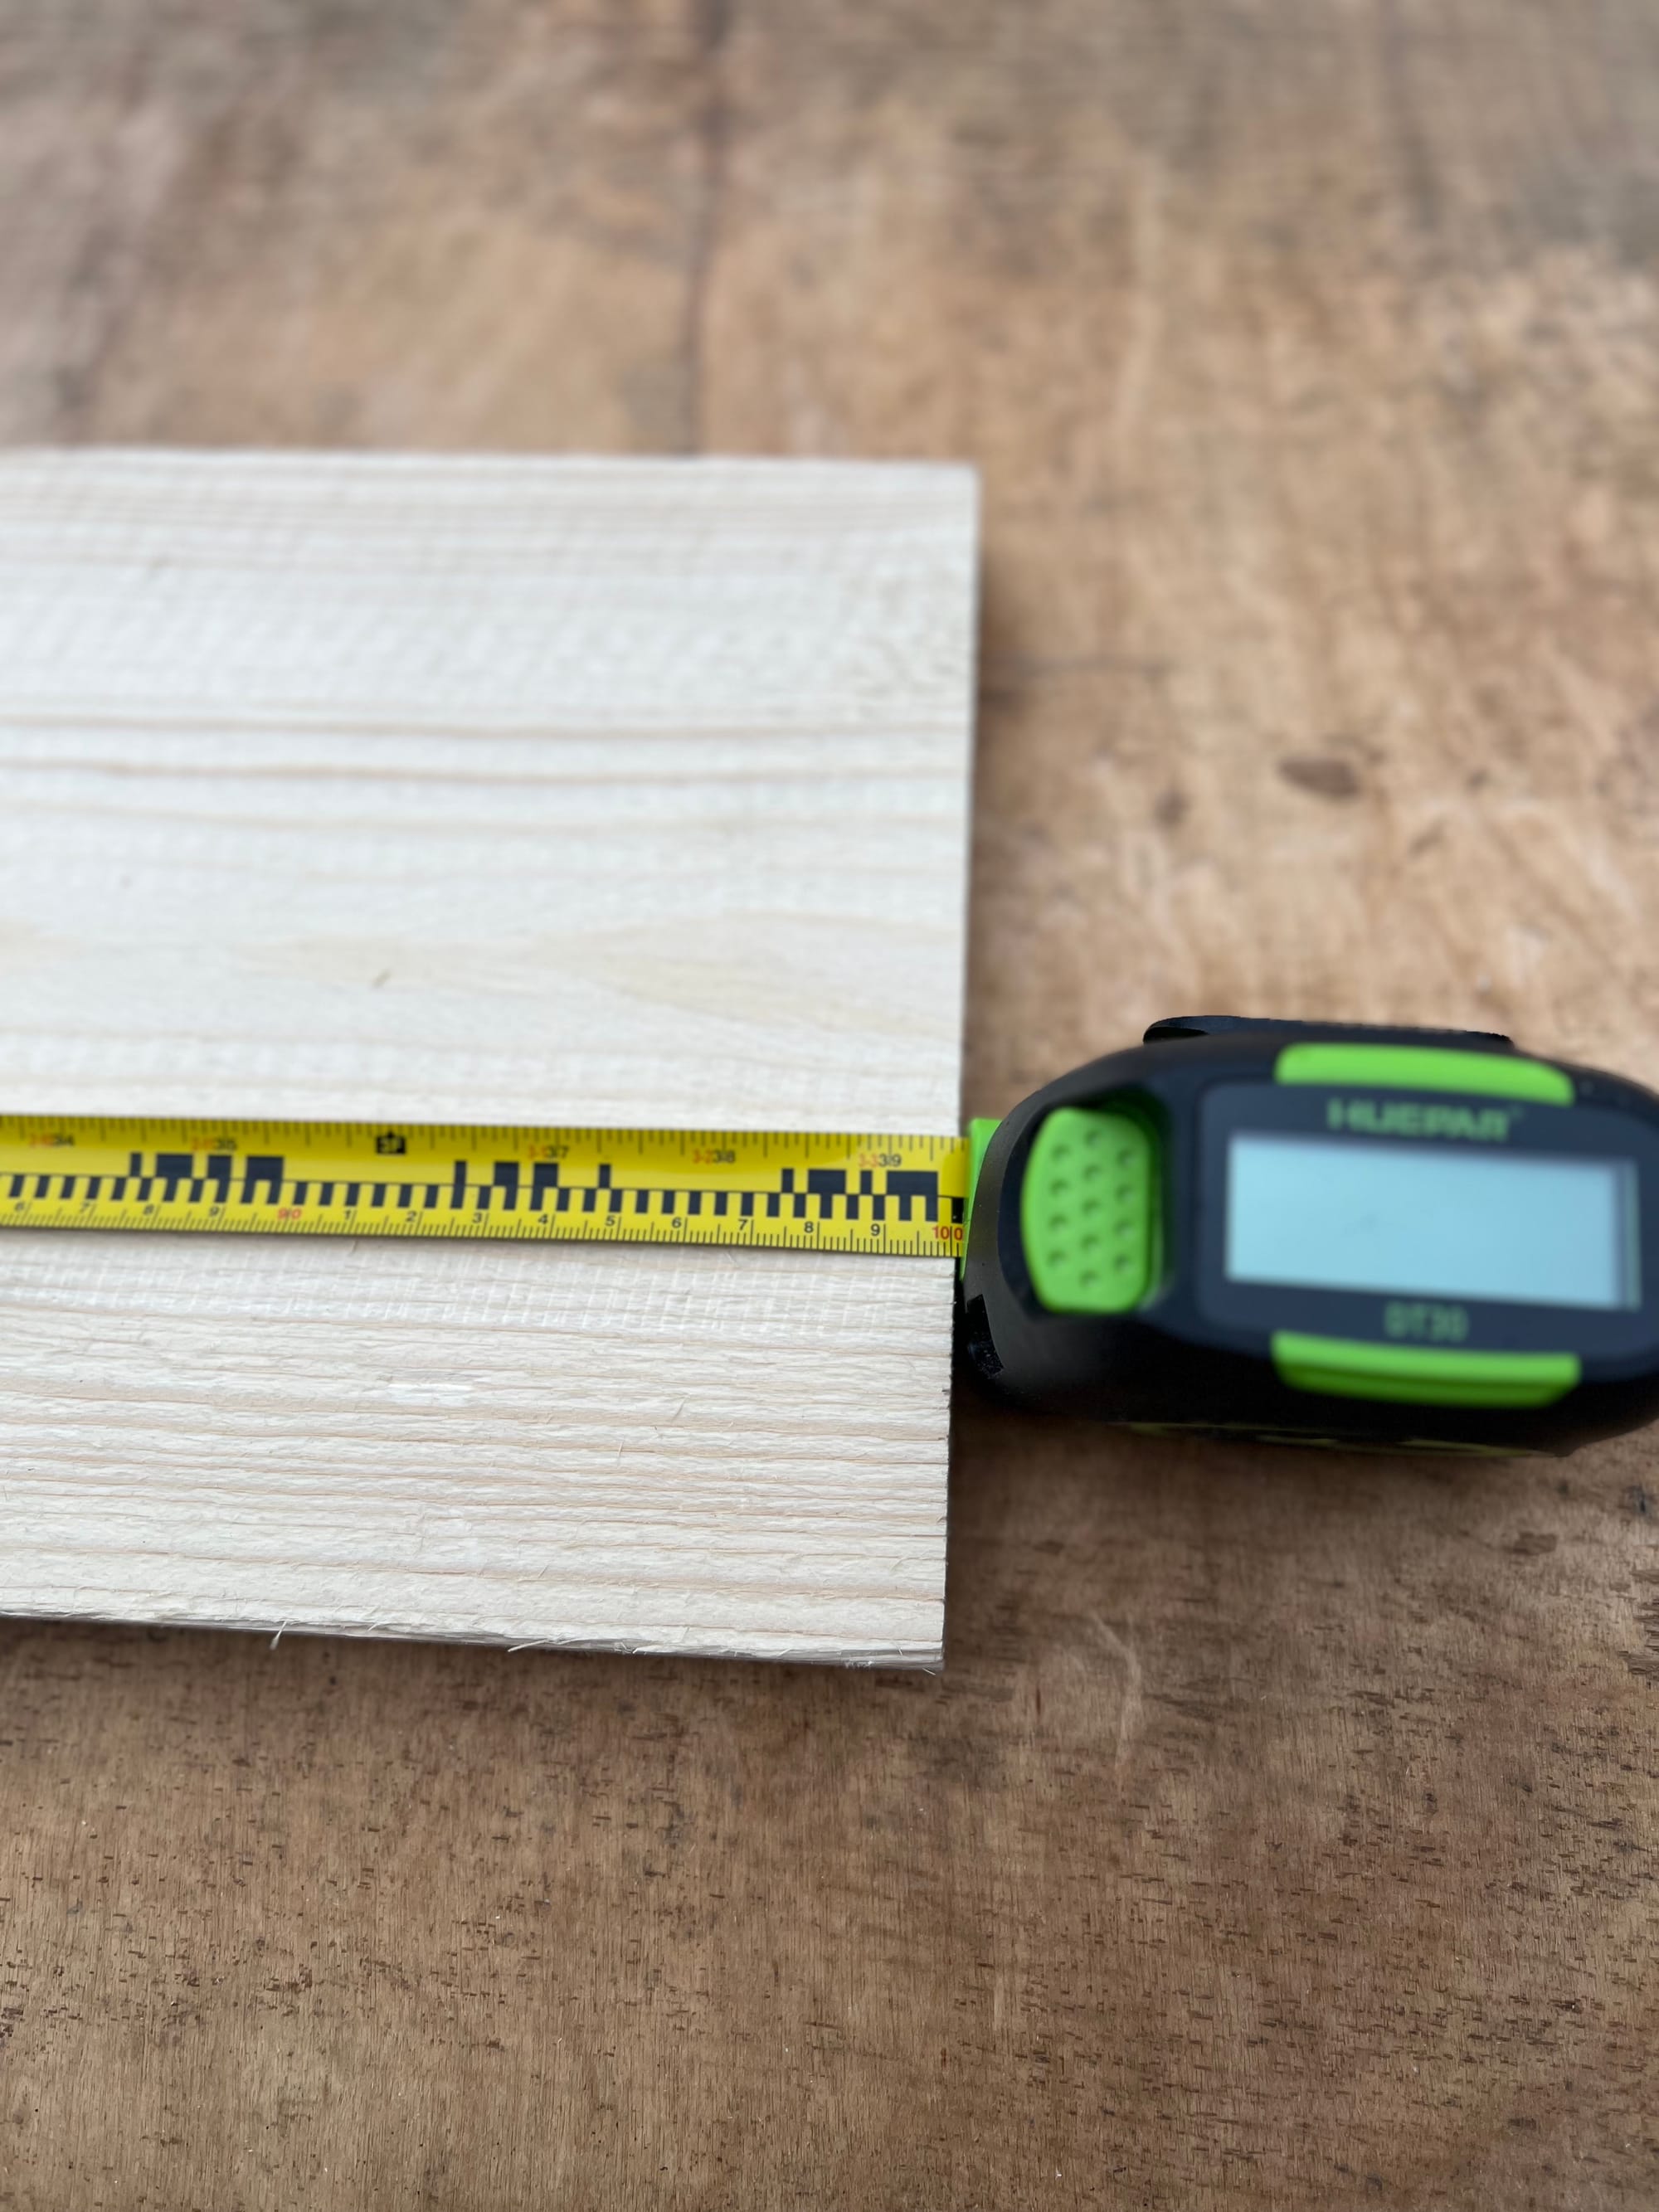
- Measuring tape
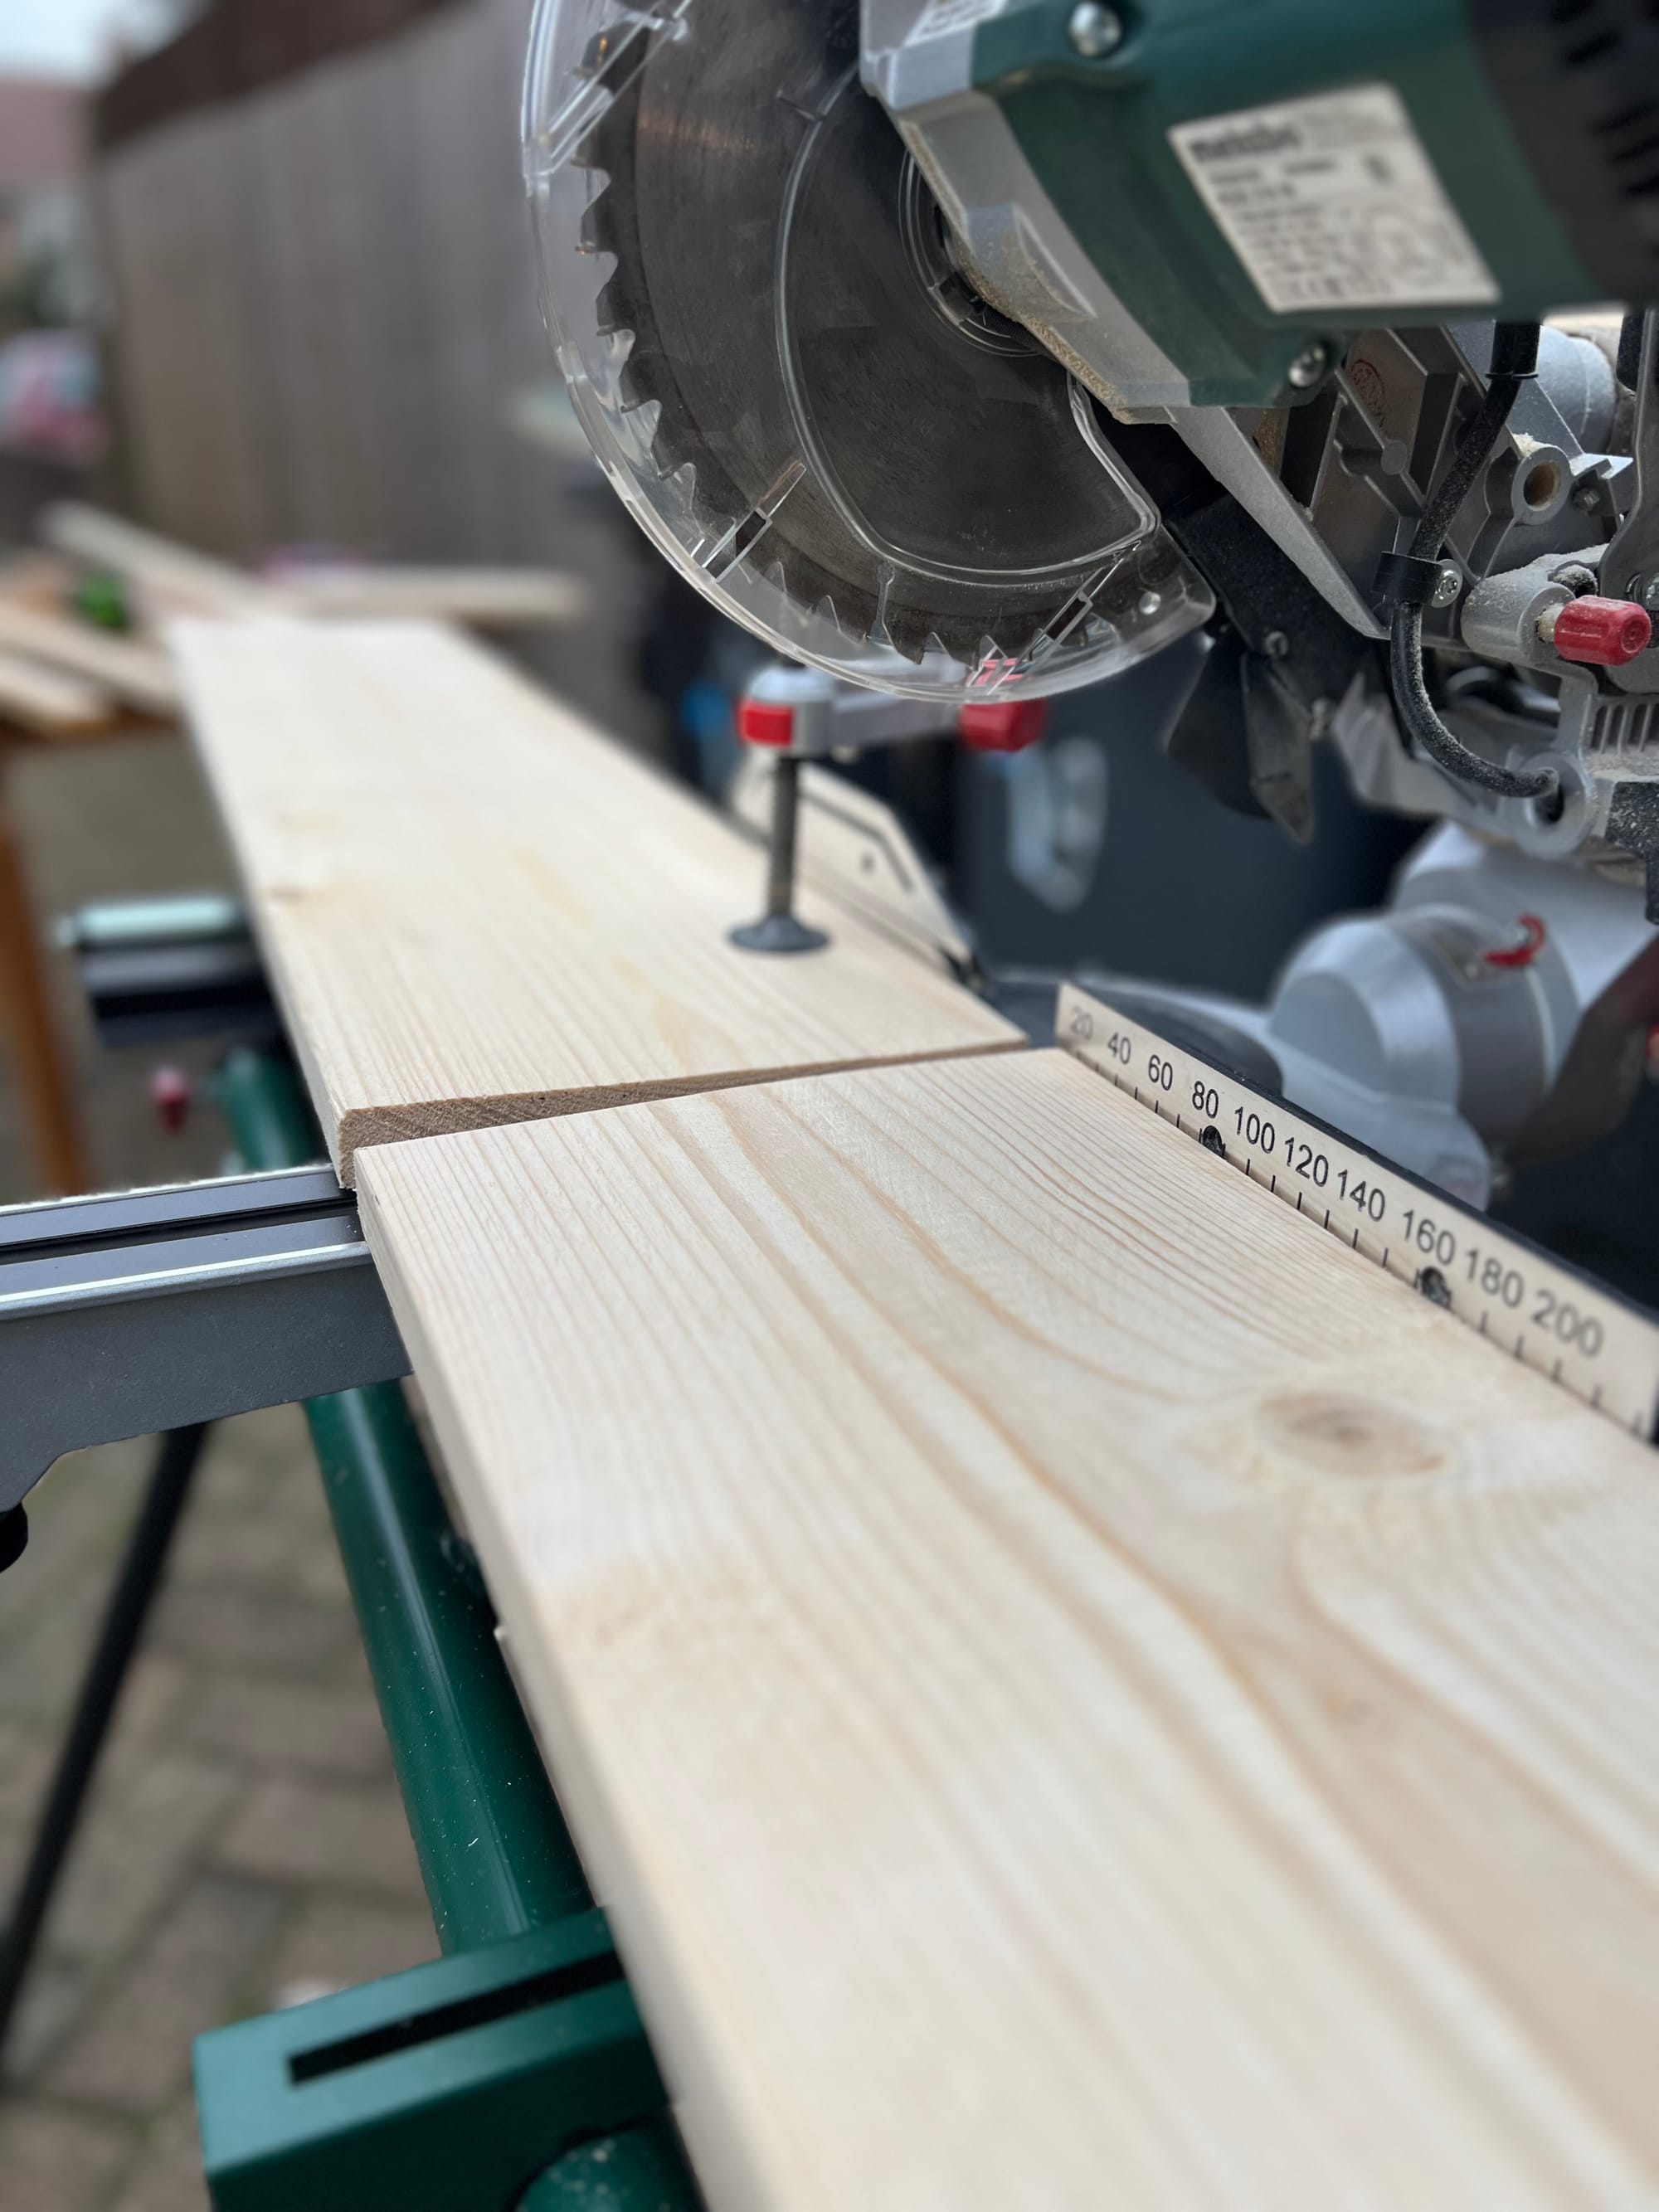
- Hand saw, Japanese pull saw, circular saw, or miter saw
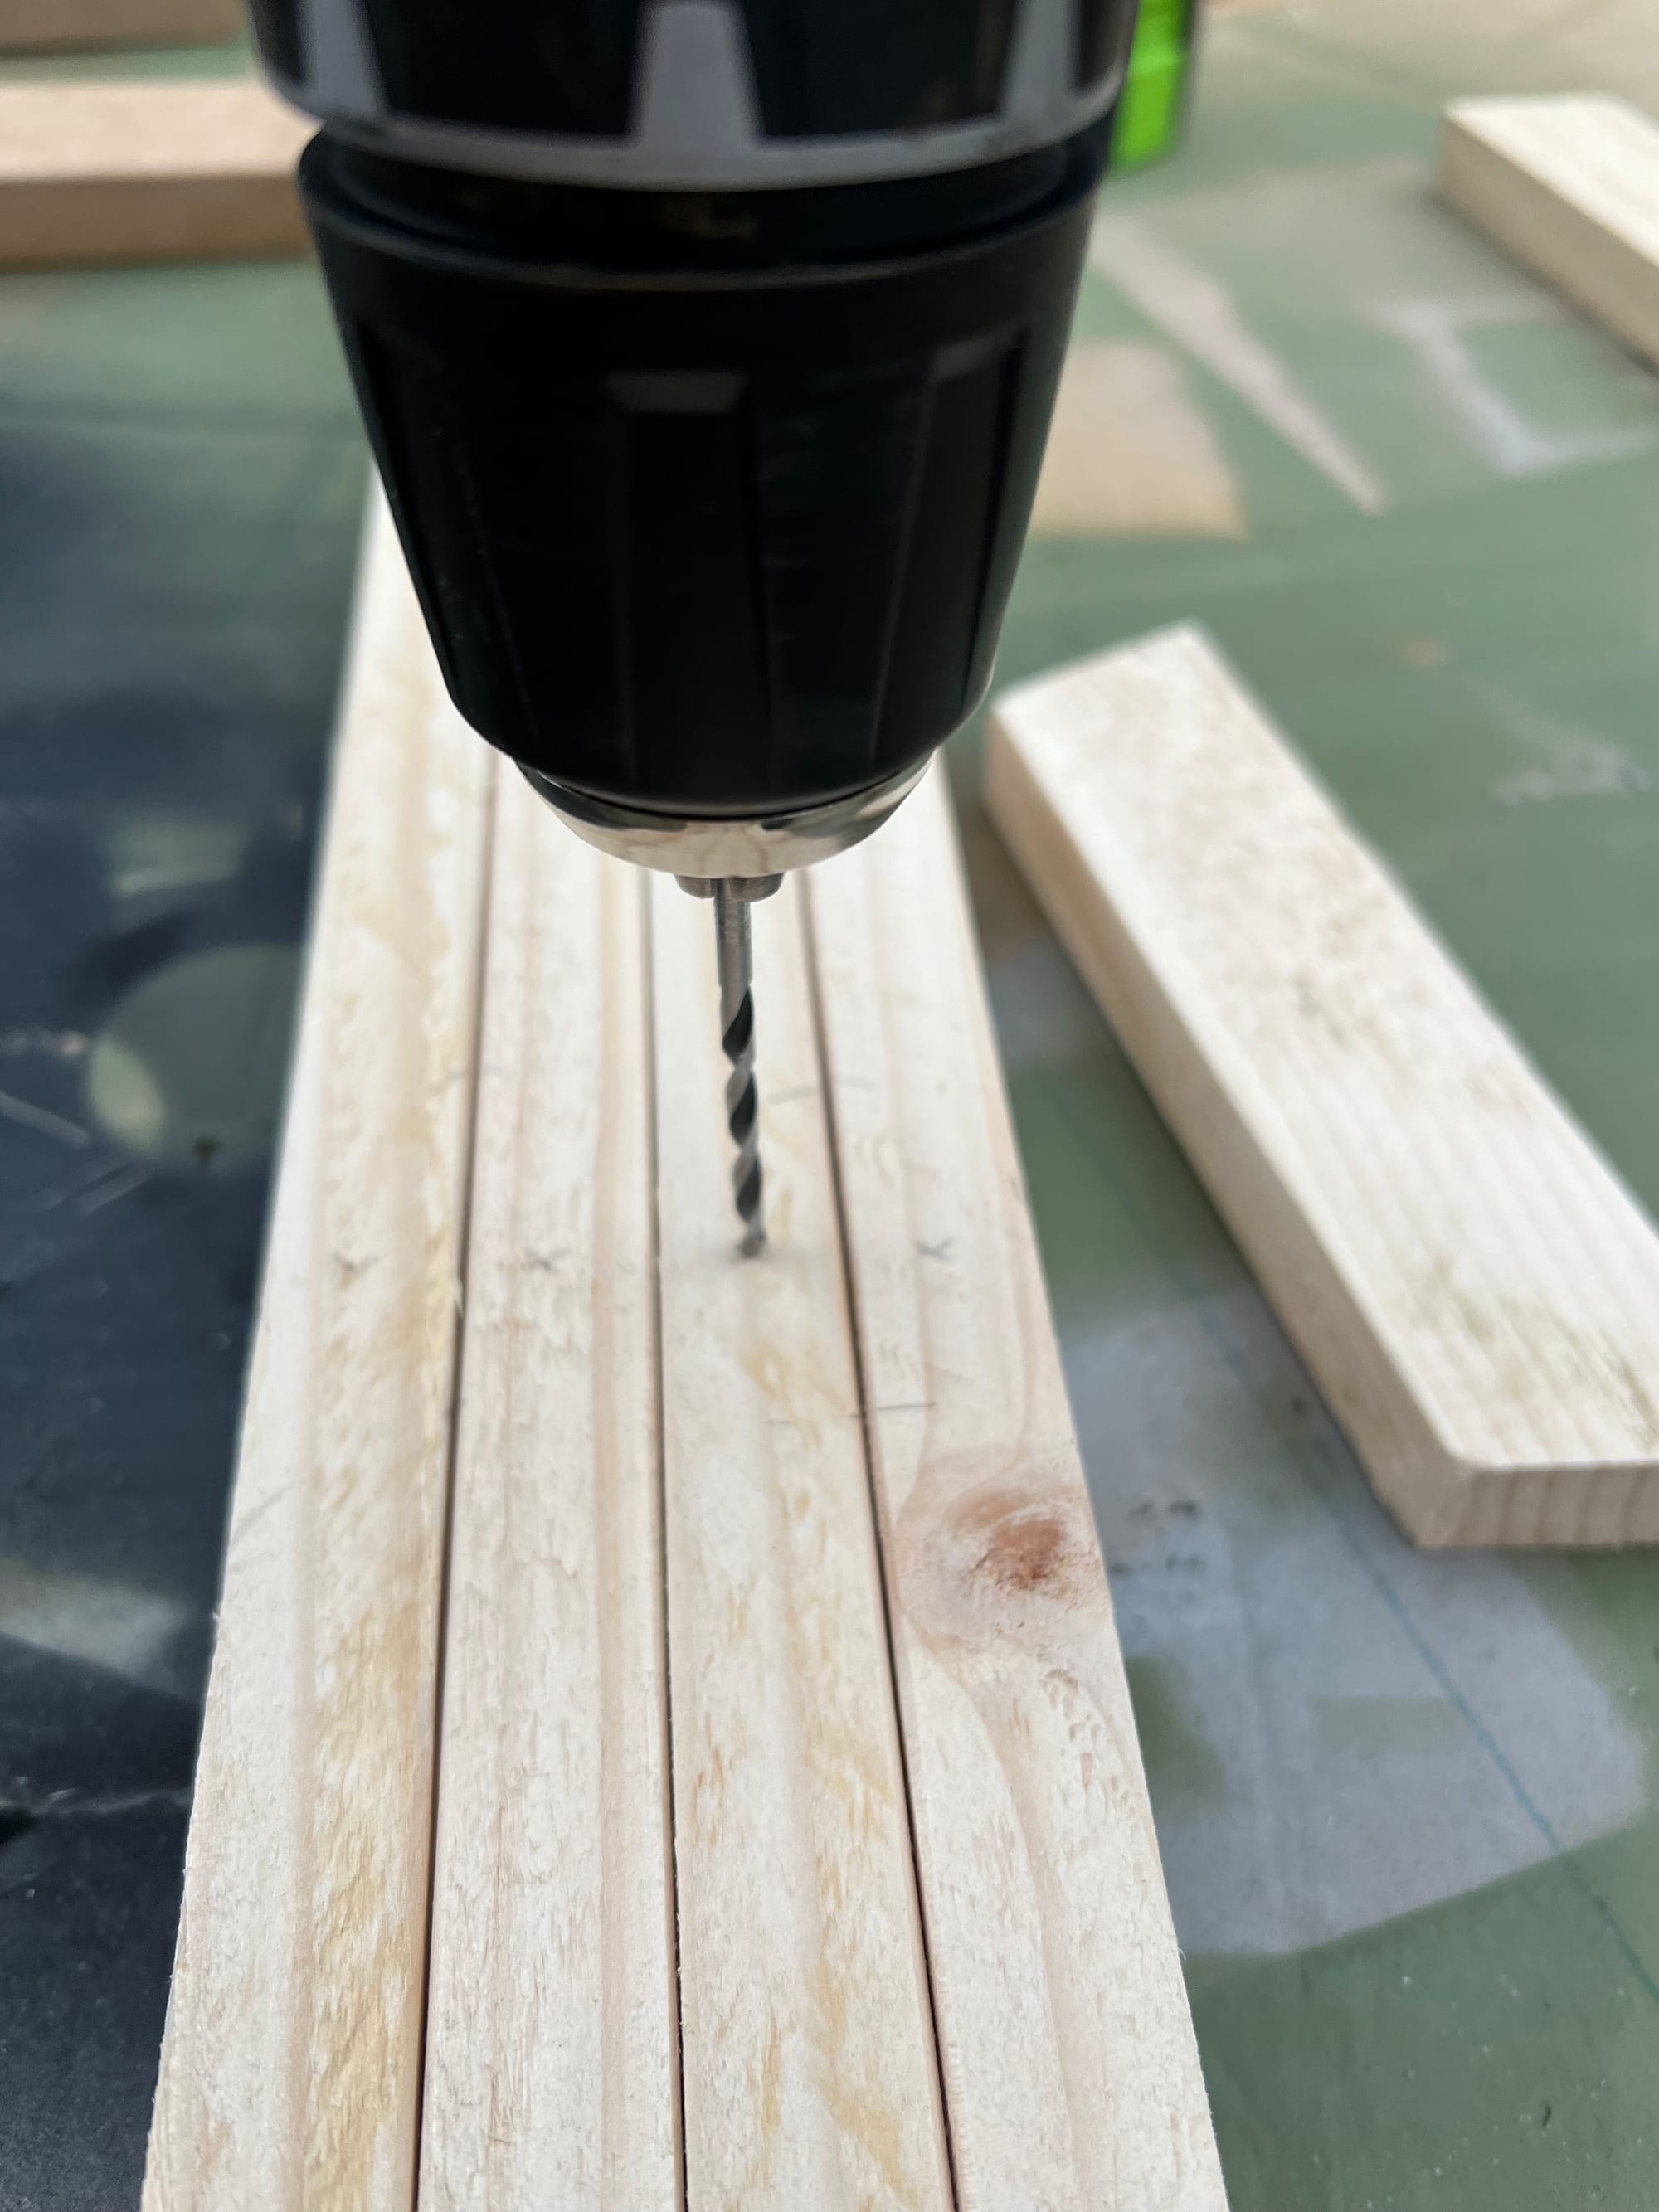
- Drill (screwdriver bit, drill bit, countersink)
- Clamps (x2)
- Protractor/miter box
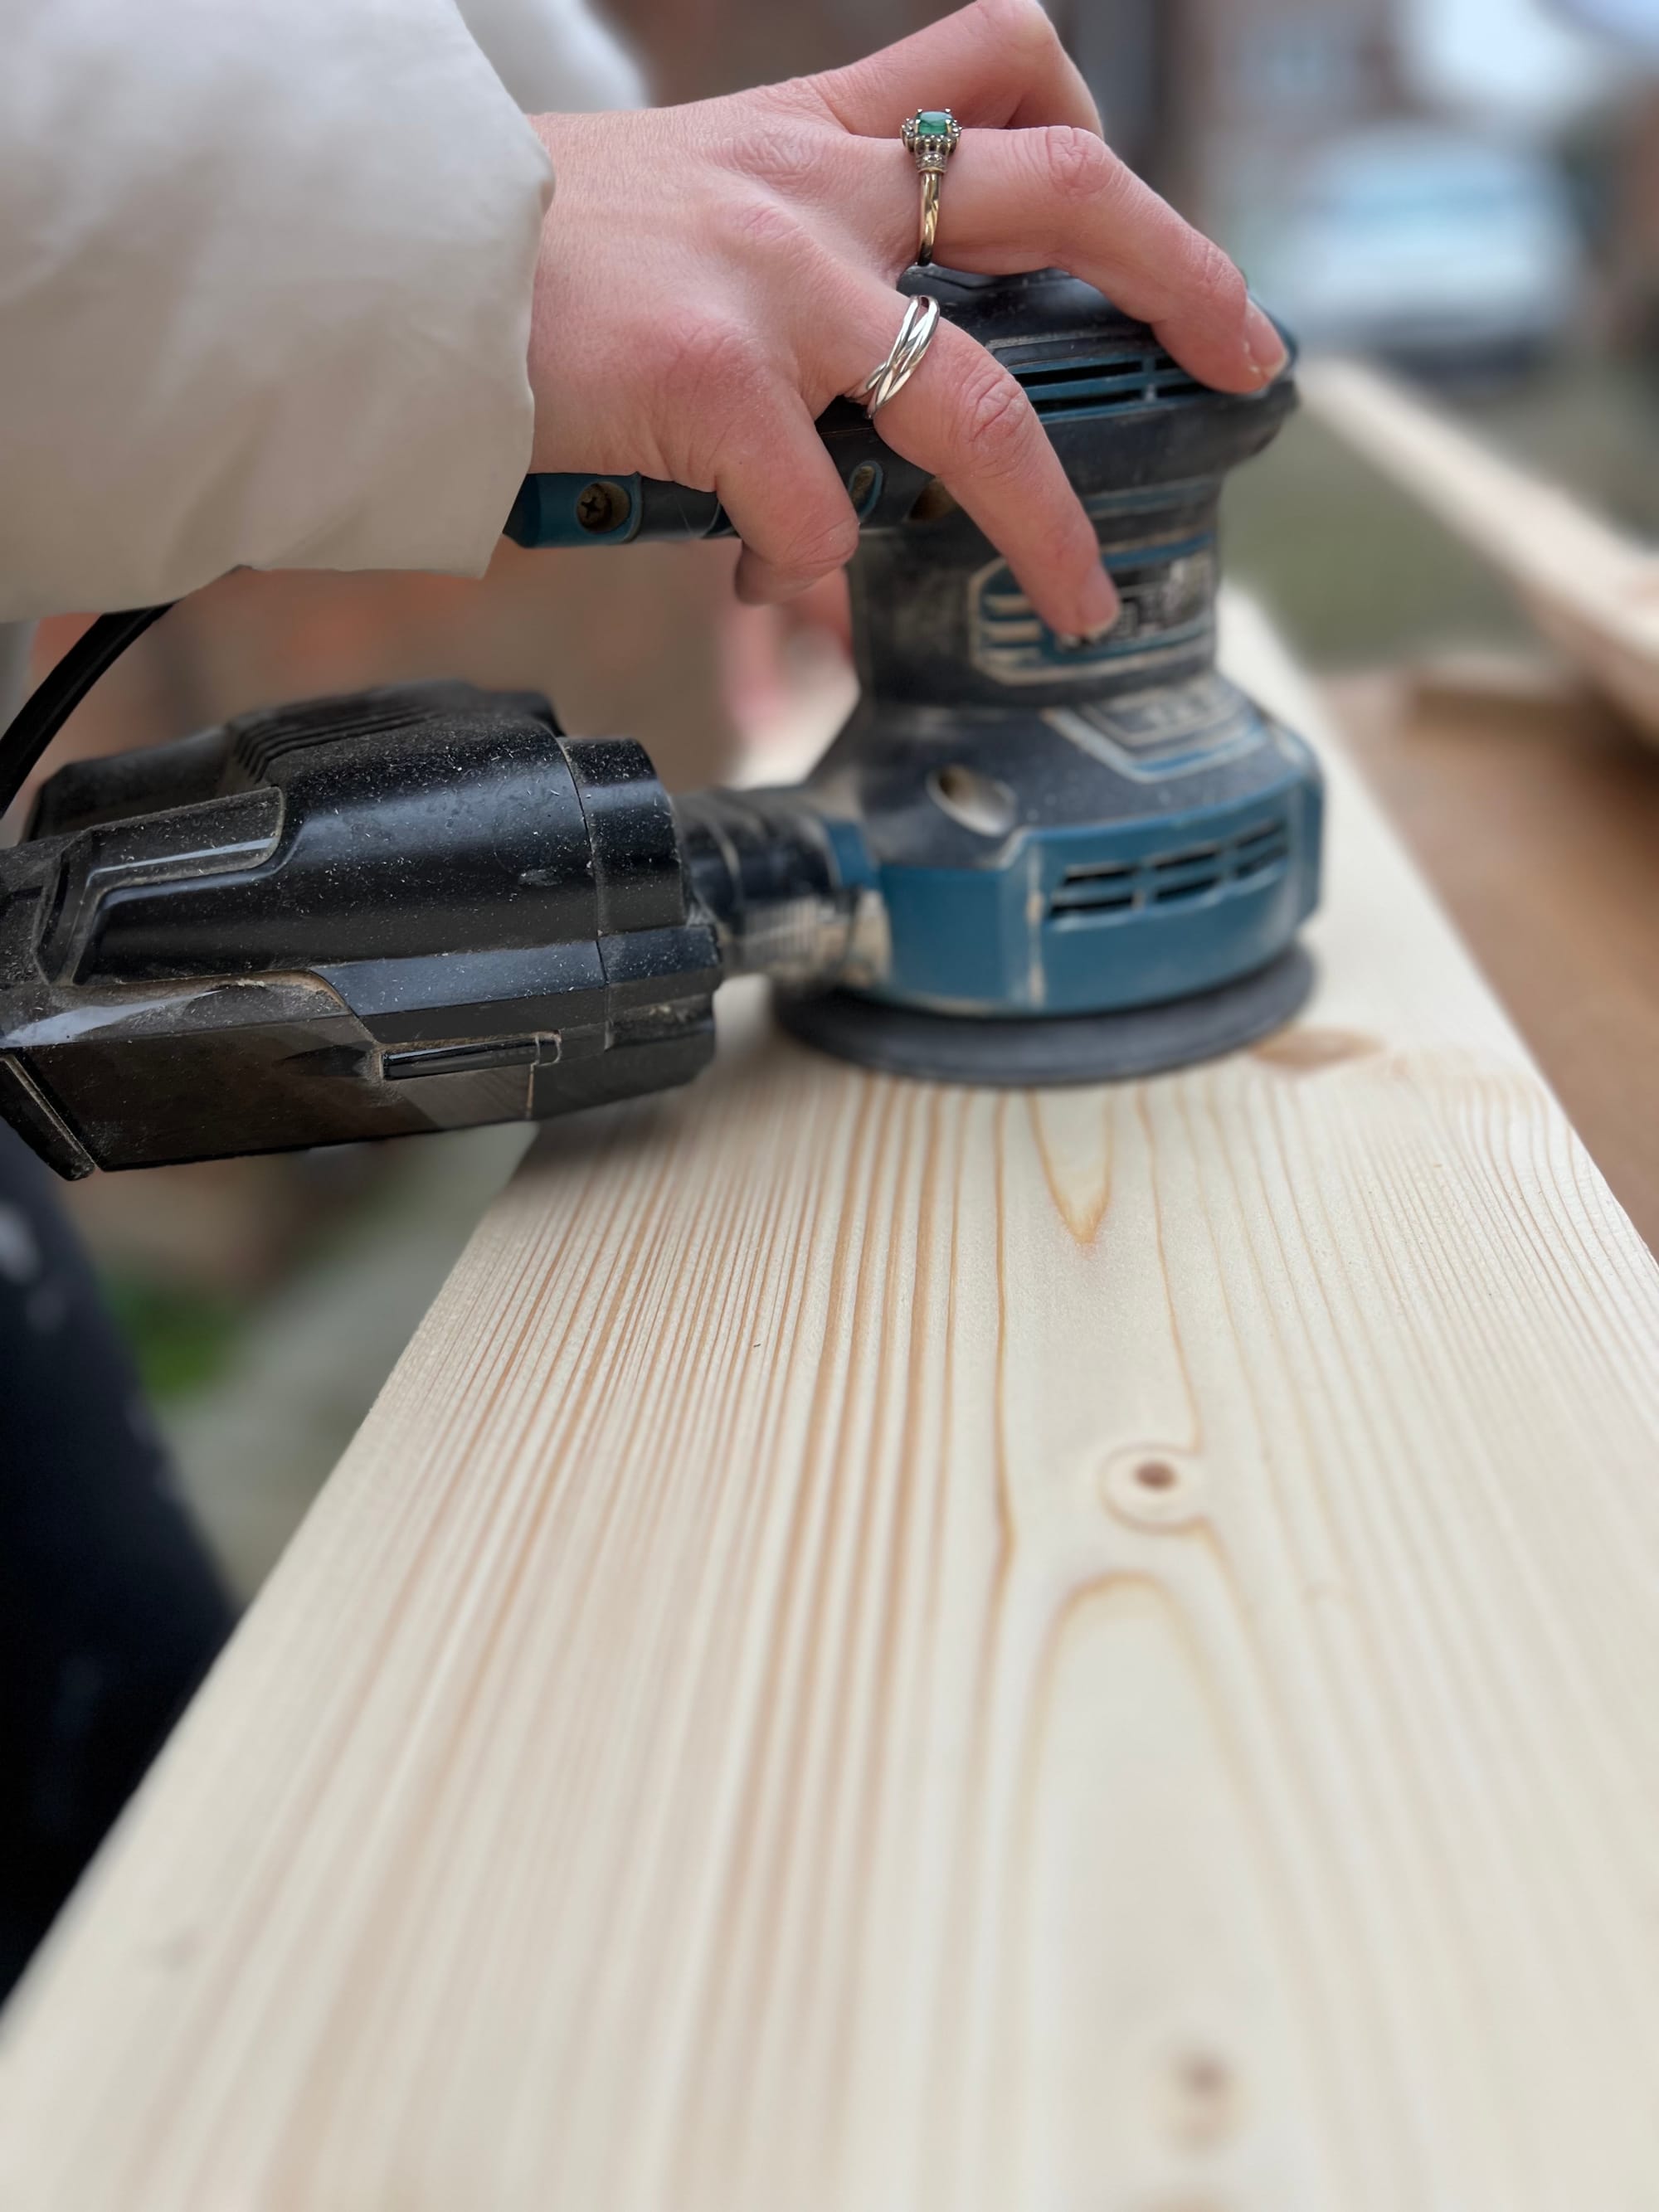
- Sanding paper, sanding block, or electric sander
I source my wood from a local timber supplier. Compared to DIY stores, local merchants often offer higher-quality wood. Plus, you’re more likely to get carpentry-grade timber that’s less prone to warping - a lifesaver when it comes to assembly. Investing a little extra in quality materials is worth it. Trust me, nothing is more frustrating than trying to assemble a bench with warped slats.
The great thing about this project is that it doesn’t require fancy tools. While I have a miter saw and a Japanese pull saw (perfect for clean cuts), you can absolutely make this bench with basic tools like a hand saw, a miter box, and sandpaper. If you’re serious about DIYing and upcycling then investing in better tools will really elevate your projects and save you time.
Step-to-step
Step 1: Cut everything up
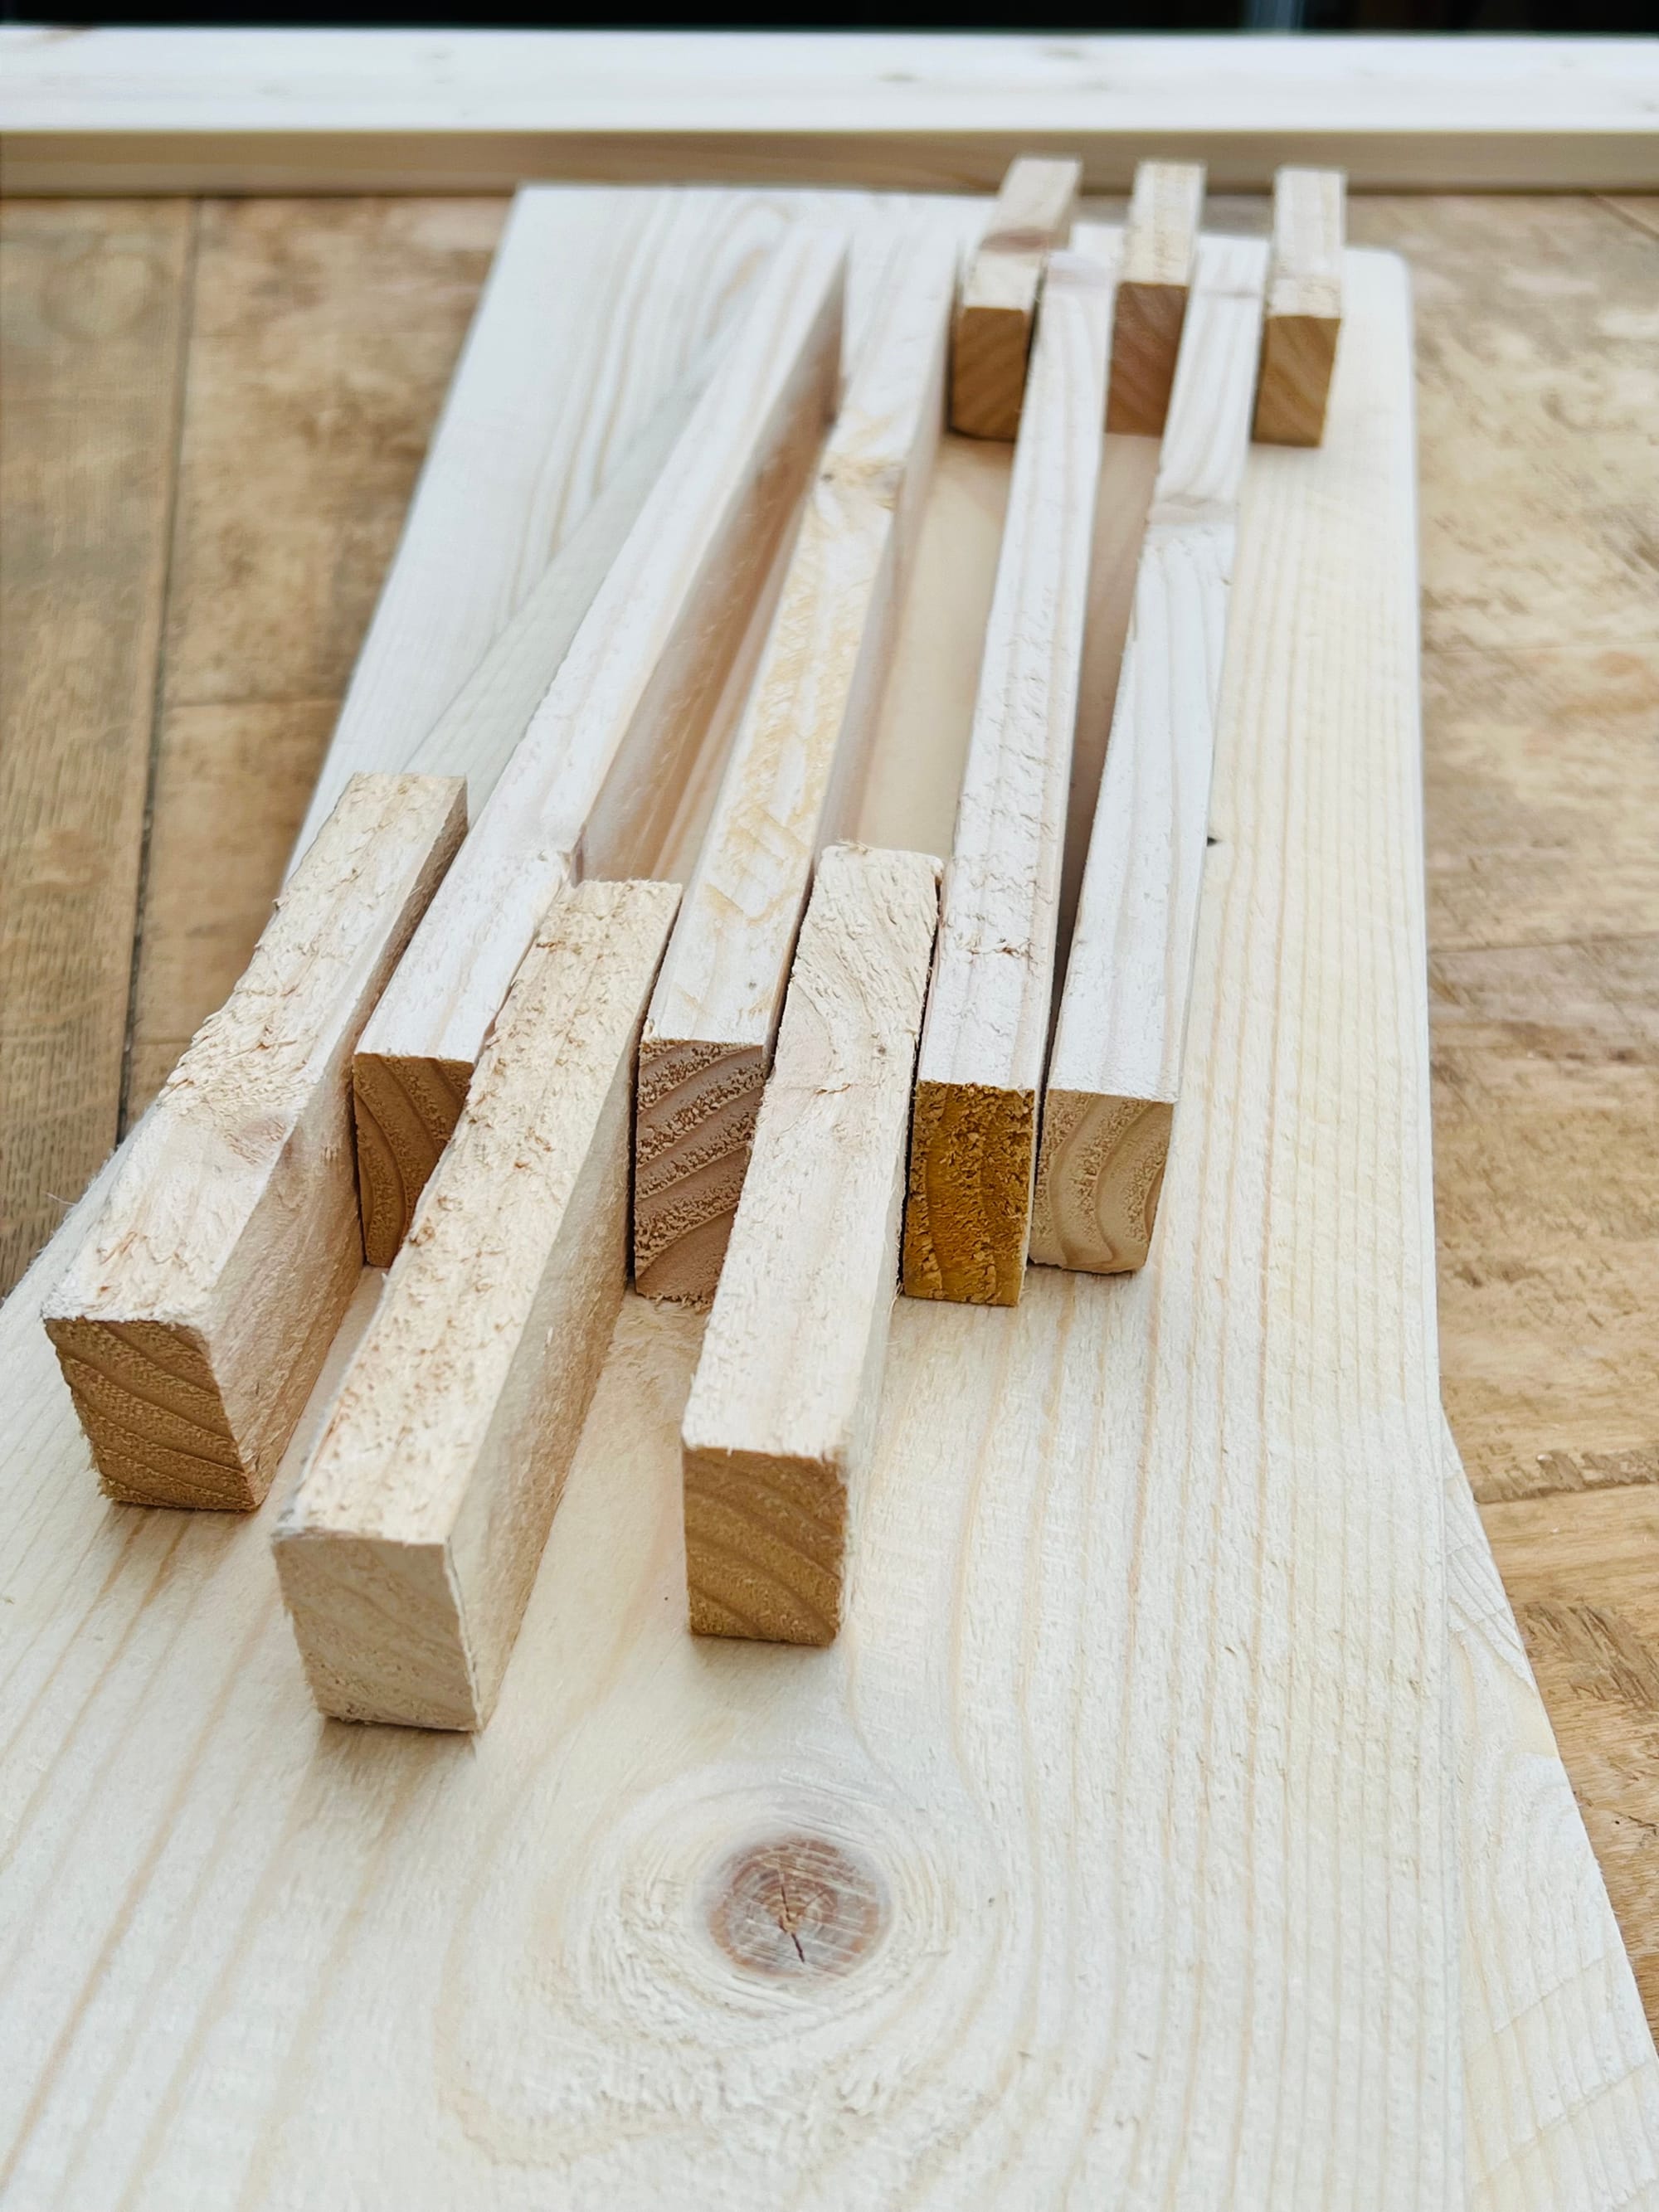
Items to cut and Measurements:
Bench Top - Pine Board (1x)
- Width: 20 cm
- Length: 100 cm
- Thickness: min 1.8 cm
Bench Shelf - Pine Board (1x)
- Width: 20 cm
- Length: 78 cm
- Thickness: 1.8 cm
Bench Shelf Support - Pine Slats (2x)
- Width: 3.8 cm
- Length: 20 cm
- Thickness: 1.9 cm
Legs - Pine Slats (4x)
- Width: 3.8 cm
- Length: 40 cm
- Thickness: 1.9 cm
Bench Leg Support - Pine Slats (6x)
- Width: 3.8 cm
- Length: 15 cm
- Thickness: 1.9 cm
To cut the bench top and the shelf you just need to measure up 100 and 78 cm and do a straight cut - simple 90-degree cuts. The legs are a little bit more complex, but not tricky, it just requires some geometry.
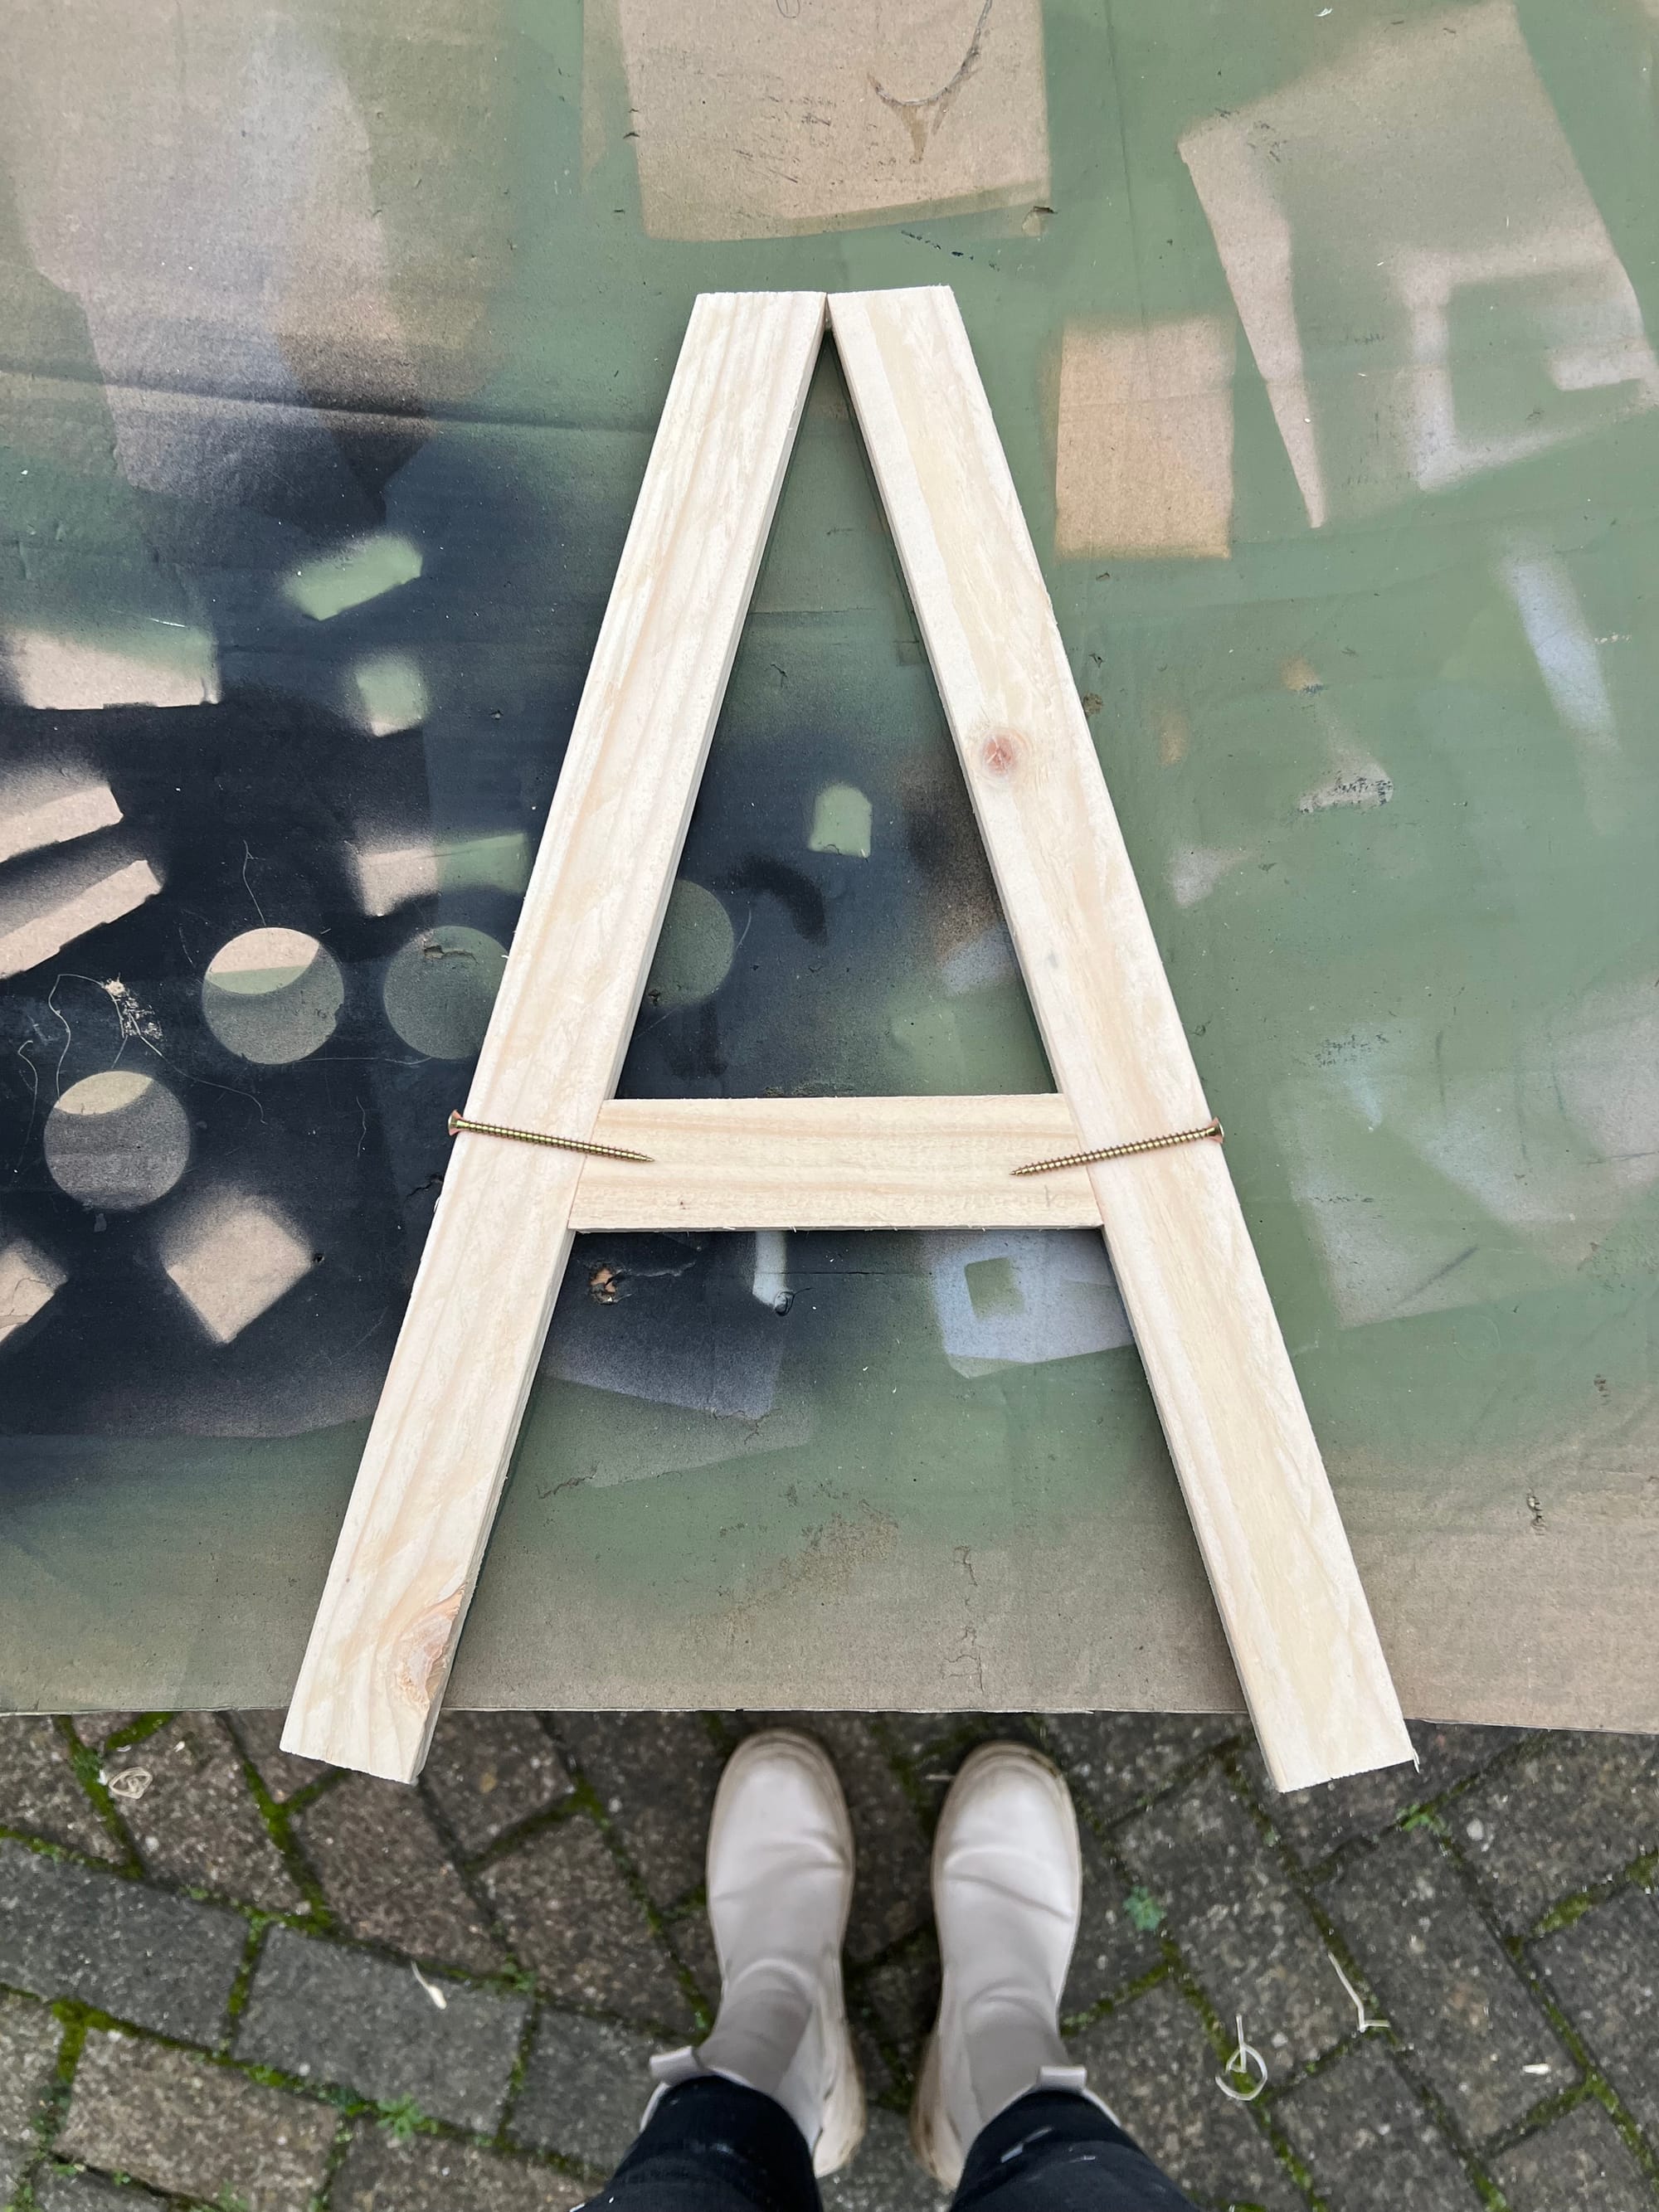
- Legs: Cut to 40 cm with one end at a 15-degree angle and the other straight, and for the leg support just cut to 15 cm, with both ends angled at 15 degrees.
- Bench Shelf Support: Cut to 20 cm, with both ends angled at 15
degrees.
Use a protractor/miter box or your miter saw to mark precise angled cuts. Make sure your saw blade cuts on the offcut side of the line for accuracy.

Step 2: Sanding
Sand all boards until smooth, ensuring no rough edges or splinters. My test? If someone in tights can sit on the bench without worrying about snags, you’re good to go! While I use an orbital sander for efficiency, a sanding block or sandpaper will work just fine. Round off sharp edges for safety, especially if kids will use the bench. Before assembling, give the boards a good dust-off to ensure a clean surface for glueing and staining.
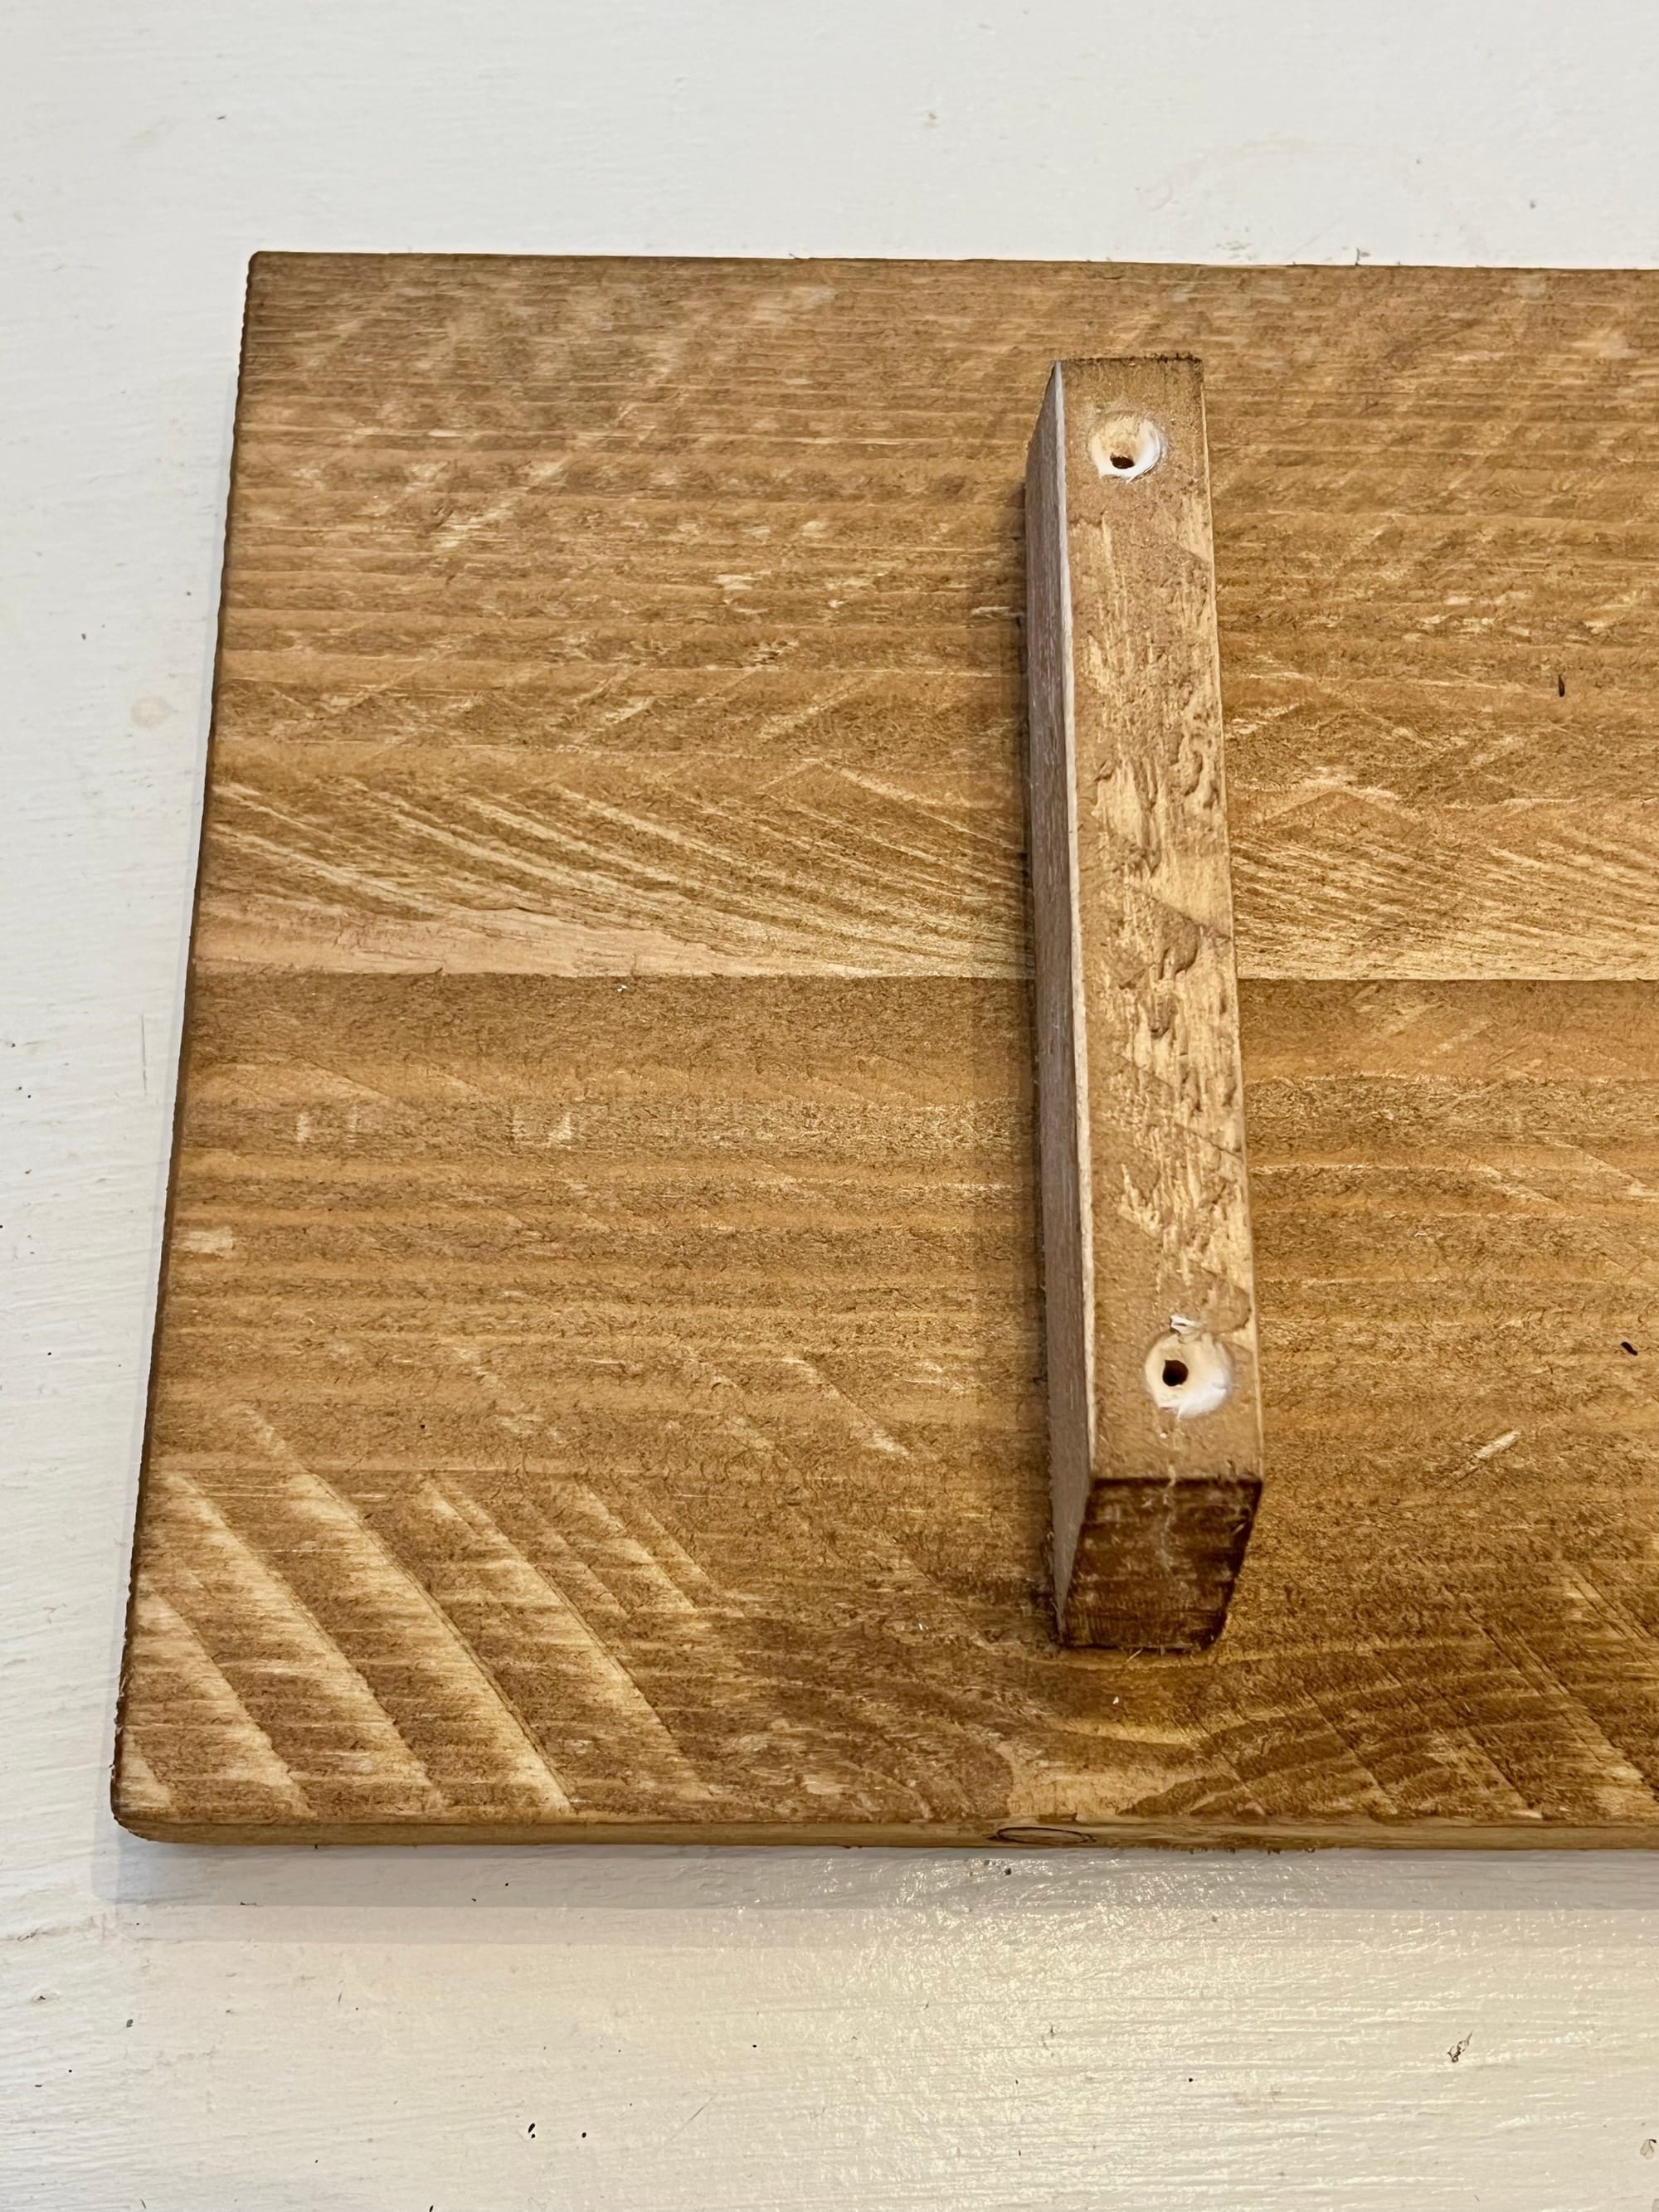
Step 3: Mark the legs
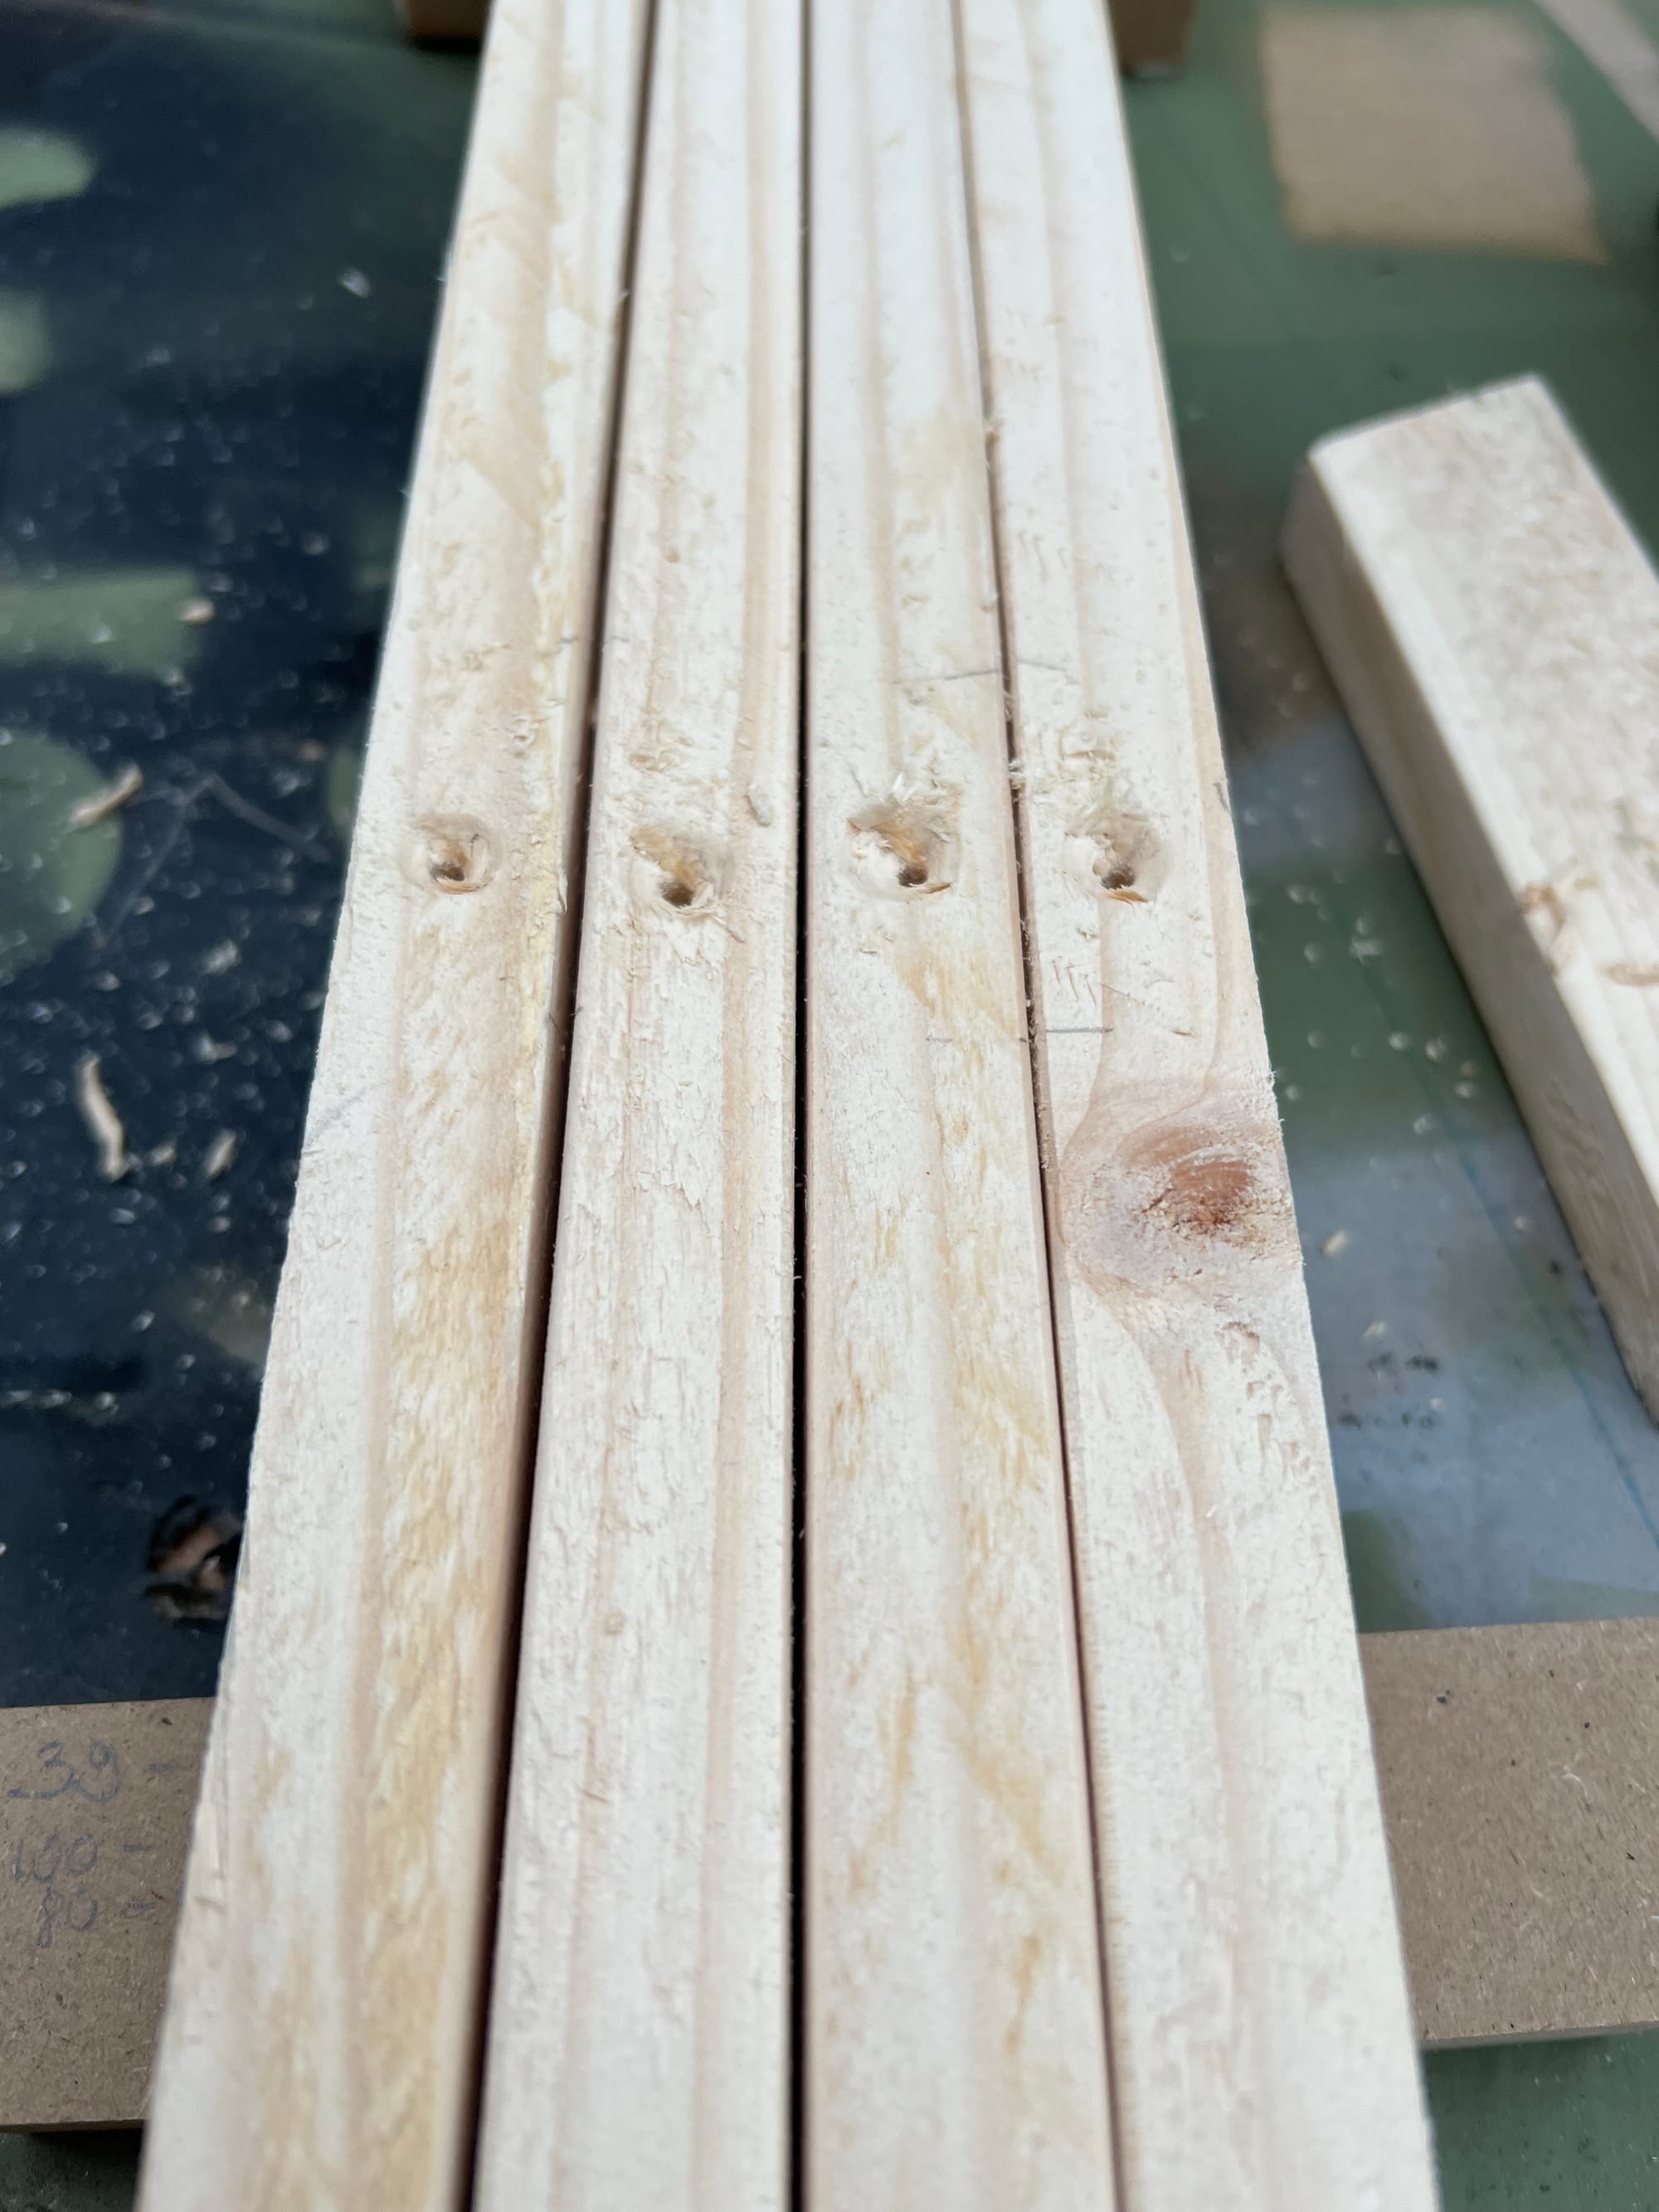
Start by laying out the legs with the angled ends meeting at the top. After this you just have to mark the screw placements on one leg, then use it as a template for the others. Finish with drill pilot holes, countersink the holes, and dry-fit the pieces.
Step 4: Staining
Before permanently assembling everything, I like to stain all my pieces with the base colour at this time. I used Littlefair’s Internal Wood Stain in light oak for its eco-friendly formula and warm tone.
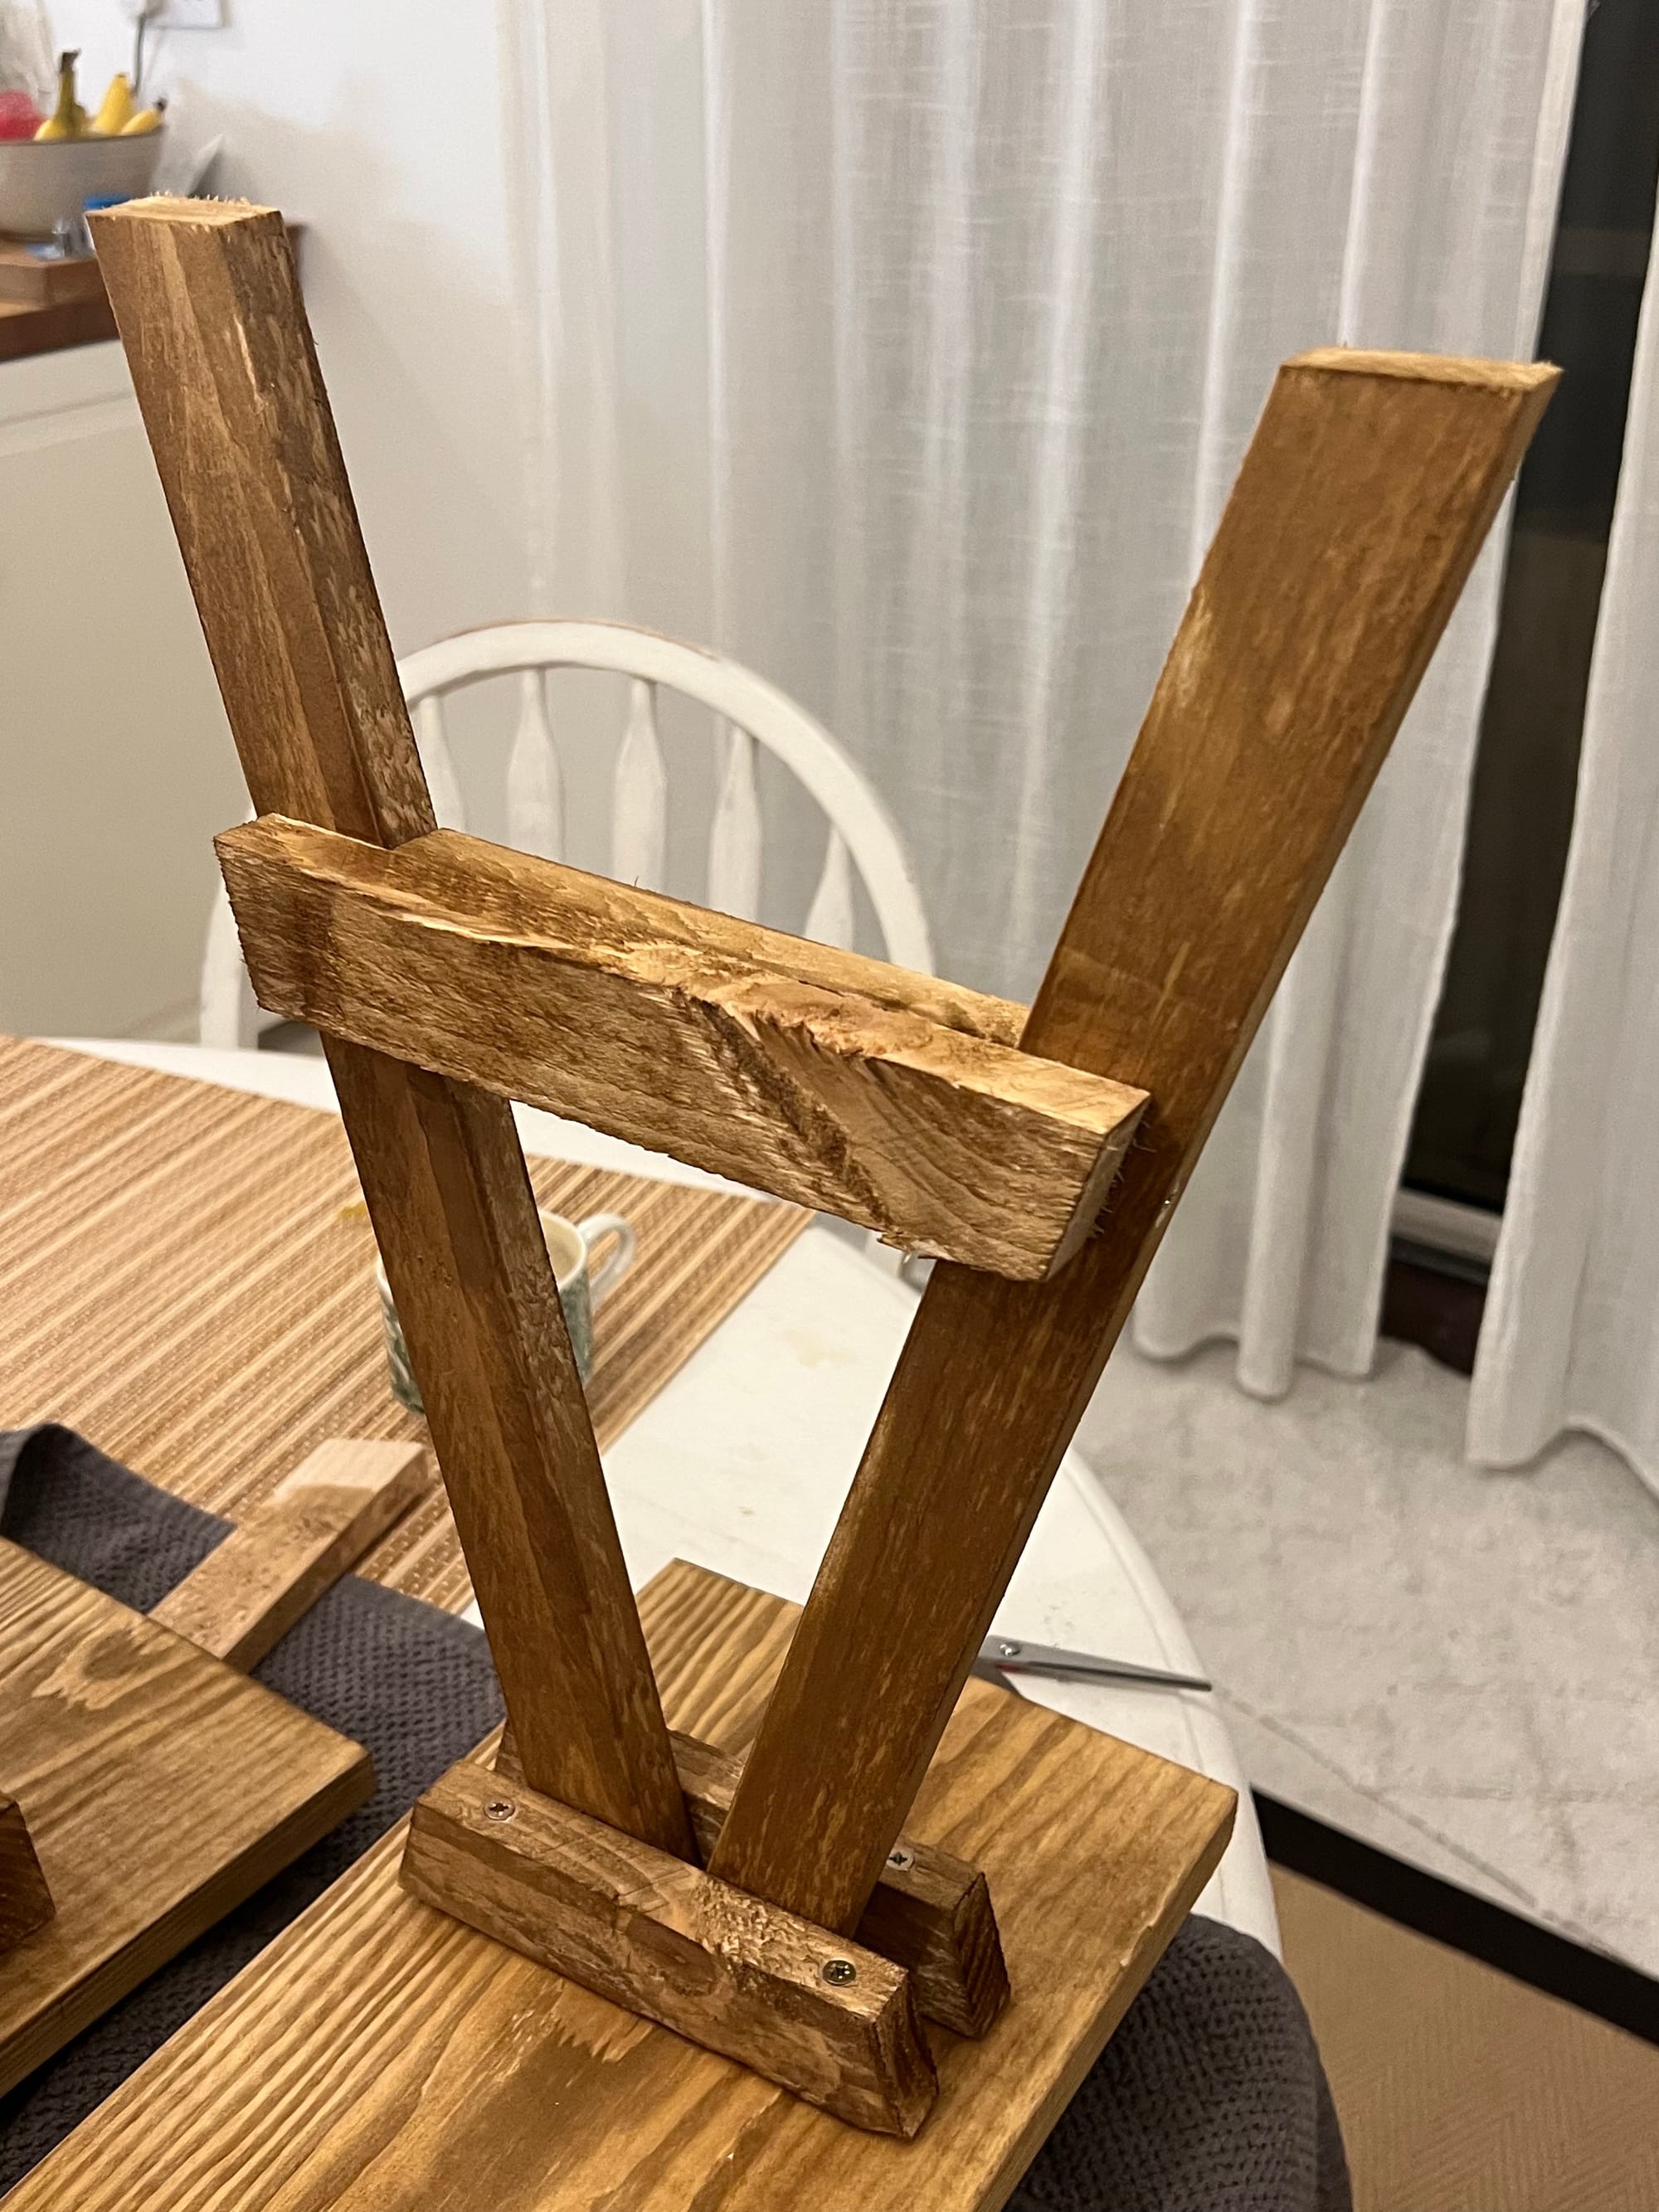
Step 5: Assemble the Legs
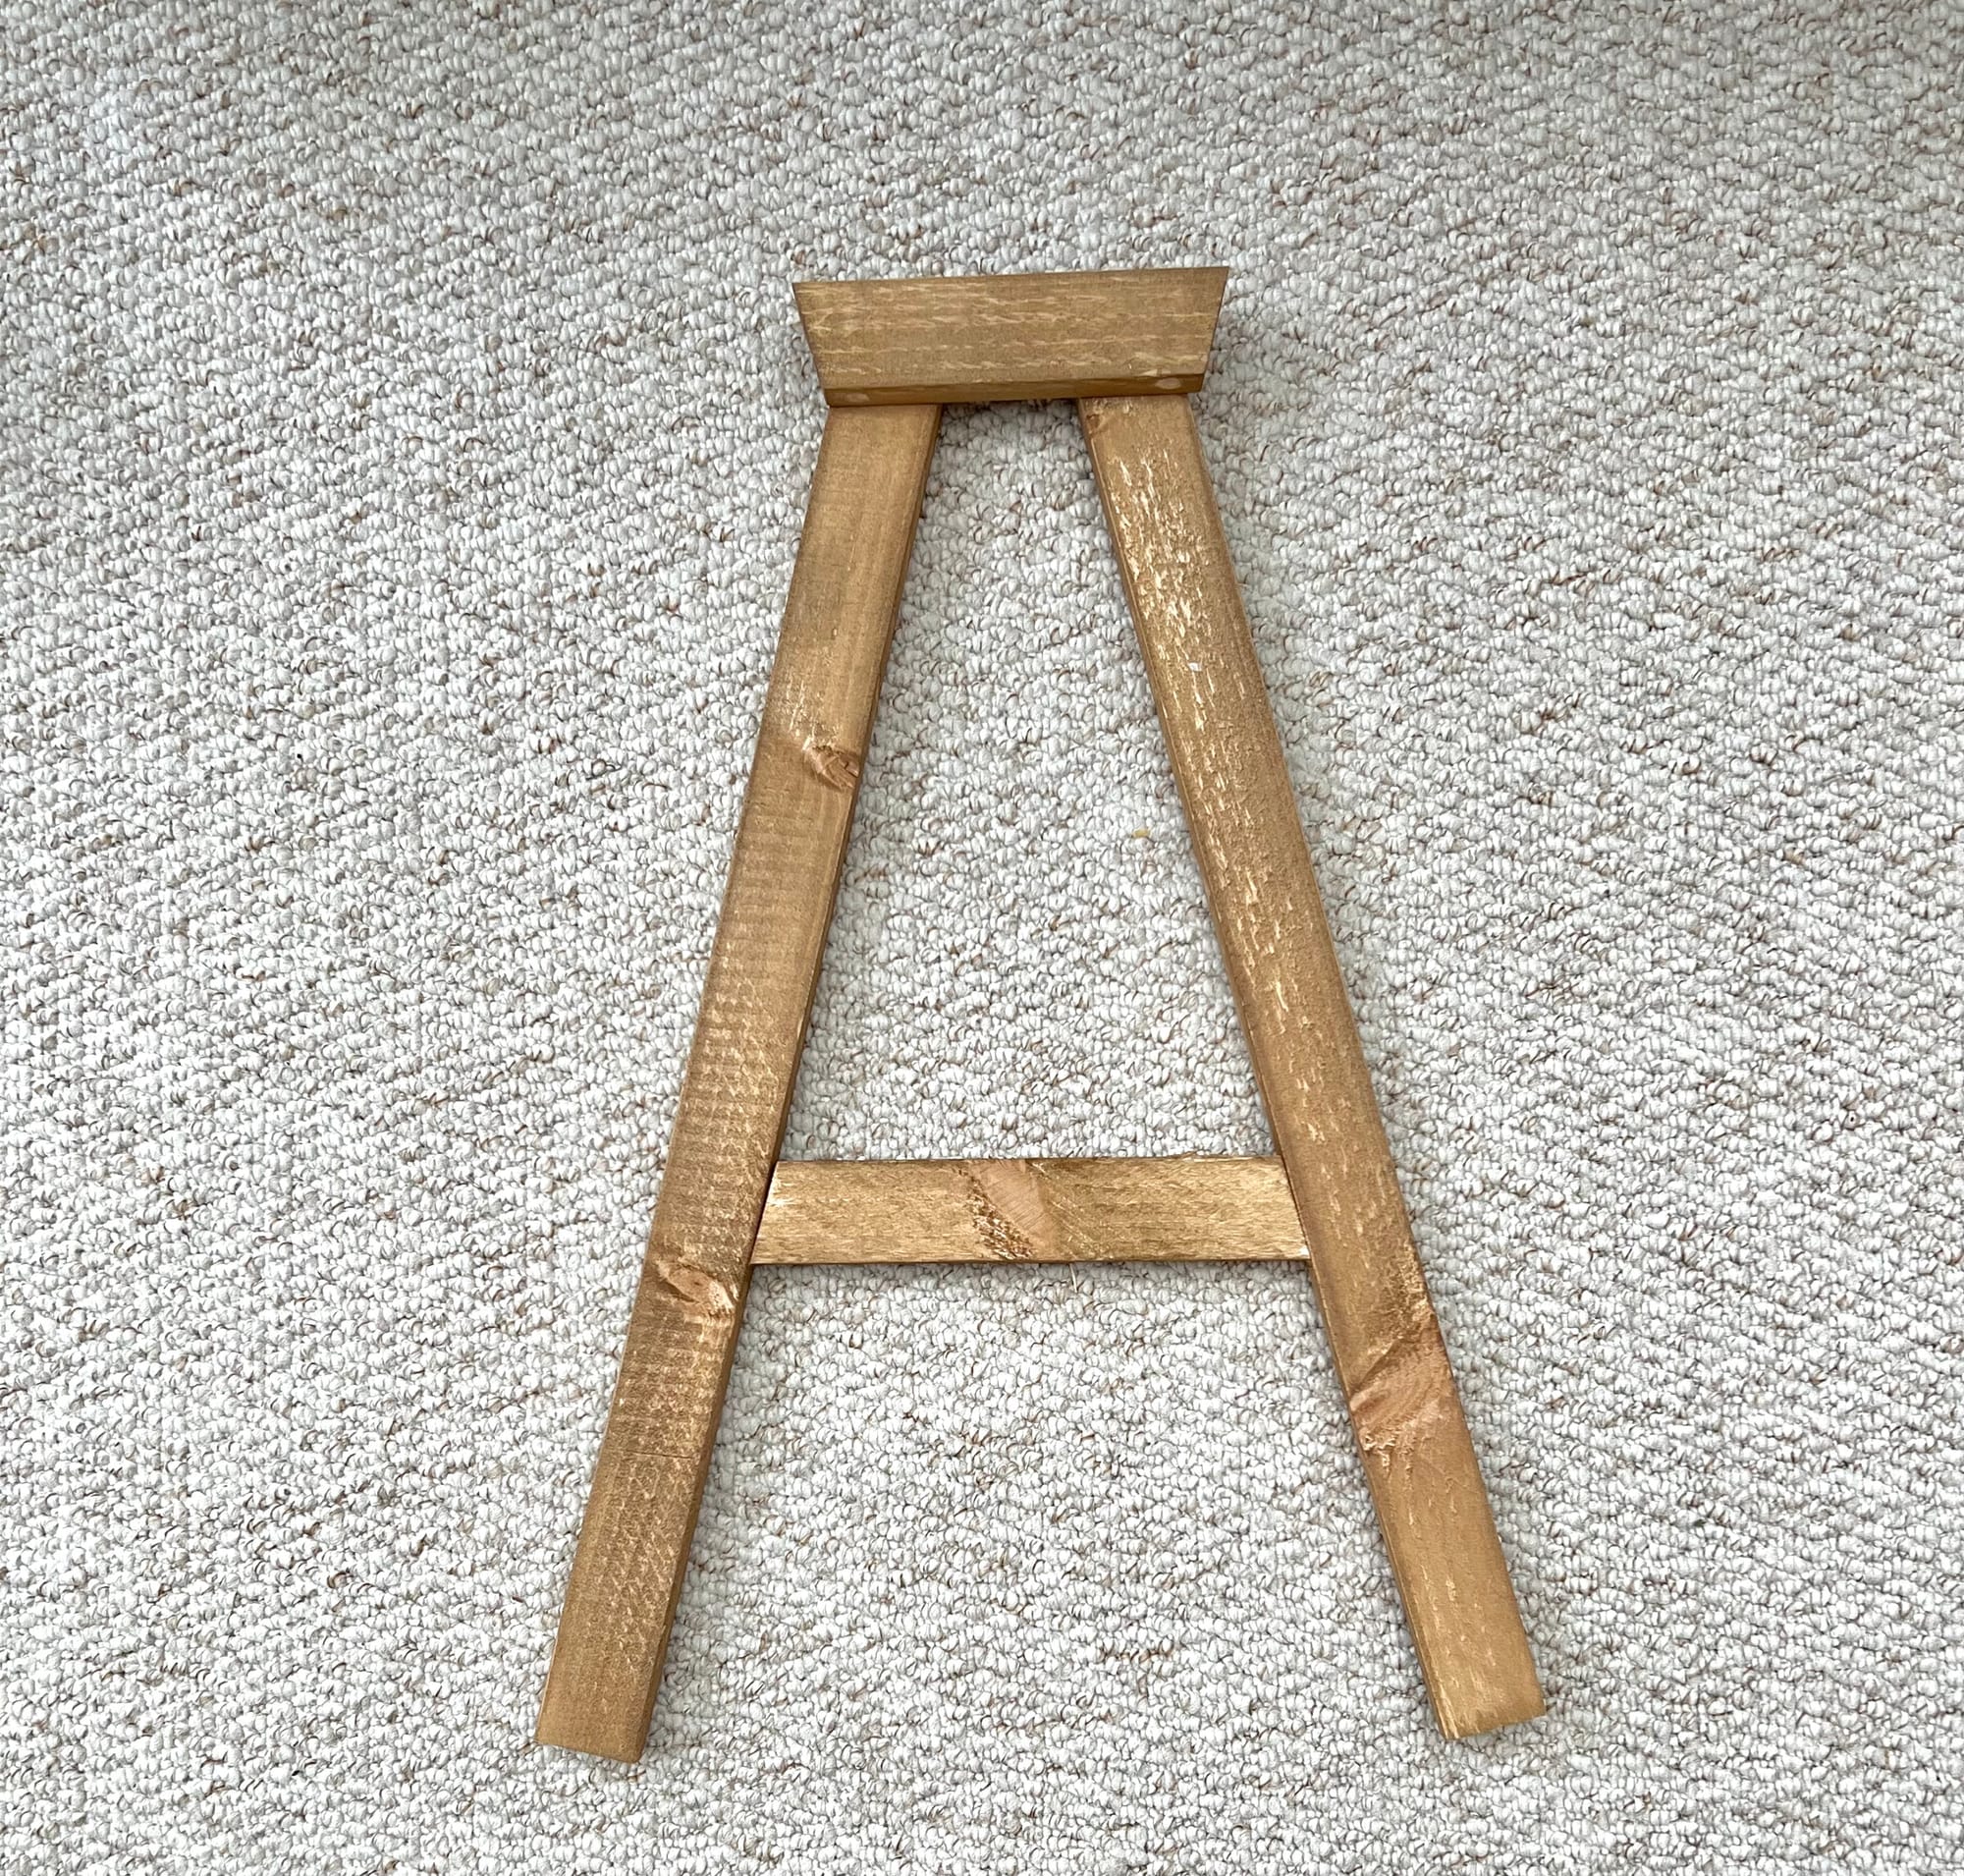
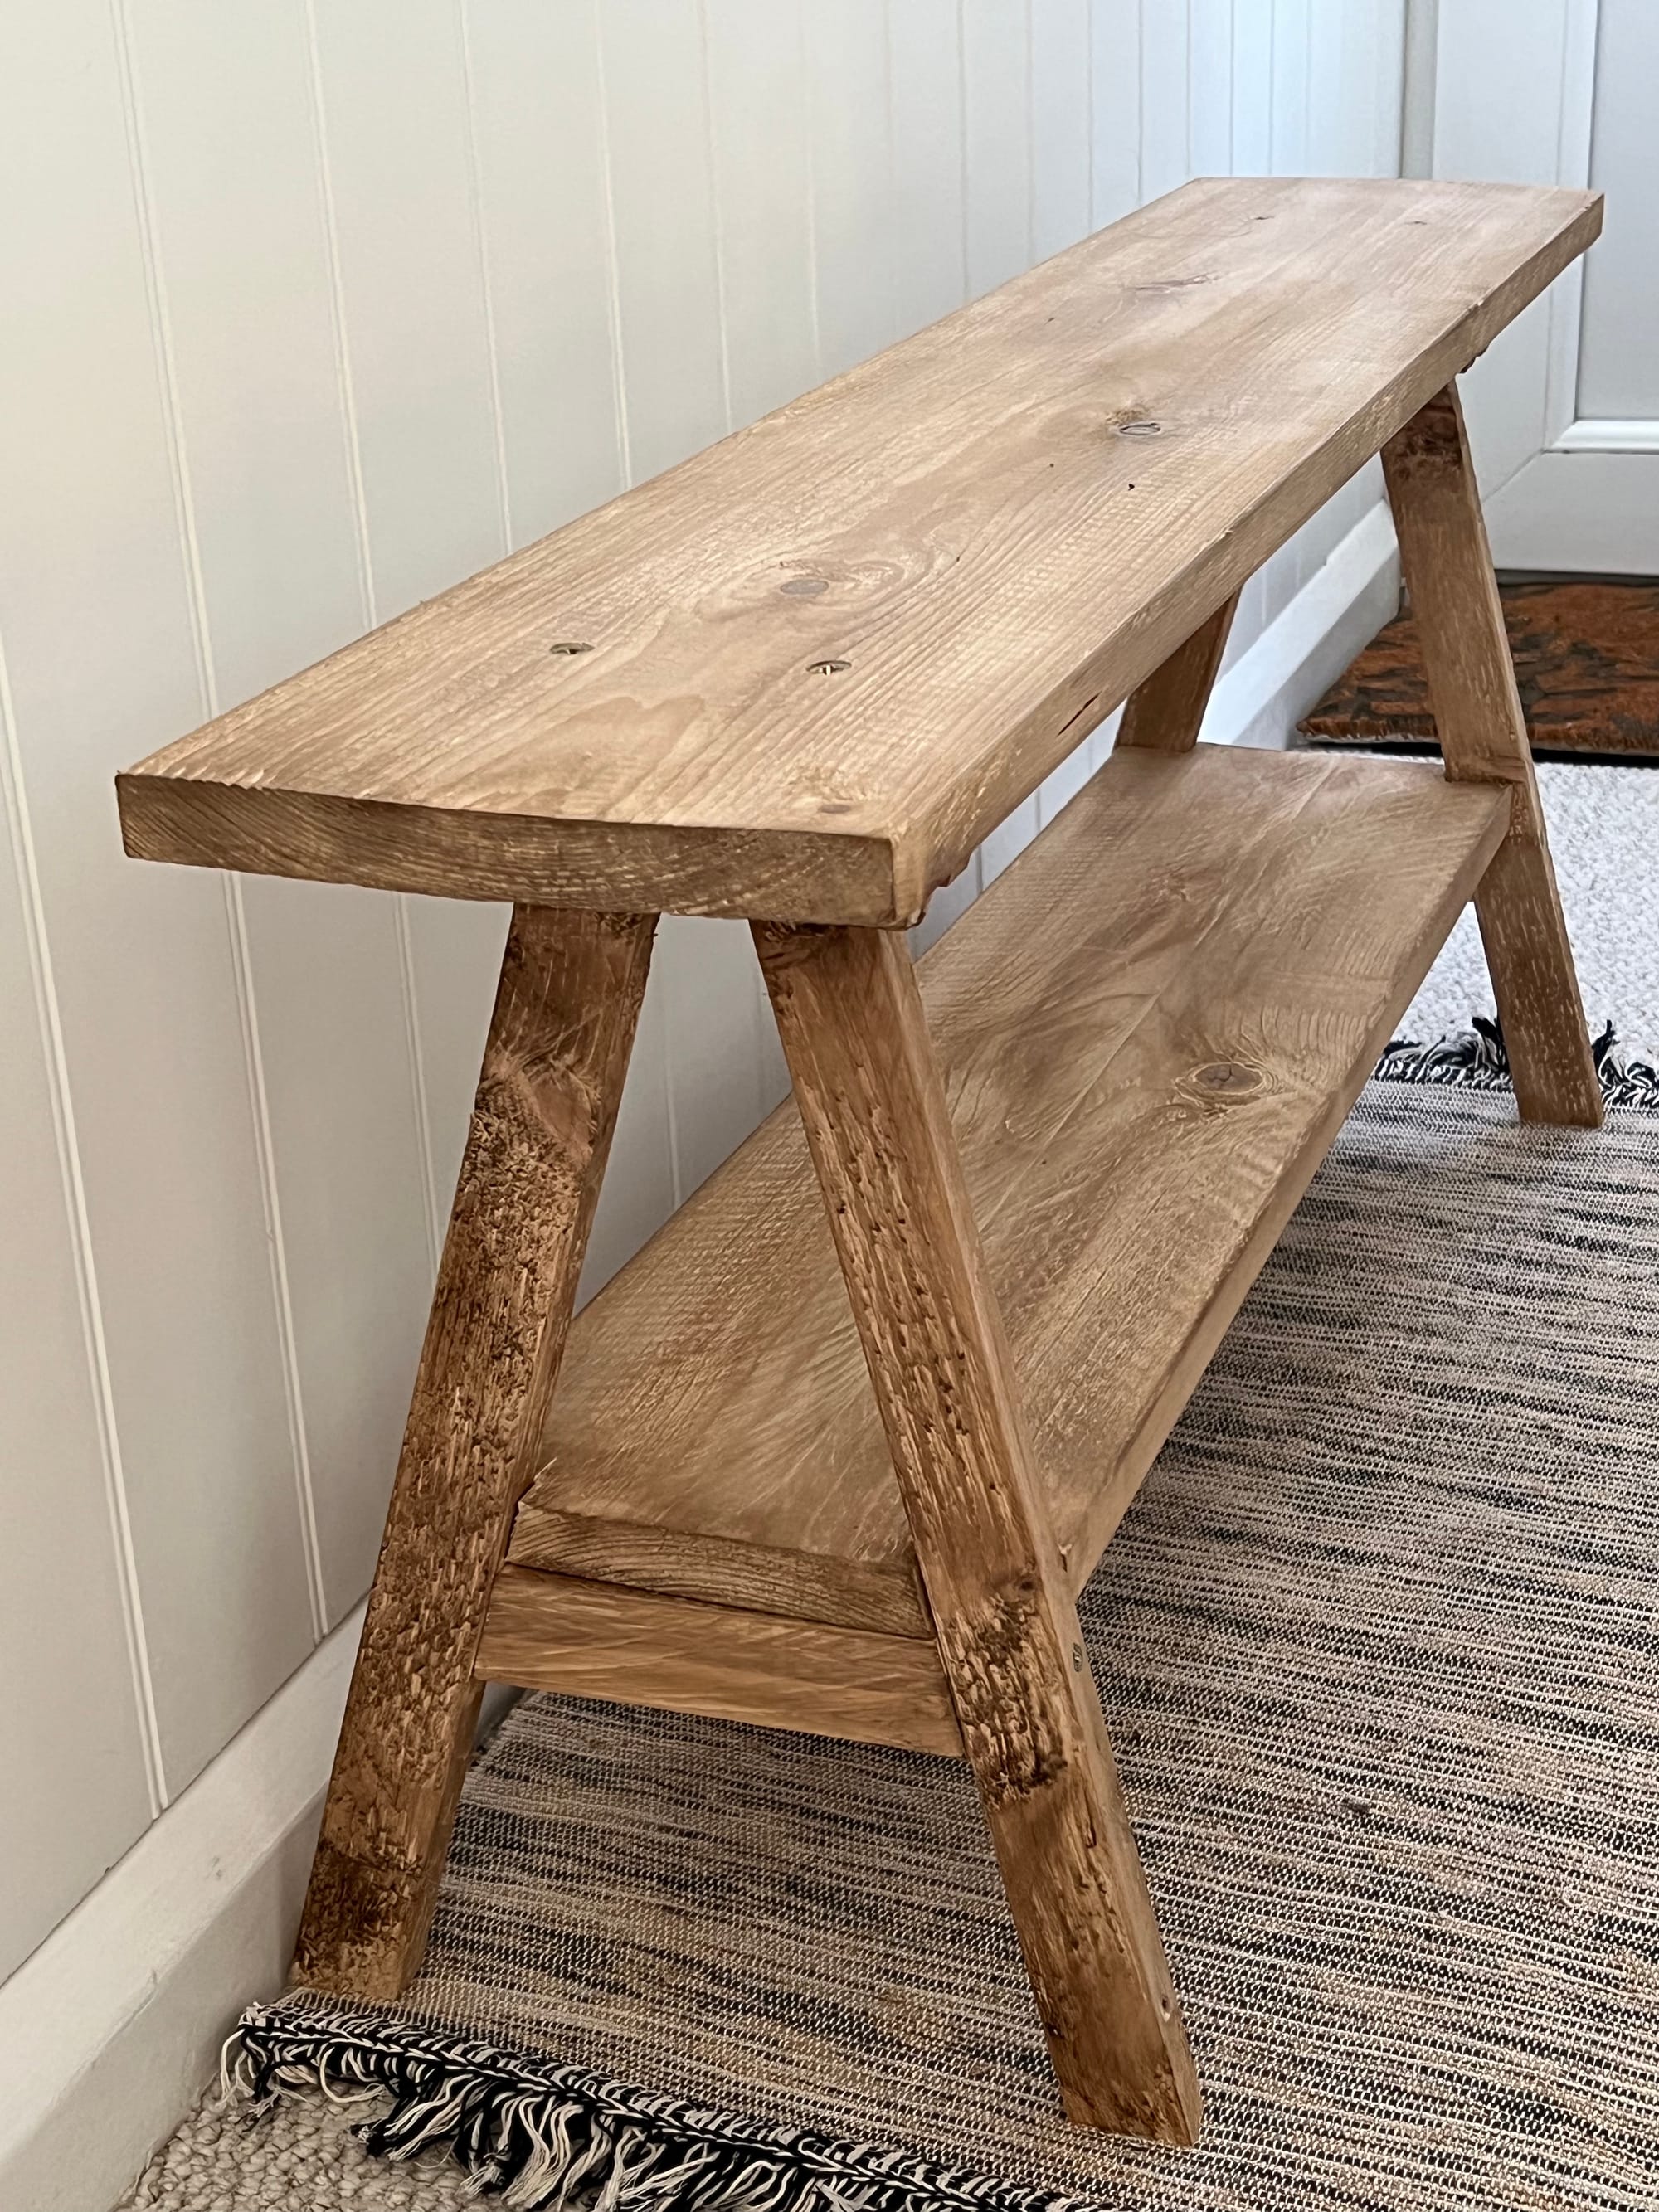
Apply wood glue generously to all joints. Start by attaching the leg supports in the middle then add the top support next, to create the A-frame as you see it in the picture. Use clamps to hold everything in place as the glue sets.
Step 6: Complete the Assembly
For the remaining two leg supports, mark guidelines 10 cm in from each end of the top board. Glue and screw the 2 leg supports in place first, then attach the A-frame legs against them. Apply glue to overlap the bench shelf supports with the existing leg supports and secure them with a clamp.
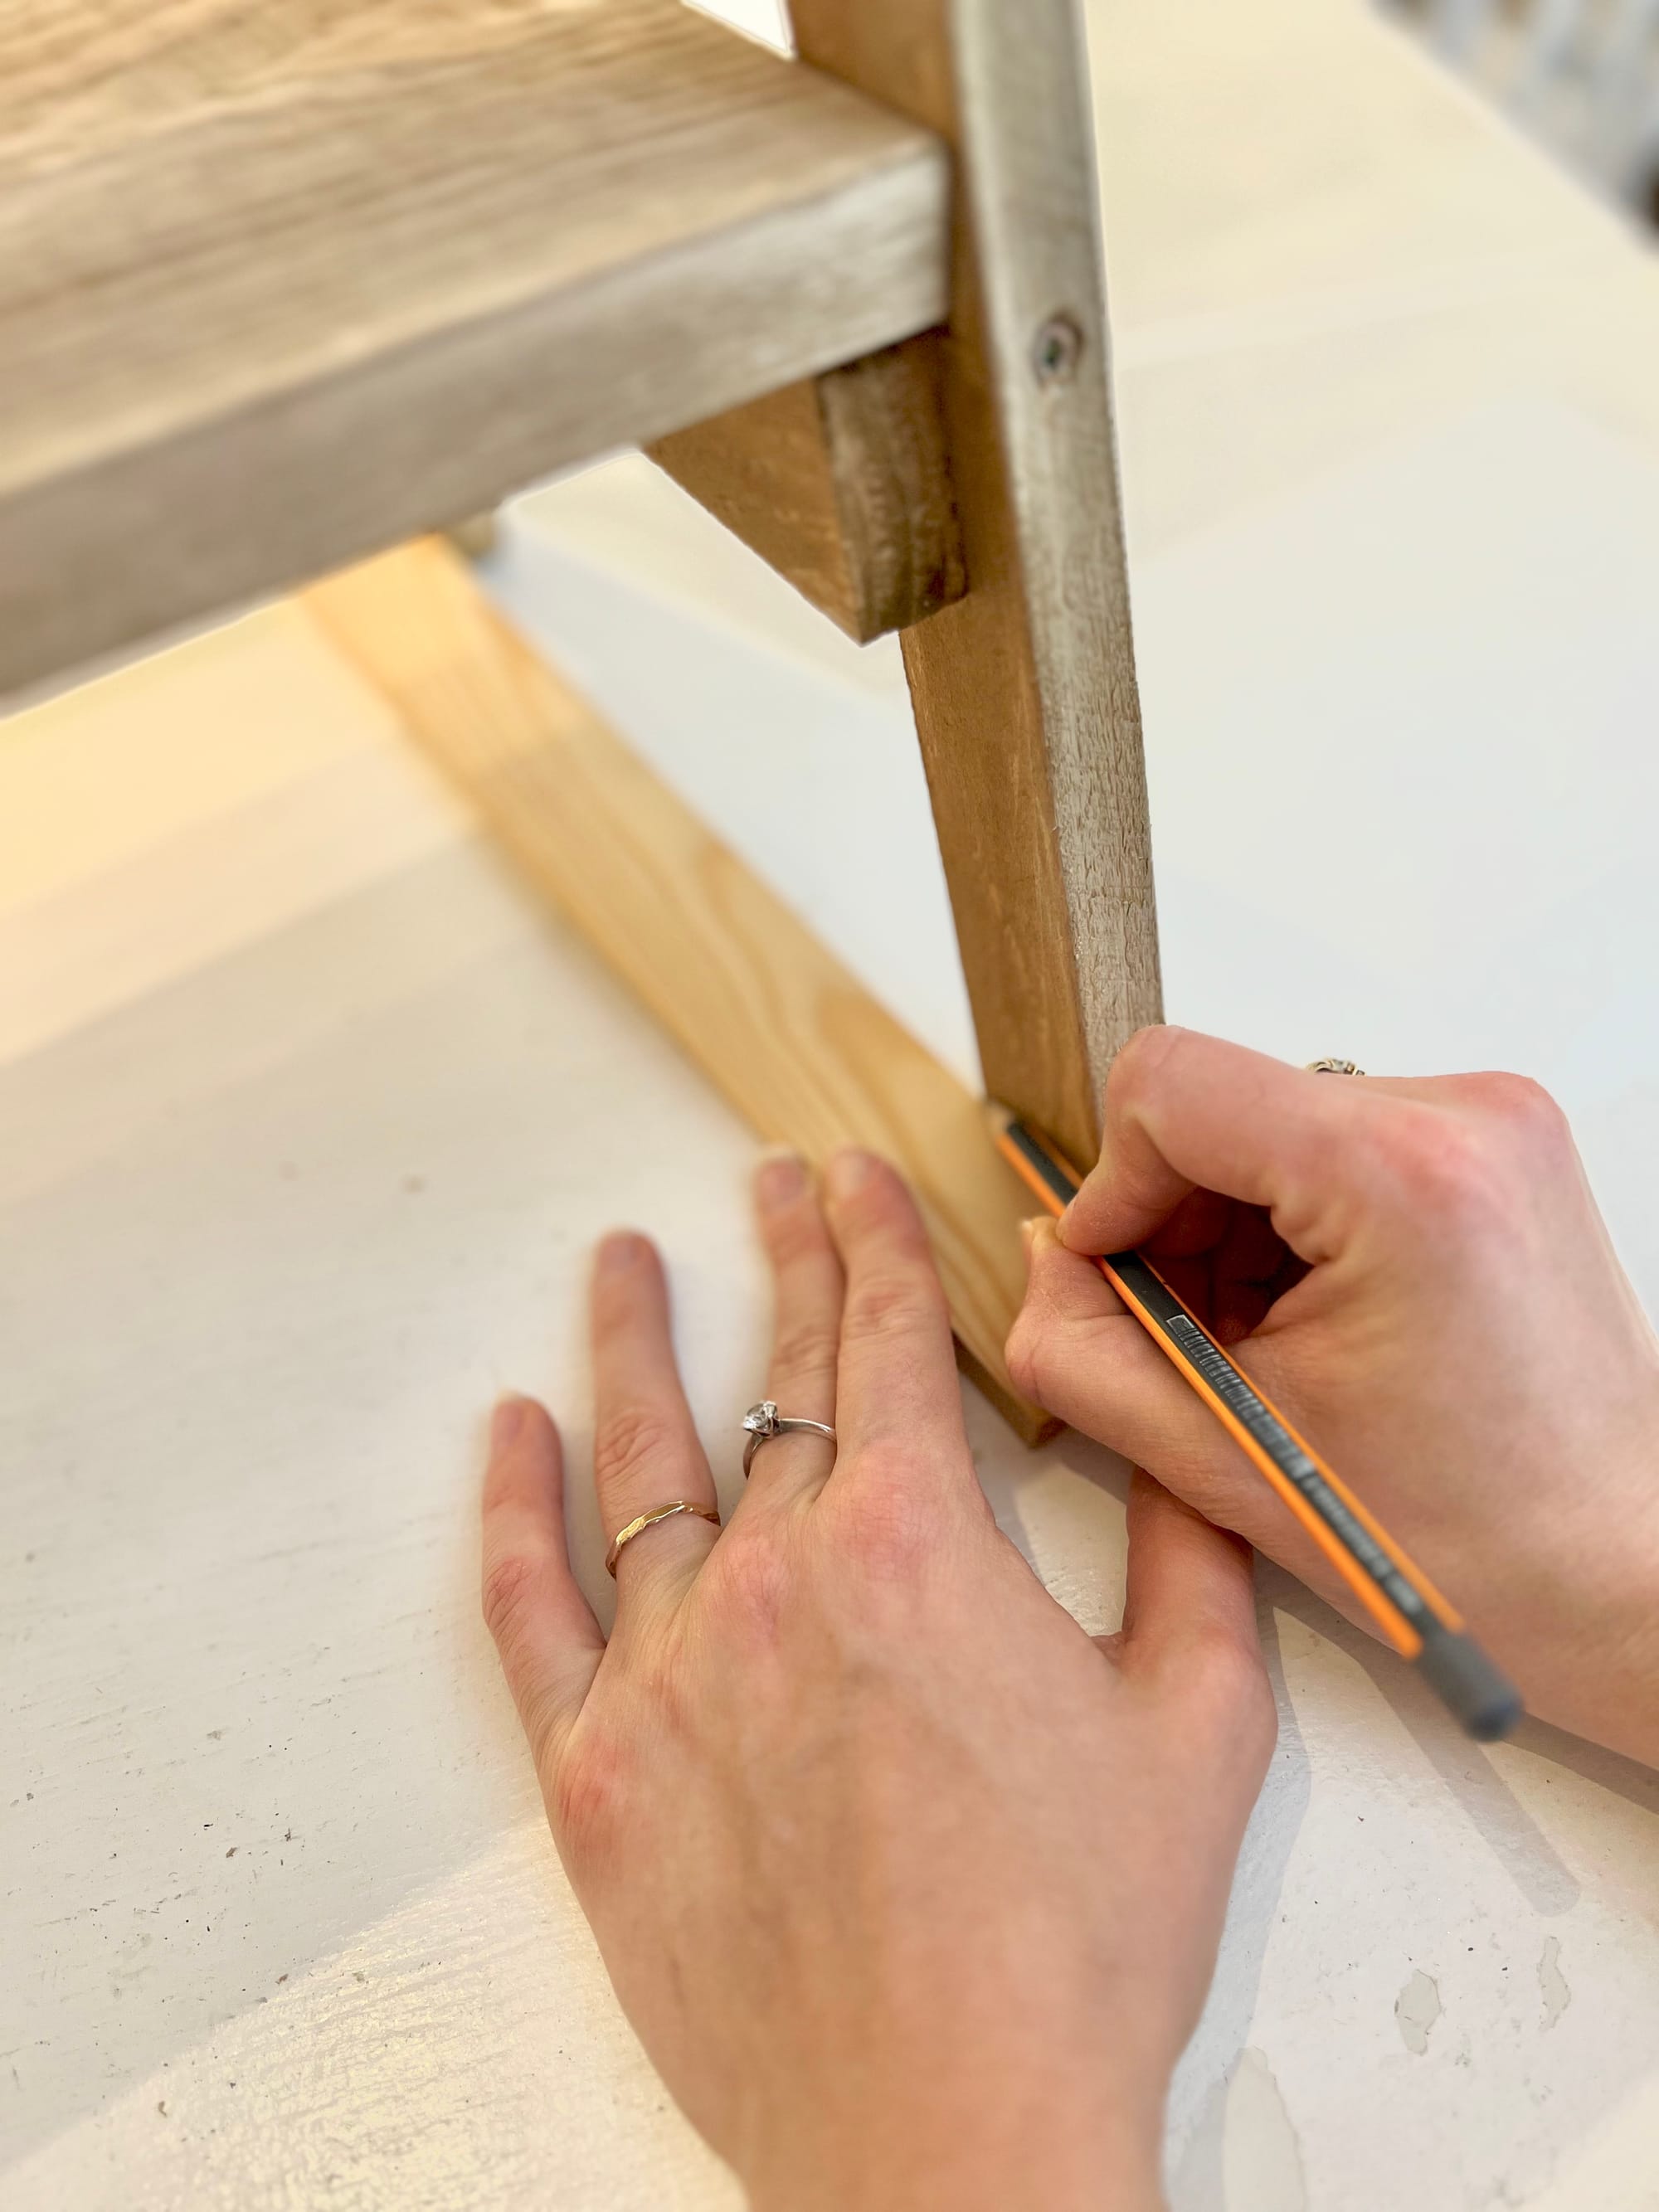
When the A-frame legs are glued and secured, place the bench on a flat surface. Use a 1 cm offcut as a guide to mark the floor line on each leg, then trim to ensure it sits level. Once everything is in place, screw the top board into the legs for extra security. Measure carefully to ensure screws hit the leg supports accurately.
You’re nearly there! Slide the bench shelf into place, making sure it rests securely on the supports on both sides. If there’s a slight variation of 1–2 mm between the legs, you can use chair pad stickers on the bottom of each leg to even things out.
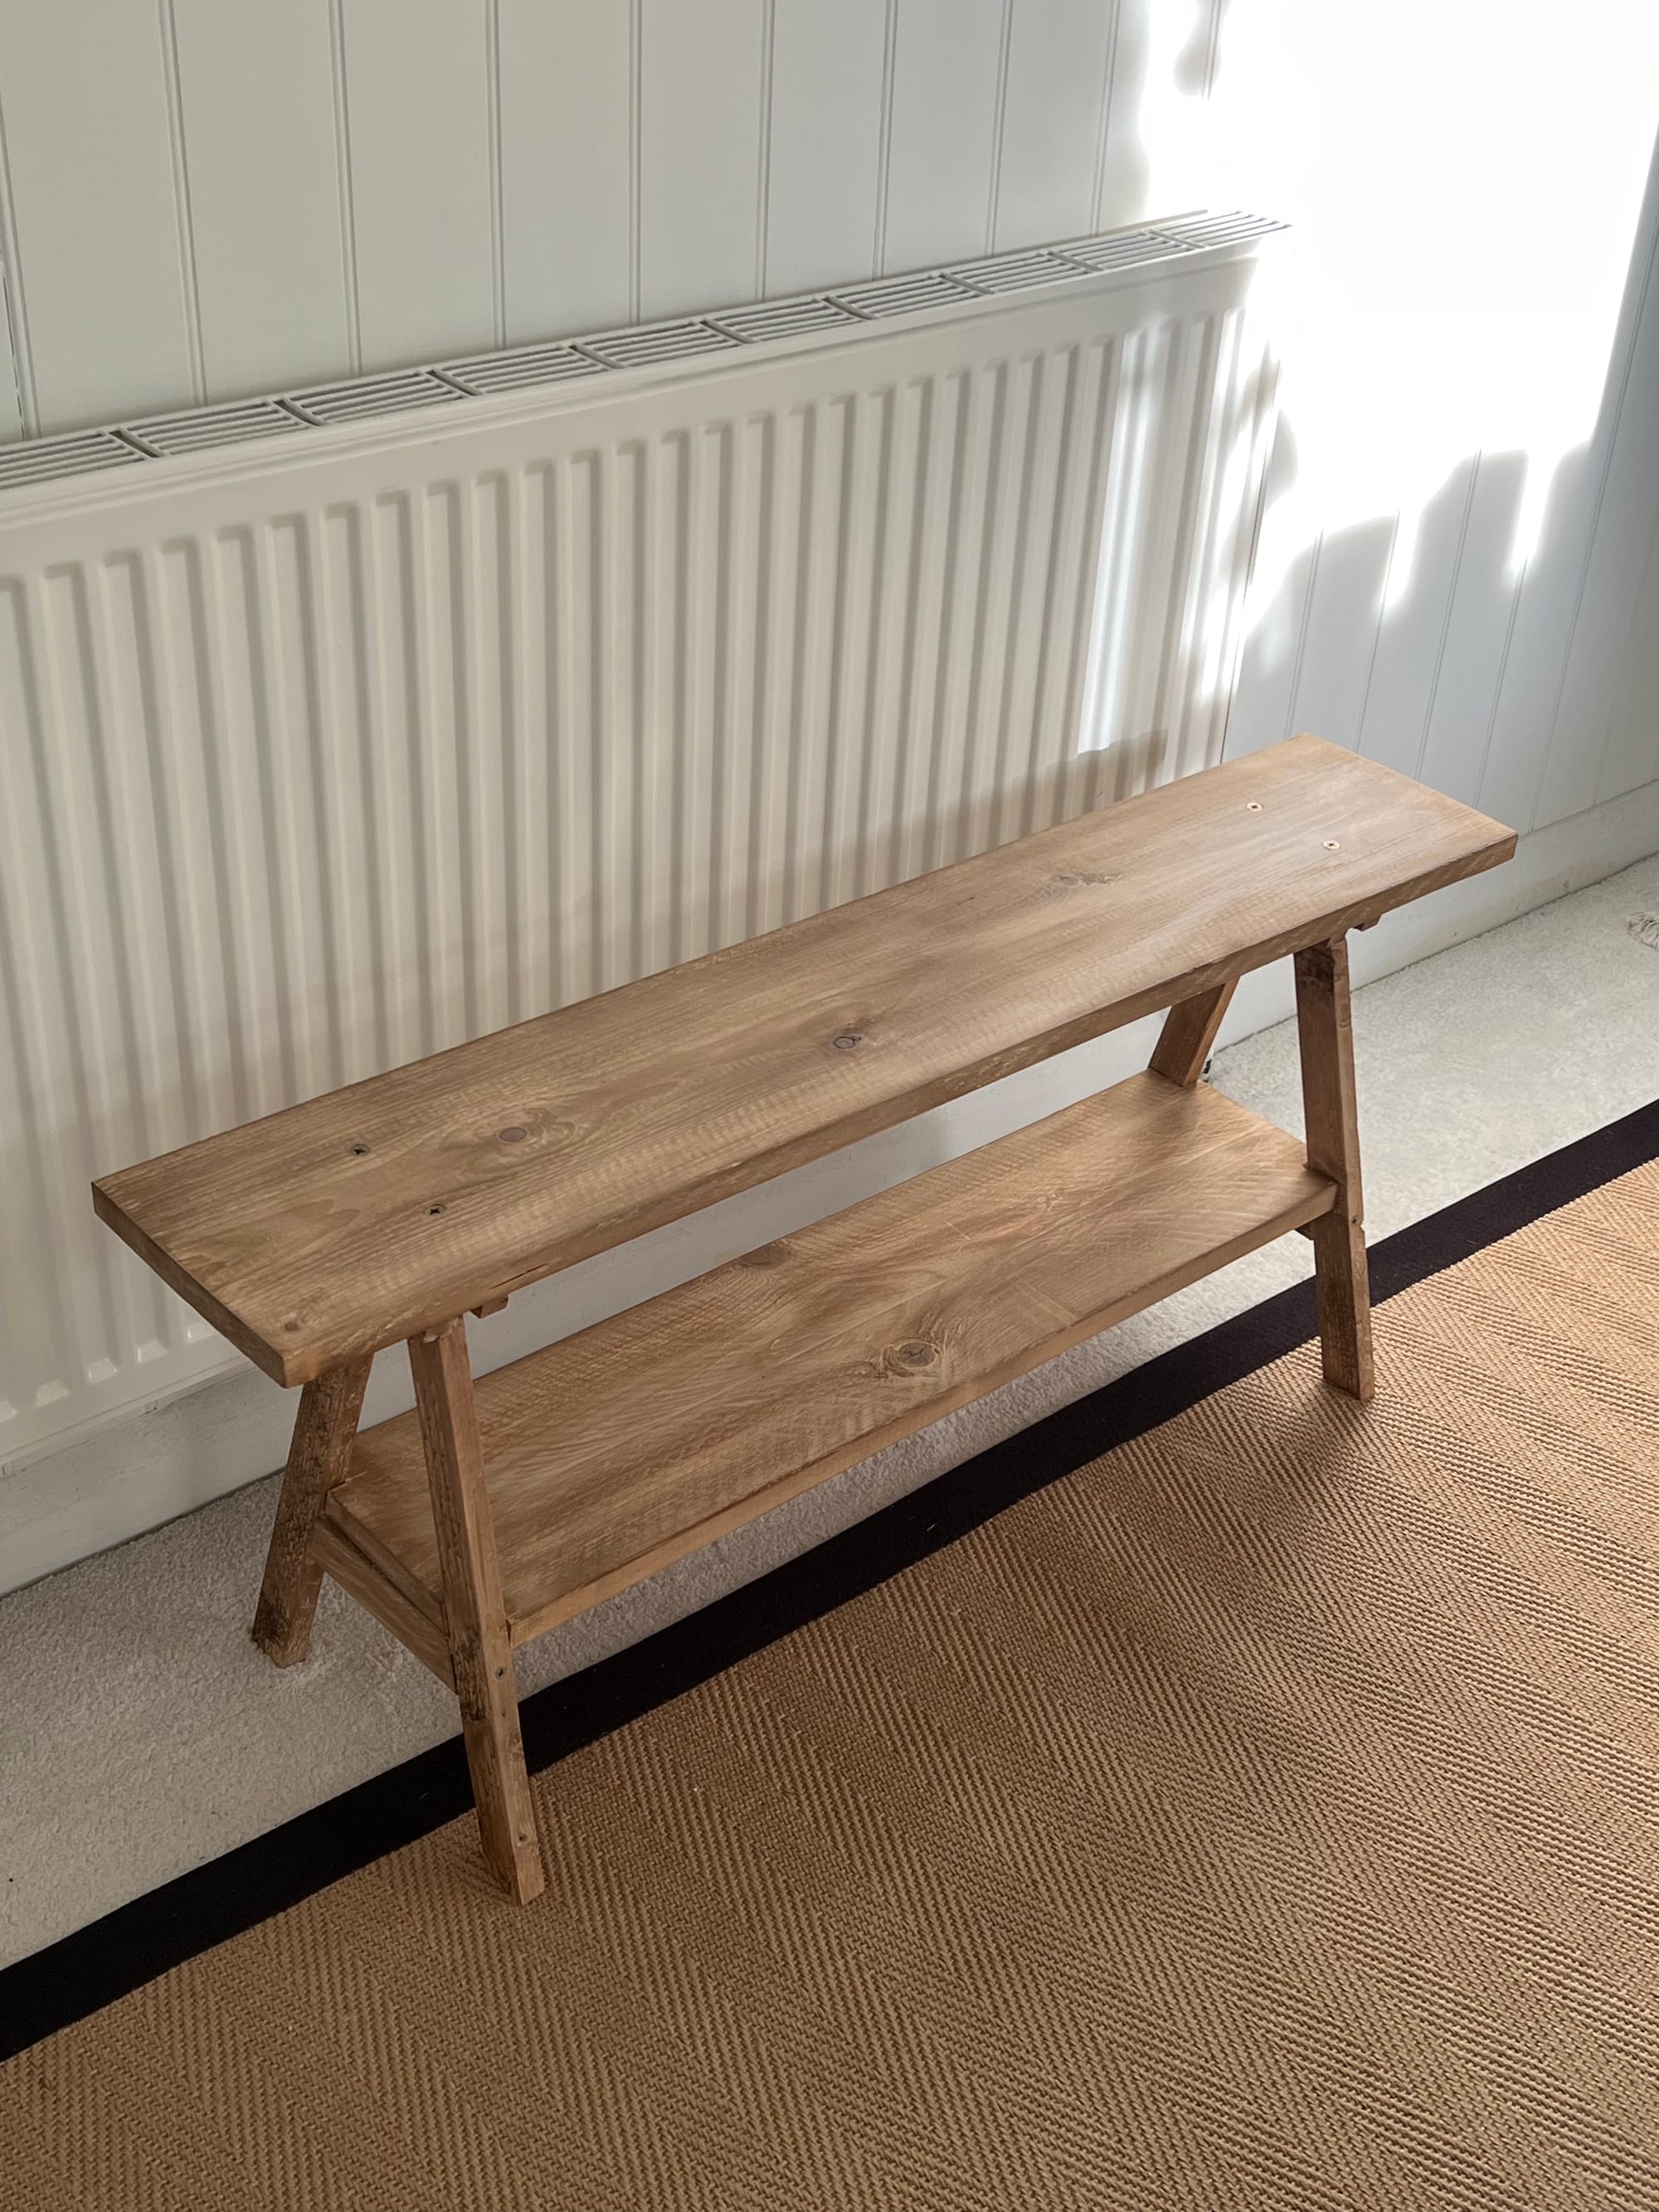
Step 7: White Wash
After assembly, I gave the bench a whitewash finish for a rustic limewash look. When dried, I applied a mix of clear and brown furniture wax to seal.
Whether you’re an experienced DIYer or just starting out, making your own furniture is incredibly satisfying and it’s even better when the finished piece becomes a beloved part of your home.
Give it a shot, and good luck creating your own bench!

Creator: Zsofi - Manor In Progress
Instagram: @manorinprogress
Facebook: Manor In Progress


