

Ever thought about adding a touch of mystery to your home decor? Hiding a door in your home can be both practical and aesthetically pleasing, creating a seamless look in your living room while adding a touch of intrigue for guests trying to find the hidden entrance. Imagine your guests trying to find a hidden door – it’s a guaranteed conversation starter! Let’s dive into how you can achieve this look with a DIY project.
Materials Needed:
- Wooden slats (dimensions depend on your measurements)
- Wood glue
- Nails
- Jigsaw
- Wood stain (e.g., "Oak" from Action)
- Magnets (for the door)
- Basic tools: brushes, ruler, pencil, level
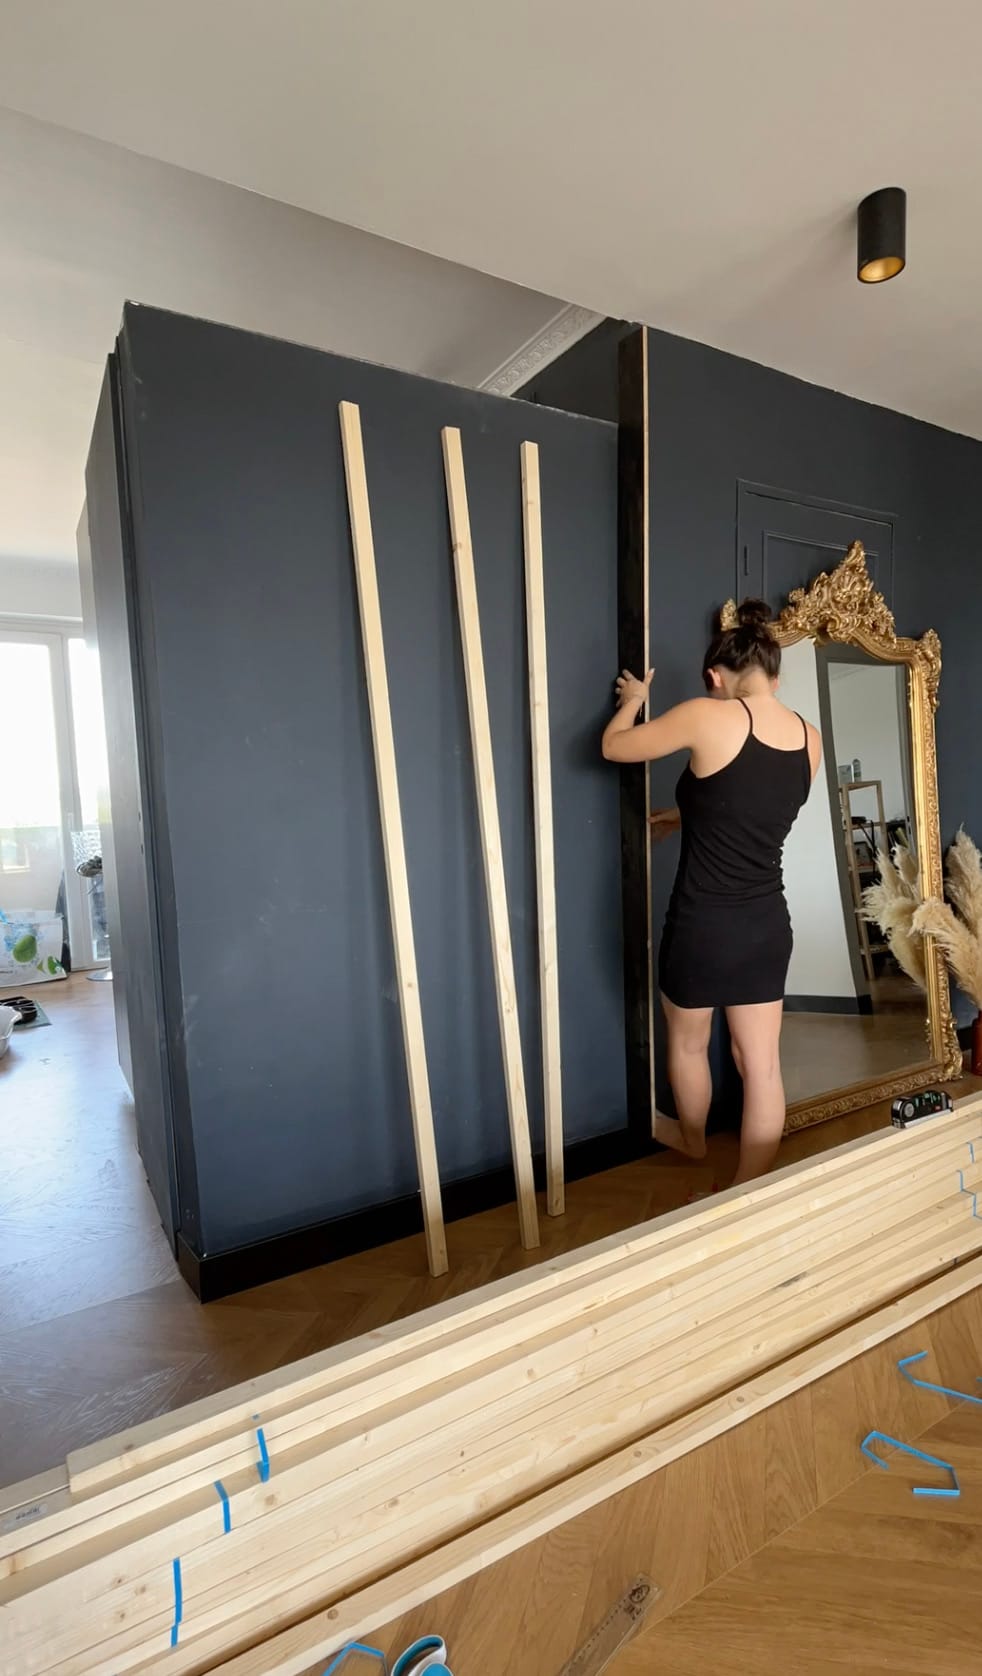
Step 1: Choosing the Door
First, consider which door you want to hide and why. If there’s no real benefit to hiding this particular door, perhaps it’s better to choose a different location. This technique works well for doors like bathroom doors, laundry room doors, storage closets, or garage doors. In the Bonnat project, we couldn’t change the location of the toilets, so we decided to hide the door. We first changed the direction of the door opening and then concealed it with wooden slats. (We even created a cat pathway, which you can see on Instagram!)
Step 2: Measuring
Once you’ve selected the door, you need to measure the surrounding walls. Note the following dimensions:
- The door itself (Width x Height), including any recesses.
- The wall where the door is located.
- The adjoining wall if it forms an exterior angle (optional if the door wall forms an interior angle).
For example, if your door has a 2 cm recess and you choose 4 cm slats, the slats around the door should be 2 cm to balance with the 4 cm slats on the rest of the wall.
Step 3: Calculating the Slats
Now, calculate how many slats you will need. For my project:
- Door dimensions: 80x210 cm with a 2 cm recess.
- Wall dimensions: 100x210 cm.
- Adjoining wall dimensions: 150x210 cm.
I wanted 4 cm slats spaced 1 cm apart. Depending on the spacing, the look can vary significantly. Calculate the number of slats needed for a total length of 250 cm for the walls (using 4 cm thick slats). Then, calculate the number of slats needed for 80 cm (using 4 cm wide, 2 cm thick slats). Once the calculations are done, you’ll have the quantity of slats required.
Step 4: Gathering Materials
I sourced all the materials from Bricoman, as I found the slats from Leroy Merlin to be subpar, though others have had better luck. The key is to find the straightest slats possible since wood can warp over time. Alternatively, you can purchase ready-made slat panels from Wall-in (contact me for a discount).
Step 5: The Process
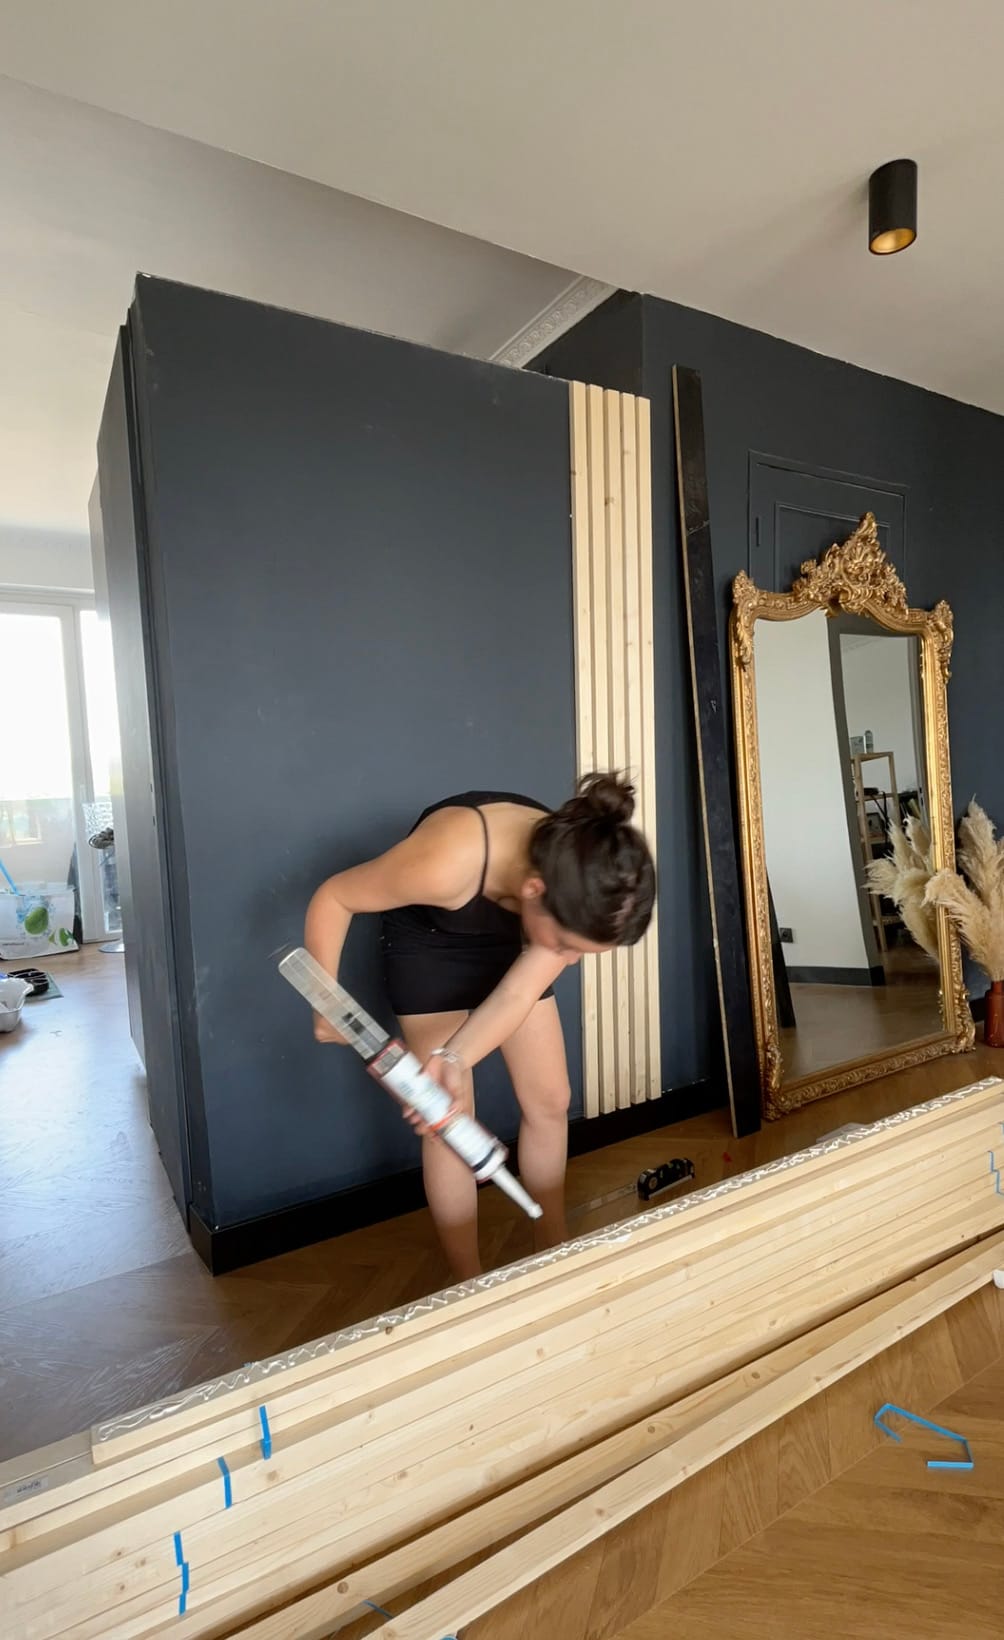
With your materials ready, follow these steps:
- Start by drawing a level line on the wall where the slats will go. This will be your guide to ensure everything is straight.
- Mark additional lines to indicate where each slat and spacer will go. Do this across the entire wall.
- Cut the slats to size if necessary. For example, we needed slats to be 210 cm long instead of 250 cm.
- Remove the door handle and place magnets on the door to help it stay closed.
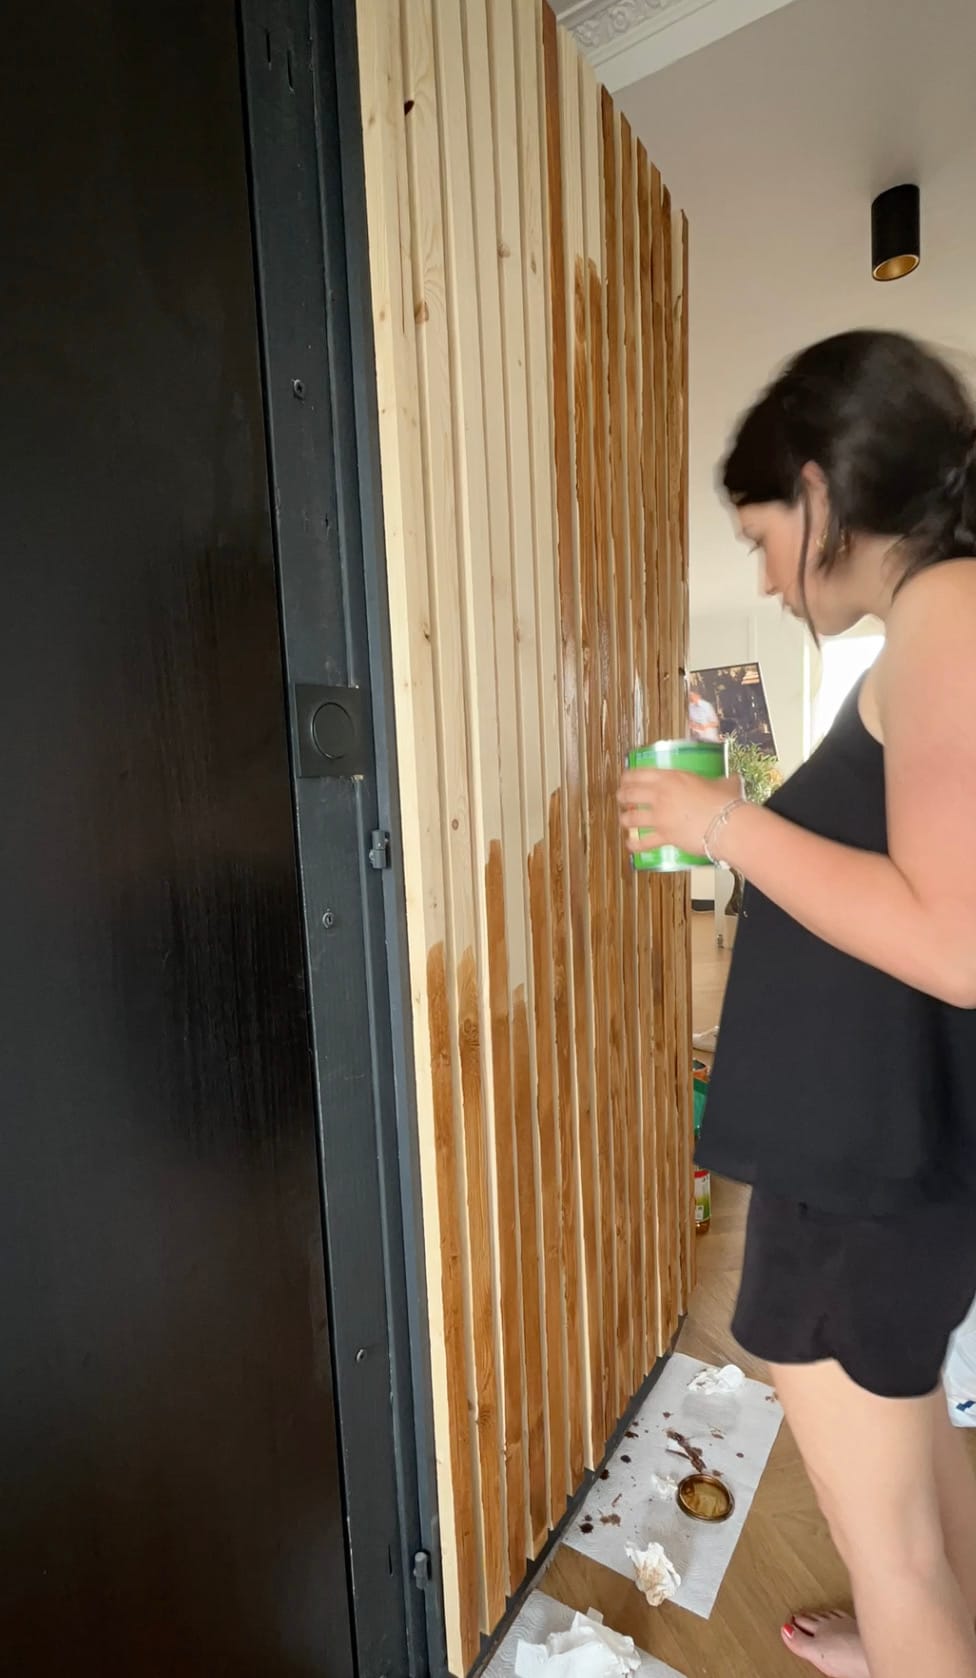
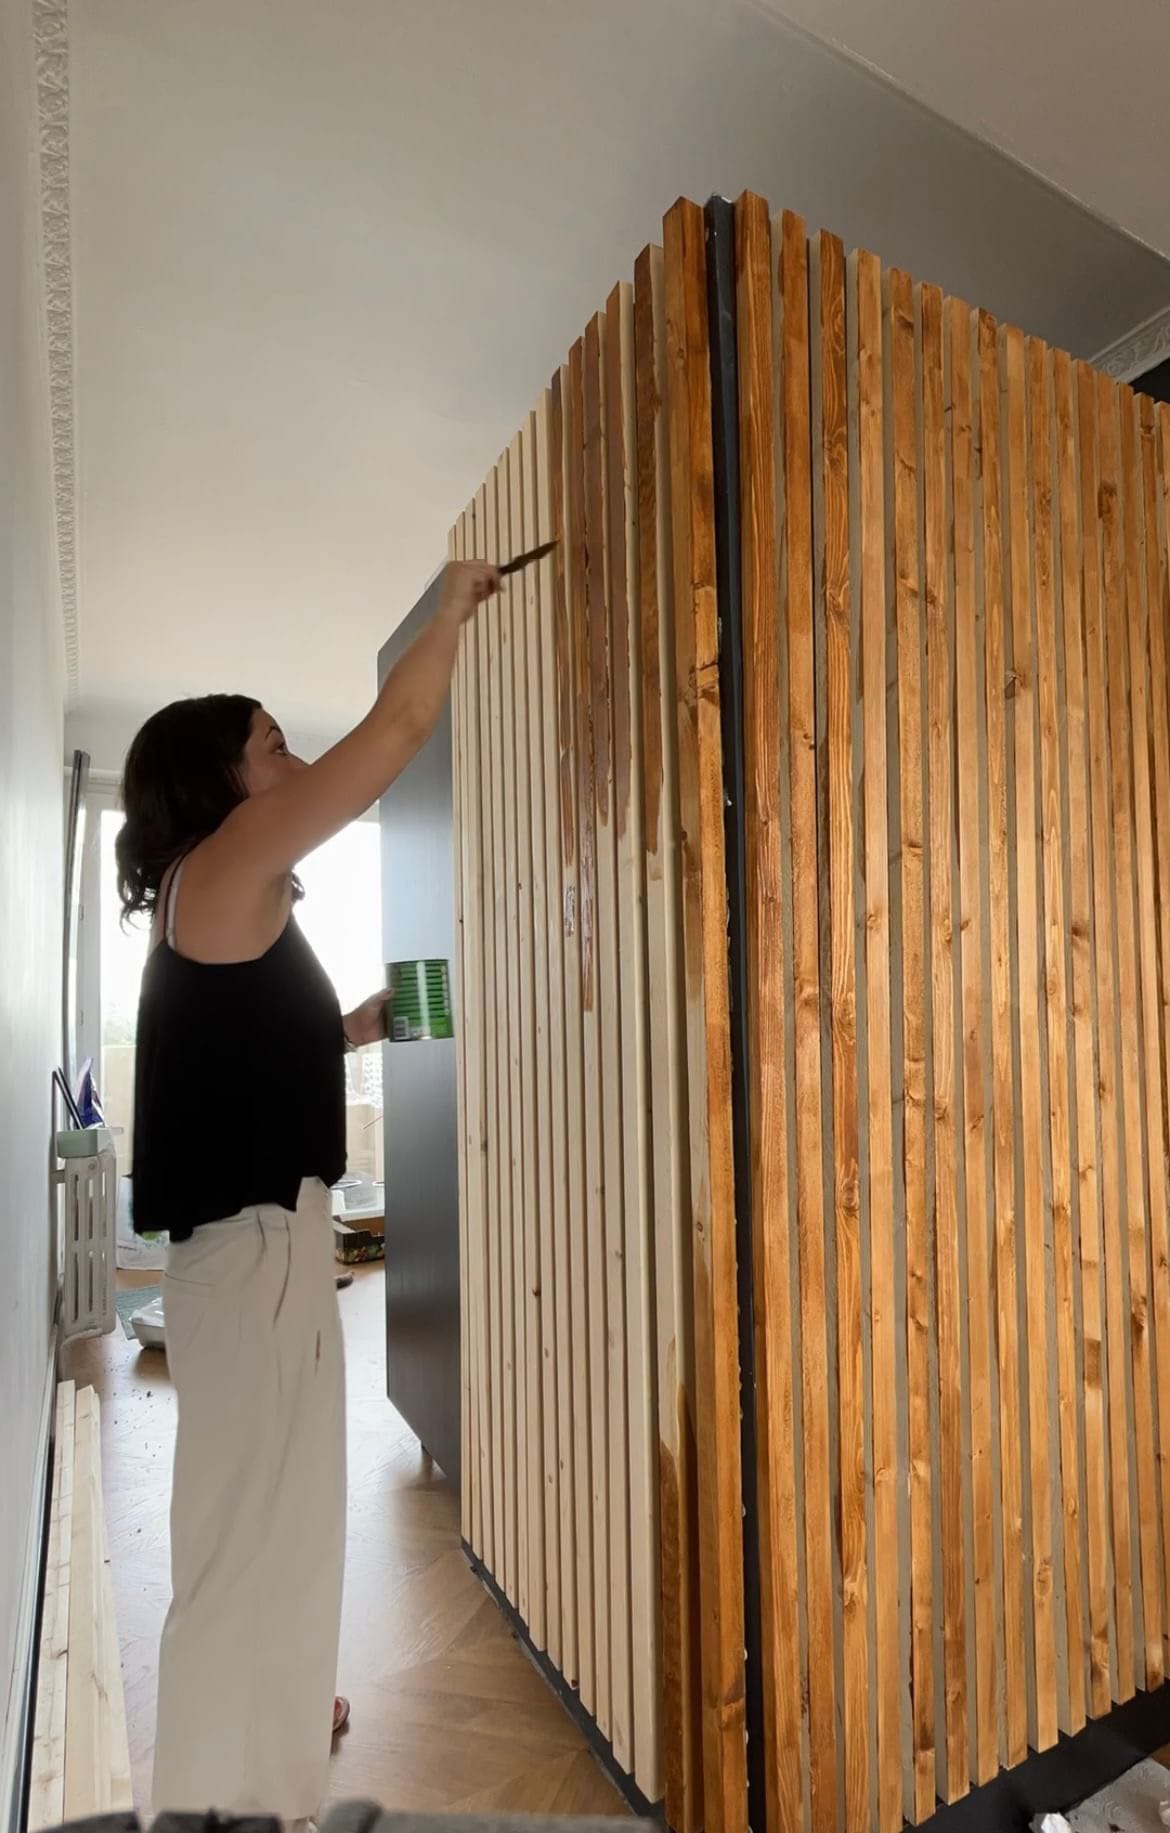
- Stain all your slats (front and sides). I made the mistake of staining after they were glued, which took much longer.
- Apply wood glue to the back of each slat and press them into place on the wall according to your markings. Use nails for extra support if needed.
- Allow the glue to dry completely.
And there you have it! A hidden door that not only looks fantastic but also adds a unique and functional element to your home. If I can do it, so can you.
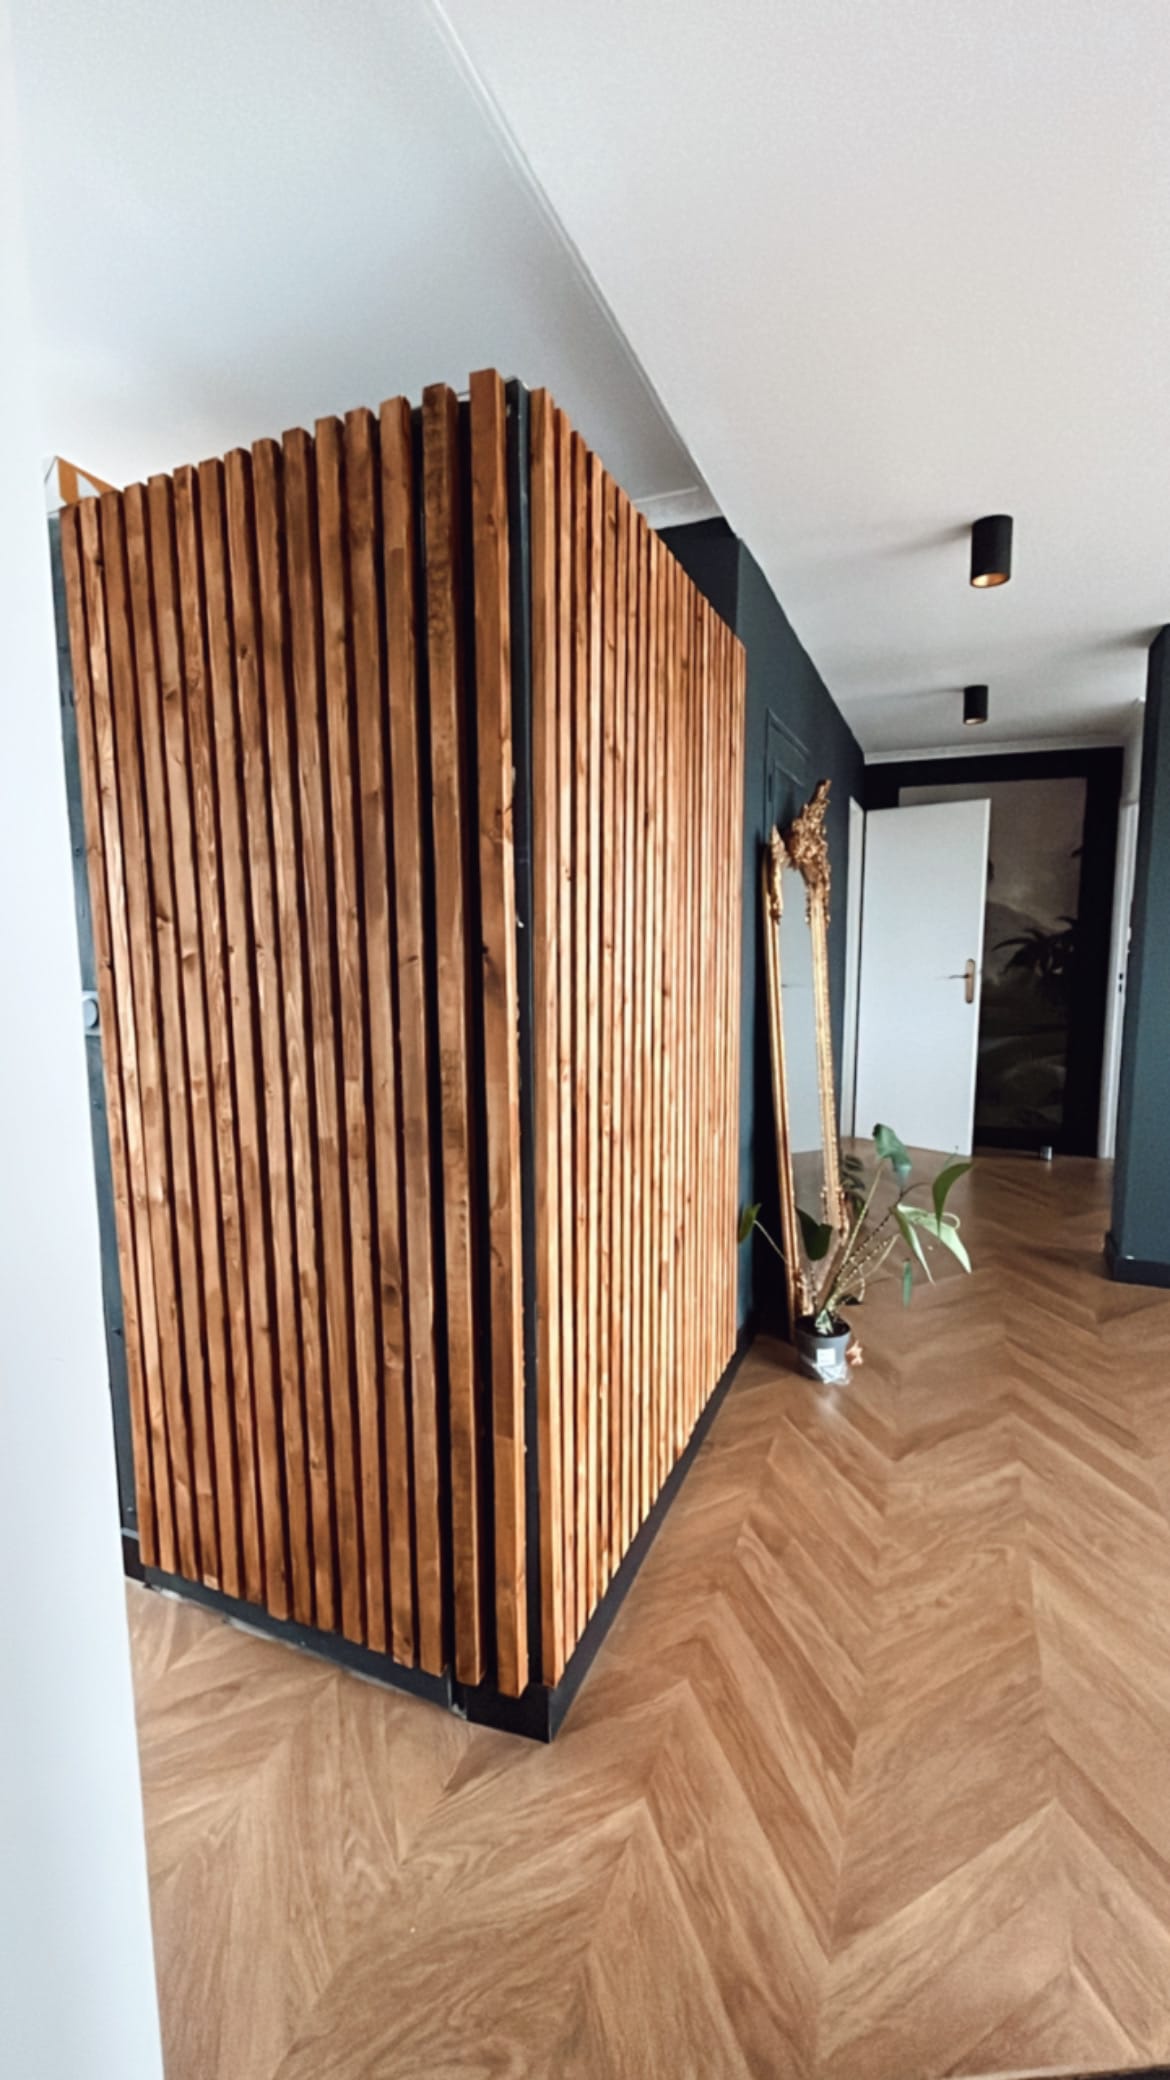
This hidden door not only adds functionality but also enhances the aesthetic appeal of your space. Enjoy your new, stylish, and cleverly disguised door!

Creator: Marylène
Instagram: @agencelmdeco
LinkedIn: Marylène Laurent


