
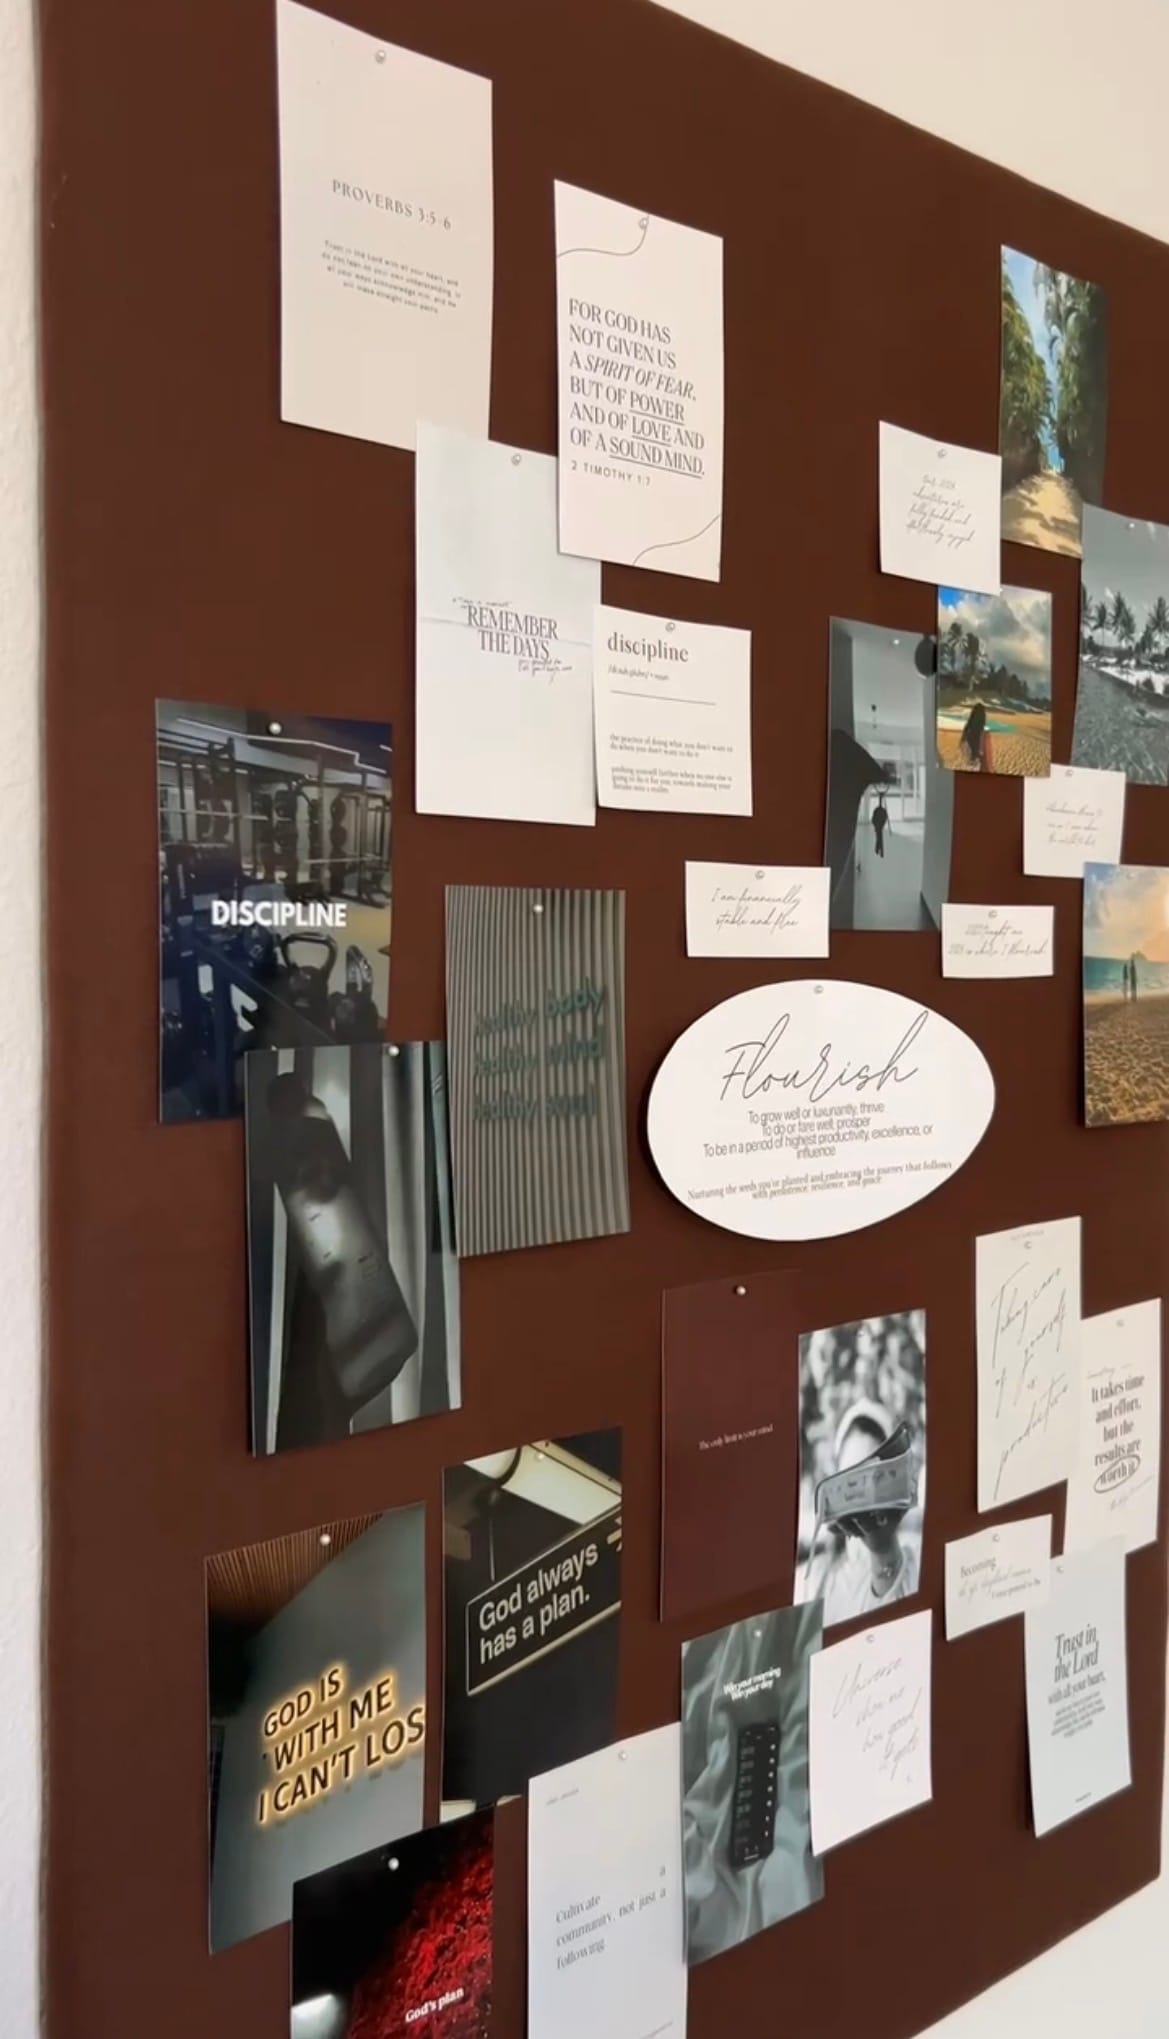
At the beginning of the year, I wanted a vision board that would keep me inspired every day, but I also wanted something practical - a place where I could pin my daughter's photos, school reminders, personal goals, and meaningful memories, while still looking like home decor rather than something cluttered or distracting.
Instead of buying an expensive pinboard, I decided to make my own custom fabric pinboard. It's completely customizable, affordable, and easy to update throughout the year!
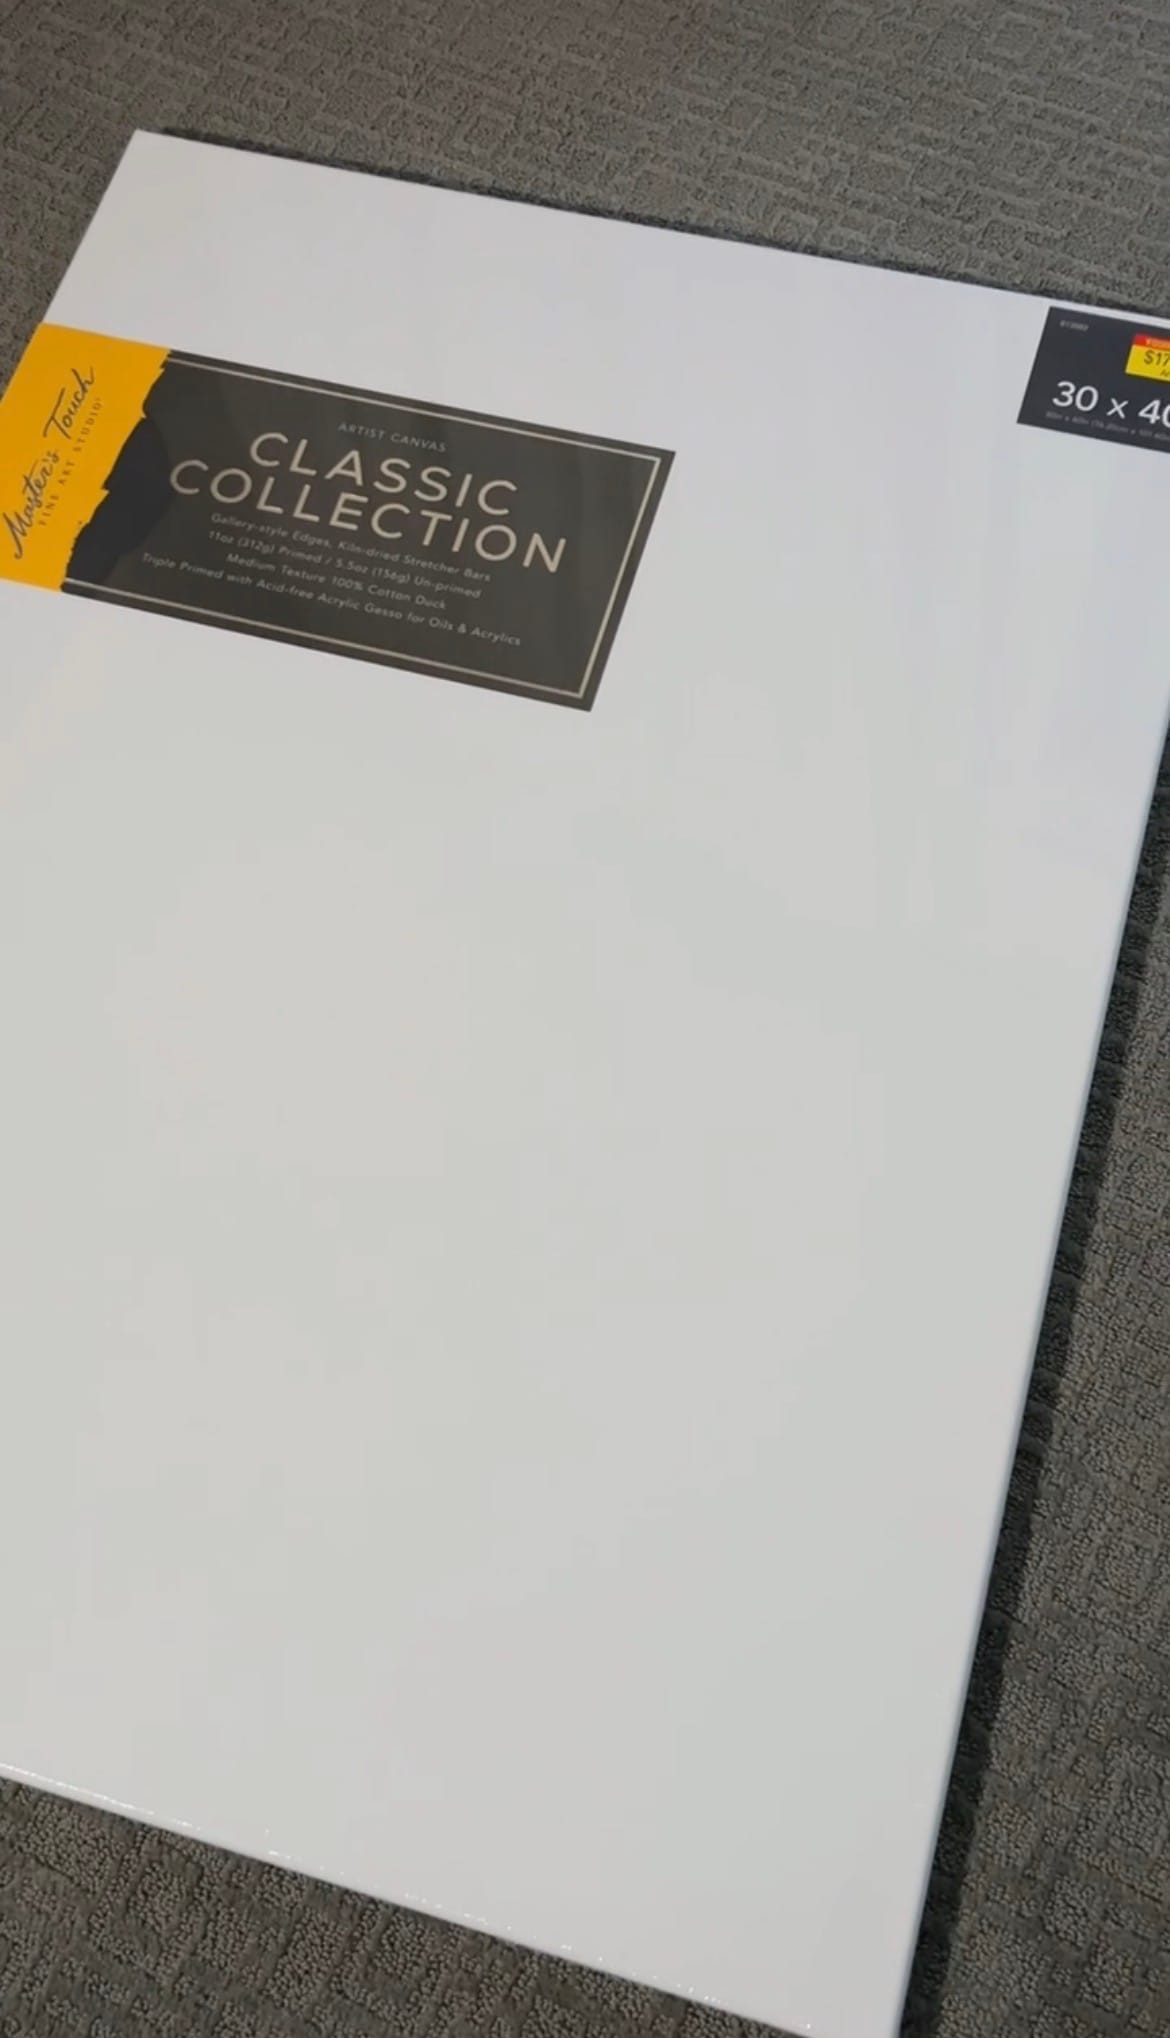
The finished board is 30x40 inches, costs less than $50 to make, and can be styled with any fabric to match your space.
Materials:
- 30x40 Stretched Canvas (or your preferred size)
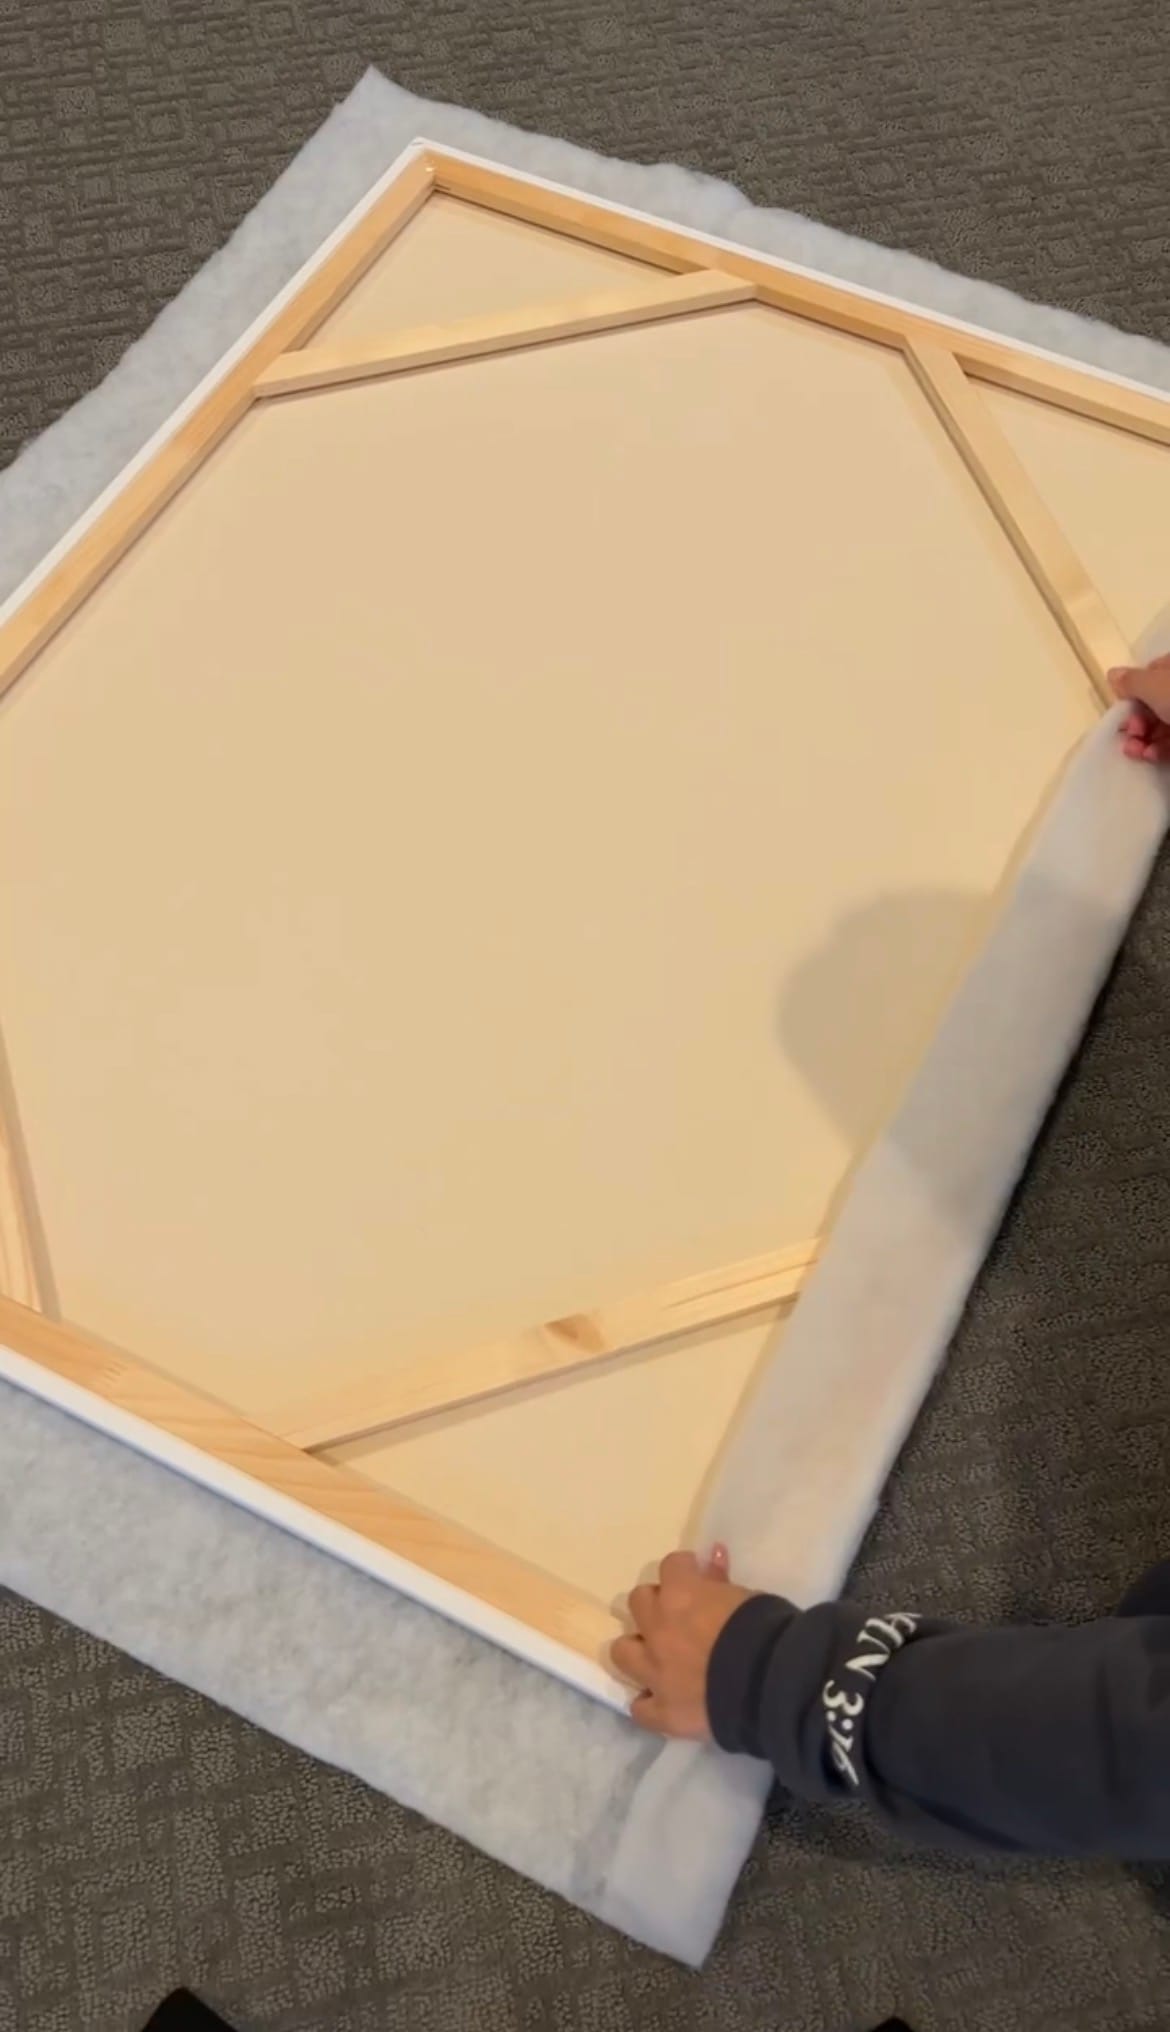
- 1 yard of batting (This is perfect for a 30x40, if you choose a larger size, be sure to measure so you have at least 3-4 inches of "wrap around" on all sides!)
- 1 yard of fabric of your choice (This is perfect for a 30x40, if you choose a larger size, be sure to measure so you have at least 3-4 inches of "wrap around" on all sides!)
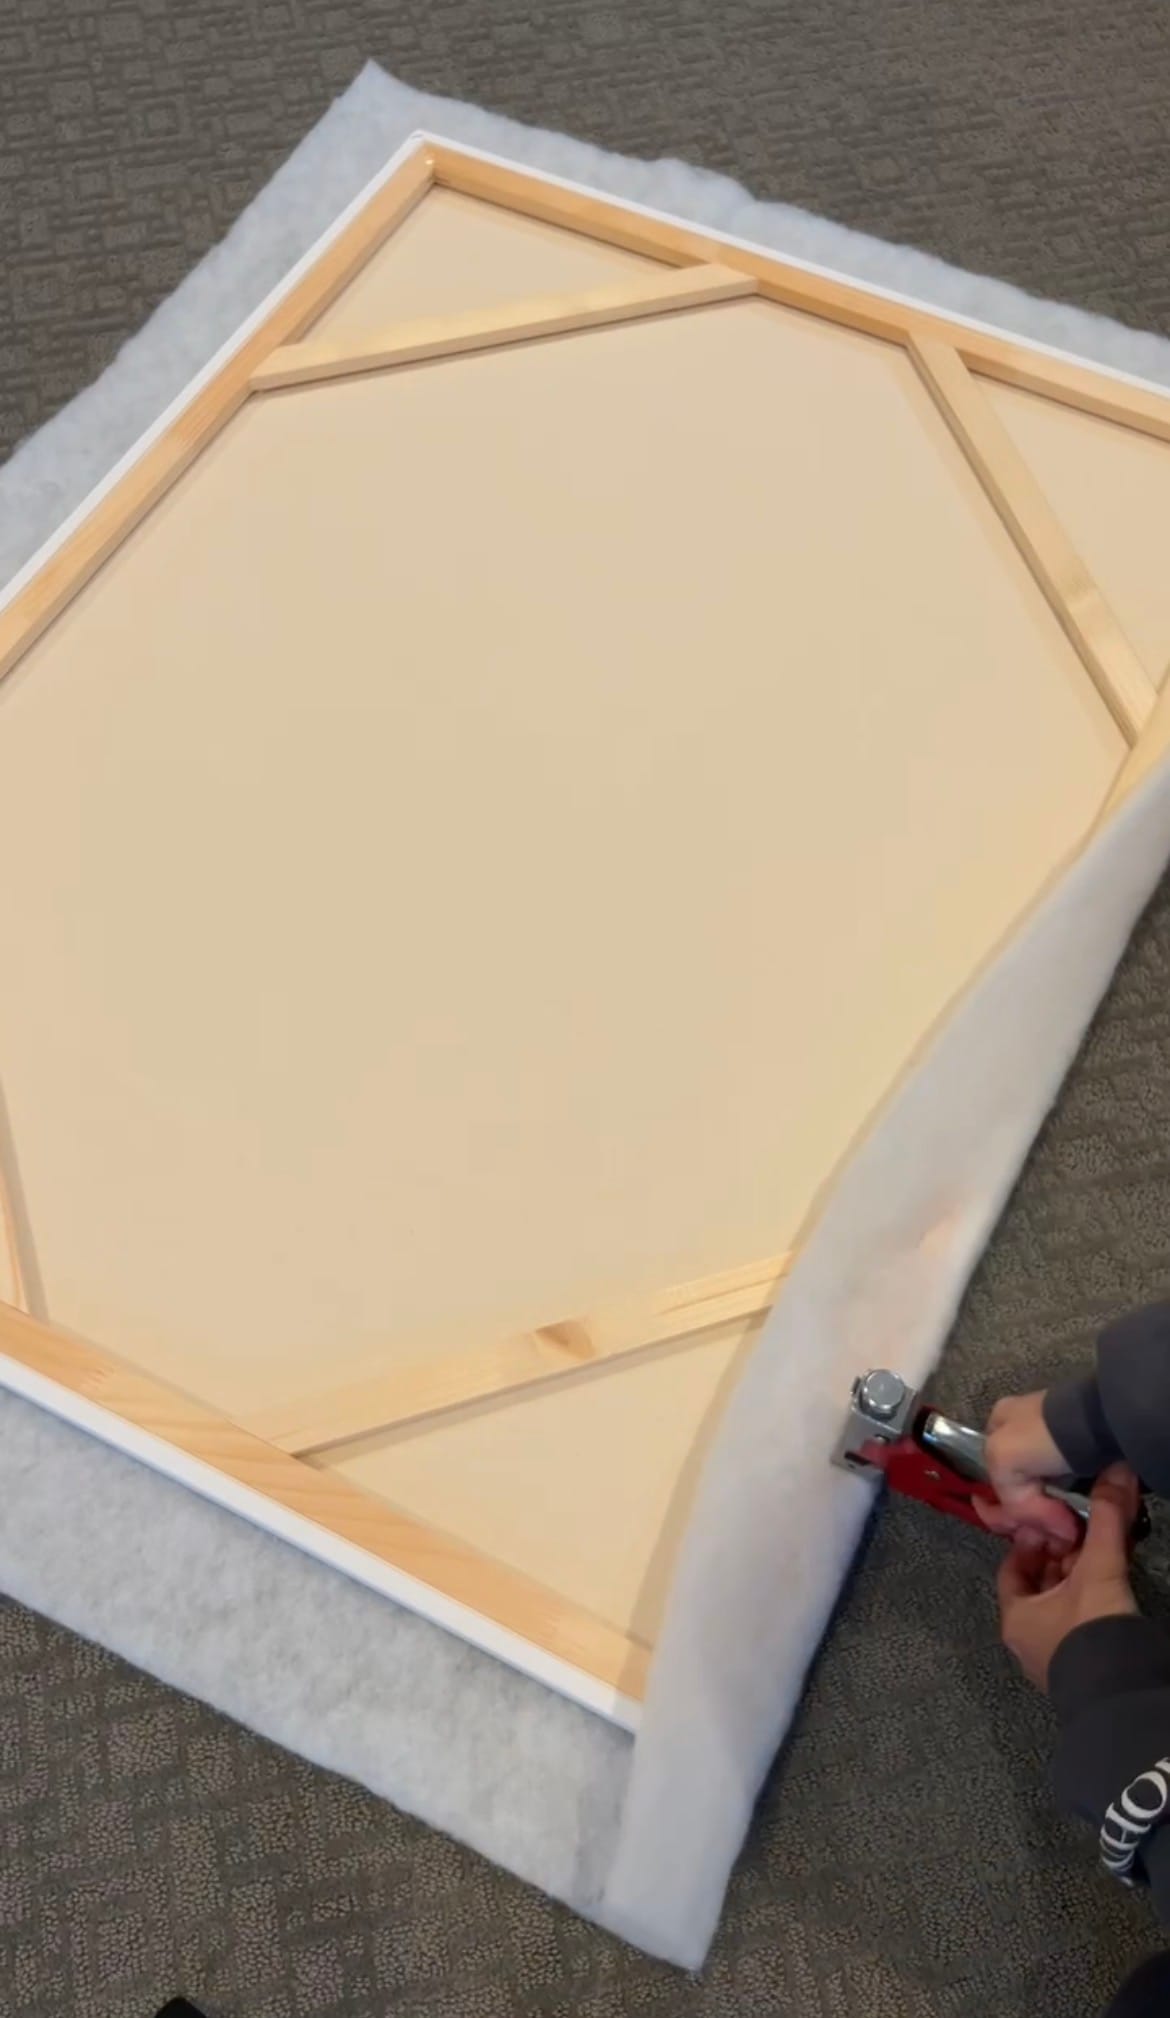
- Staple gun + staples
- Fabric Scissors
- Decorative push pins
Instructions:
Step 1: Choose Your Board Size
Decide what size pinboard you want. I used a 30x40 canvas, which is a great size for hanging on a wall and displaying photos, notes, and inspiration.
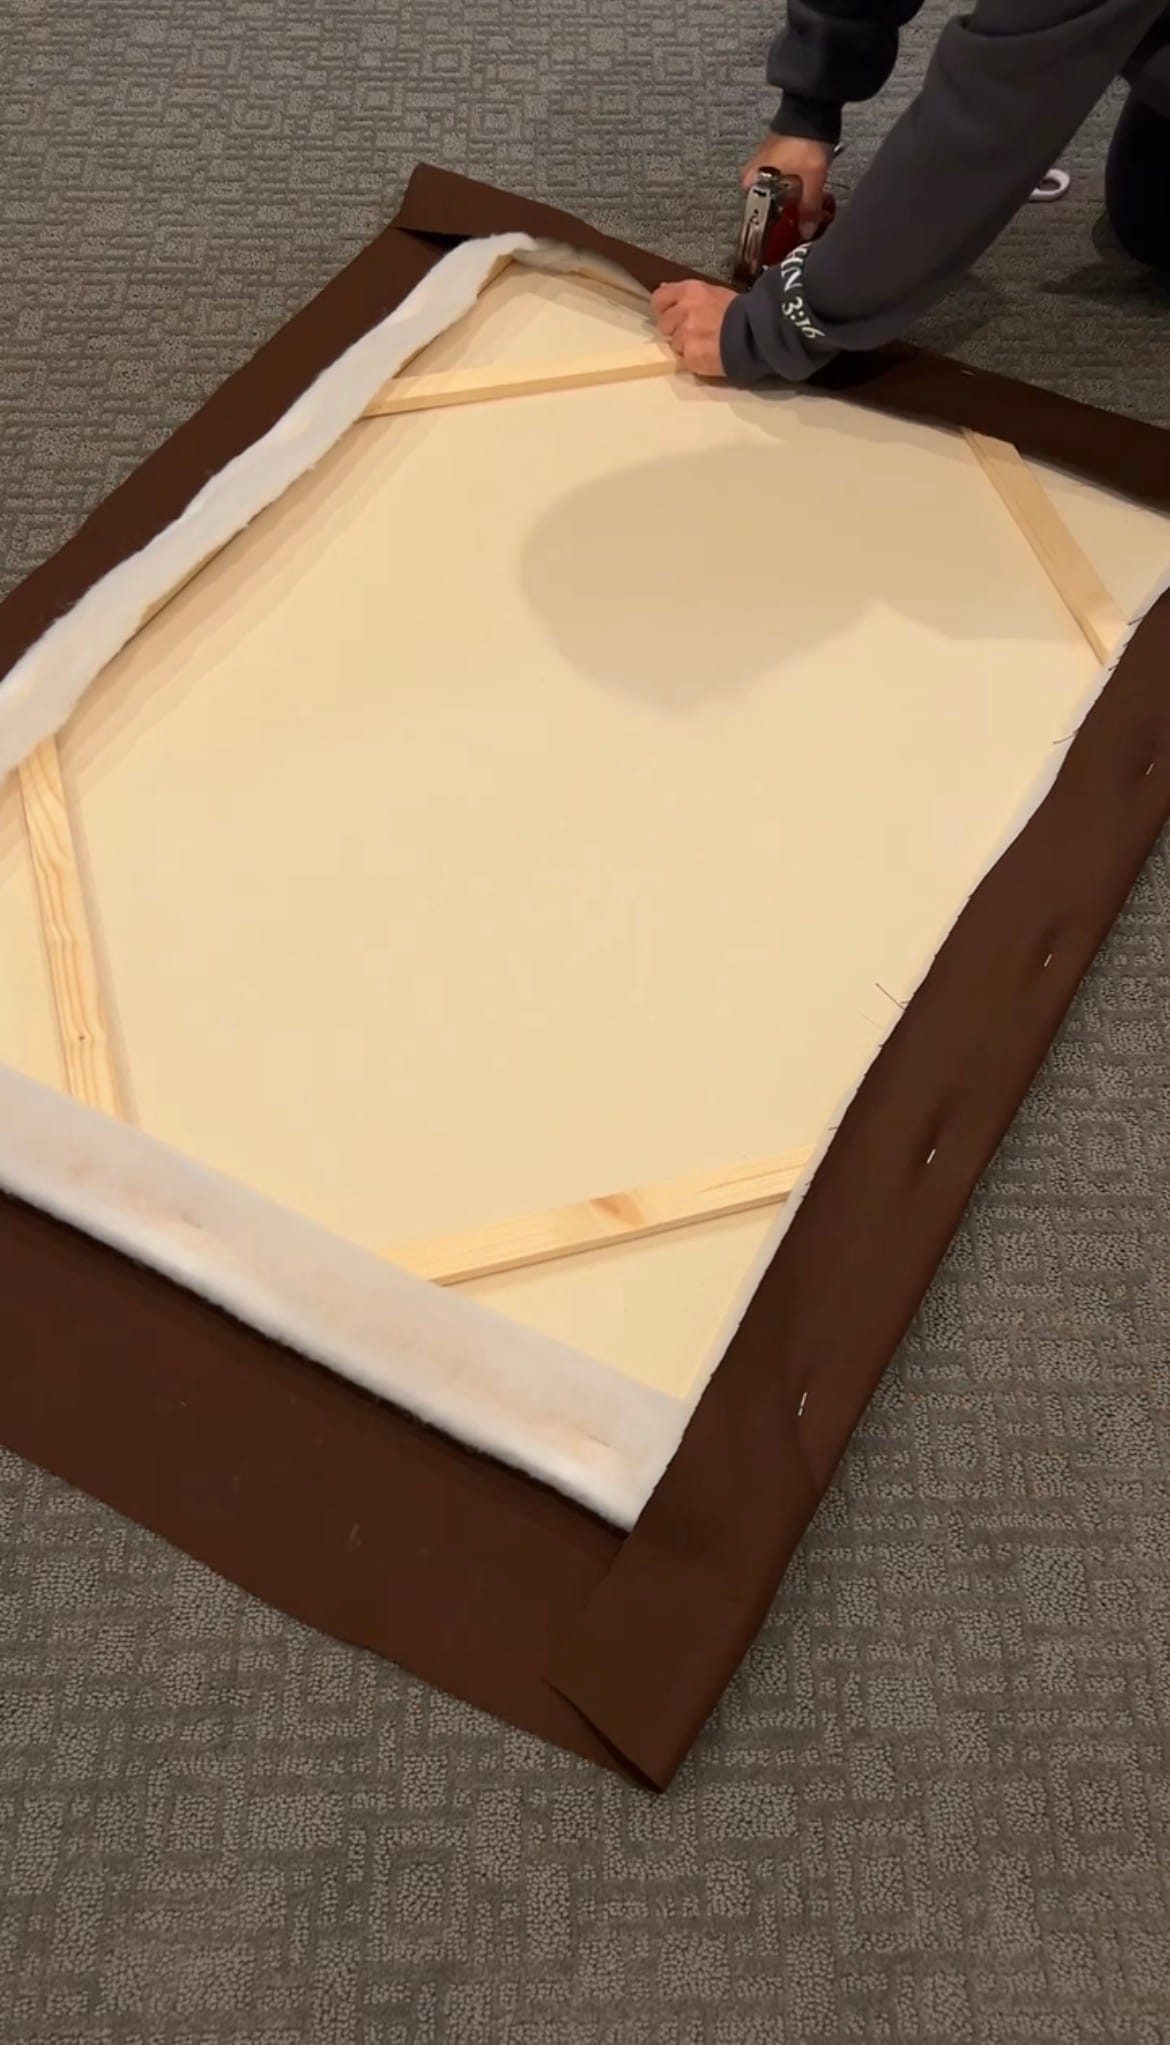
Step 2: Staple The Batting
Lay your batting on a flat surface and place the canvas face down in the center. Make sure you have enough batting to wrap comfortably around to the back of the wooden frame. Pull the batting around the back of the board and secure it with a staple gun, working your way around all four sides. This layer adds softness and makes it easier to insert push pins.
Step 3: Secure Your Fabric:
After a quick iron to remove any creases, lay your fabric out and center the padded canvas on top. Just like the batting, wrap the edges around the back and staple. Focus on keeping the fabric tight to ensure a smooth, wrinkle free finish on the front.
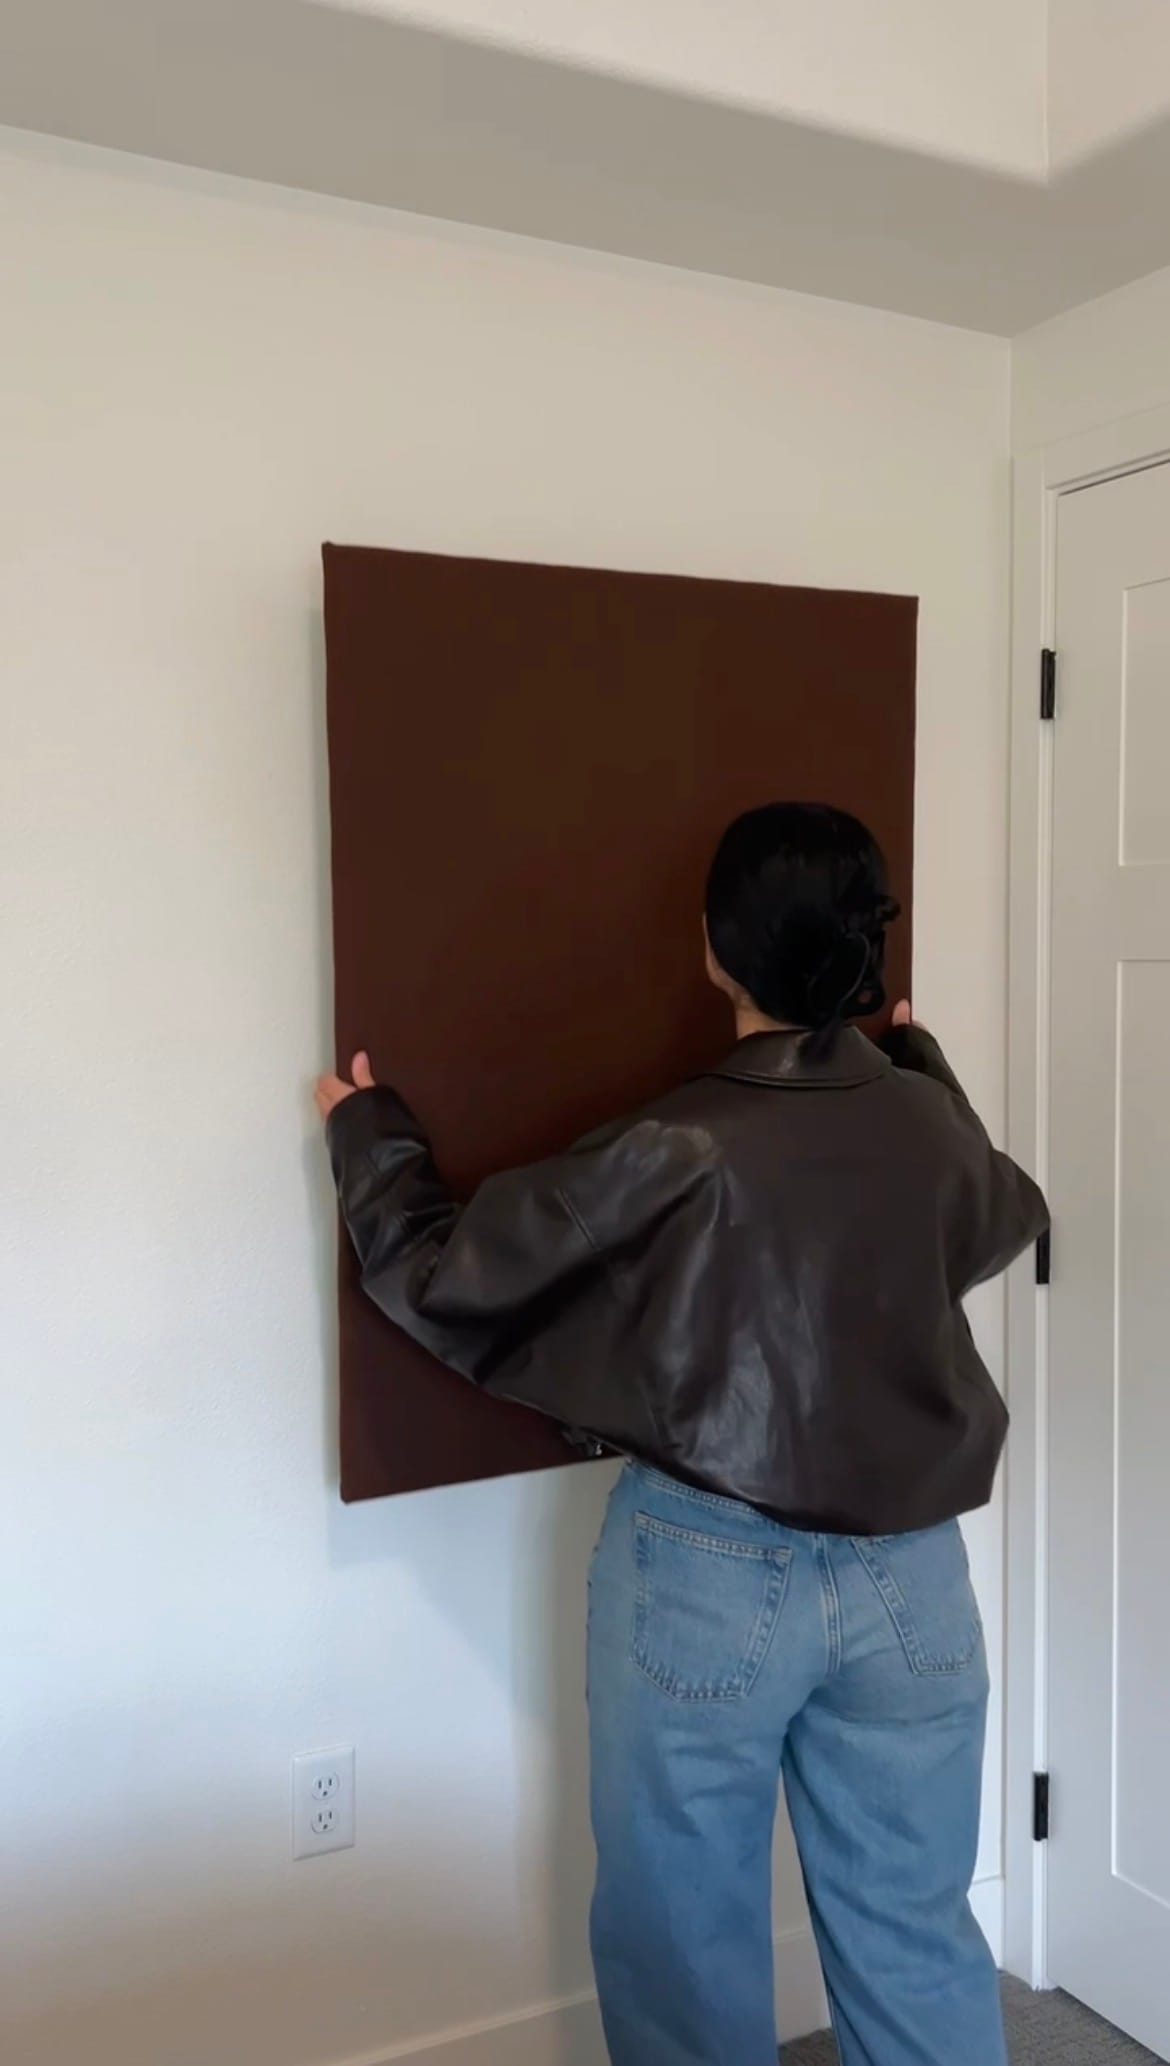
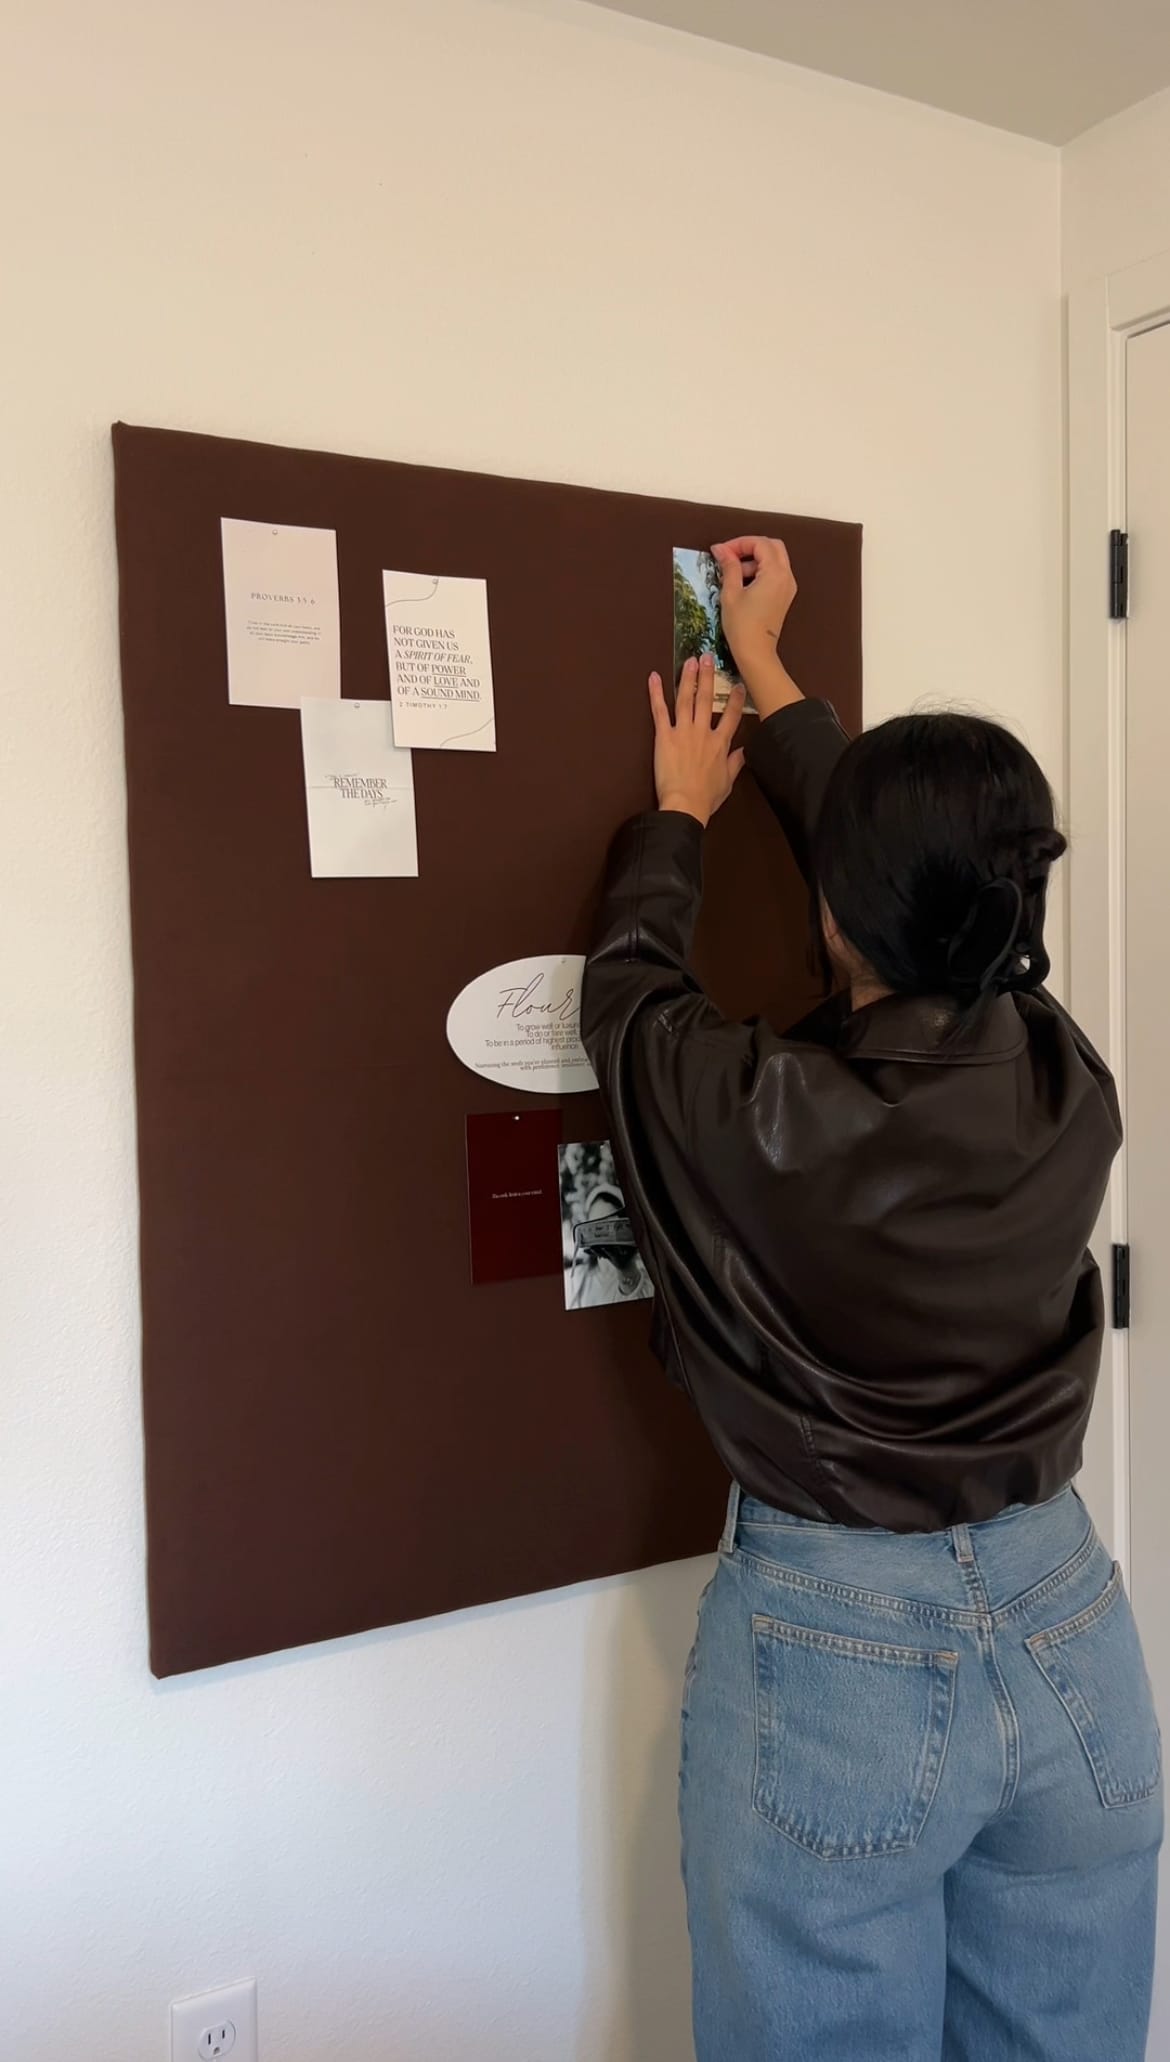
Step 4: Hang and Style Your Pinboard
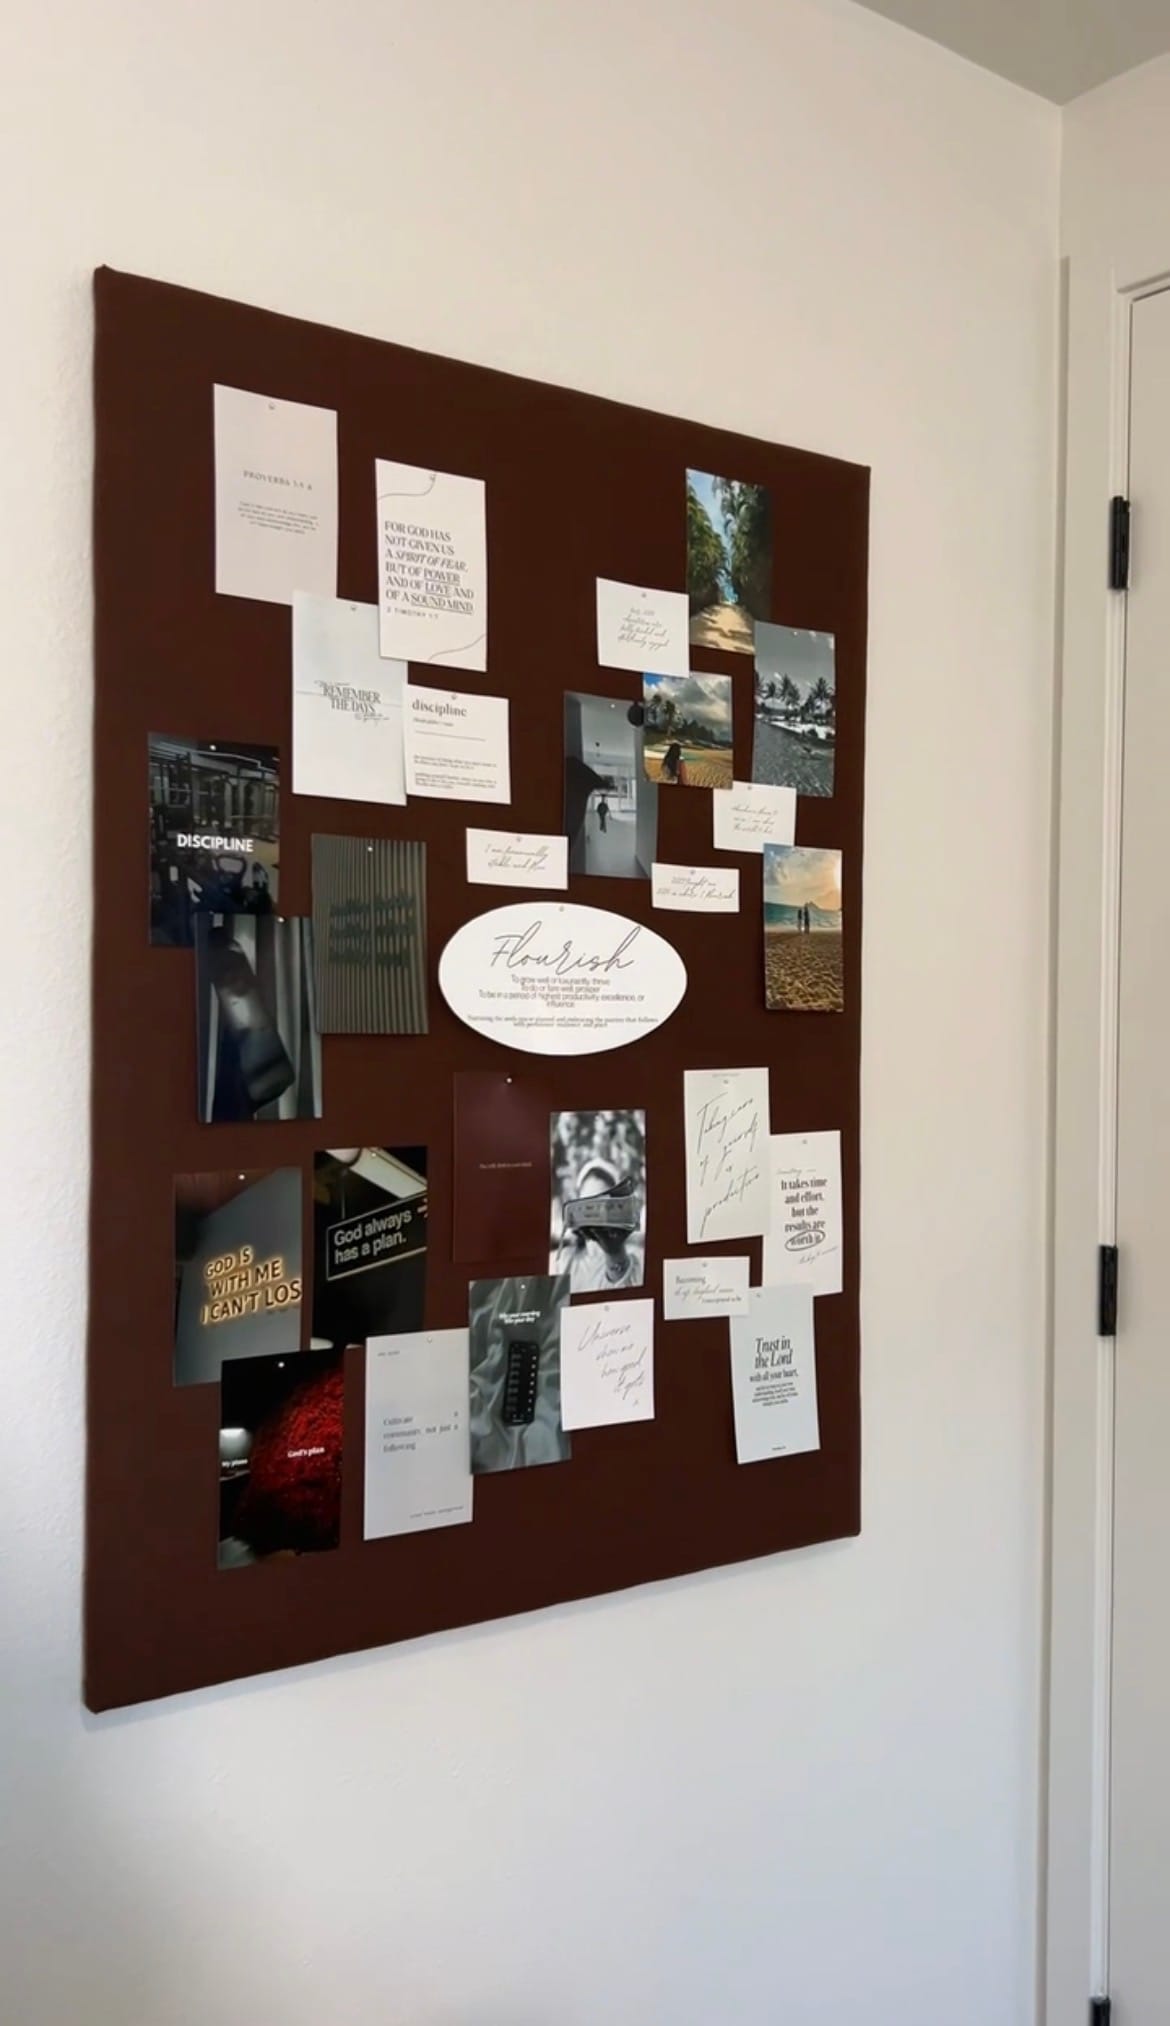
Once finished, hang your board and start pinning! I use mine as a vision board and memory board where I can display photos of my daughter, inspirational quotes, personal goals, school reminders, and meaningful memories. It's the perfect way to keep your "vision" front and center without sacrificing your home's aesthetic.

Final Thoughts
This DIY pinboard is one of my favorite projects because it's as functional as it is meaningful. It keeps my daily inspirations and favorite memories all in one beautiful place, and I love how easy it is to refresh throughout the year.
Since you can choose any size and fabric to your exact taste, it's the perfect way to create a high-end piece of decor that uniquely fits you and your home decor!
Creator: Audrianna Skillin
Instagram: @skillinhome
TikTok: @skillinhome


