
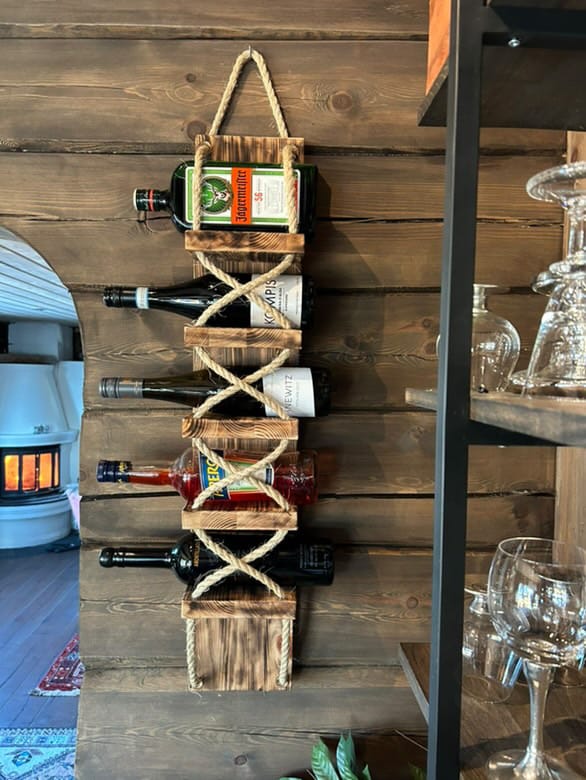
Nothing adds warmth and character to a space quite like handcrafted decor. This DIY wall-mounted wine rack is not only a statement piece but also a functional storage solution for wine lovers. Whether you want to enhance your kitchen, dining area, or bar nook, this rustic-inspired rack is easy to build and completely customizable. Plus, it’s a great way to incorporate natural materials like wood and hemp rope into your interior design. Let's walk through the steps to create your very own wine rack!
Materials You’ll Need:
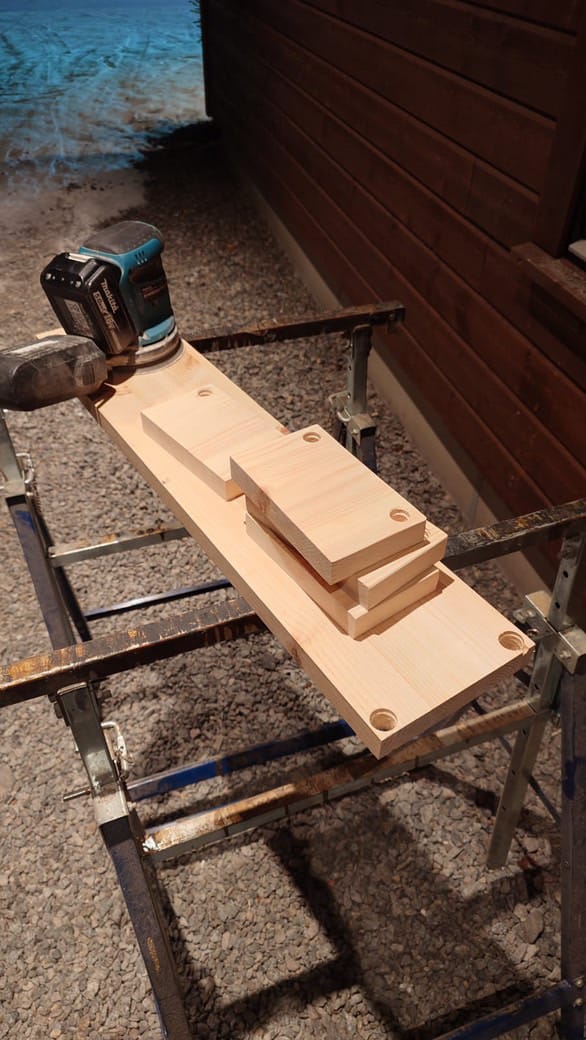
- 1 back panel (85 cm length x 16 cm width)
- 4 shelves (16 cm width x 9.5 cm depth)
- Hemp rope (for a decorative and sturdy touch)
- Screws & wood glue (for assembly)
- Drill & drill bits (for rope holes)
- Sandpaper (for a smooth finish)
- Heat gun (optional, for a burnt wood effect)
- Wood stain or paint (optional, for your desired color)
- Mounting brackets or sturdy screws (for wall attachment)
Step-to-step
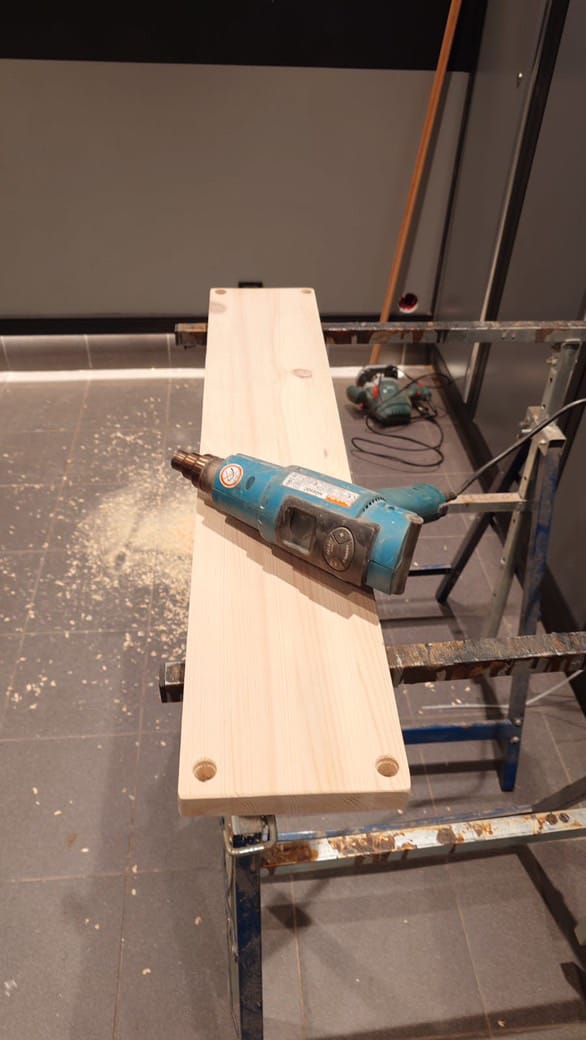
Step 1: Prepare the Wood
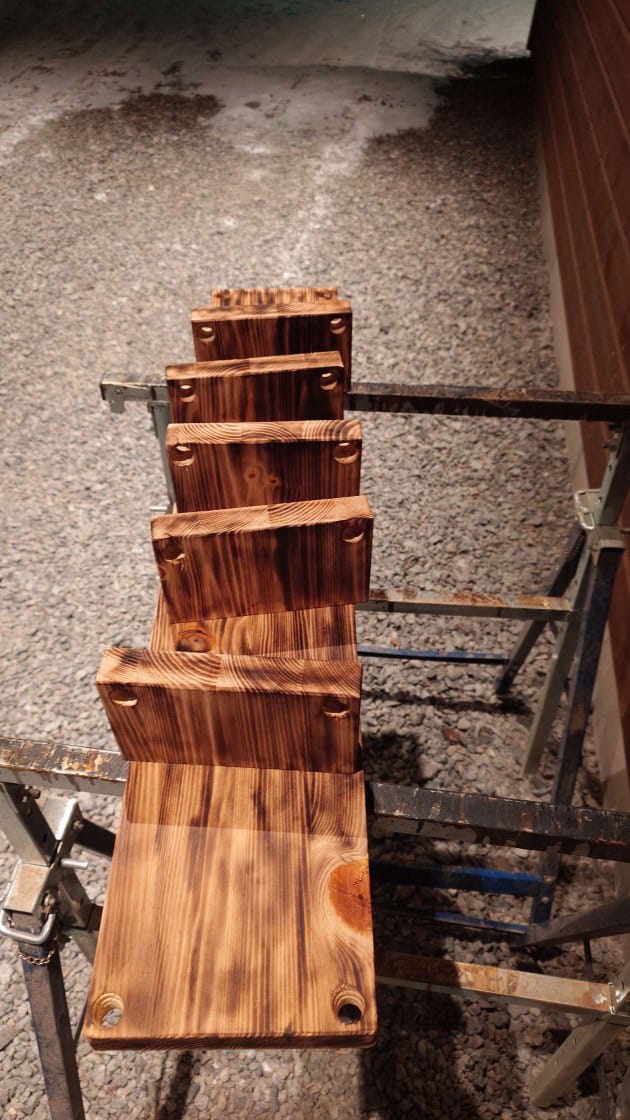
Start by cutting the back panel and four shelves to the correct measurements. If you’re using pre-cut wood, double-check the sizes to ensure they match. Once cut, sand all edges and surfaces to remove any rough spots and splinters. A smooth surface will help with both staining and assembly.
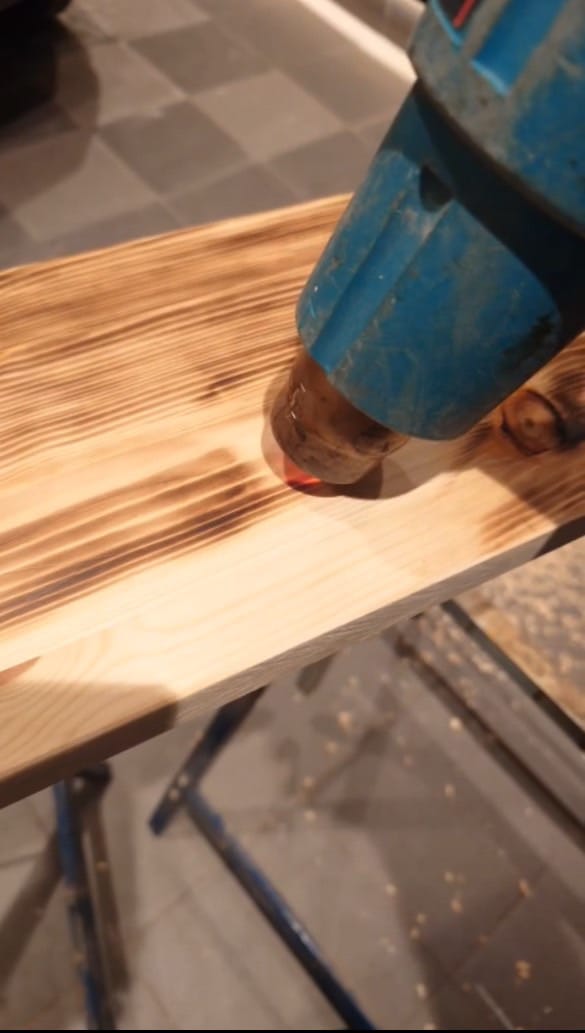
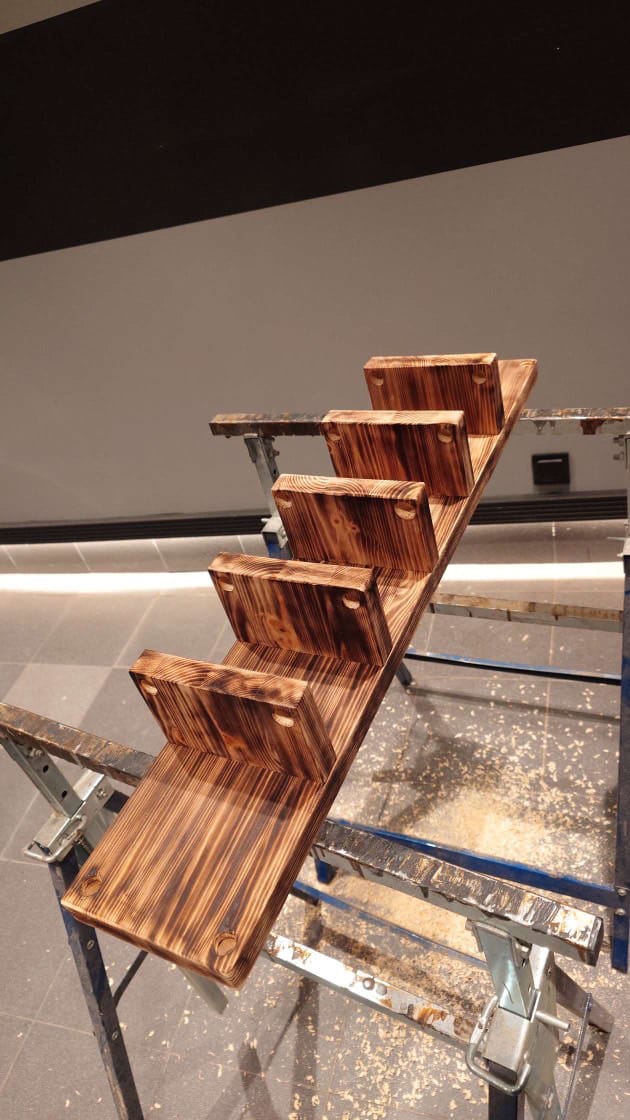
Step 4: Finish the Surface
To achieve a rustic aesthetic, consider lightly burning the wood with a heat gun for a weathered effect. If you prefer a classic or modern finish, apply wood stain or paint in your desired color. Allow sufficient drying time before handling.
Step 3: Attach the Shelves
Position the four shelves evenly on the back panel, leaving about 10 cm between each. Make sure they are level before securing them in place. Use wood glue for initial adhesion, then reinforce with screws for added stability. Allow the glue to dry before proceeding.
Step 4: Drill Holes & Thread the Hemp Rope
Next, drill two holes at the top and two at the bottom of the back panel for mounting. Then, drill one hole on each side of every shelf so the hemp rope can pass through the entire rack. Once drilled, thread the rope from the top through each shelf, ensuring an even and secure fit. Tie knots at the bottom or use screws to hold the rope firmly in place.


Step 5: Mount on the Wall
Now it’s time to bring your project to life! Securely attach the wine rack to the wall using sturdy screws or mounting brackets. Ensure it is level before fully tightening the screws.
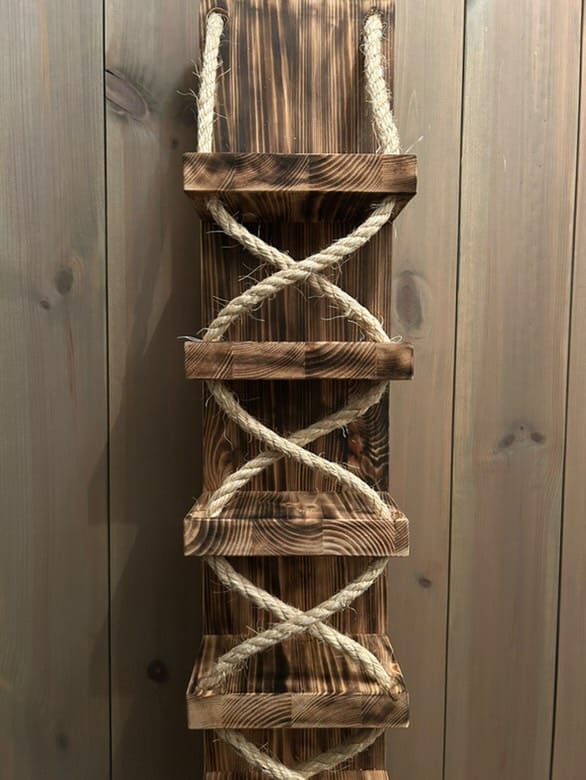

And there you have it—a stunning, handcrafted wine rack that adds character and function to your space! Whether you prefer a natural wood finish or a bold pop of color, this project is a fantastic way to elevate your home decor. Now, all that’s left to do is fill it with your favorite bottles and enjoy the cozy ambience it brings. 🍷🤠
Cheers to your DIY success!

Creator: Trine
Instagram: @trine_lager_hage_


