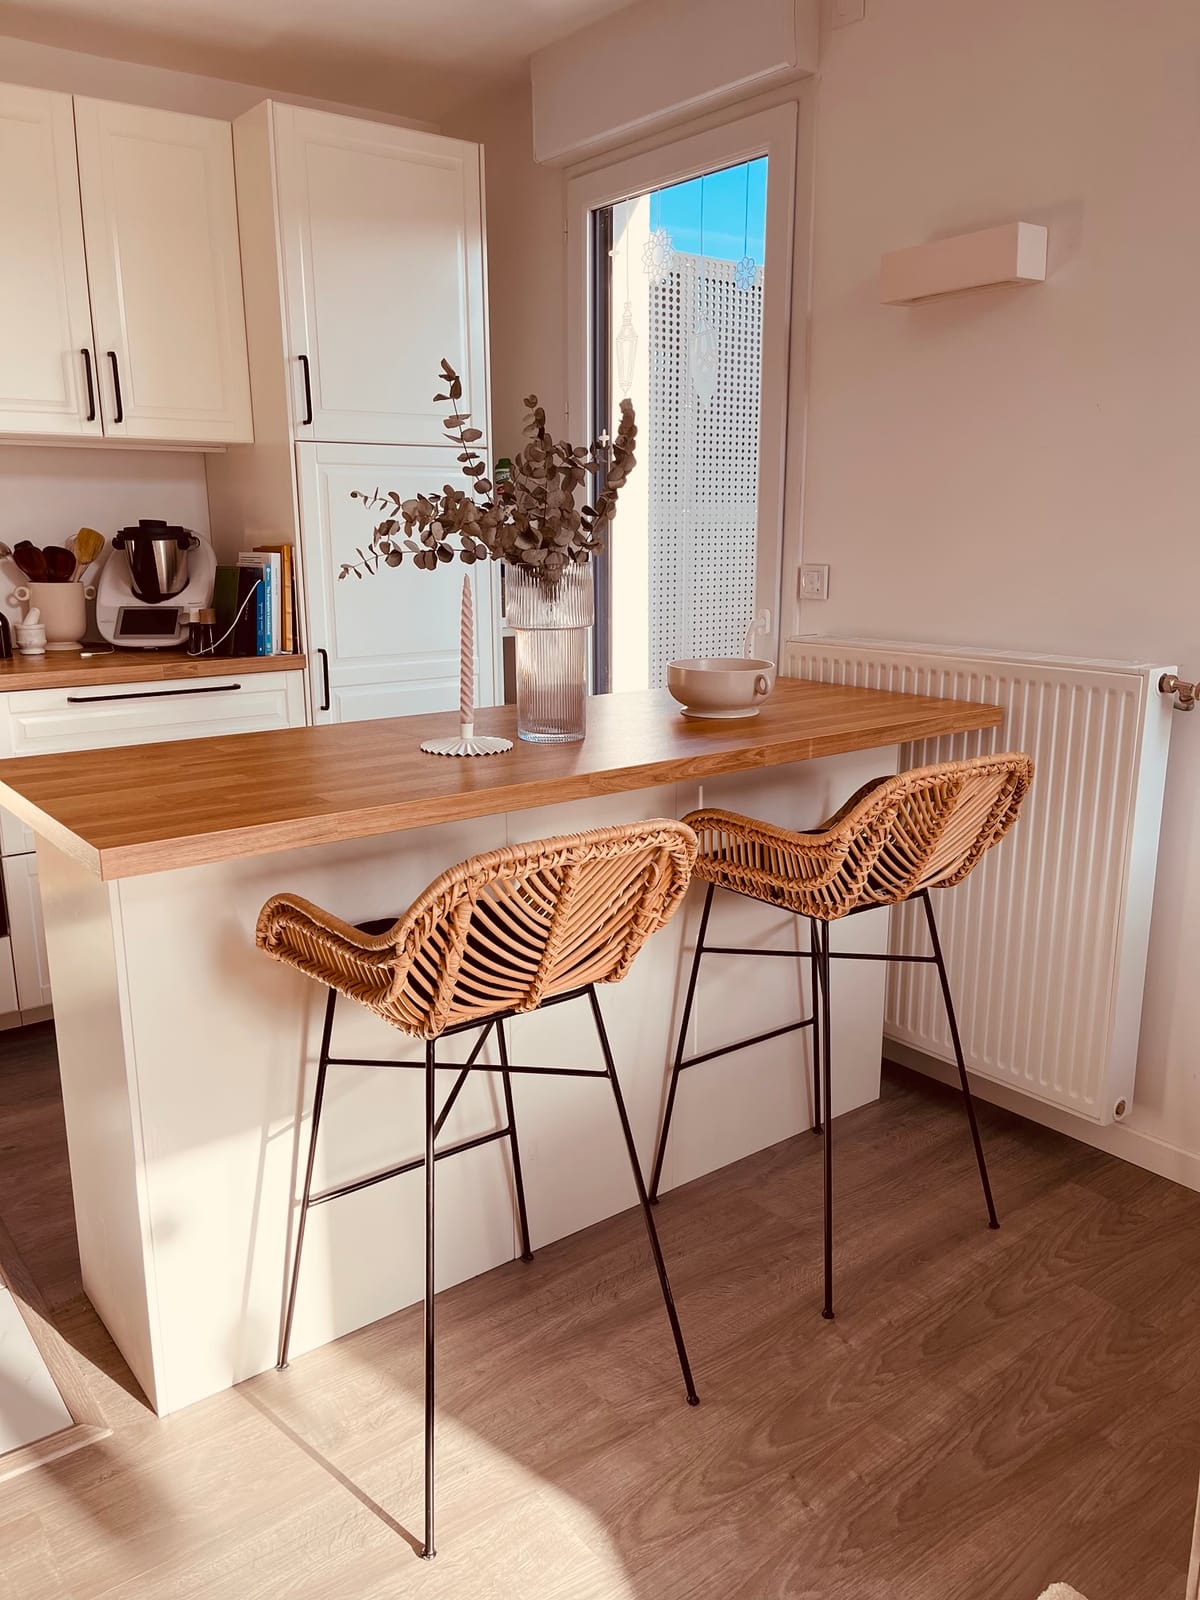
Are you looking to add a touch of elegance and functionality to your small living space? This IKEA kitchen island project is designed to optimize your area while providing a warm and stylish centerpiece for your home. Let's dive into the details and steps to create this compact and elegant kitchen island!
Materials You'll Need:
- IKEA Cabinets (37 cm deep)
- Bodbyn Fronts (off-white finish)
- Saljan Countertop (reference: 606.391.73)
- BORGHAMN Handles (black, reference: 403.189.78)
- FORBATTRA Side Panels (reference: 402.344.36)
- FORBATTRA Plinth (reference: 602.807.76)
- METOD/MAXIMERA Cabinets (reference: 403.189.78)
- Brackets for assembly
- Strong Glue for added stability
Step-by-Step Guide:
Step 1: Assemble the Cabinets
Start by assembling the 37 cm deep IKEA METOD/MAXIMERA cabinets according to the instructions. Ensure all screws and fittings are securely tightened.
Step 2: Attach the Bodbyn Fronts
Once the cabinets are assembled, attach the Bodbyn fronts. The off-white finish provides a traditional yet stylish look that will complement your space beautifully.
Step 3: Install the Saljan Countertop
Place the Saljan countertop (reference: 606.391.73) on top of the cabinets. This countertop adds warmth and a touch of elegance to the overall design. Secure it in place according to IKEA's instructions.
Step 4: Add the BORGHAMN Handles
Attach the black BORGHAMN handles (reference: 403.189.78) to the Bodbyn fronts. The handles create a striking contrast against the off-white fronts, giving your kitchen island a modern and sophisticated look.
Step 5: Install the FORBATTRA Side Panels and Plinth
For a cohesive and finished appearance, attach the FORBATTRA side panels (reference: 402.344.36) and the FORBATTRA plinth (reference: 602.807.76). These elements not only enhance the aesthetic appeal but also reinforce the stability of the unit.
Step 6: Secure the Structure
To ensure your kitchen island is solid and stable, use brackets to secure the cabinets together. Apply strong glue to the bottom of the cabinets before placing them on the floor. This step helps prevent any movement and keeps your island firmly in place.
Step 7: Final Touches
Double-check all fittings and make sure everything is securely in place. Wipe down the surfaces to remove any dust or debris from the assembly process.
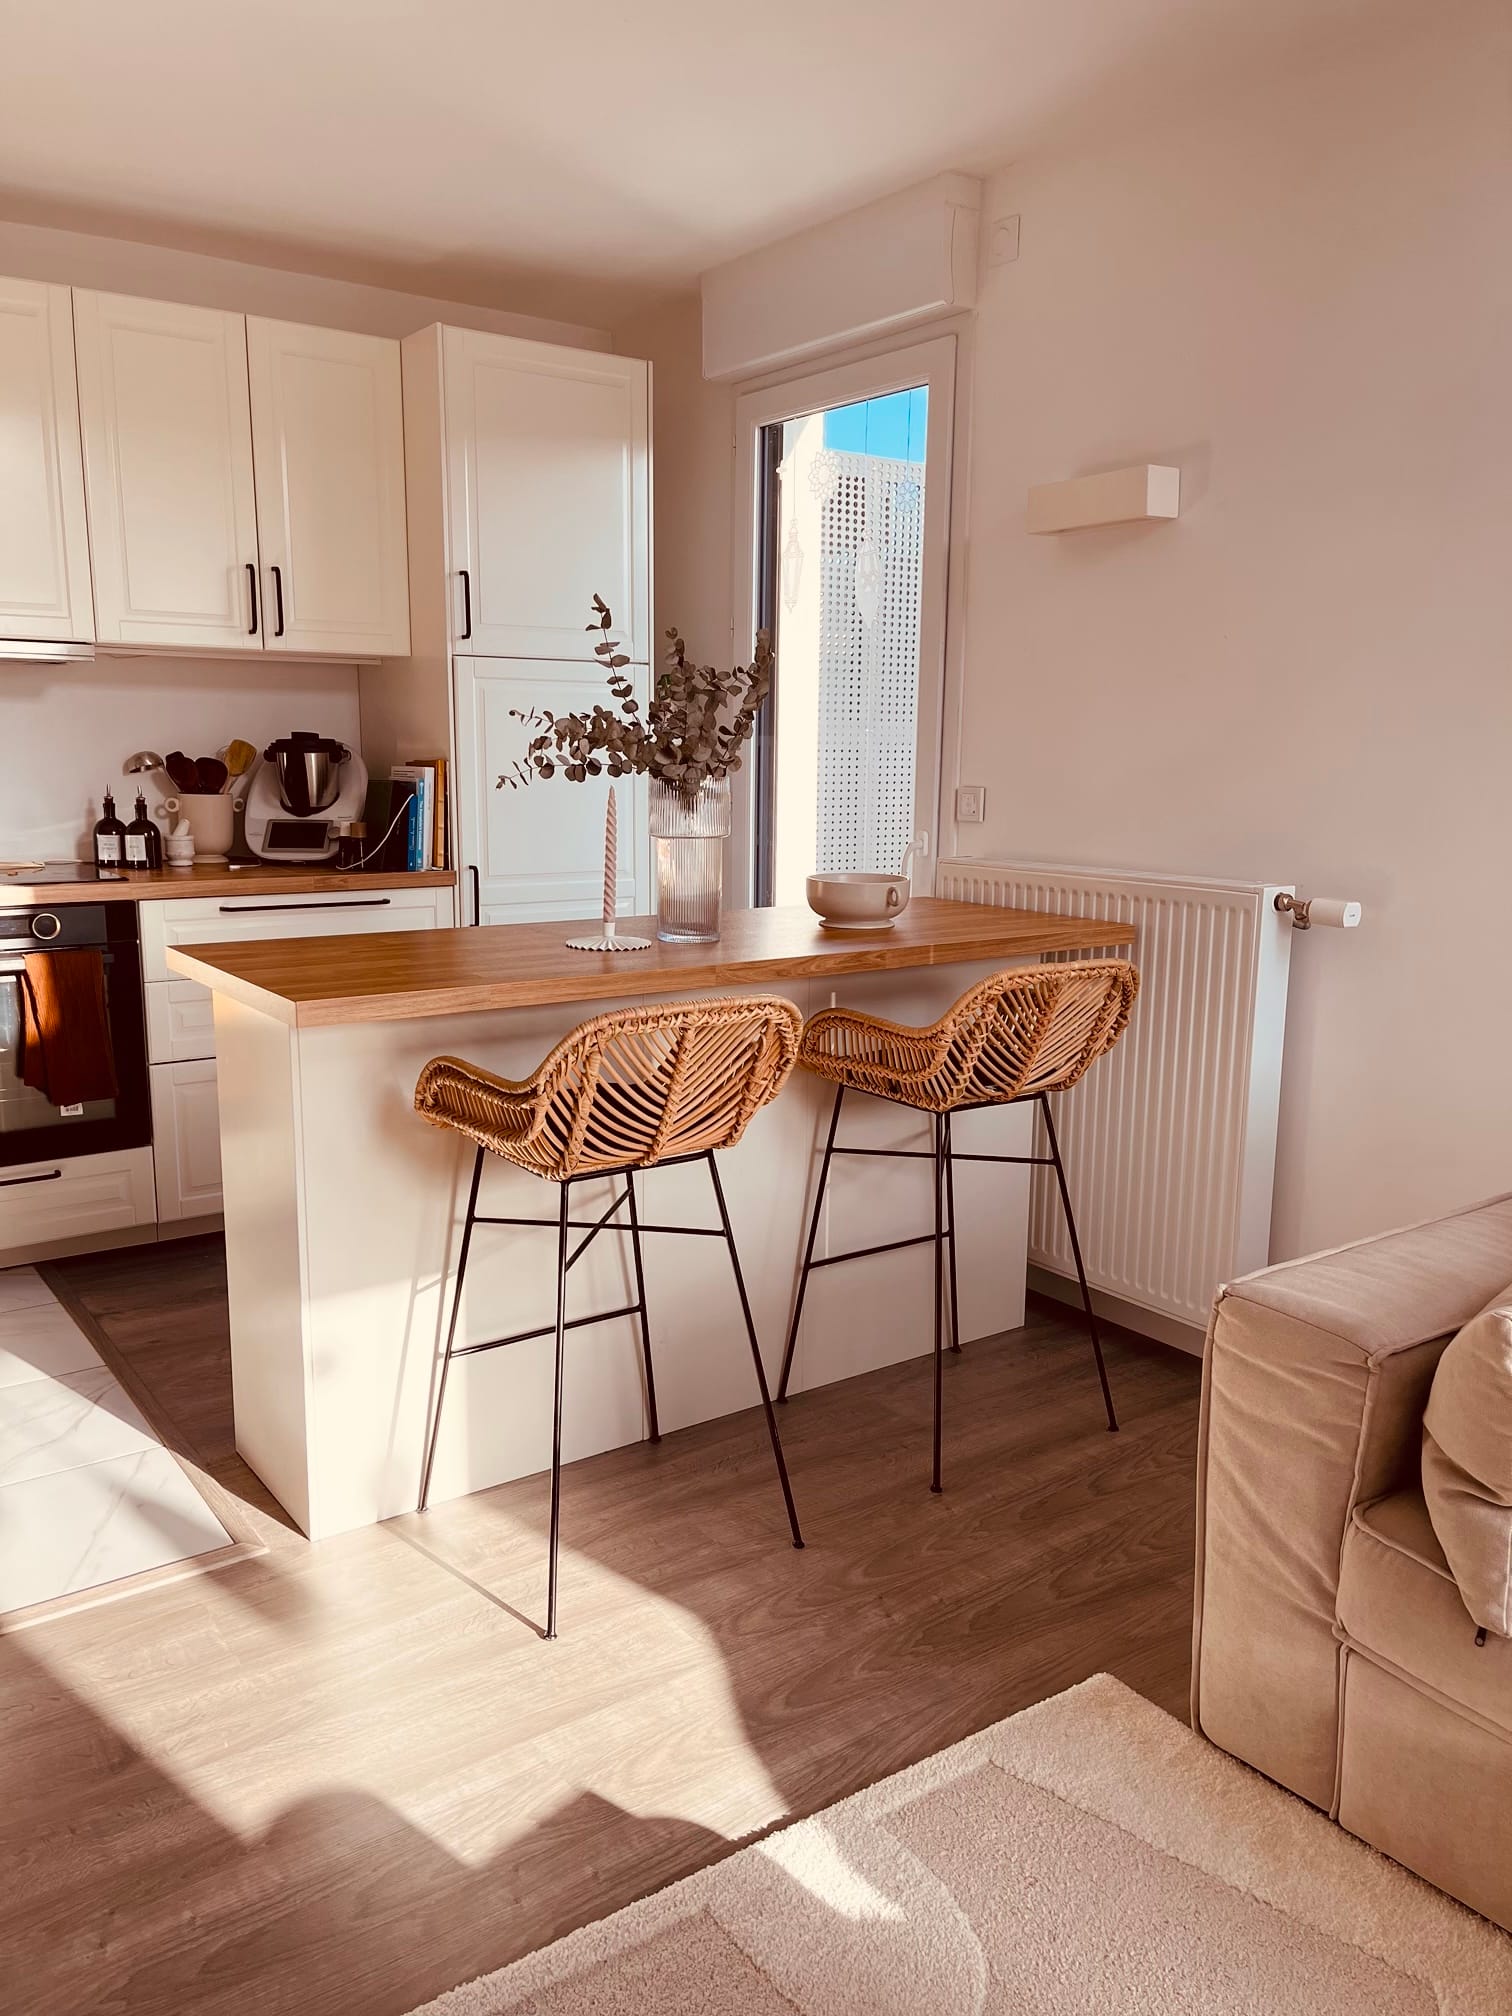
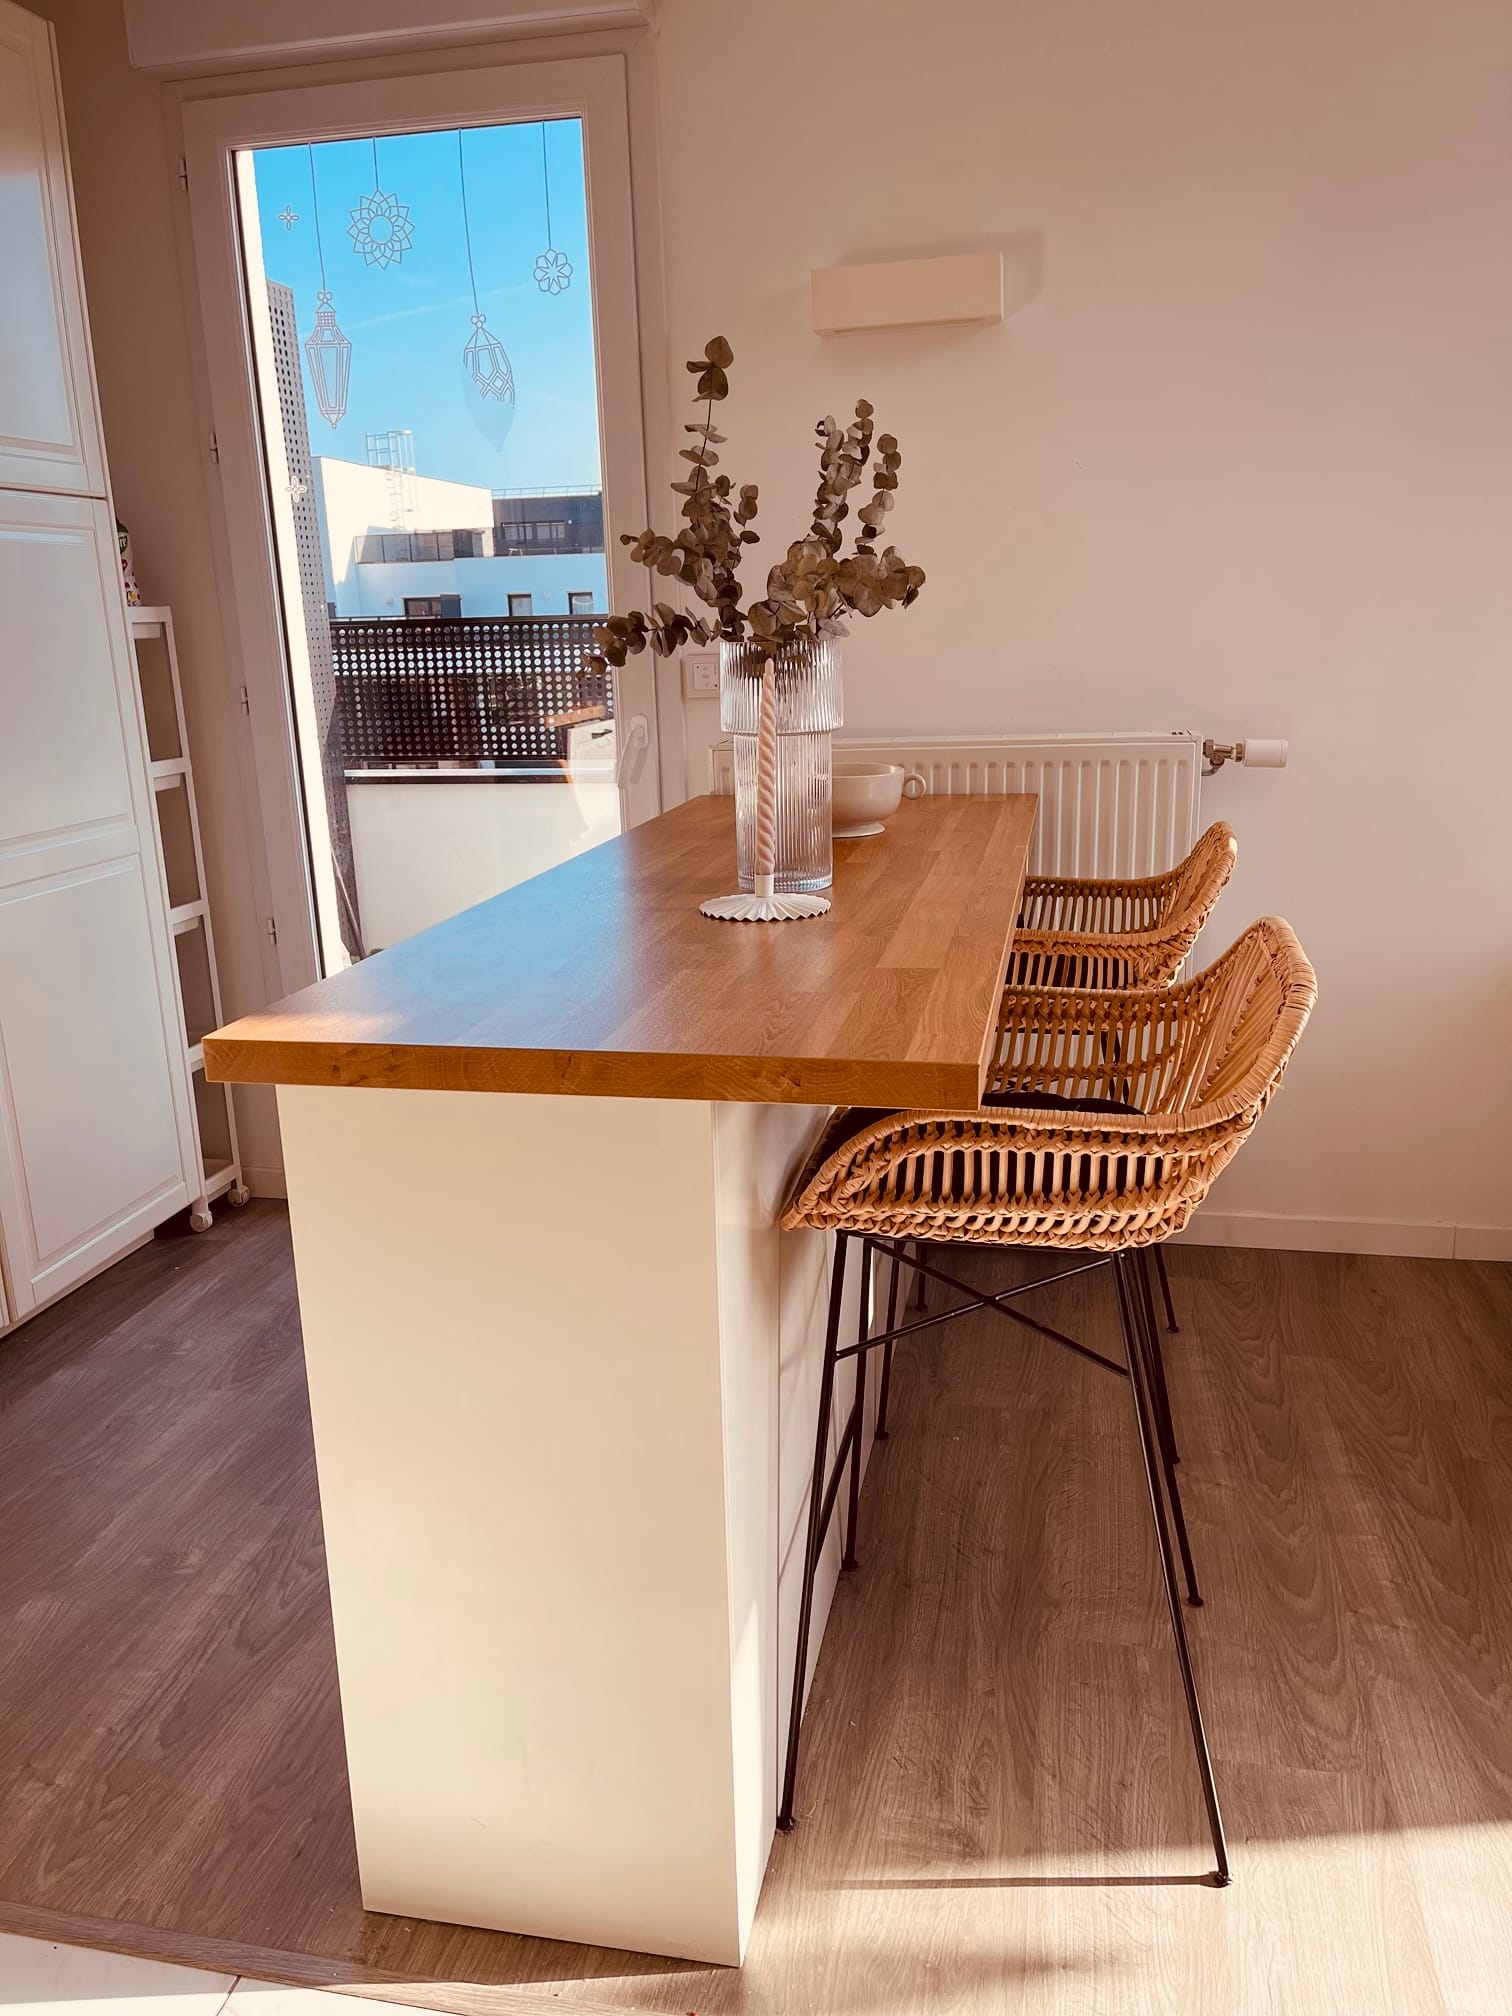
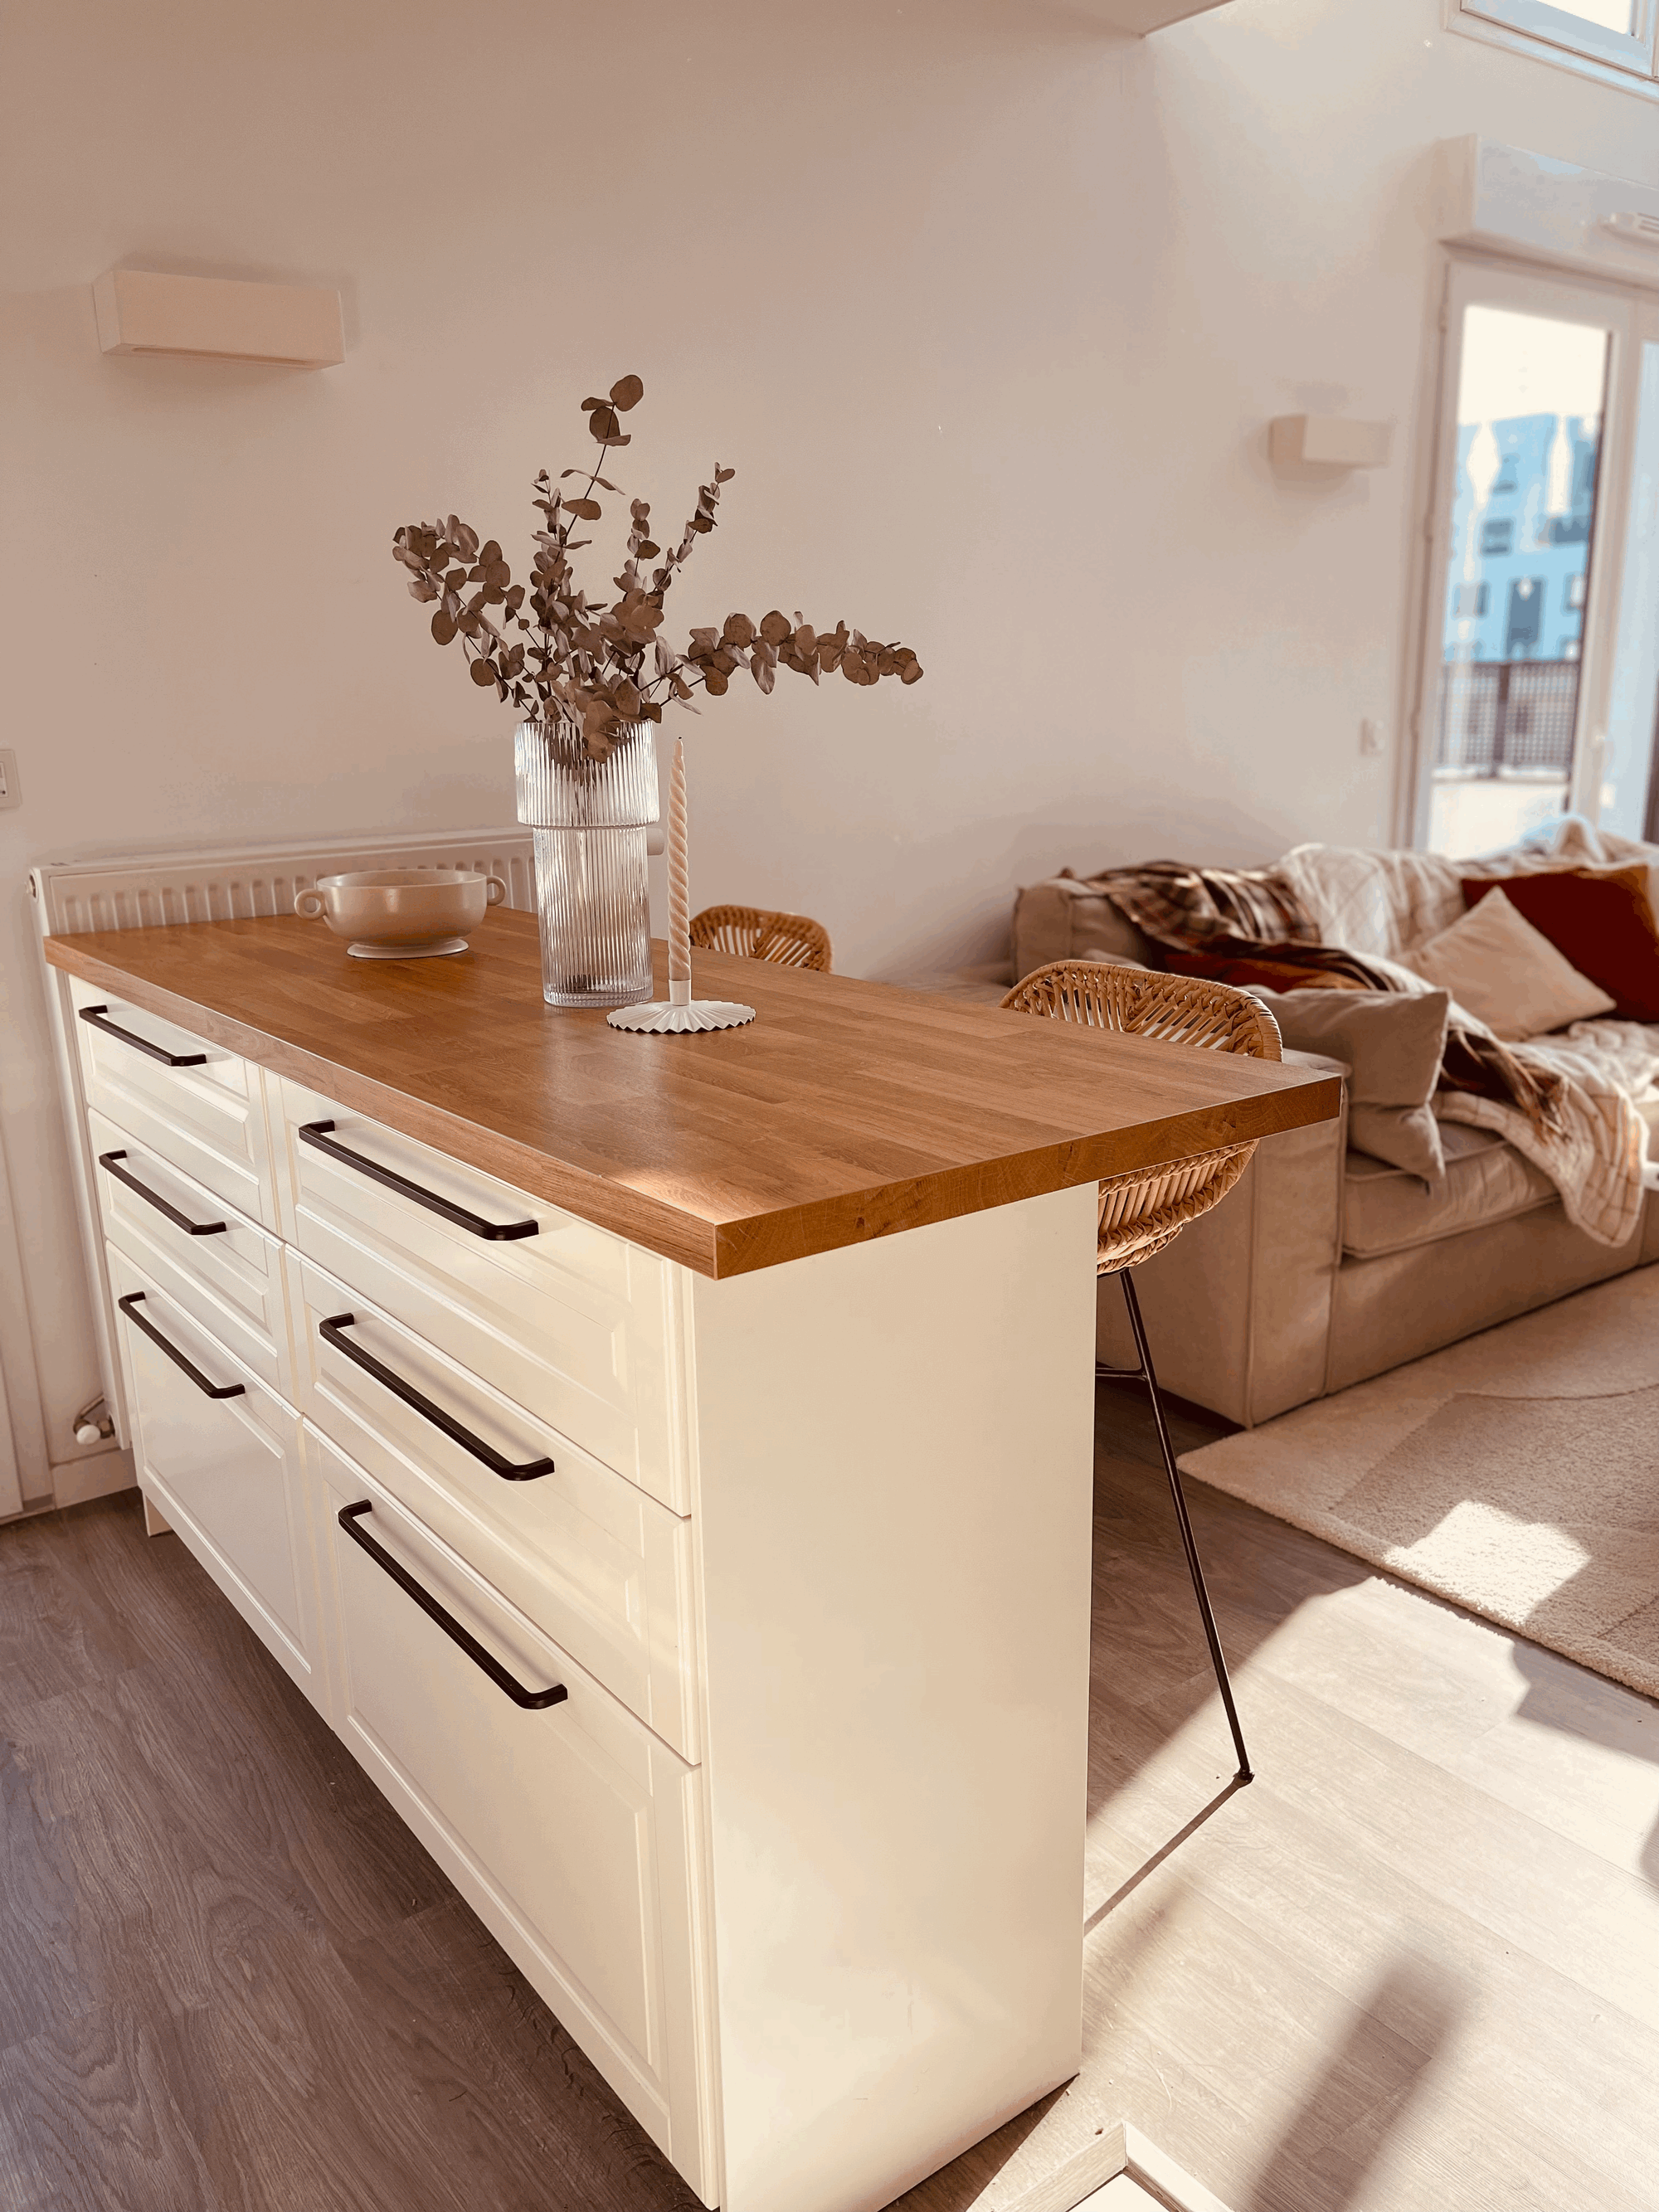
Creating an IKEA kitchen island is a fantastic way to maximize space in a small living area while adding a stylish and functional element to your home. The combination of traditional Bodbyn fronts with the modern contrast of BORGHAMN handles and the warmth of the Saljan countertop creates a balanced, elegant look. Follow these steps, take your time, and enjoy your beautiful new kitchen island!
Happy DIYing!

Creator: Sali
Instagram: @vibewithsali
Kitchen Maker: @samam_cuisine


