

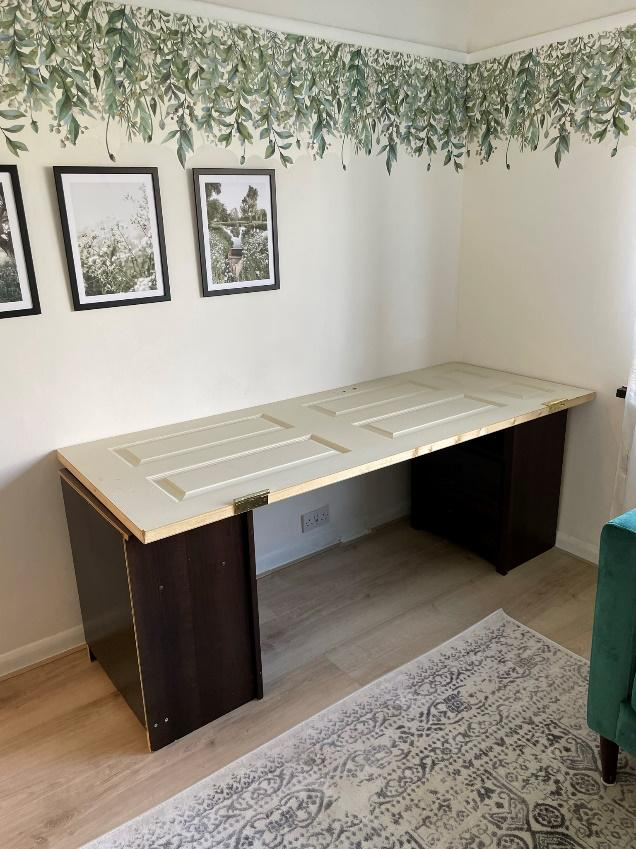
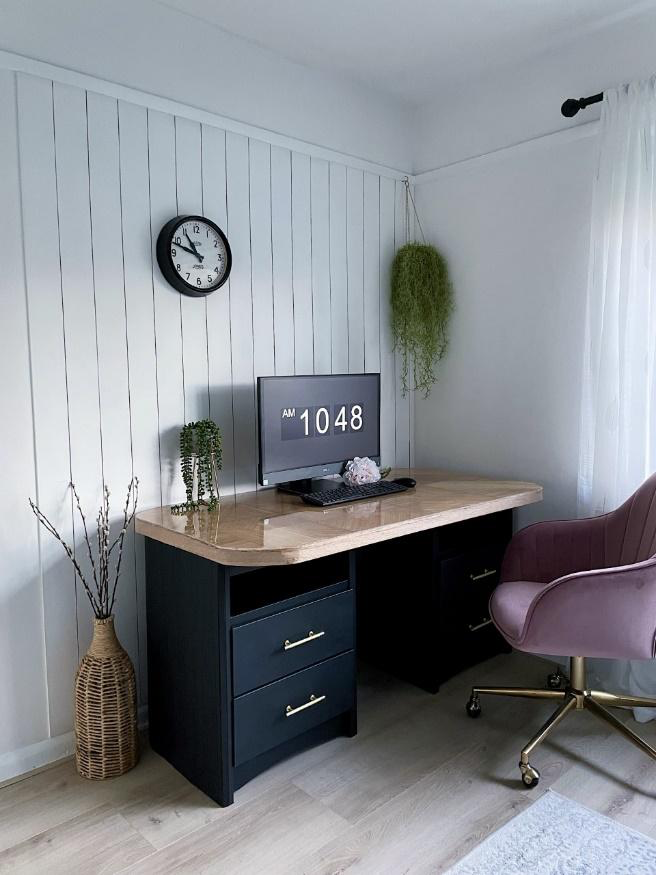
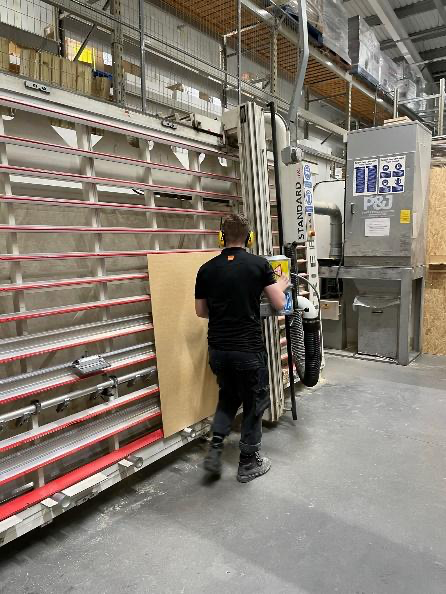
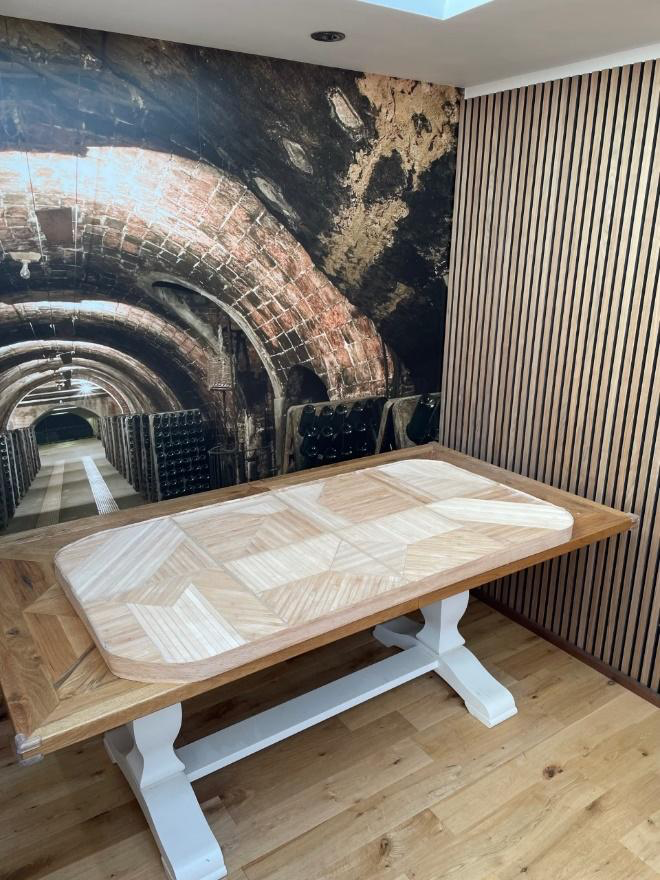
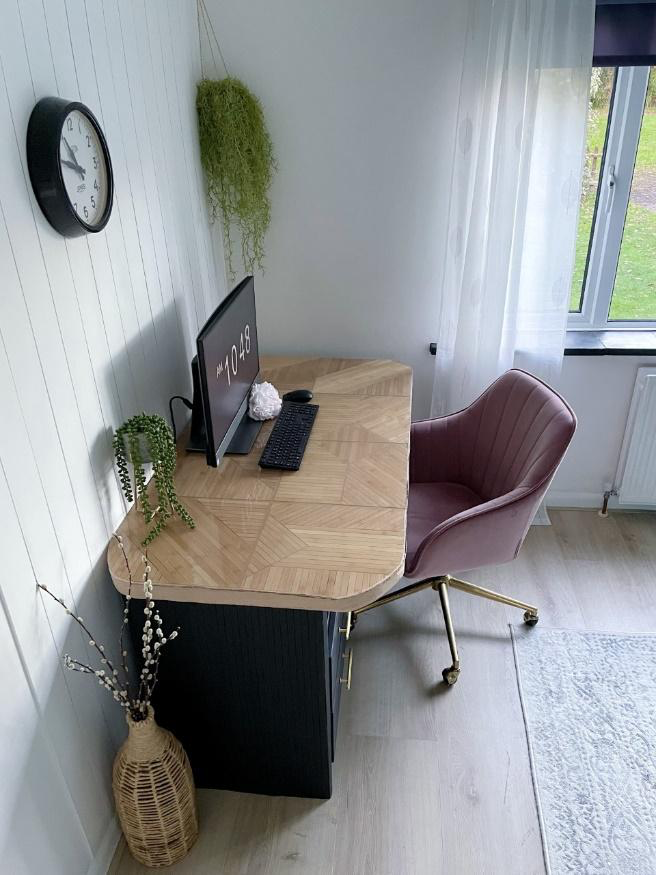
DIY enthusiasts and design lovers are always looking for new projects to take on, and one of the most popular ones these days is furniture renovation. In particular, desks have become a favourite among those looking to create a personalized workspace. One recent project that caught my attention is a desk makeover using pole wrap, a flexible wood veneer that can be used to cover poles, posts, or any cylindrical object.
Here are the steps you need to follow to create this beautiful desk:
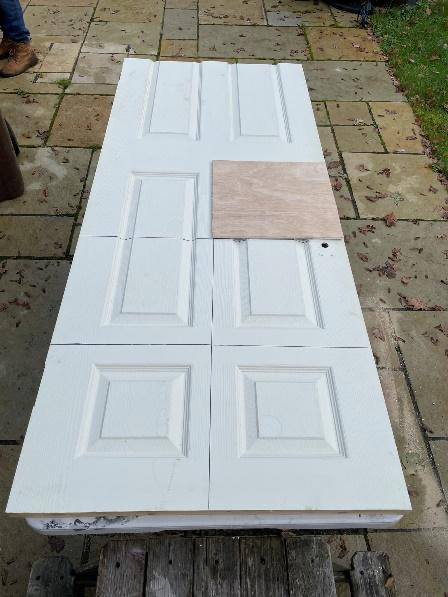
Step 1: Cut a square template from cut-off wood and mark it out on your door.
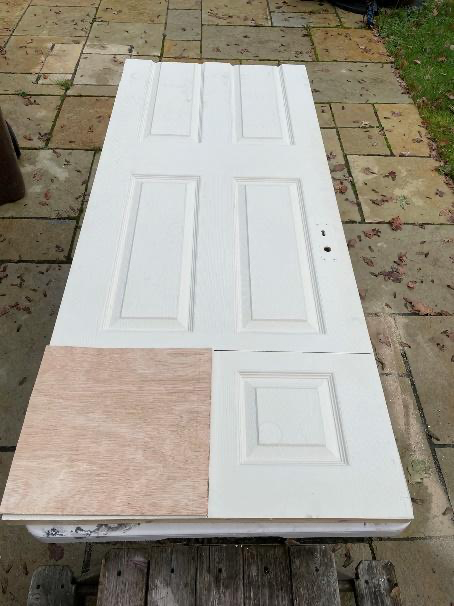
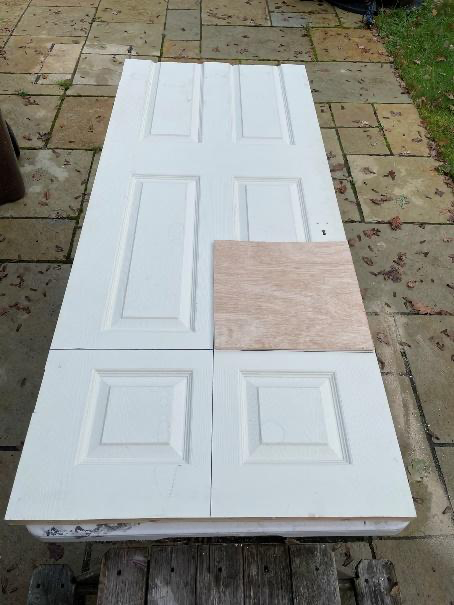
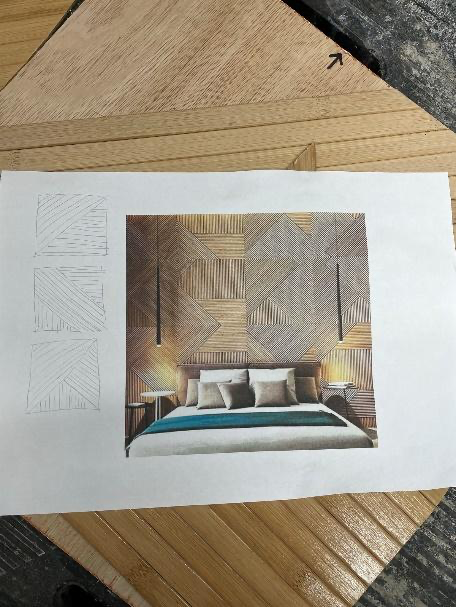
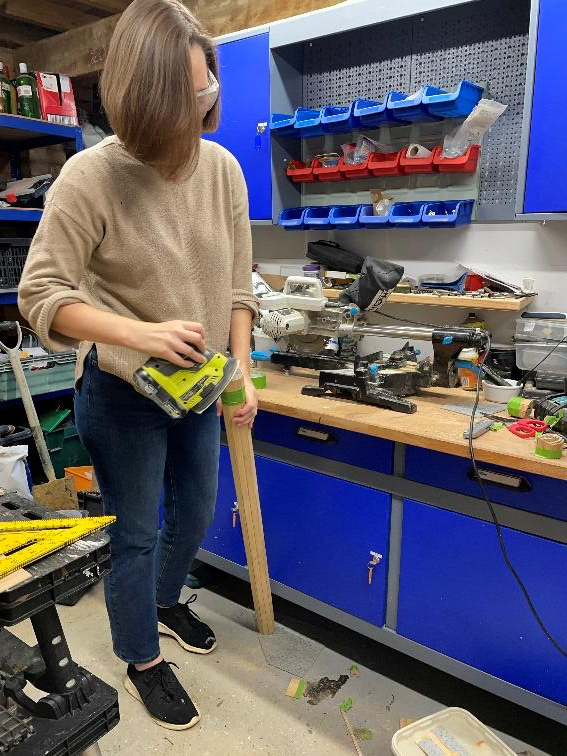
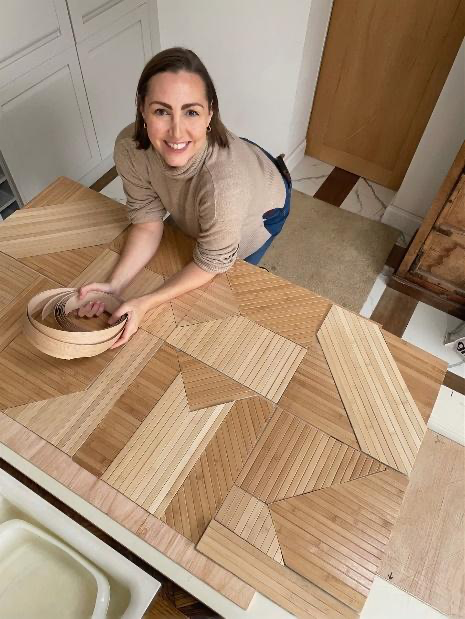
Step 2: Cut the pole wrap into square puzzle pieces to size using an inspiration picture as guidance.
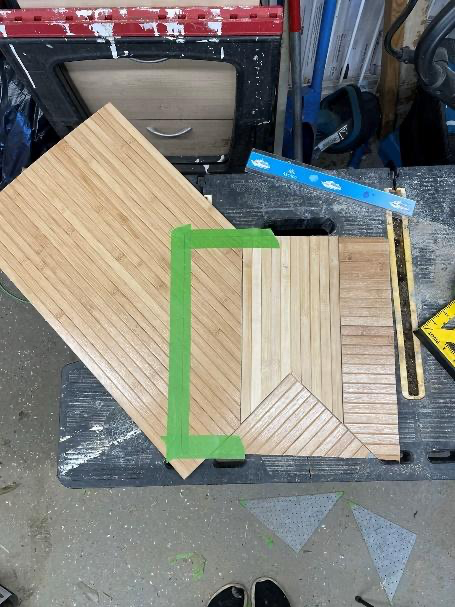
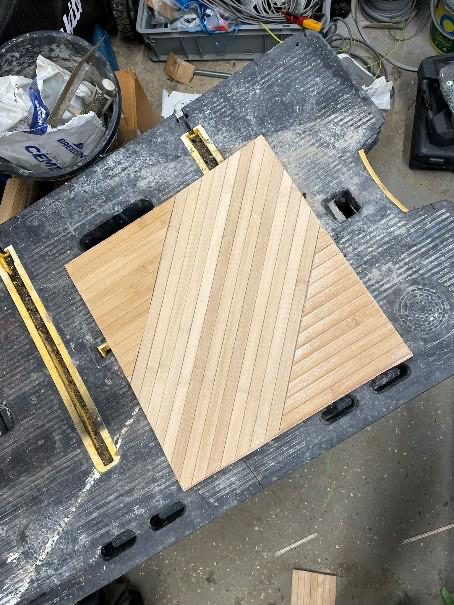
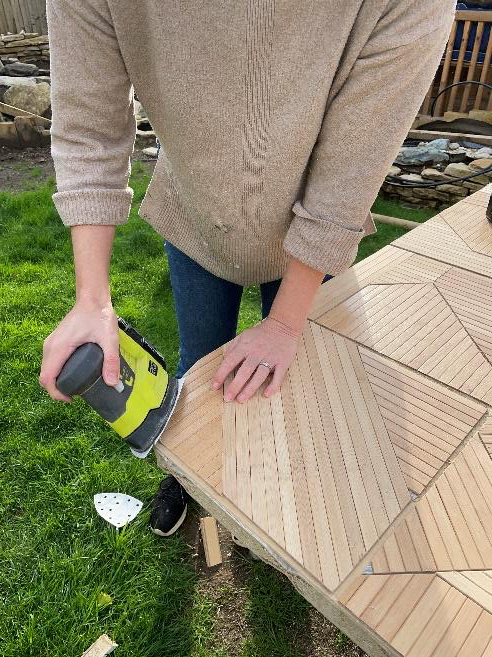
Step 3: Sand the edges of the pole wrap along the cut line to make them smooth.
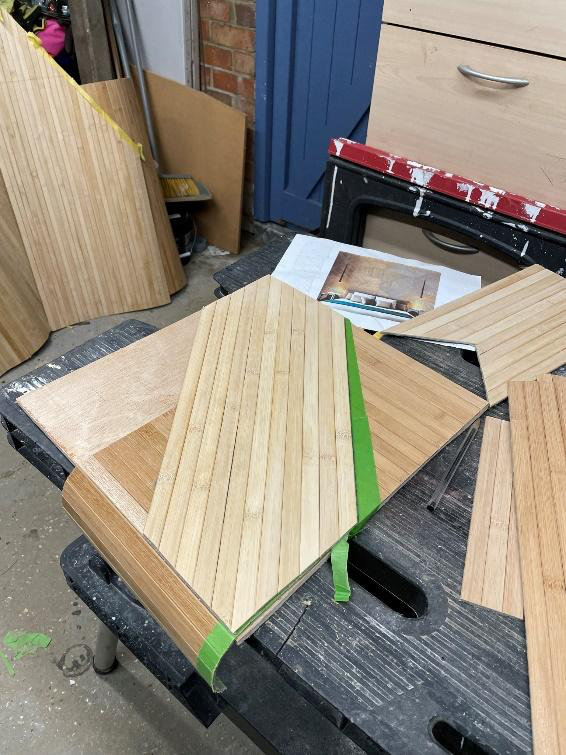
Step 4: Start assembling the square puzzle pieces on top of the desk and measure the exact top surface area covered for Step 5.
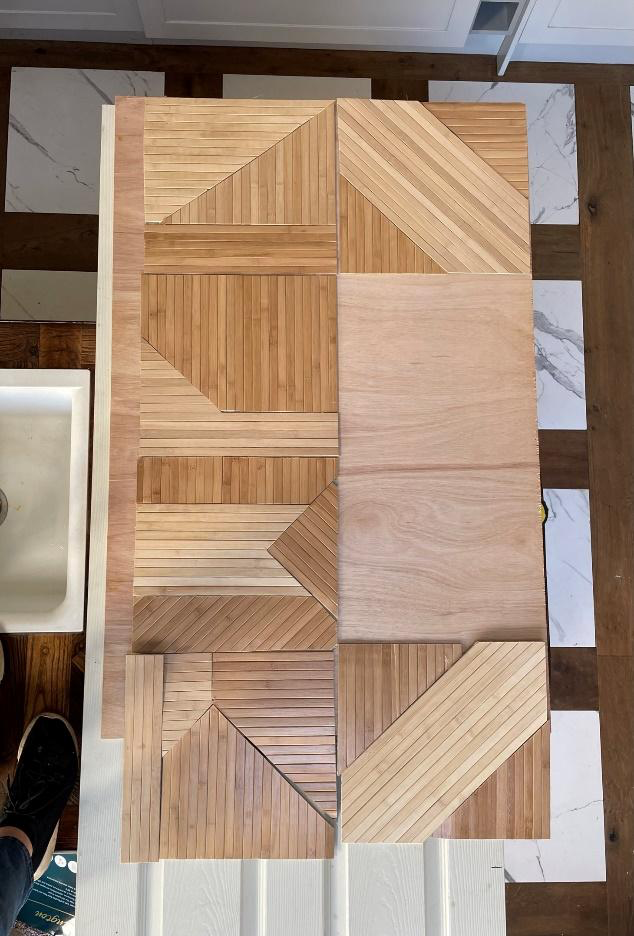
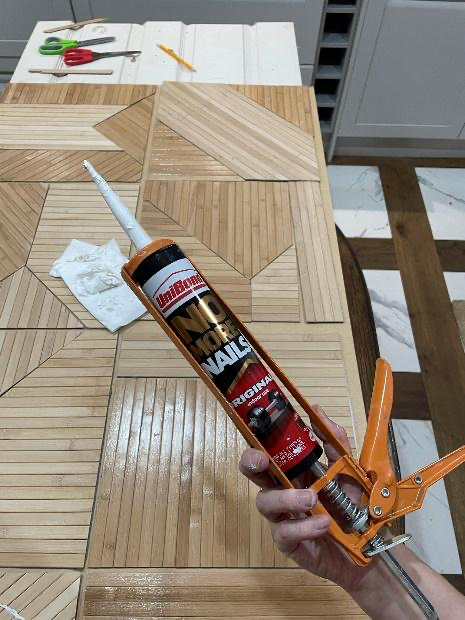
Step 5: Cut a hardwood board to size and attach it to the top of the door using No More Nails.
Step 6: Glue the puzzle pieces down using No More Nails.
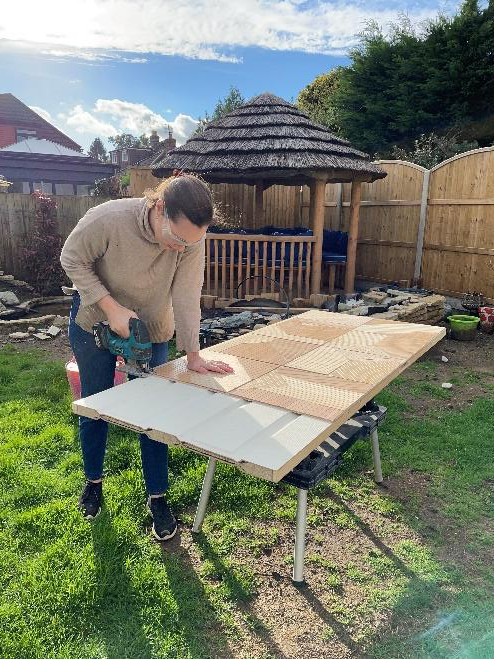
Step 7: Cut off any excess from the door and round the corners.
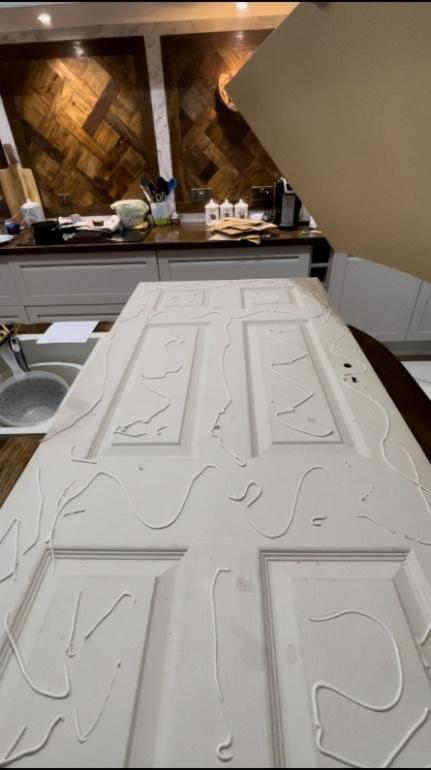
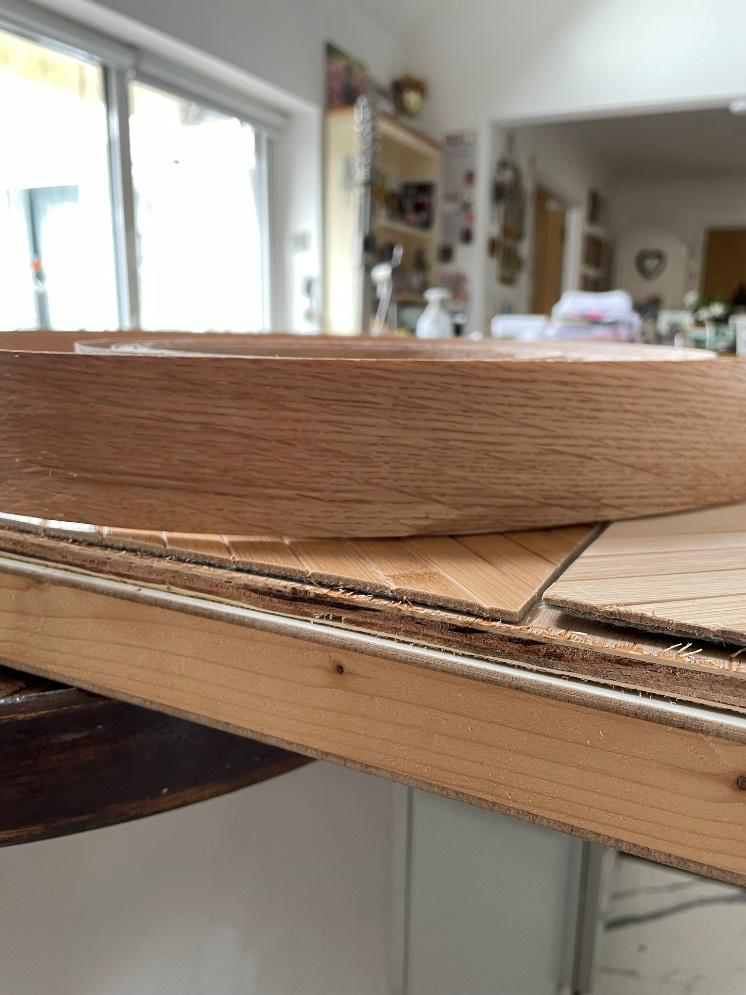
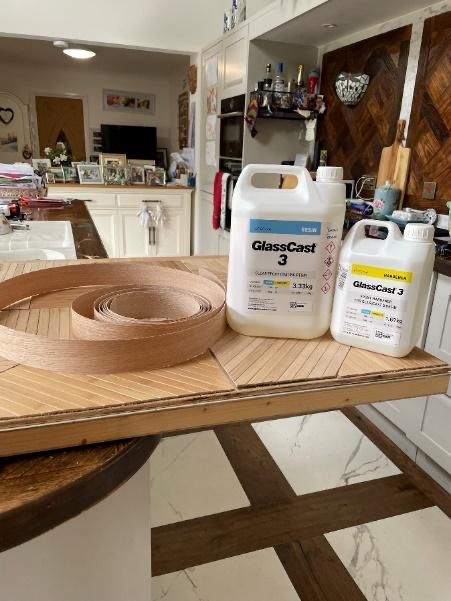
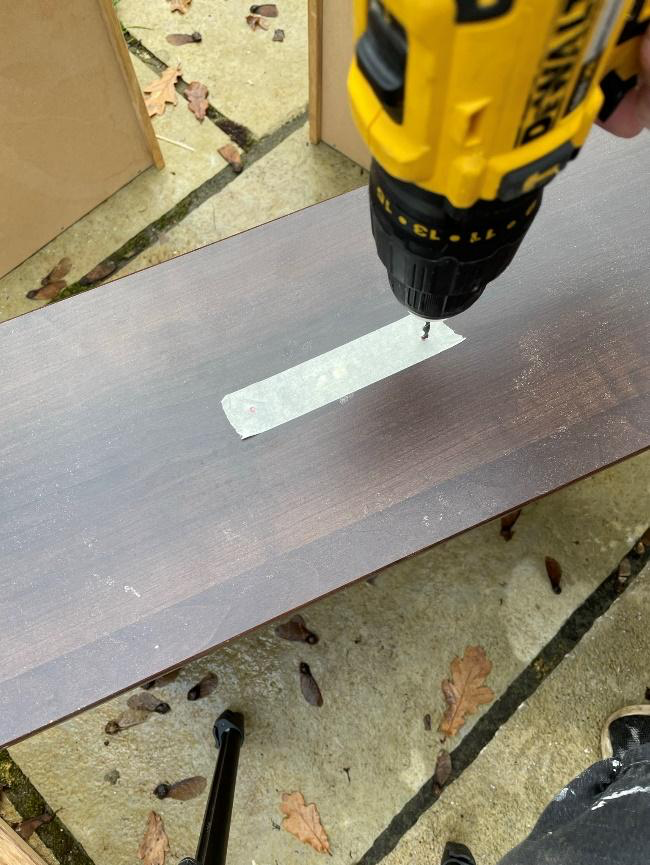
Step 8: Iron on the edging tape, leaving a 5mm gap at the top for the resin to sit in.
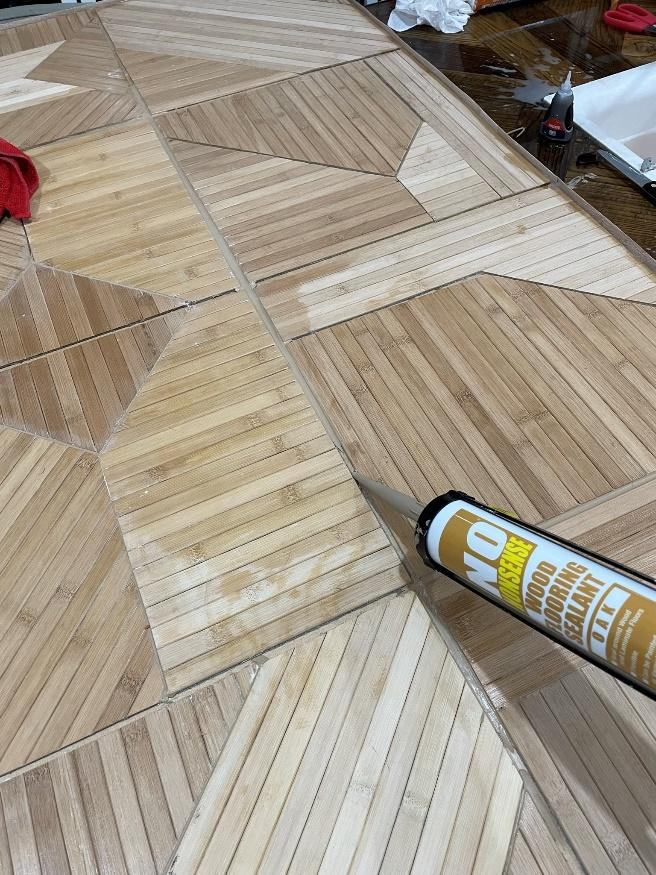
Step 9: Seal around the edge with a waterproof sealant to ensure a good seal all the way around the edge. Otherwise, the resin will pour onto the floor.

Step 10: Fill in all the gaps with oak-colored sealant to make the surface smooth.
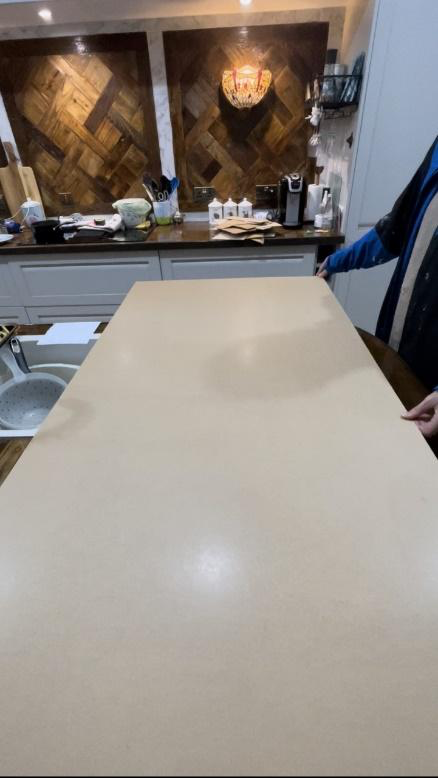
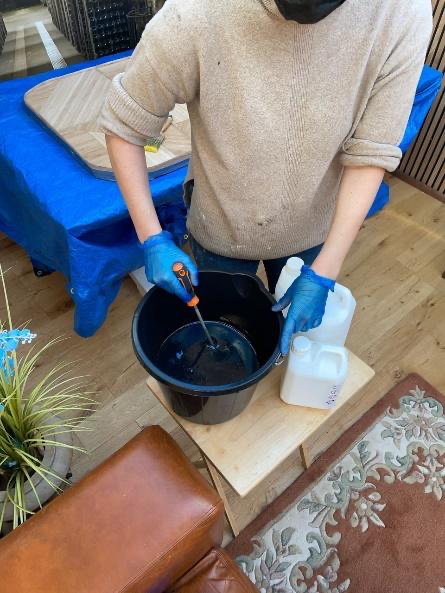
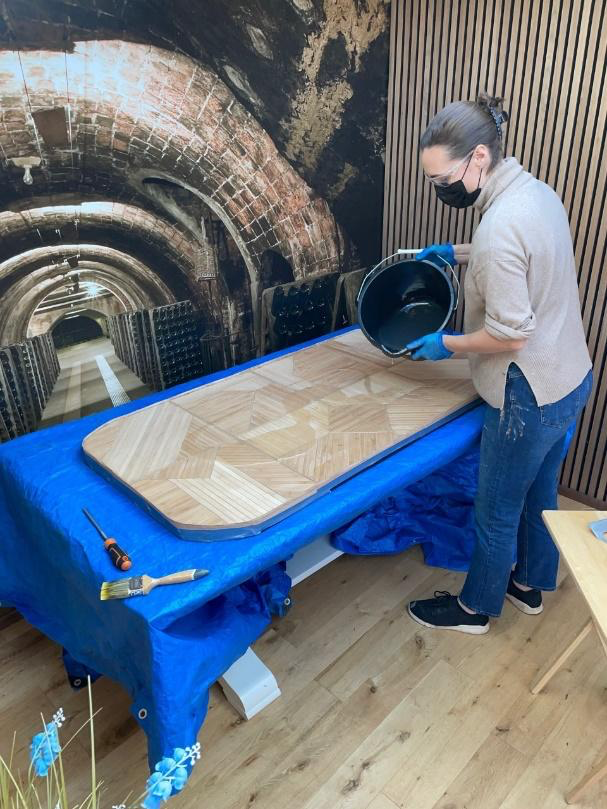
Step 11: Mix up the resin and paint on a thin sealing coat. This will take 24 hours to cure.
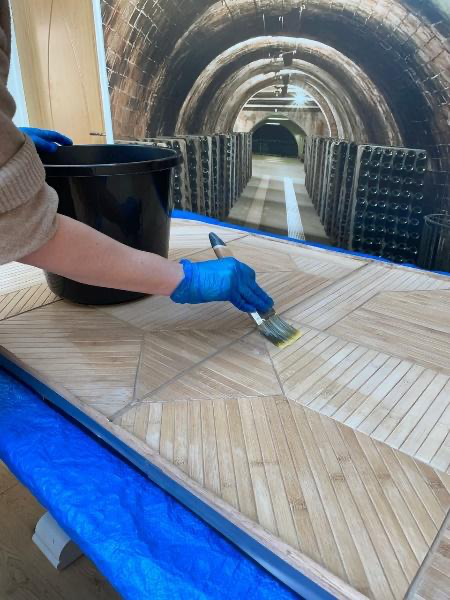
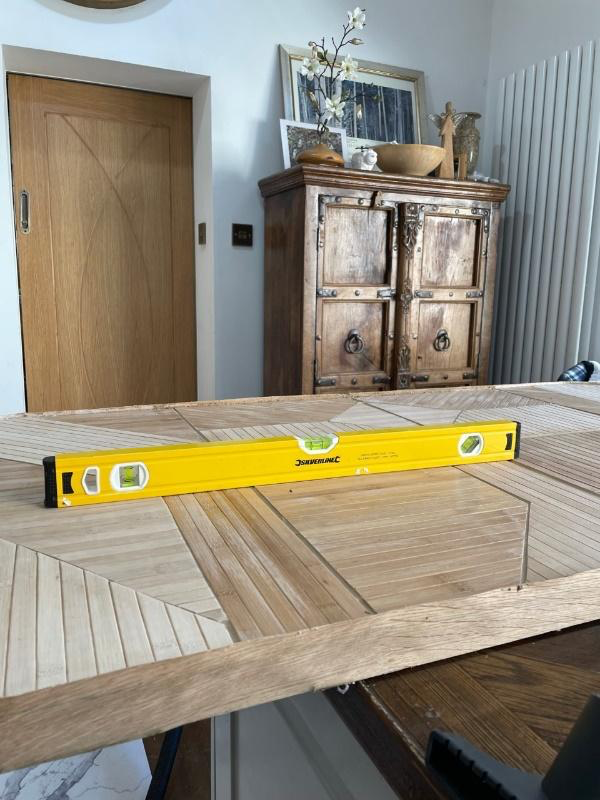
Step 12: Sand the table with 120-grit sandpaper and give it a clean before applying the final pour. The GlassCast resin is self-levelling, but check that the desk is level before you start to pour. Pour the resin and spread it around with a notch spreader. This will take 24 hours to fully cure.
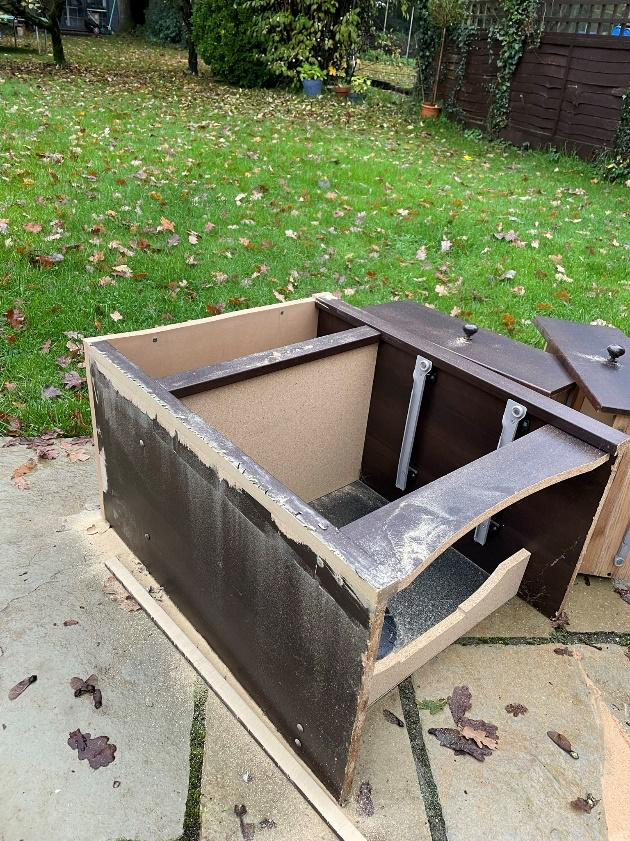
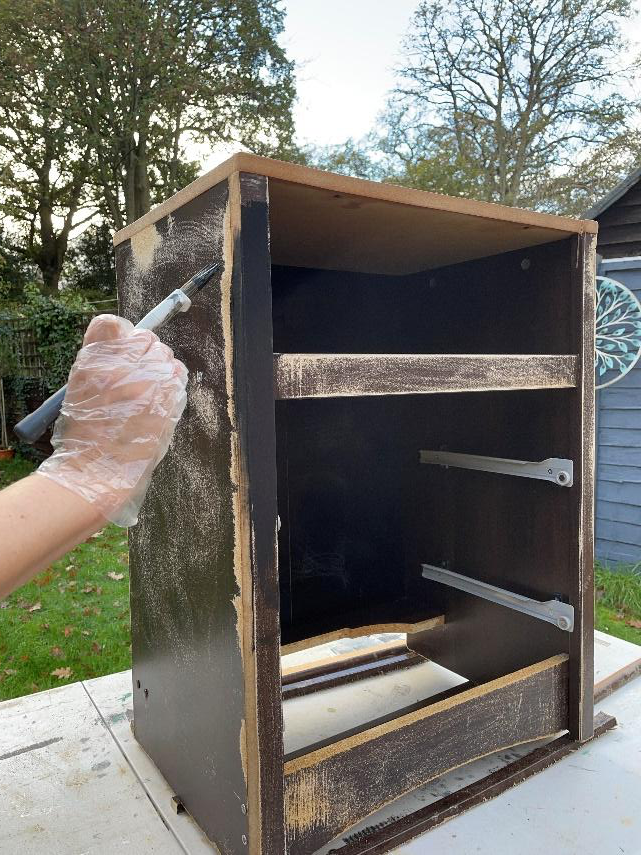
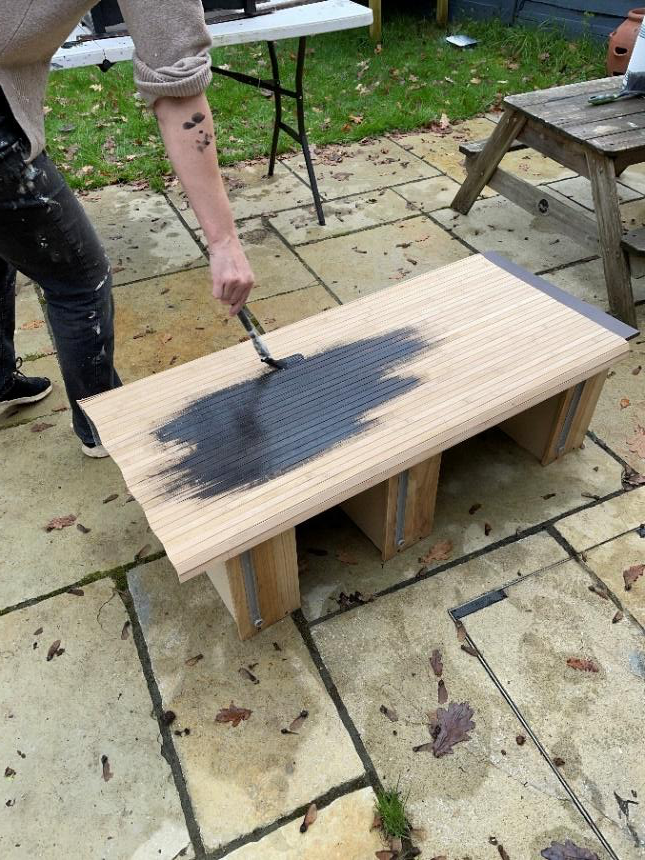
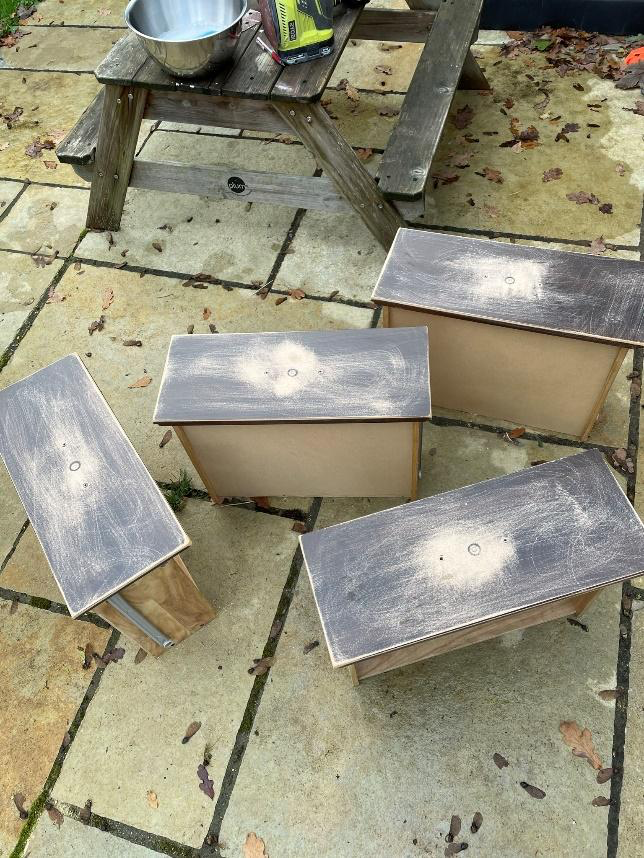
Step 13: While the resin is curing, work on the cabinets, which will form the base for your desk. Cut off any bulky excess wood pieces, sand, prime, paint the cabinets, and some pole wrap sheets to finish either end.
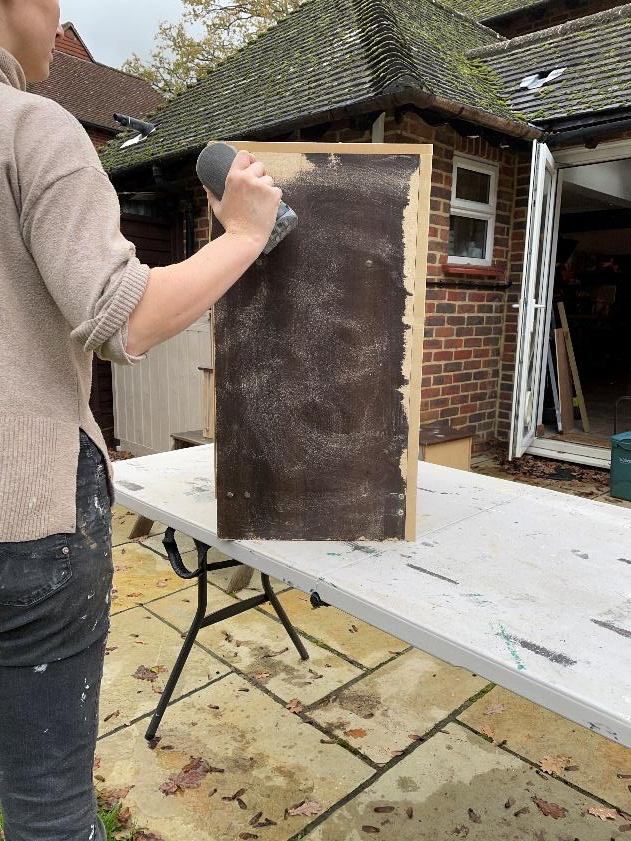
Step 14: Sand, prime, and paint the desk drawers. Fill old holes, drill new ones, and attach new hardware.

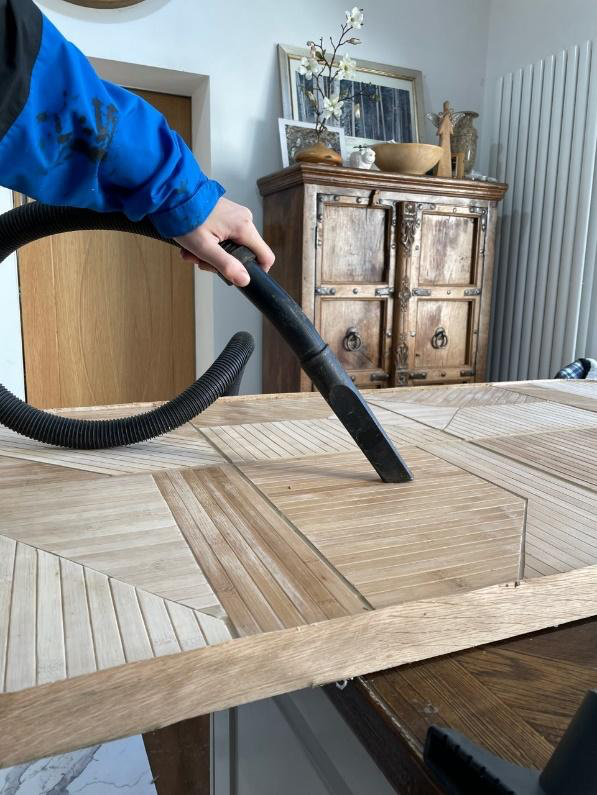
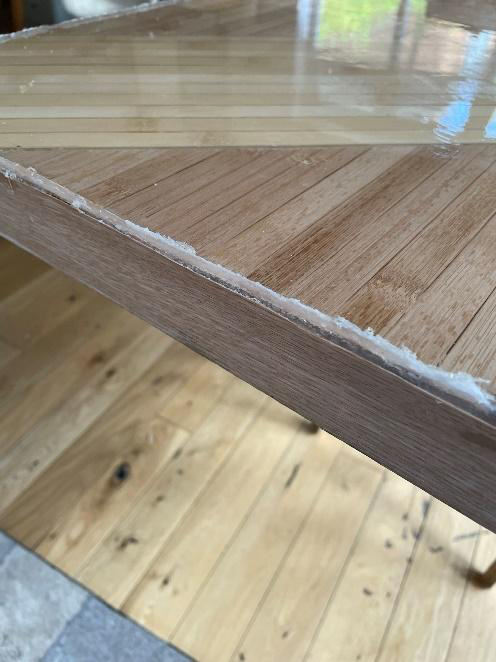
Step 15: Cut away the excess edging tape at the top and remove any leftover sealant.
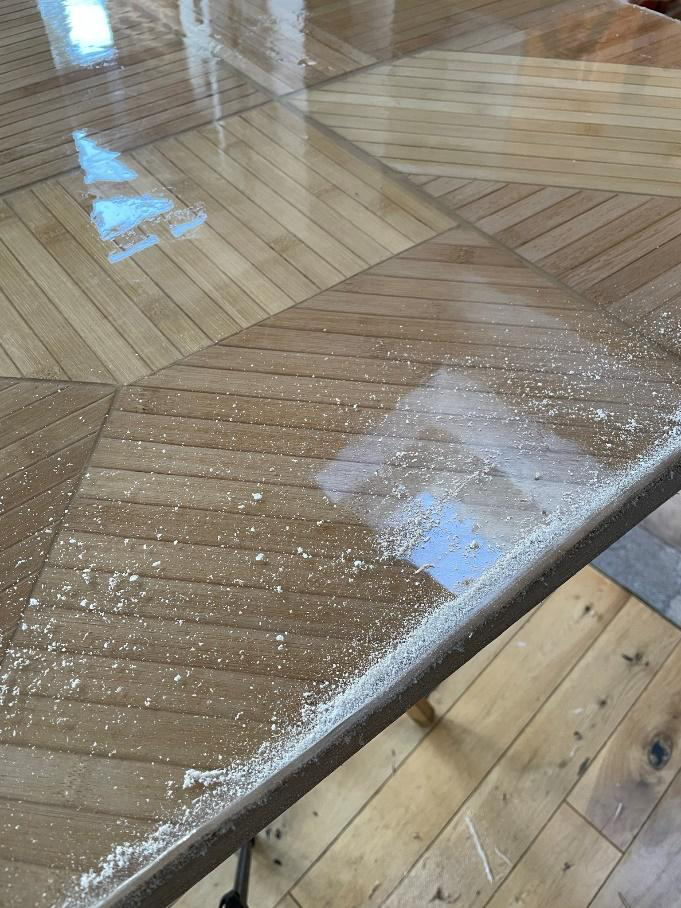
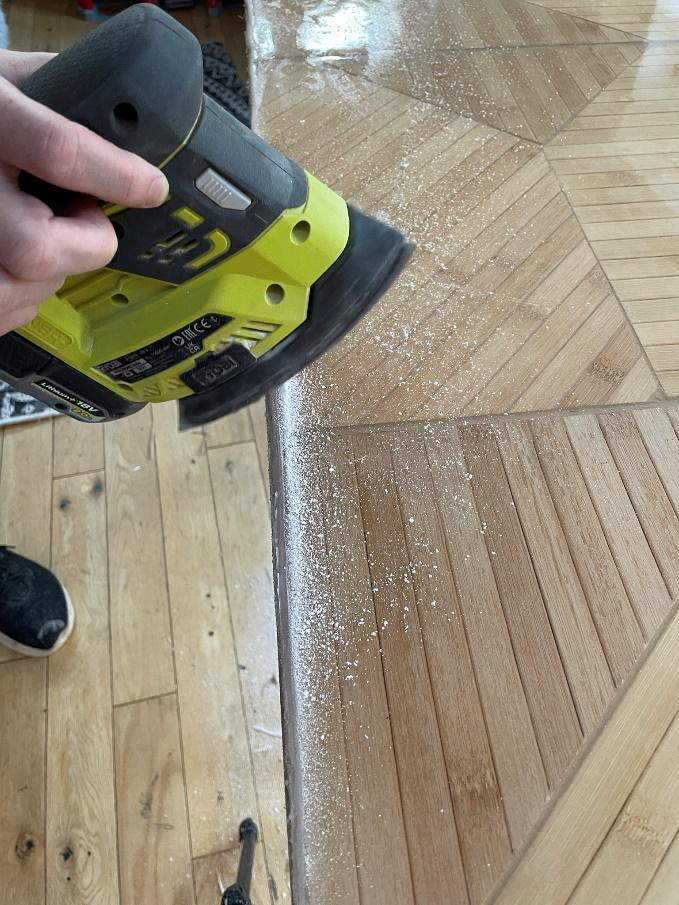
Step 16: Sand the resin through the grits, starting at 120 up to 1200 grits. It is best to wet sand resin, so mist it with water first and use waterproof sandpaper. Sanding will round the edge off beautifully, leaving a smooth surface. After sanding the resin, polish it to go from the matte sanded look to a glass-like finish.
To answer some common questions about this project

Materials used:
- Door
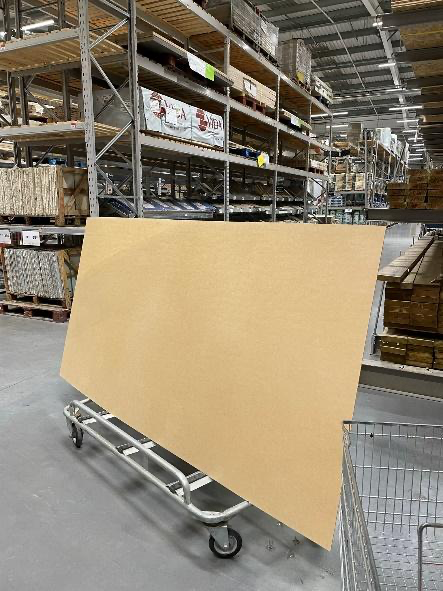
- Hardboard (L) 1.22m (W) 2.44m (T) 3mm – cut to size by B&Q
- Pole Wrap
- Square cut-off (for template)
- No More Nails
- Clear Silicone sealant (No Nonsense 310ml)
- Wood Flooring Sealant Oak (No Nonsense 310ml)
- Iron-on edging tape (5cm high)
- GlassCast 3 epoxy coating resin (5kg pack)
- Gold Handles
Tools Used:
- Frog Tape
- Pencil
- Iron
- Stanley Knife
- Spirit Level
- Rafter square / speed square OR ruler
- Electric sander
- Jig Saw
- Mitre Saw
- Notch spreader
- Stirrer
Commonly Asked Questions
Q: How much resin will I need?
A: GlassCast has a calculator on their website, but it is 2kg per square metre of resin you will need. You can calculate this by weight at a ratio of 2 to 1 (resin to hardener).
Q: How do you mix the resin?
A: Mix part A (the resin) with part B (the hardener) for 3 minutes. Pour the resin into a clean pot (IMPORTANT) and stir again for 3 minutes - this will ensure the resin is fully mixed.
Q: Why should you paint on a sealing coat of resin first?
A: Wood is a porous material, and if you go ahead without one you run the risk of air being drawn out of the wood, and into the resin forming air bubbles.
Q: How do I know if the resin is cured?
A: You will not be able to make an impression with your fingernail.
Q: What happens if there are areas that have not dried after several days?
A: There is no easy answer here – it means that the sticky area was a patch of unmixed resin and there is no “hardener” mix in it and it will not cure. Dig out the soft resin and mix more.
Q: Can you sand the resin?
A: Yes, wet sanding is best as dry-sanded resin particles are hazardous. GlassCast have some great instructional videos on this on the website www.glasscastresin.com
Q: What is the best product for polishing resin?
A: GlassCast sell a polish called NW1 that is specifically designed for hard plastics like cured epoxy resin. For an optional extra step – add GlassCast’s Top Finish for a mirror-like finish.
Q: What do I need to know about polishing with NW1?
A: The NW1 is self-diminishing, so as you add more polishing compound it will start from its most course state. What does this mean in layman’s terms? Each time you apply the polish, make sure you are covering the whole area and working it down, so it disappears.
Q: Where can I find more information on the project process?
A: There is a story highlight named “DESK” on my Instagram at @SurreyHouseDIY that documents the entire process – INCLUDING THE MISTAKES!
CREATOR: Becky
Instagram: @surreyhousediy


