
Creating a craftsman-style doorway can transform the look of any room, adding a touch of elegance and sophistication. This project might seem daunting at first, but with careful planning and the right materials, you can achieve a professional-looking result. In this guide, I’ll walk you through each step of the process, from initial measurements to the final touches. Let's get started!
Materials and Tools Needed
Materials
- 2 x 4 boards
- 1 x 4 select pine boards
- 1 x 6 select pine board
- Wood putty (in colors matching your stain)
- Pre-stain conditioner
- Stains: Early American by Minwax, Kona by Varathane, Weathered Oak by Minwax
- Danish Oil
Tools
- Measuring tape
- Pencil
- Saw (for cutting boards)
- Drill with 3” screws
- Brad nailer
- Rubber mallet
- Wood putty knife
- Brushes for staining and sealing
Step-by-Step Instructions
Step 1: Measure and Plan
Start by measuring the height and length of your opening. Use these measurements to plan the layout of your boards. For a symmetrical look from both sides, bump out the opening with two 2 x 4s. Secure the first 2 x 4 to the wall stud with 3” screws, then layer the second 2 x 4 on top, repeating the process.
Step 2: Build the First Side
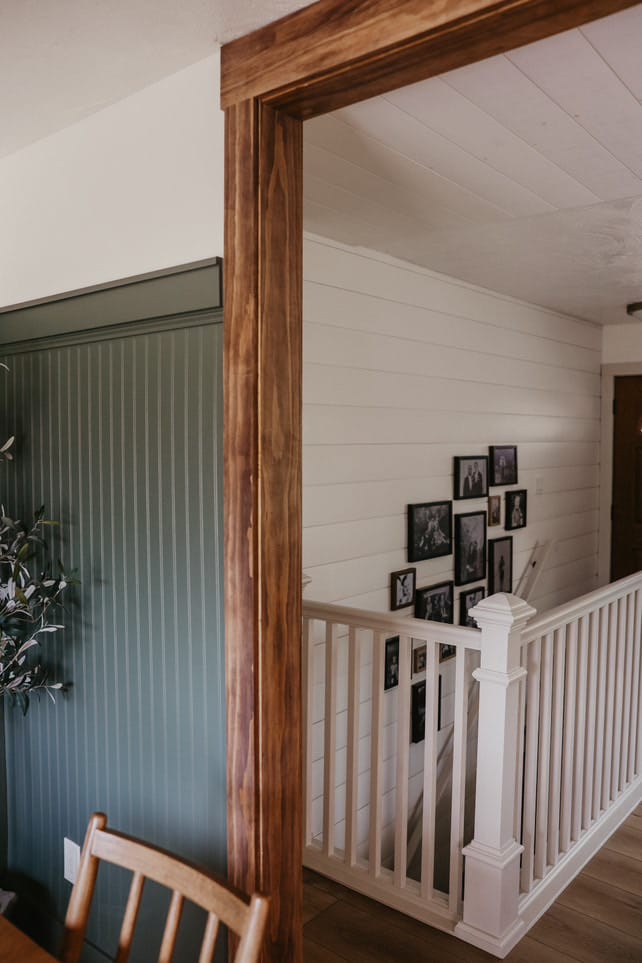
Begin by building one side of the doorway. Cut the 1 x 4 select pine vertical boards to the desired height. For an 8 ft ceiling, cut them to 91”. Nail these boards into the wall in a criss-cross pattern using a Brad nailer. Next, cut and attach the 1 x 6 select pine top piece across the vertical boards, ensuring a 1/2” overhang on either end for a craftsman look.
Step 3: Repeat on the Other Side
Repeat the same steps on the opposite side of the doorway. Ensure both sides match perfectly for a symmetrical appearance.
Step 4: Add the Middle Pieces
Measure and cut the vertical middle pieces to 91” tall and 4.75” wide for a tight fit with minimal gaps. Install these pieces in the center. For the middle top piece, measure the distance from end to end, adding 1/16” for a snug fit. Tap it into place with a rubber mallet and secure with brad nails.
Step 5: Fill Nail Holes
Mix wood putty in two colors to match your stain, then fill the nail holes. Allow the putty to dry completely.
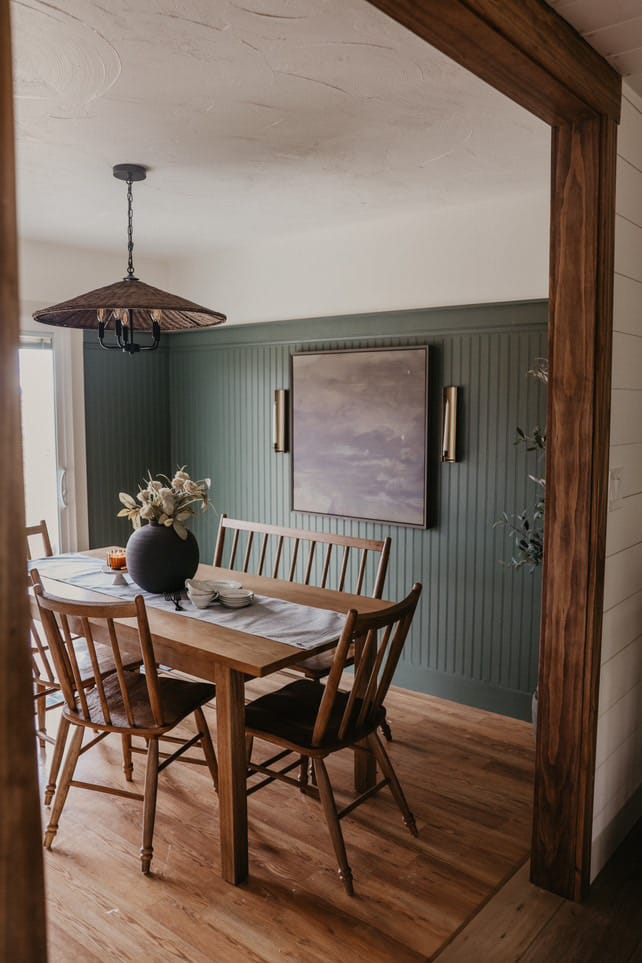
Step 6: Stain and Seal
Before installation, stain the boards using a pre-stain conditioner followed by layers of Early American by Minwax, Kona by Varathane, and Weathered Oak by Minwax. Seal the boards with four coats of Danish Oil for a durable finish.
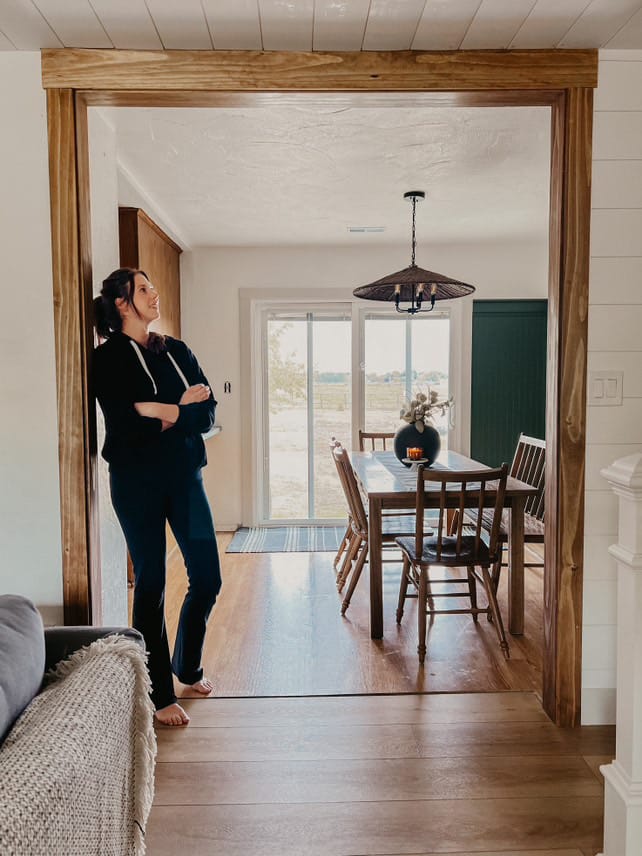
Once everything is dry, step back and admire your handiwork. You now have a beautiful, craftsman-style doorway that adds character and charm to your space.
Creating this doorway was a fun and rewarding project, and I’m thrilled with the results. If you need more inspiration or have any questions, feel free to check out my Instagram profile

Happy crafting and enjoy your new doorway transformation!
Creator: Taylor
Instagram: @thetaylorstyle_


