

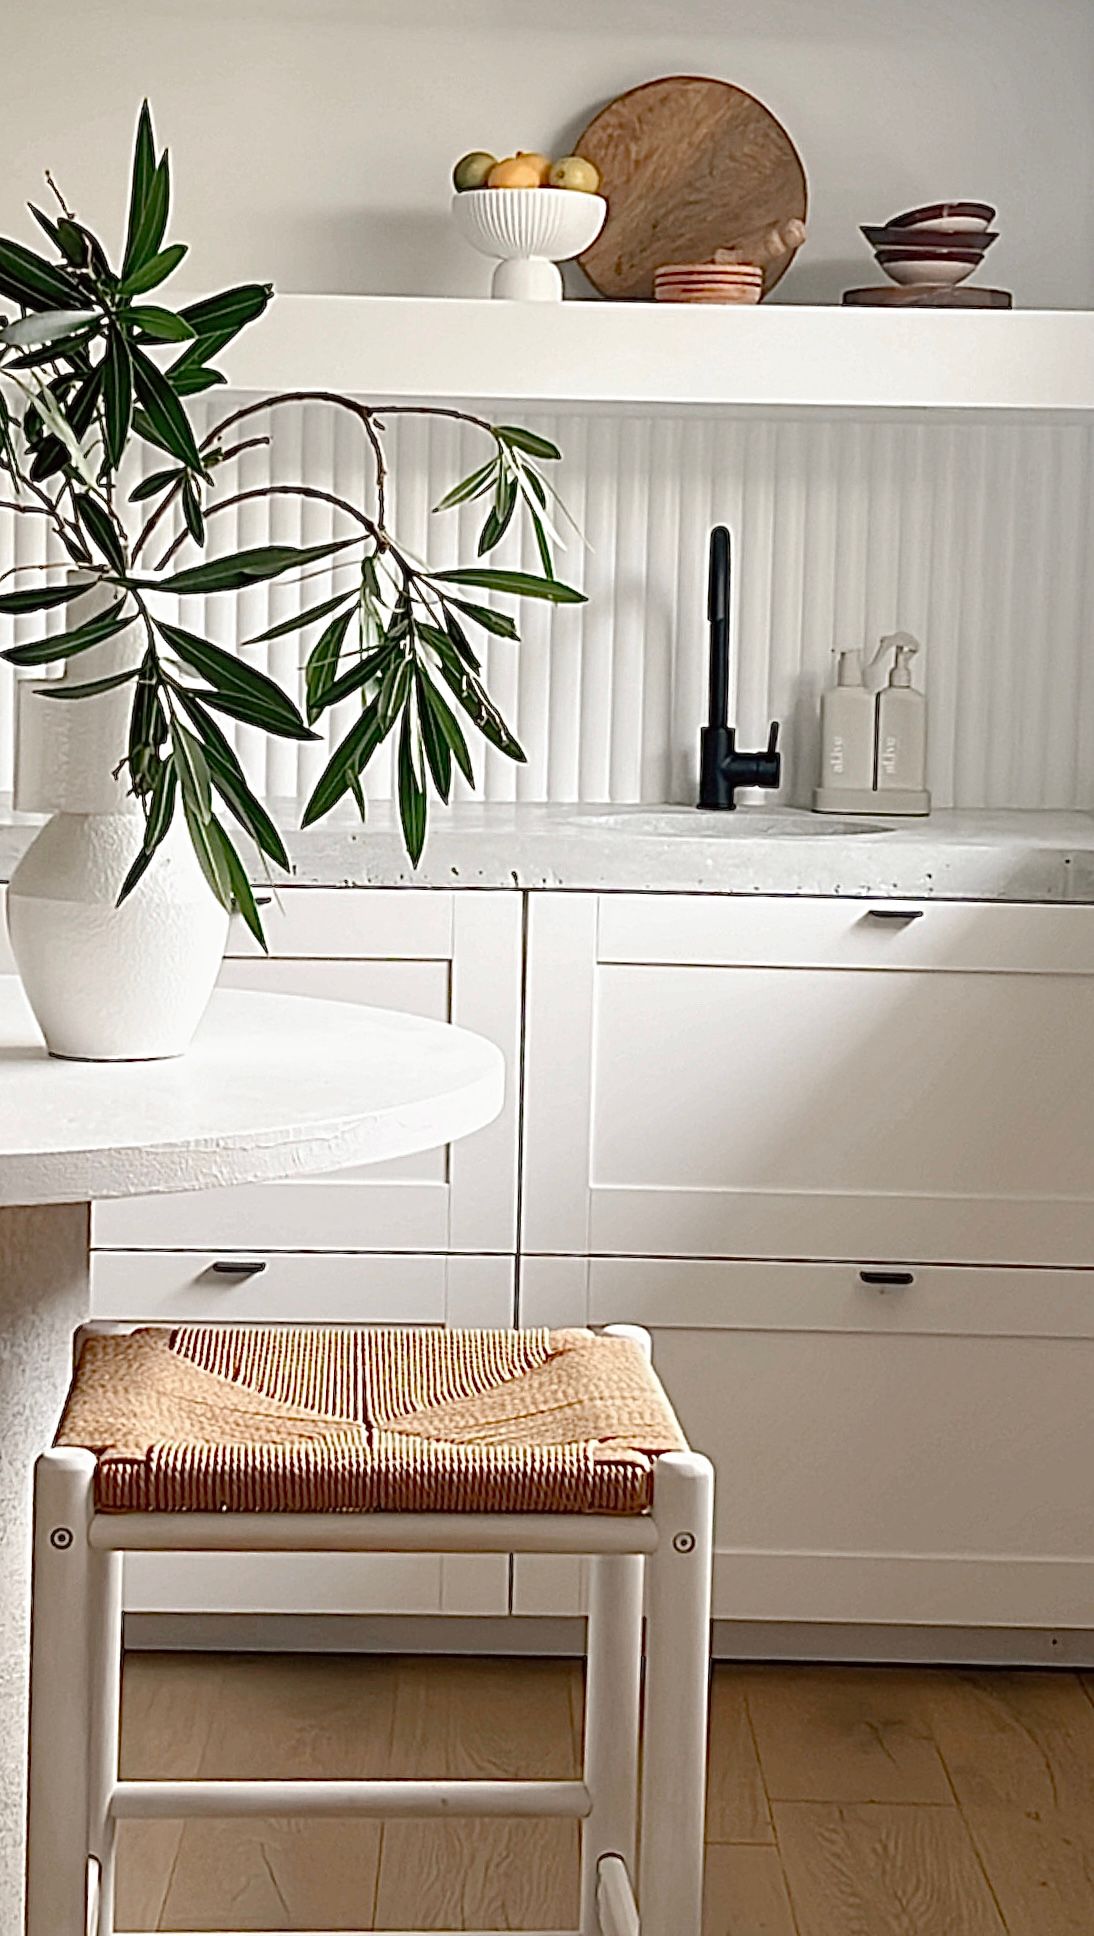
We really wanted an organic natural Concrete top that lasted for many years to come, however, we didn't really have the budget to pay someone to do it for us, so we set out too giving it a try ourselves.
A Step by Step Guide

Here's what you will need:
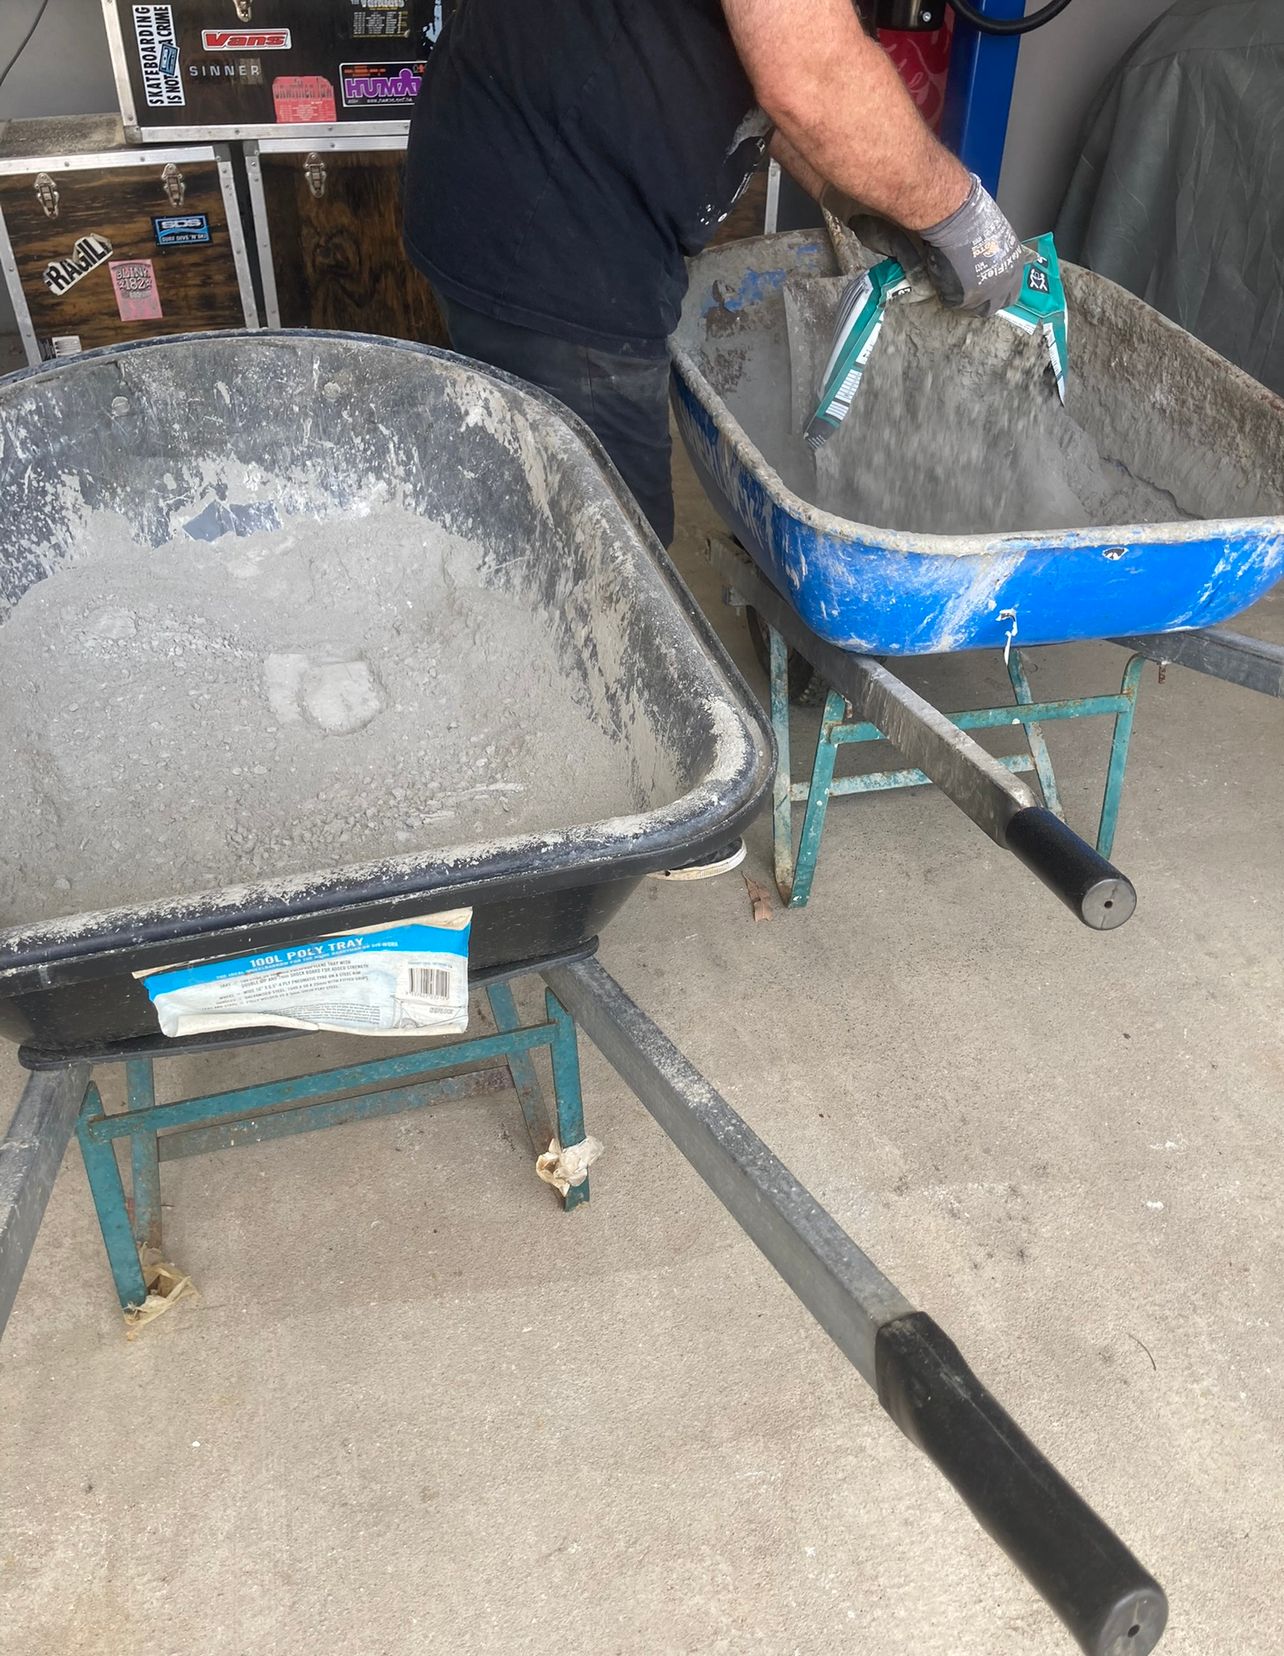
- 8 bags of 55 MPA Concrete (this was for a 2800 x 600mm bench top) 60mm thick edge.
- Compressed fibre sheet ( Cut to size )
- 25mm steel angle line to give support to structure within the concrete (we used 2 lengths, to give structural integrity, particularly to the span across the gap where the fridge will be installed)
- 4 mm gauge reinforcement mesh placed centrally within the concrete
- Galvanised strap, (used as formwork) cut from a sheet to size and rolled to the diameter of the sink to form the cut out for the sink. (Attention to detail is important here so the inner edge of the concrete counter top marries up neatly with the sink wall itself)
- Forming timber to prepare formwork (we used some left over melamine and ripped it to specification of the custom bench)
- Timber Screws, to attach the formwork
- plastic cover sheets to prepare the area ( so that the mess stays contained)
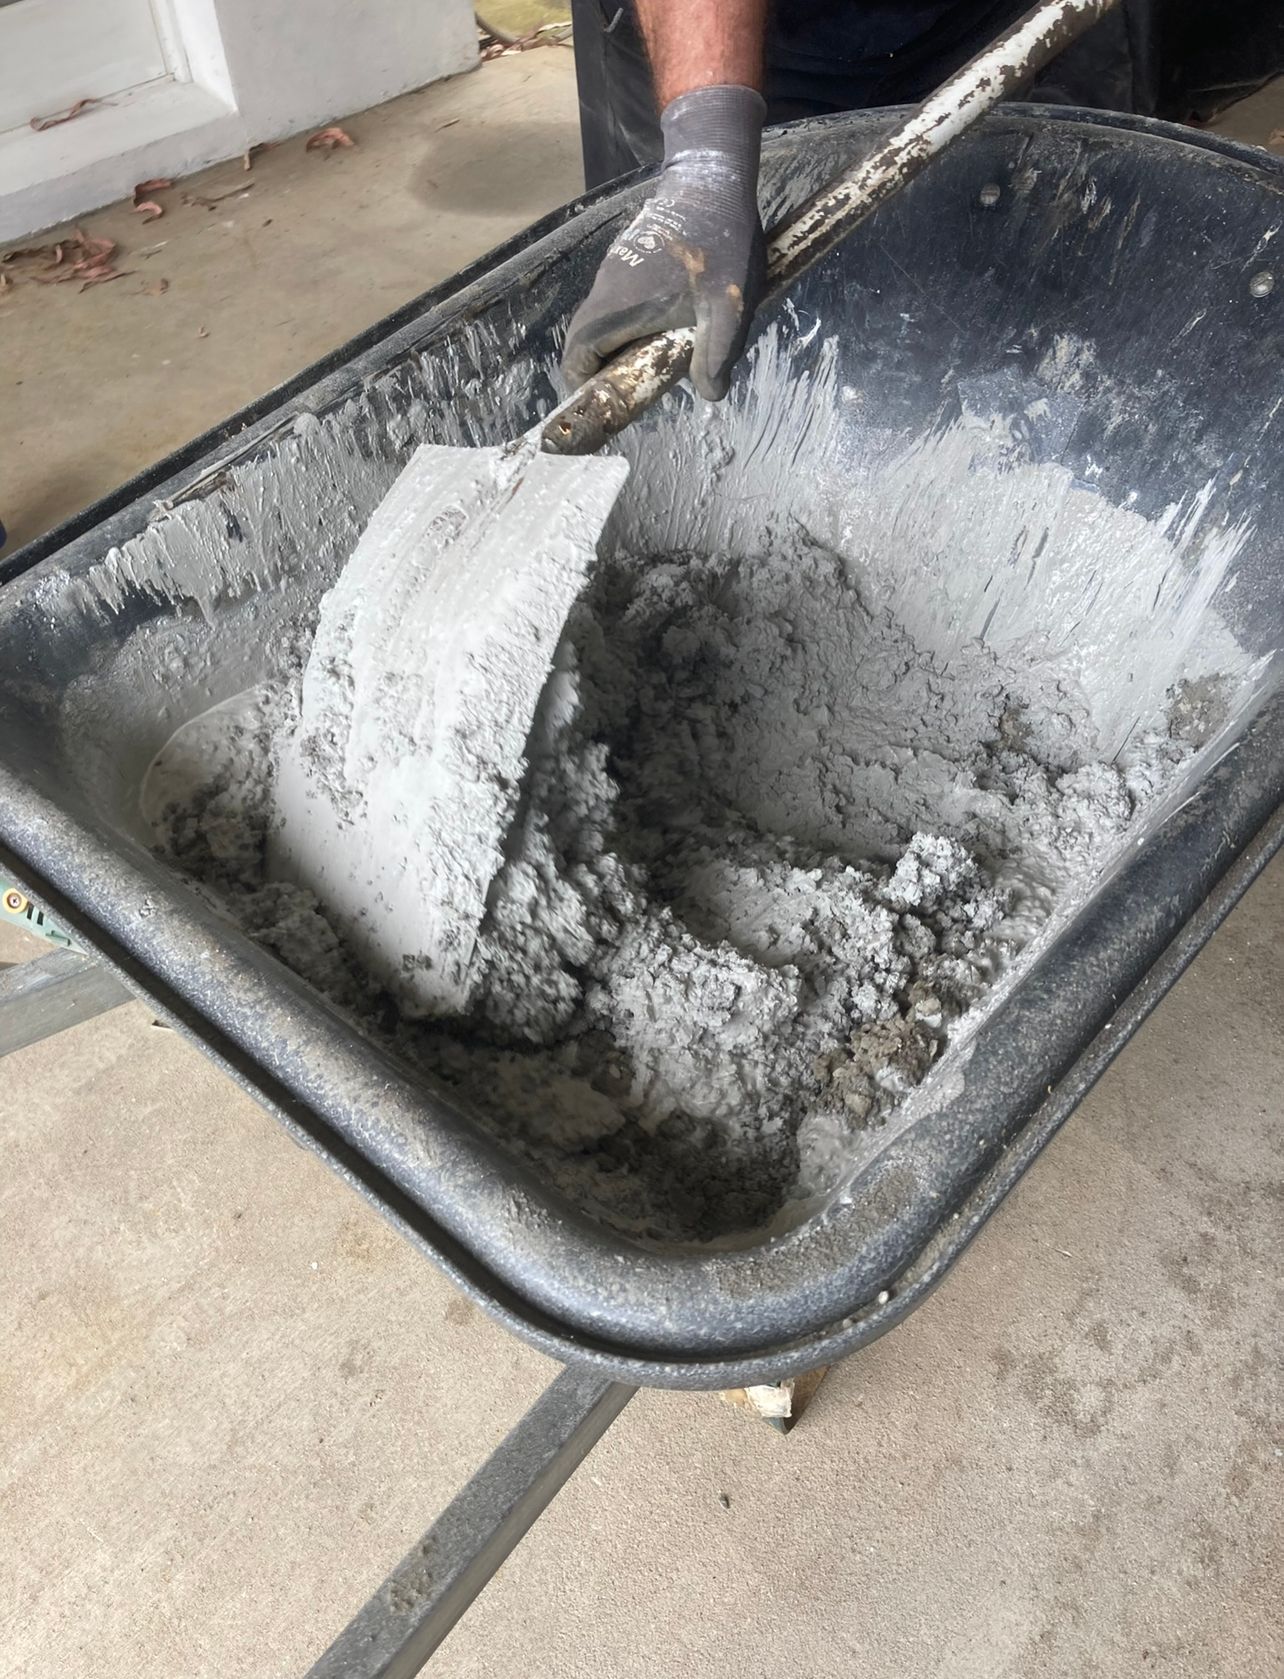
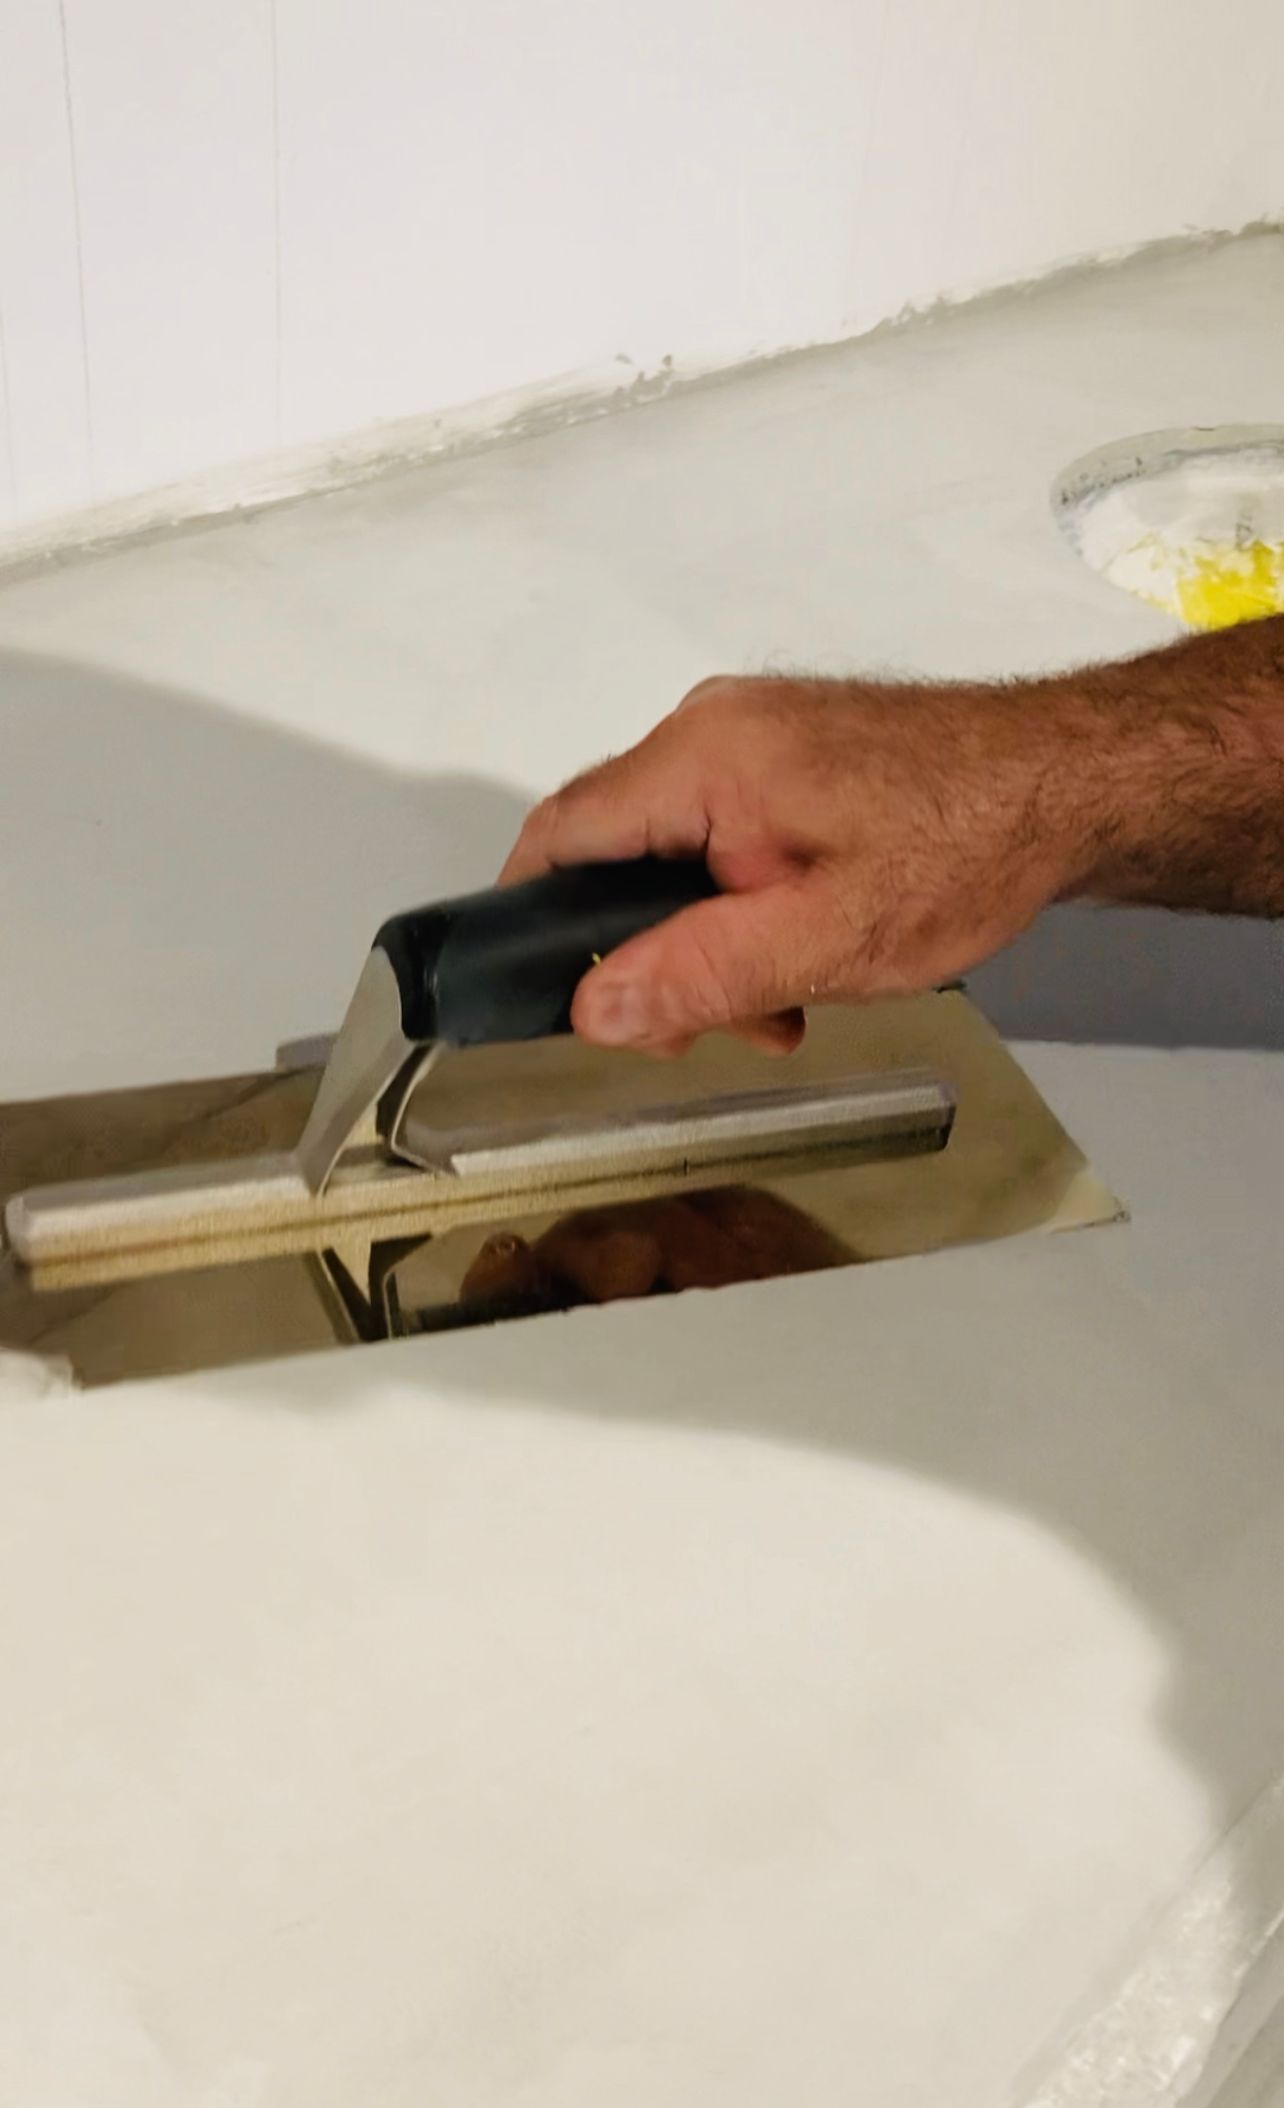
- A 150mm pointing trowel, A 280mm stainless steel finishing trowel, shovel and 2 wheelbarrows with one already mixed and ready to go. (Timing is very important, you do not want your bench pored with a long gap between concrete mixes, so mix the entire amount ready to go straight in and be worked)
To create your own concrete bench top.
Follow these steps below:
Step 1. Lay your compressed fibre sheet down secure top by screwing down the sheeting, then add your steel angle line across to form strength in the middle, then add your timber formwork around the edge and depending on the edge thickness you are wanting measure that and build your formwork to suit that, we wanted a 60mm thick edge on ours, once your area is all prepared with formwork and edges and plastic is laid in place to keep area clean and tidy, remember preparation is everything.
Step 2. Get your concrete ready in the wheelbarrow and mix with water until you have a relatively mixed (not to runny) the mixture needs to be thick.
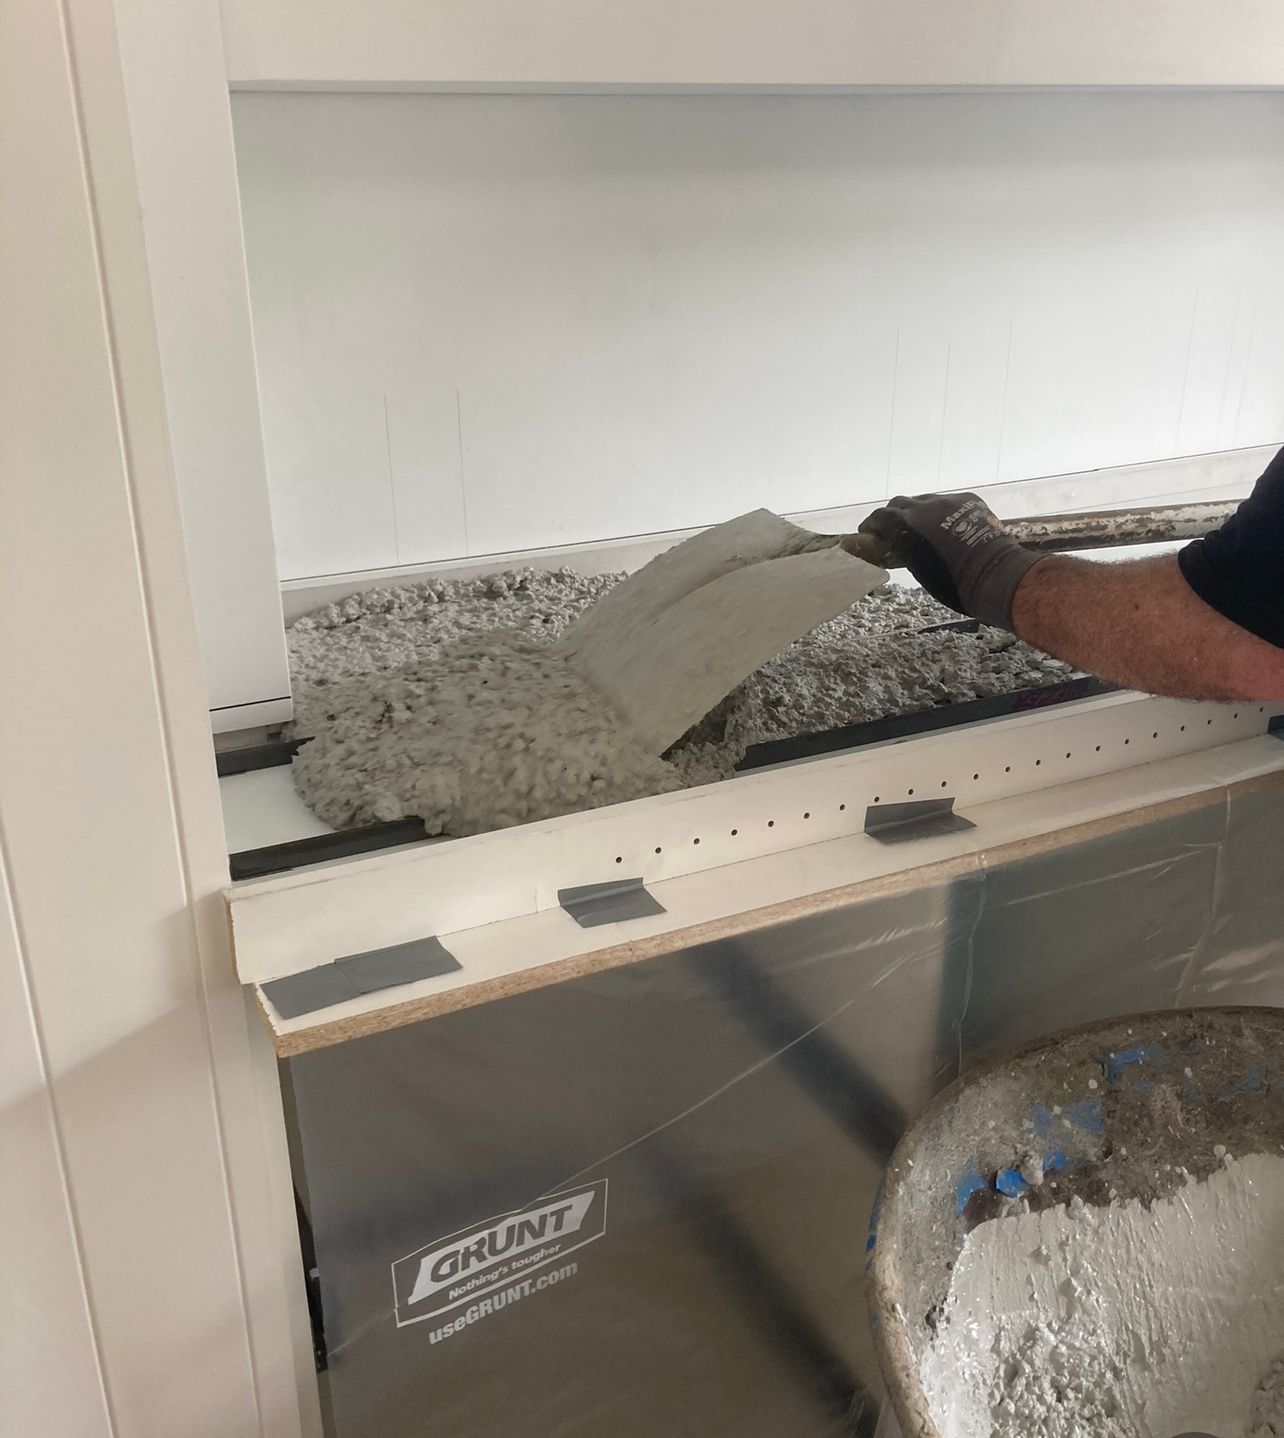
Step 3. Once you have spread the first batch of concrete get ready to lay your 4mm reinforcement steel in the middle of the mix.
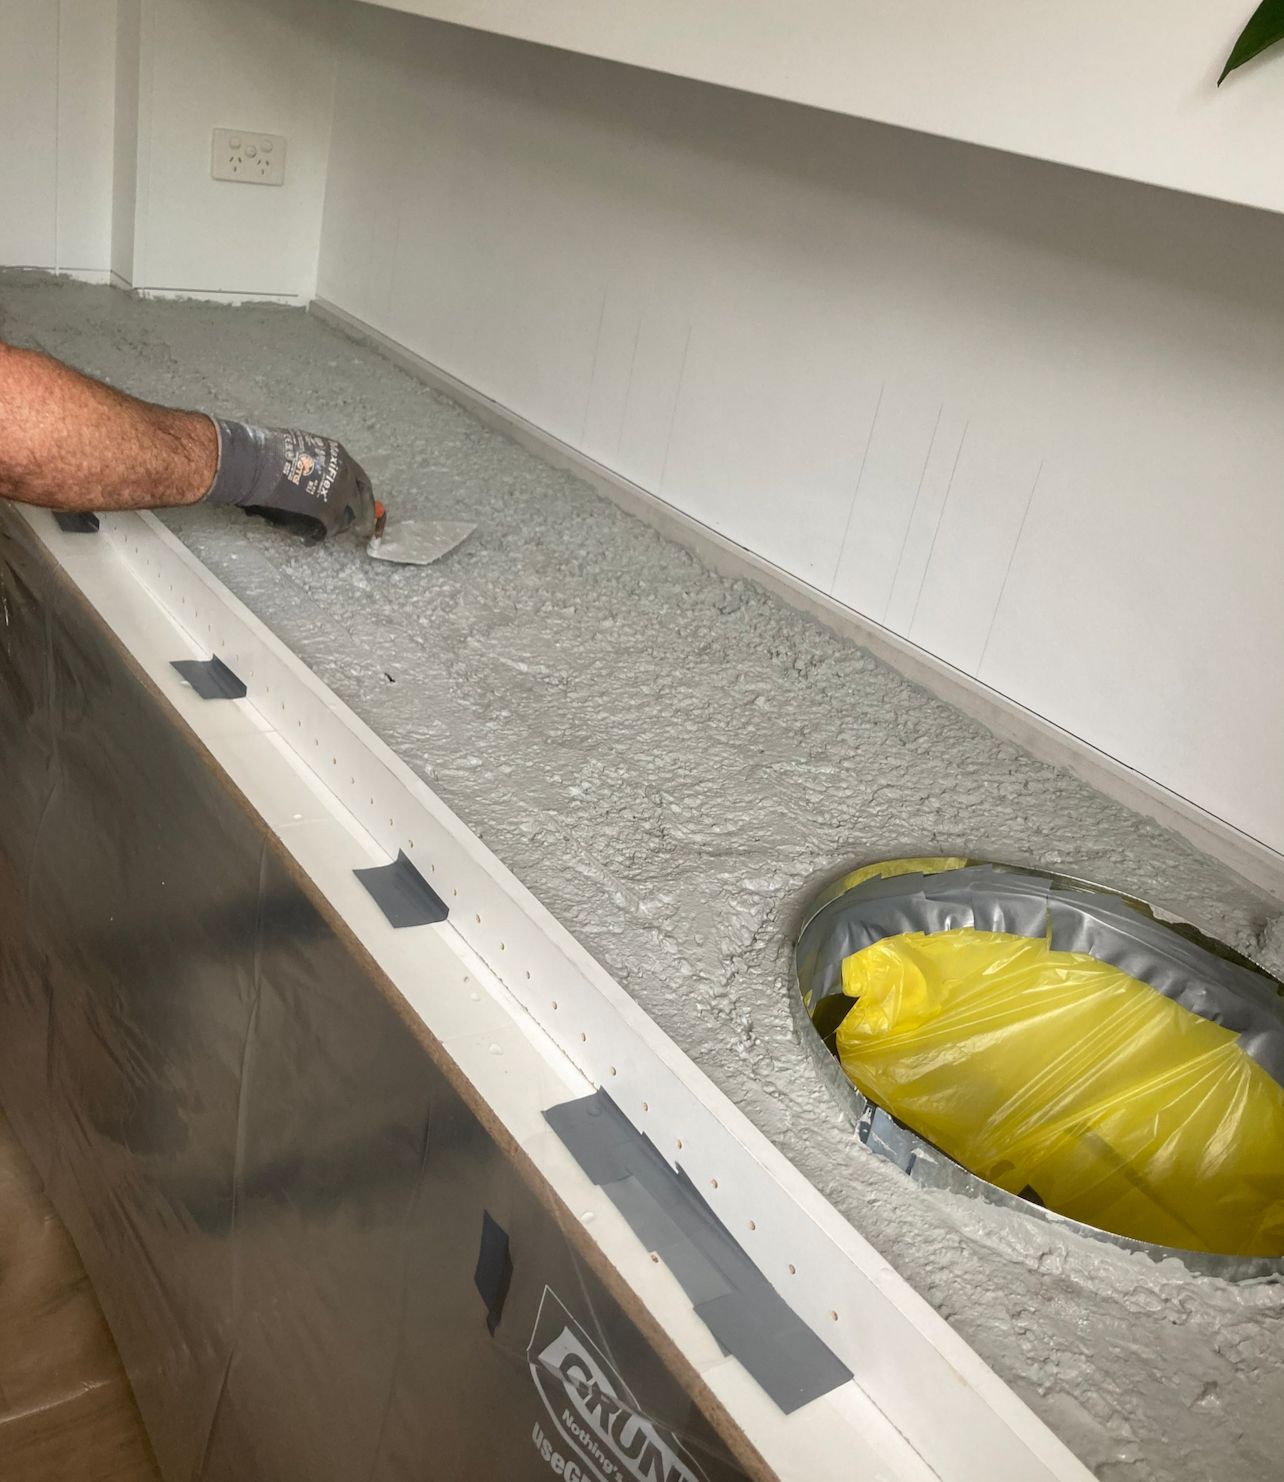
Step 4. Add your reinforced 4mm gauge steel now and start adding your second batch of concrete, spreading the mix evenly and level to the top of the form using a straight edge.
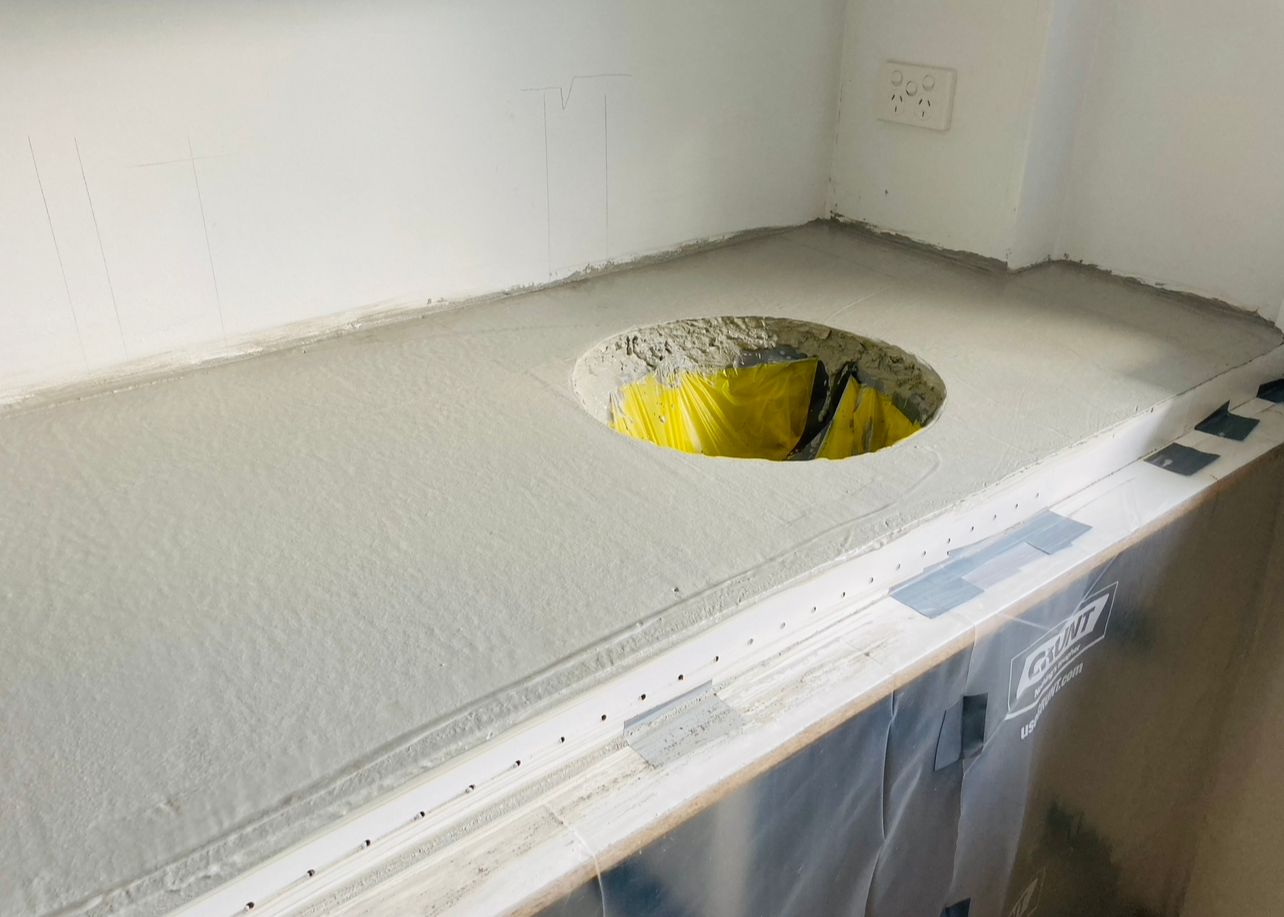
Step 5. Wait until concrete goes off a little then slowly start smoothing it until you get the right look and feel of the work top you desire.
And Here it is a few video's showcasing the process and how it turned out.

Creator: Rosanna
Instagram: @playa_interiors


