

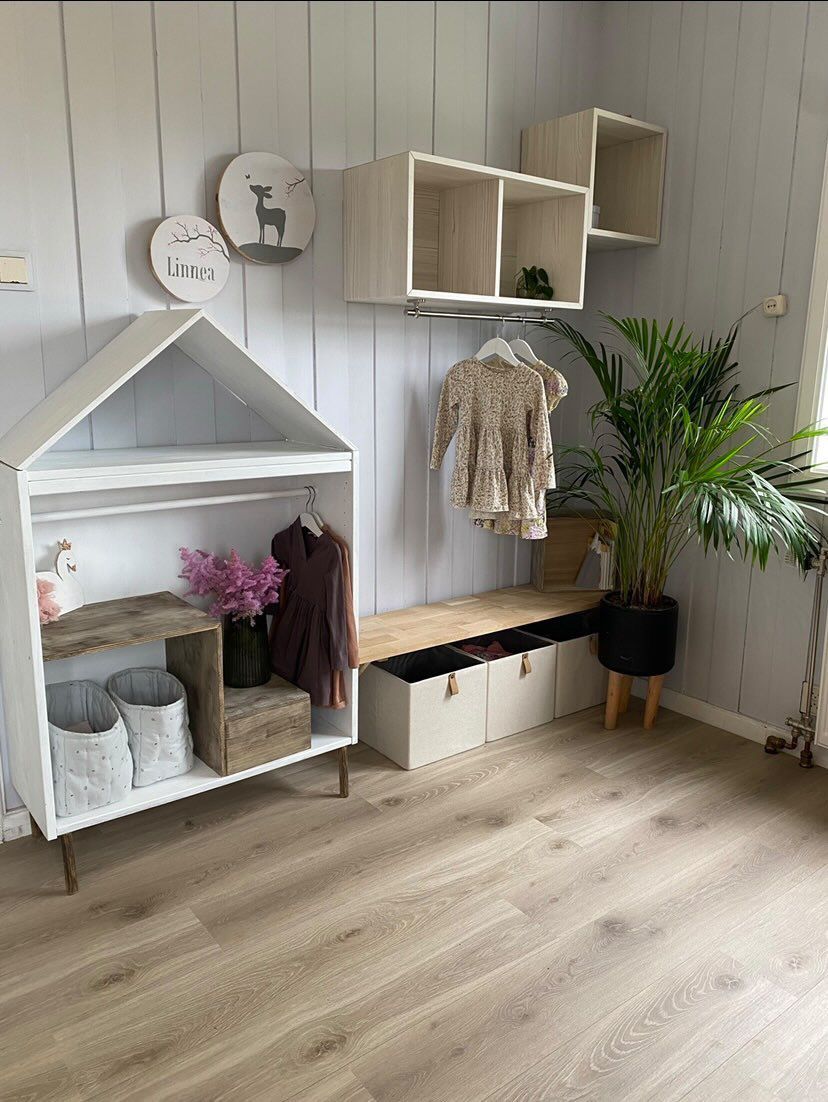
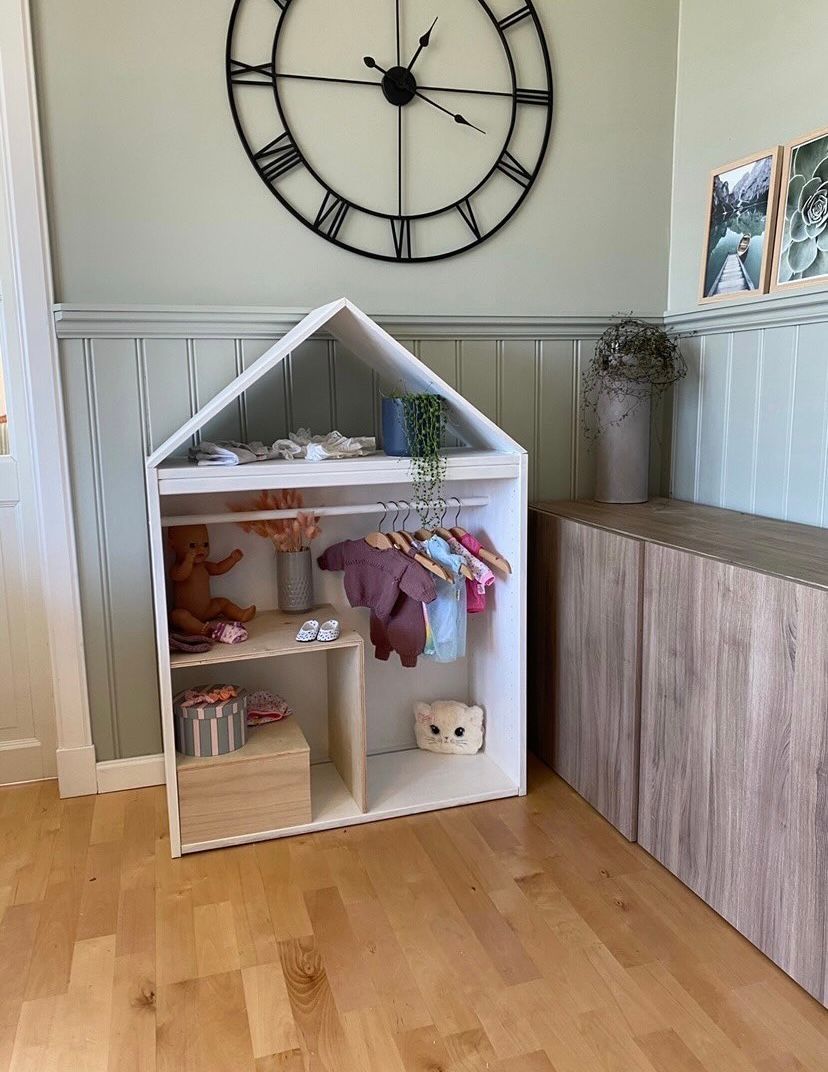
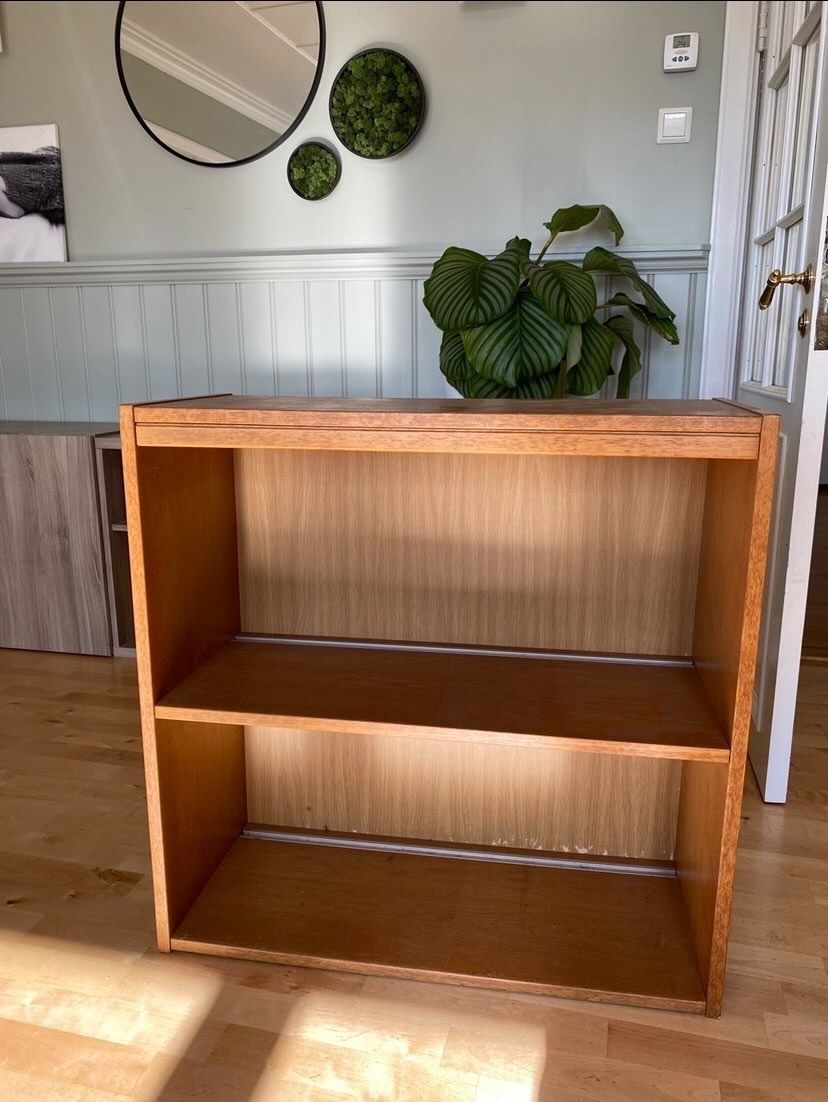
Turn an Old Shelf into a Stylish Wardrobe
Are you looking for a creative and affordable way to add more storage space to your home? Why not repurpose an old shelf and turn it into a stylish clothes house? This project is easy to do and doesn't require a lot of tools or materials. In this blog post, we'll walk you through all the steps to make your own DIY clothes house.
Materials:
- An old shelf or dresser
- 1-2 round sticks
- Plywood board
- Screws
- Paint
- Painting cost
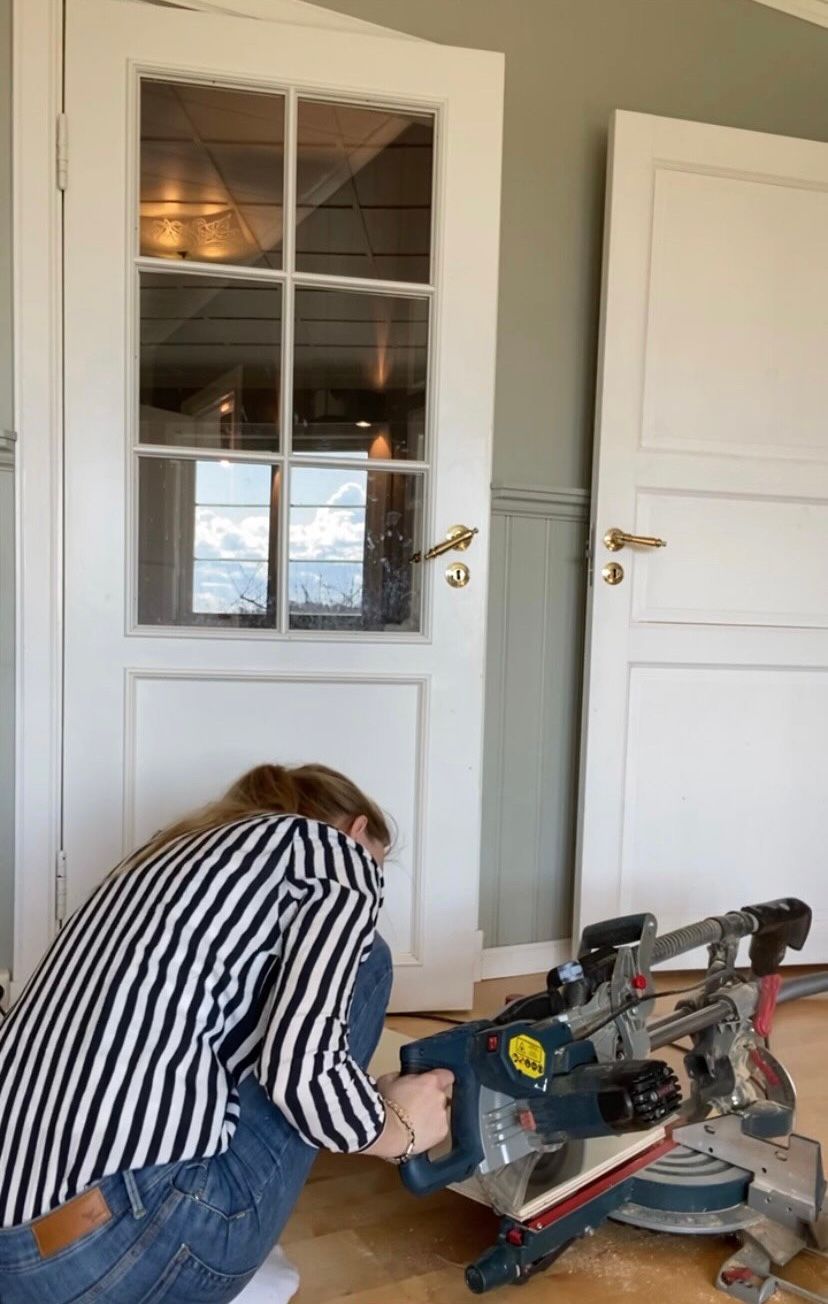
- Cut and miter saw
- Spatula
This DIY clothes house project is perfect for small spaces or anyone who wants to add a unique touch to their home. Plus, it's an eco-friendly way to upcycle old furniture and give it new life. With a few basic materials and tools, you can create a stylish wardrobe that will fit your personal style and storage needs.

Steps:
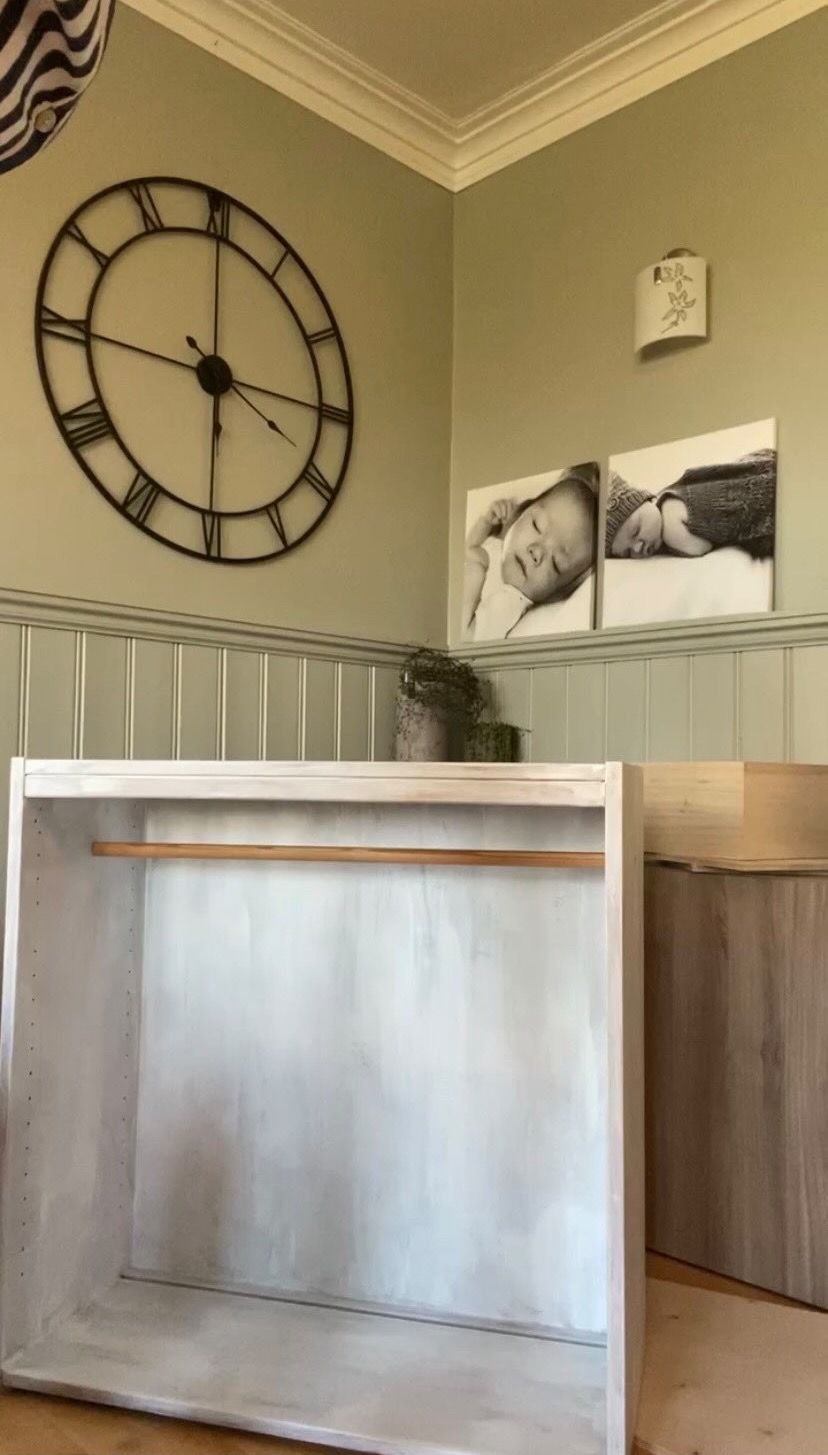
- Start by finding an old shelf or dresser that you want to use. Remove any shelves or drawers that you won't need.
- Cut a round stick to the same length as the shelf. Screw it to one end of the shelf and repeat on the other end.
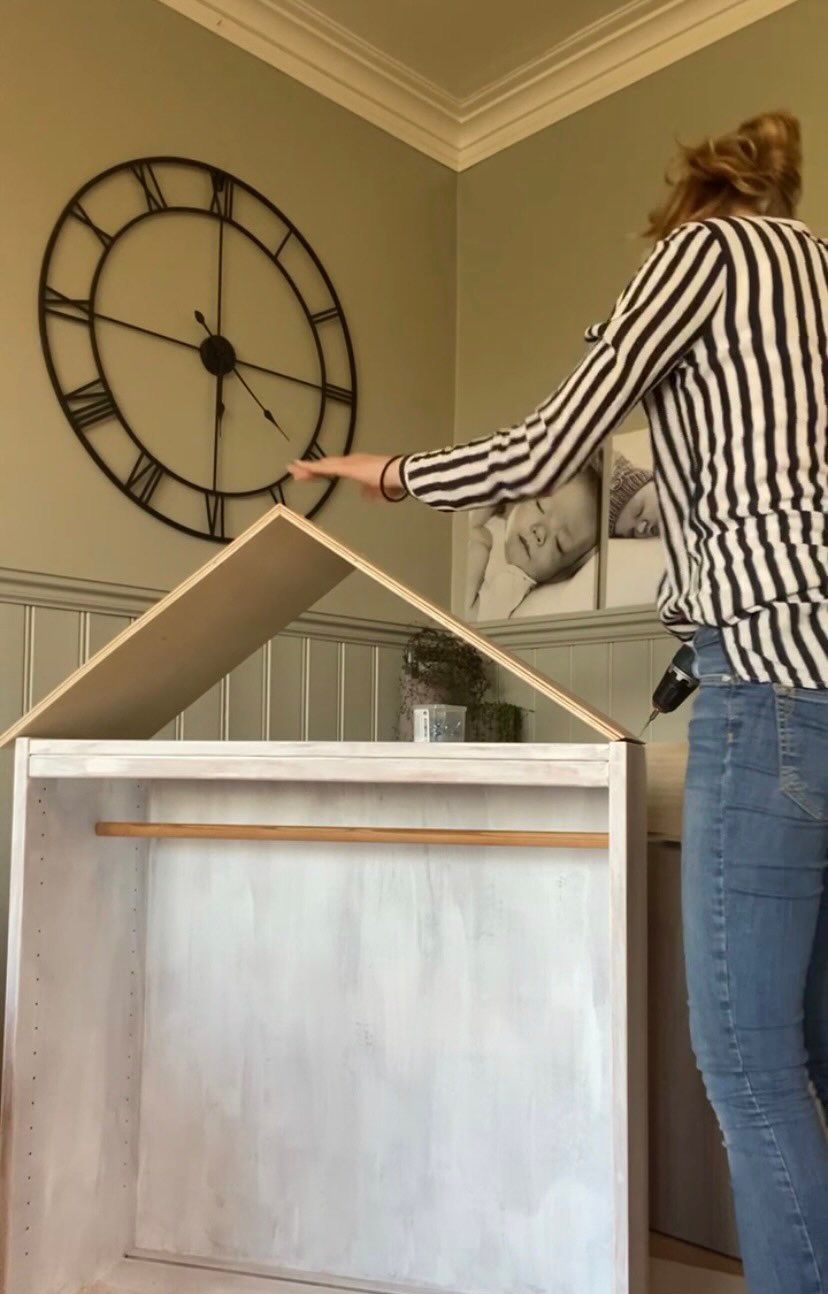
- Cut a piece of plywood to the size of the top of the shelf. Cut the edges at a 45-degree angle to create a ceiling effect. Screw it into place on top of the shelf.
- Cut another piece of plywood to the size of the inside of the shelf. Cut the edges at a 45-degree angle to create a square shelf. Screw it into place on the inside of the shelf.
- Fill any screw holes or gaps with a spatula and let it dry completely.
- Sand the entire shelf to create a smooth surface.
- Paint the shelf with your desired color. You may need to apply more than one coat for full coverage.
- Stain the inside shelf with the color of your choice to give it a stylish and unique look.
- If you want legs for your clothes house, you can add thick round logs or buy ready-made legs from a furniture store.
Hope this blog post has inspired you to try this DIY project.
Happy crafting!

CREATOR: Linn

Instagram: @linnsinterior


