

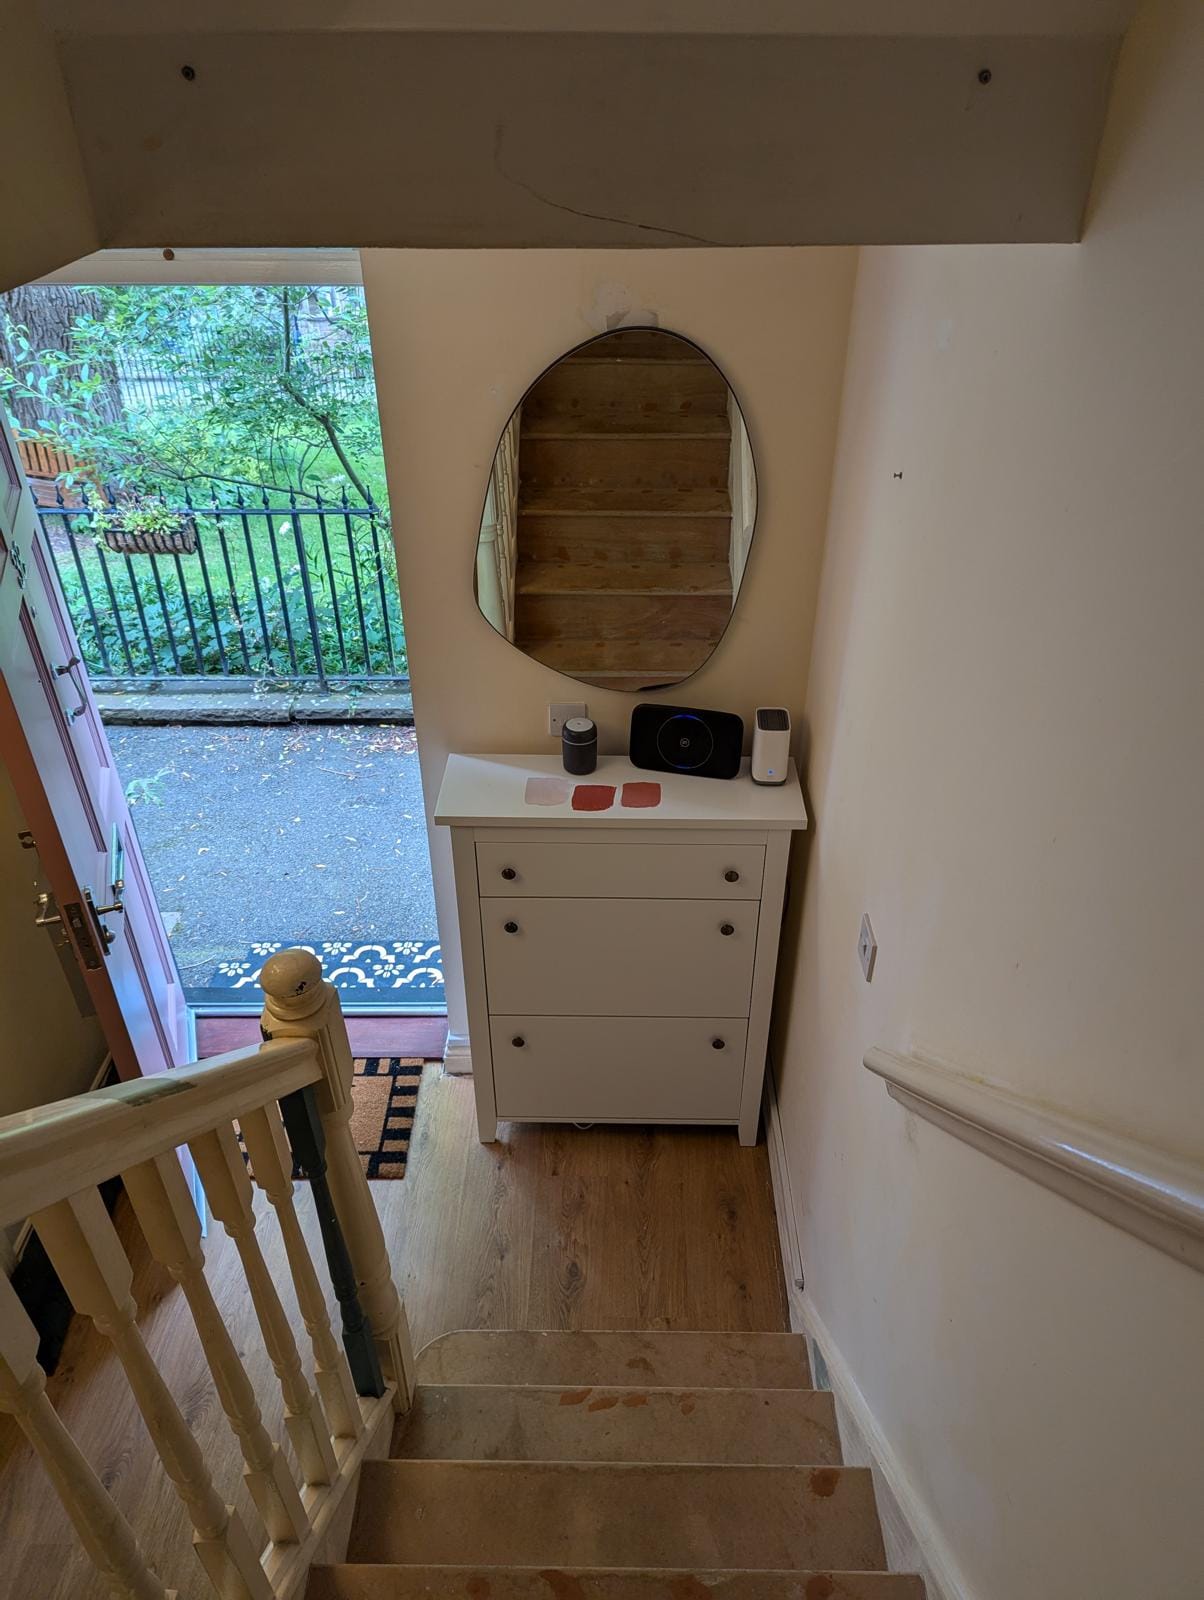
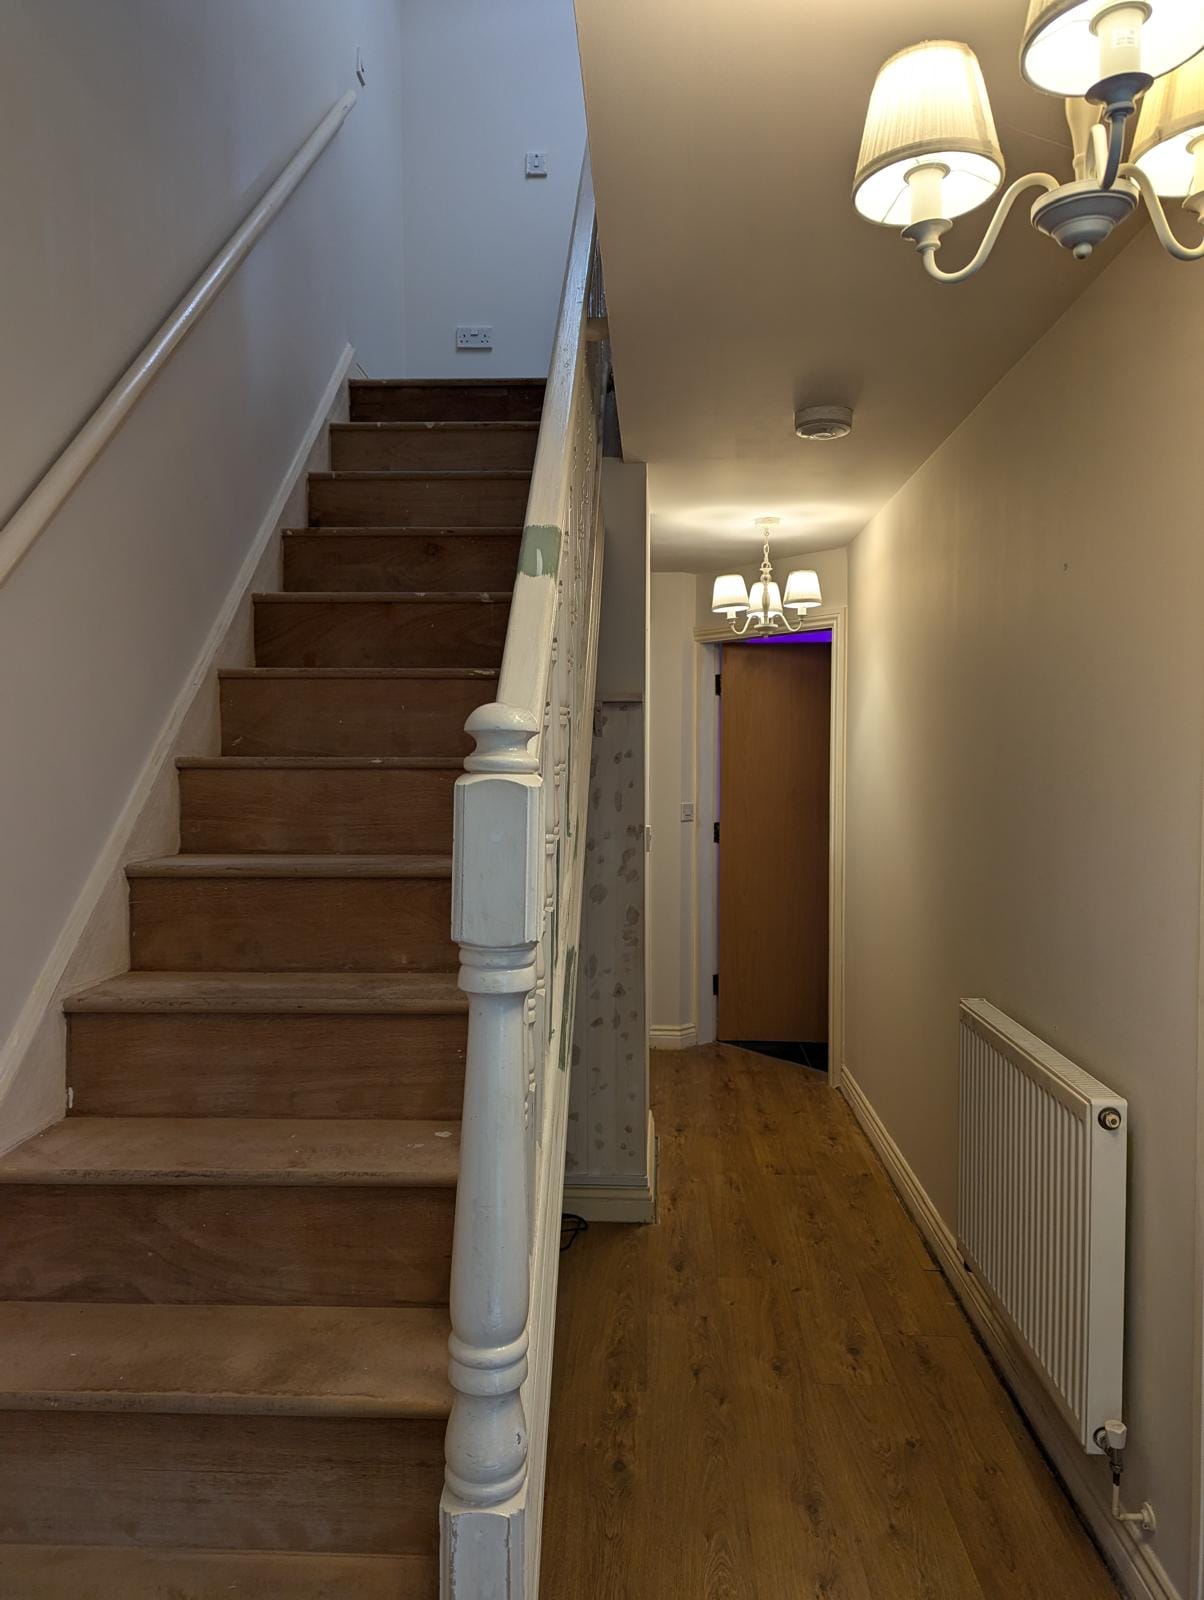
When it comes to home renovations, nothing beats the thrill of breathing new life into a tired space. Our hallway and stairs were in desperate need of a makeover—they were dull, worn out, and definitely lacking in personality. As someone who loves vibrant, colorful homes, I knew I had to inject some energy into this area. Ready to join me on this colorful journey? Let's dive into the step-by-step process of turning our bland hallway and stairs into a stunning, bright focal point in our home!
What You'll Need:
- Wood filler (for filling gaps and smoothing surfaces)
- Sandpaper (for prepping wood surfaces)
- Paint:
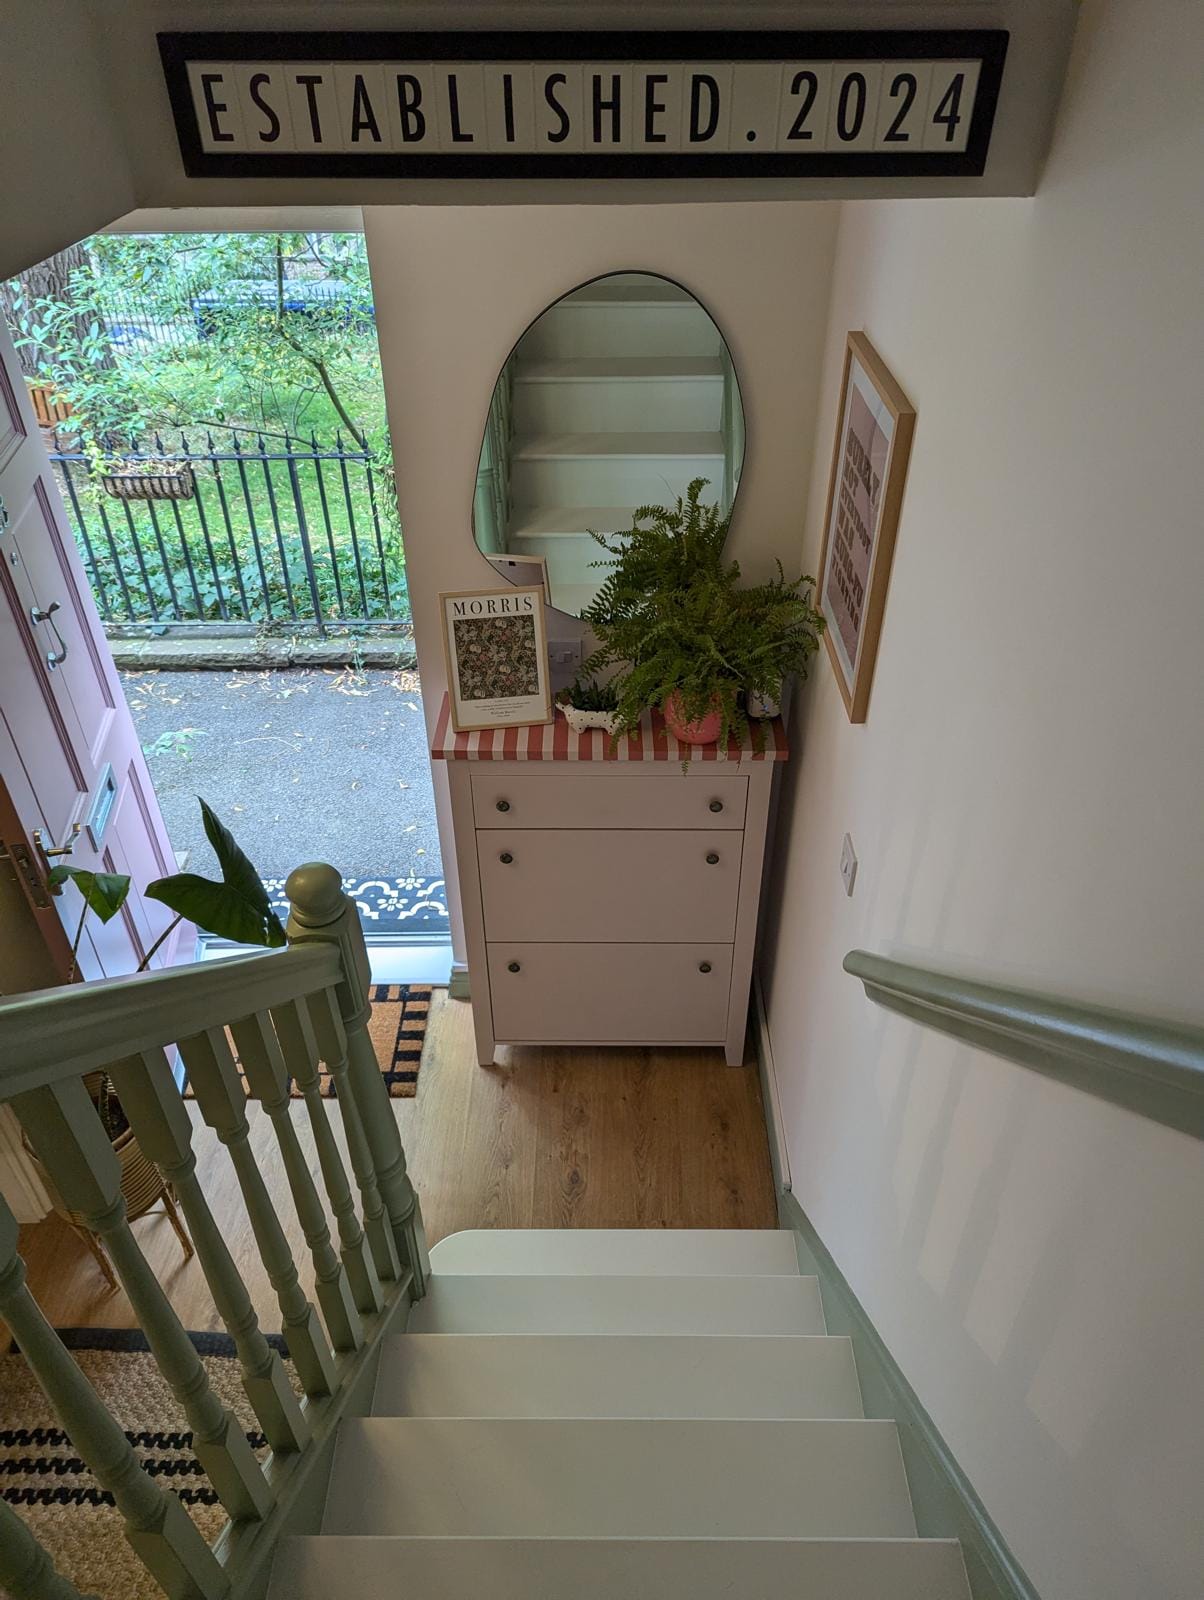
- Walls and ceilings: "Pink 01" by Lick (color-matched in Valspar)
- Skirting, spindles, and tongue & groove: Rust-Oleum interior wood paint (shade Bramwell)
- Stair treads and internal doors: Rust-Oleum floor paint (shade Steamed Milk)
- Wallpaper: "Jardin Botanico Light" by Graham & Brown
- Tongue and groove panels (for creating texture under the stairs)
- Beading (to add depth to internal doors)
- Annie Sloan Chalk Paint (shades Antoinette and Scandinavian Pink)
- Chalk wax (for sealing the shoe rack)
- Frog tape (for creating stripes)
- Basic tools: screwdrivers, hammer, nails/staples remover, paintbrushes, and rollers
Step-by-Step Guide
Step 1: Stripping the Stairs
We started by stripping the old carpet off the stairs. This part was a bit of a workout—removing nails, staples, and remnants of the old carpet. Once that was done, we filled any gaps with wood filler and sanded down the treads until they were smooth. It took a few rounds of filling and sanding, but the effort was totally worth it!
Step 2: Light Sanding for the Spindles
Our stair spindles had been painted countless times in gloss, so a light sanding was in order. This helped smooth out the rough spots and ensured the new paint would adhere properly.
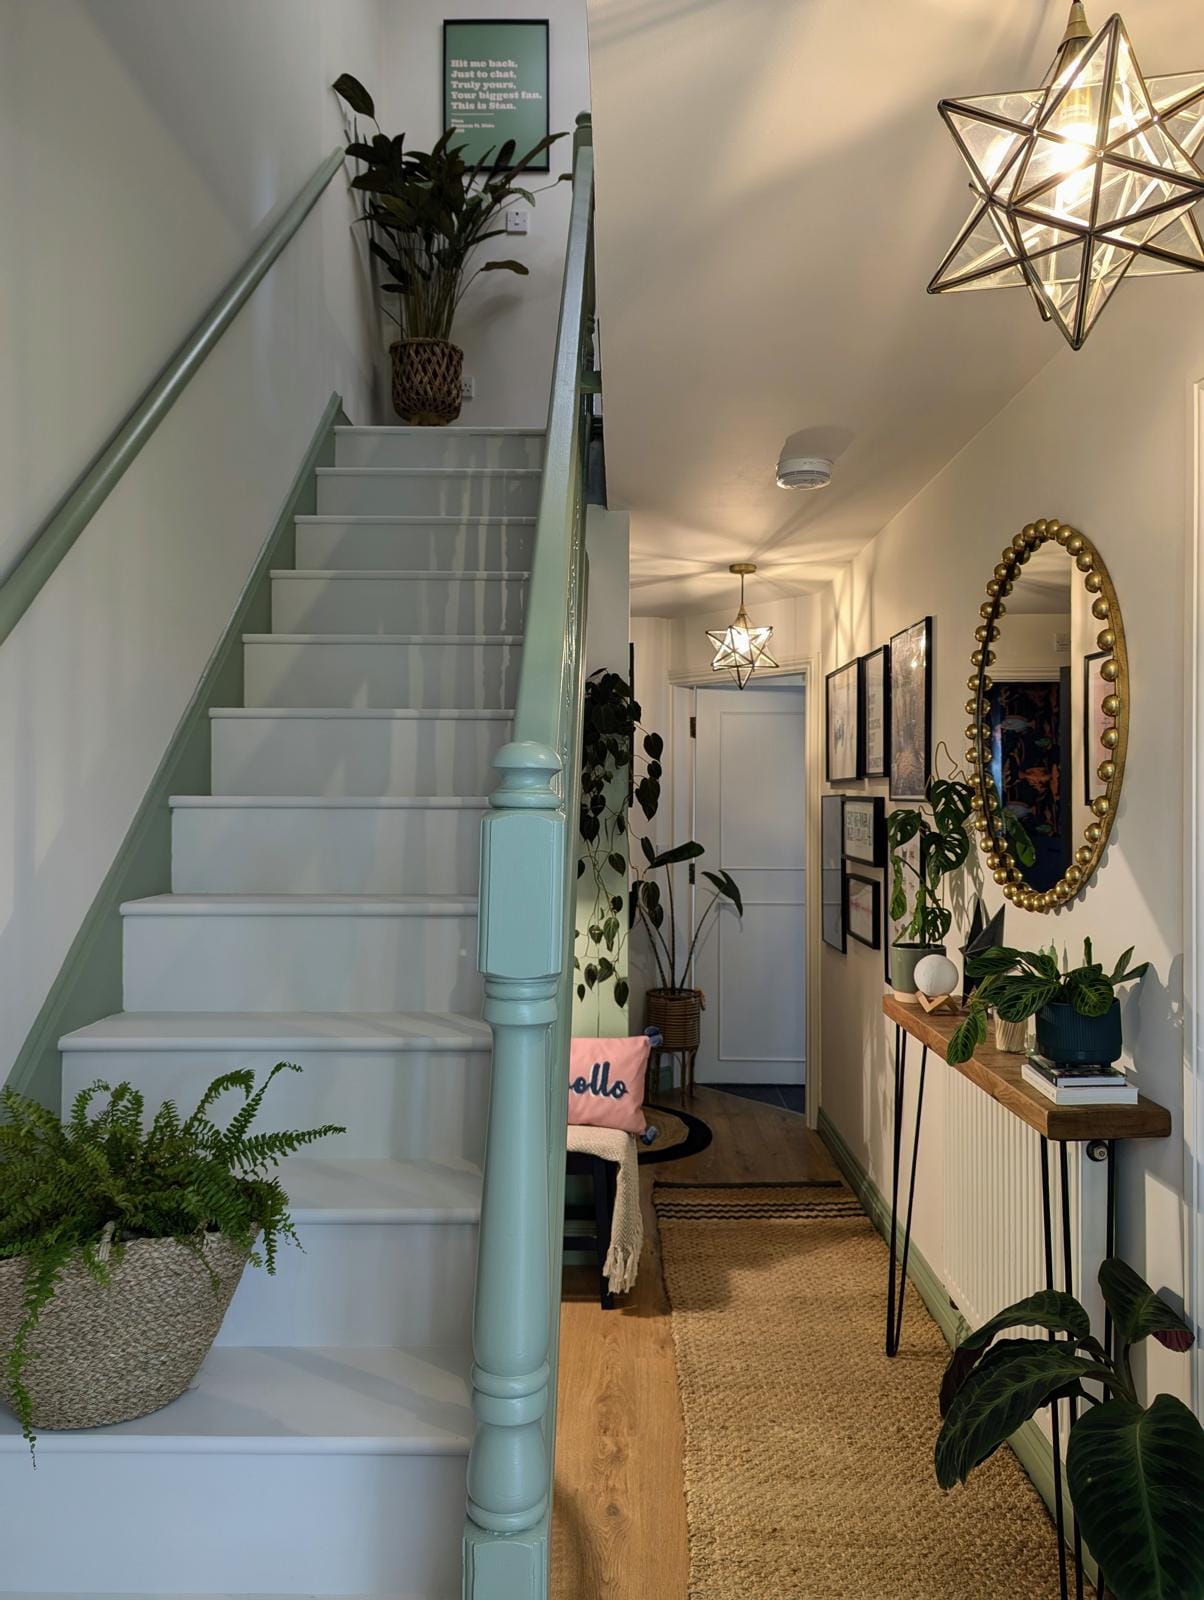
Step 3: Painting the Walls and Ceilings
With the prep work out of the way, it was time for some color! We chose "Pink 01" by Lick (color-matched in Valspar) for the walls and ceilings. This blush pink shade was perfect for our north-facing hallway, giving it a bright and uniform feel. The color drench technique (painting walls and ceilings the same shade) really opened up the space.

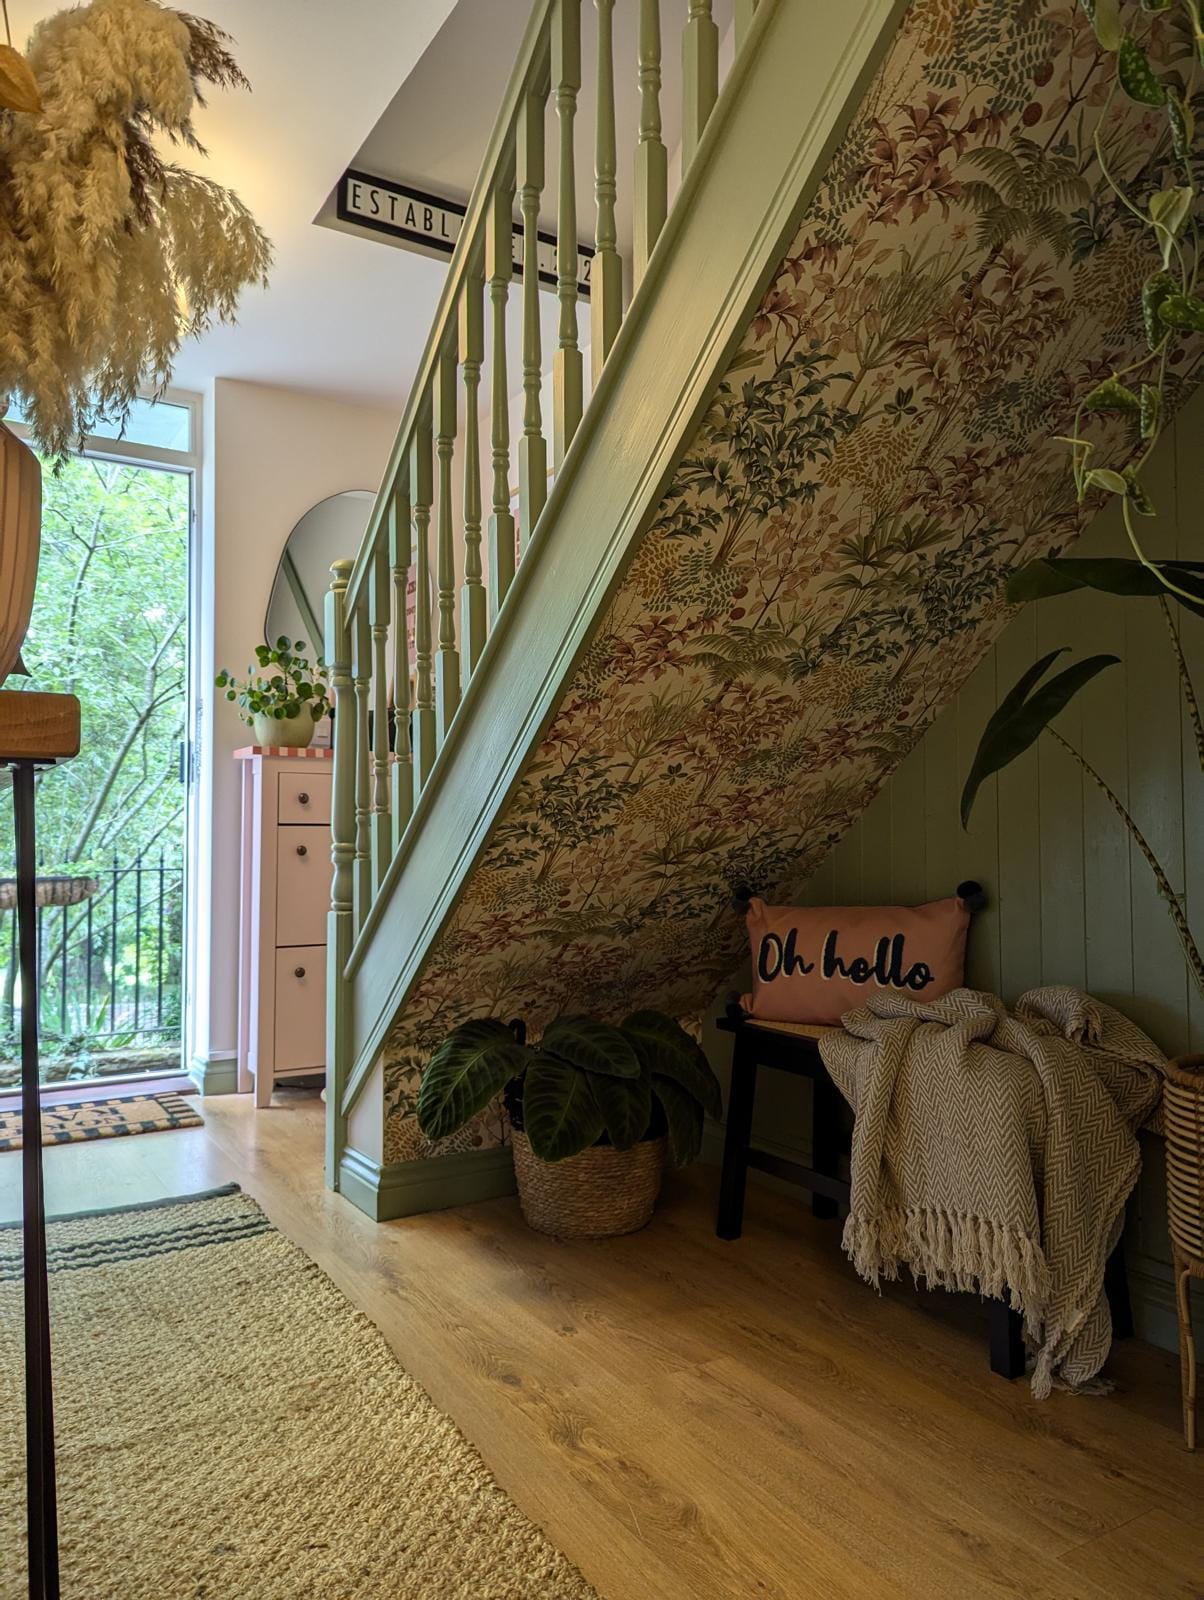
Step 4: Creating a Focal Point Under the Stairs
I wanted something special under the stairs, so we applied the gorgeous "Jardin Botanico Light" wallpaper by Graham & Brown. This floral pattern added a burst of life to the space, and we paired it with tongue and groove panels from B&Q to create a cozy, boot-room vibe. We’re planning to add a built-in bench here later for extra functionality.

Step 5: Painting the Skirtings, Spindles, and Tongue & Groove
To keep the space cohesive, we painted the skirtings, stair spindles, and tongue & groove in Rust-Oleum’s interior wood paint (shade Bramwell). This soft, calming hue brought a pop of color without overwhelming the space. The best part? This paint requires minimal prep and no primer!
Step 6: Painting the Stair Treads and Internal Doors
For the stair treads and internal doors, we used Rust-Oleum floor paint in "Steamed Milk." This creamy, neutral shade brightened up the stairs beautifully. We also added beading to the doors from B&Q, giving them extra depth and character.
Step 7: Upcycling the Shoe Rack
Our shoe rack needed some love, so I upcycled it using Annie Sloan Chalk Paint in "Antoinette" for the base coat. For a playful twist, I used Frog Tape to create stripes on top in the shade "Scandinavian Pink." Sealed with chalk wax, the shoe rack now perfectly complements our colorful hallway.

Step 8: Finishing Touches
To complete the transformation, we updated the lighting to better suit our style. Mirrors were added to reflect light, and a few well-chosen accessories—artwork, plants, and more—brought the whole look together. The result? A hallway that’s as functional as it is fabulous!


Renovating our hallway and stairs was a labor of love, and the end result is a space that truly reflects our love for color and creativity. While we’ll be adding a stair runner and updating the flooring later, we’re thrilled with what we’ve accomplished so far. Remember, the key to a successful renovation is taking your time with prep work and not being afraid to infuse your personality into the design. So, if you’re looking to transform a dull space in your home, go ahead—make it as vibrant and unique as you are!
Happy decorating!

Creator: Sarah B
Instagram: @thatruralhome